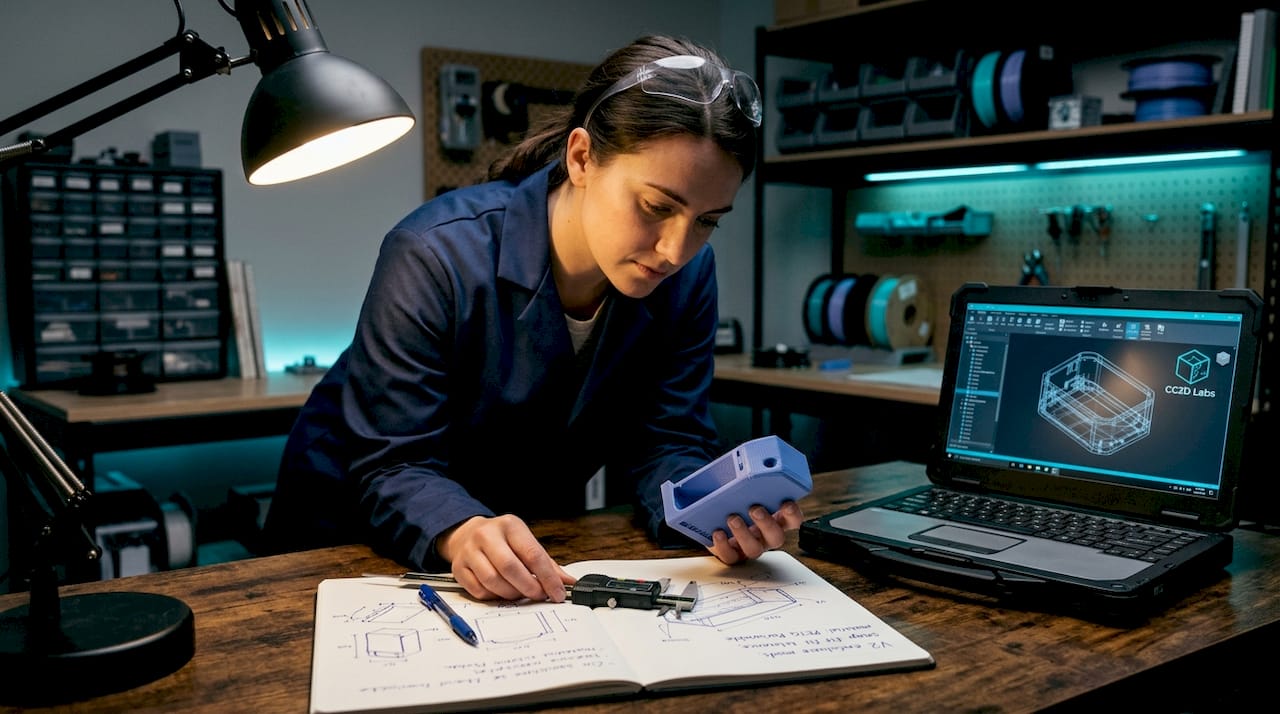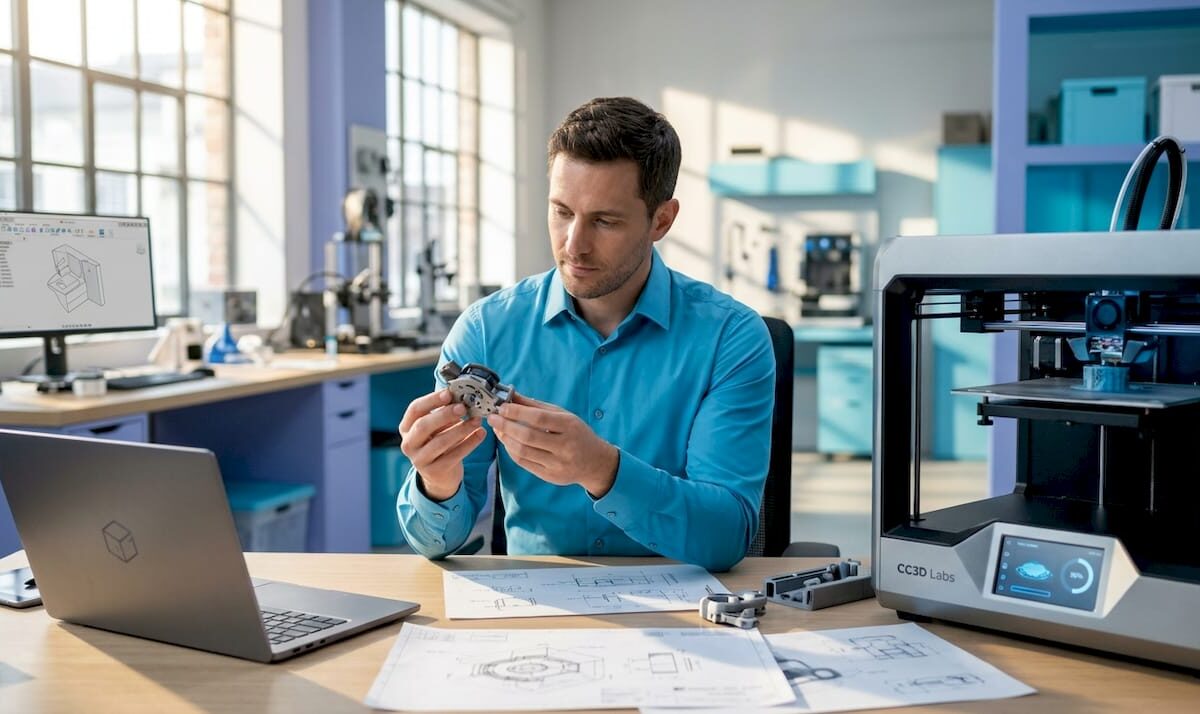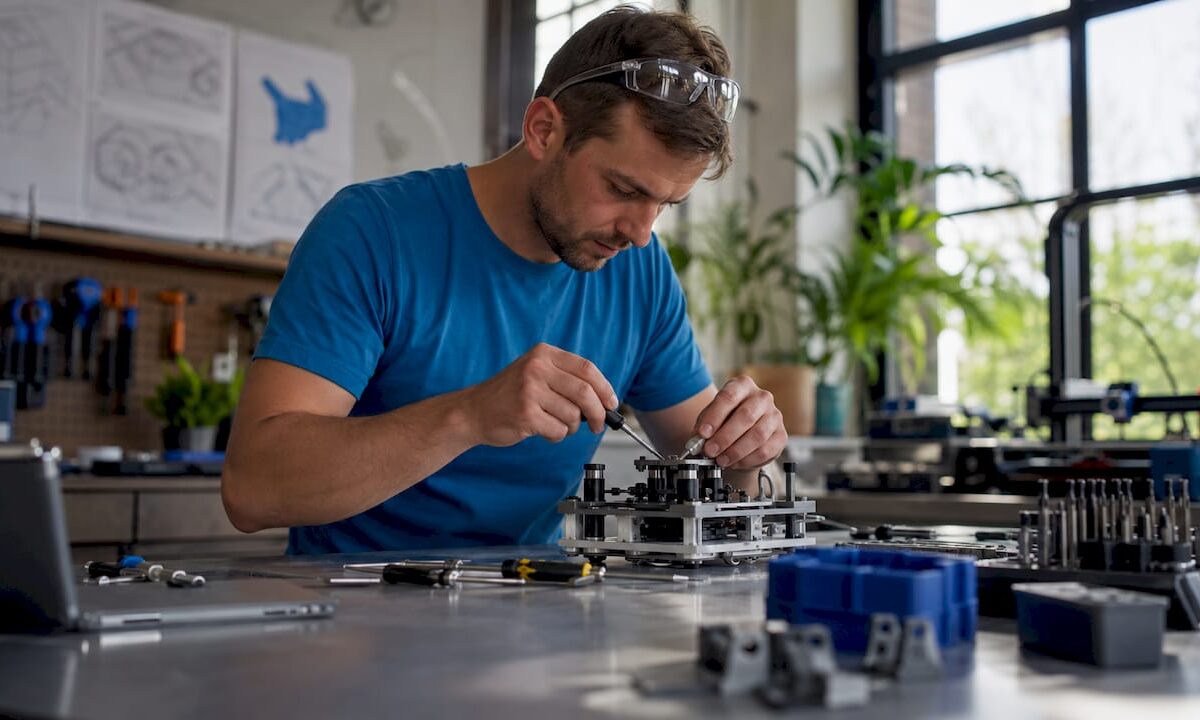
Product developer assembling functional prototype

Functional Prototyping Guide for Product Developers


TL;DR:

  • Functional prototyping builds working models to validate core product functions early, saving costs and time. Testing with five users uncovers most usability issues, while matching tools and materials to specific tests ensures accurate validation. Stopping after three consecutive tests reveal no new problems marks the completion of effective prototype development.

Functional prototyping is the process of building working models that perform core product functions to validate design feasibility before committing to production. In engineering and product development, this practice is also called design validation prototyping. A well-executed functional prototyping guide saves teams real money: prototyping prevents expensive mistakes by surfacing issues early, saving substantial cost and development time. Tools like FDM 3D printing, CNC machining, and CAD platforms such as Fusion 360 and SolidWorks are the backbone of this process. The goal is never a perfect product. The goal is a working model that answers specific engineering questions fast.

What does a functional prototyping guide actually cover?

A functional prototype is defined as a working model that represents core operational capabilities under realistic use conditions. That distinction matters. A visual mockup shows shape. A functional prototype shows whether the product actually works. It exposes mechanical failures, assembly problems, and usability gaps that CAD models and simulations simply cannot reveal.

The scope of a prototype development guide covers three things: what to build, how to build it, and how to test it. Product developers who skip any of those three stages tend to discover problems at the worst possible time, during tooling or production. The structured approach described here applies whether you are building a consumer device, an industrial component, or a medical instrument.

What do you need before starting a functional prototype?

Define your functional objectives first

Projects with clearly defined functional objectives have a meaningfully higher chance of meeting market demand. That number reflects a simple truth: vague goals produce vague prototypes. Before touching any software or material, write down exactly which functions the prototype must demonstrate. Load capacity, fluid flow, snap-fit engagement, thermal resistance. Pick the specific parameters that matter.

Hands with blueprints and prototype samples

Functional objectives should tie directly to user requirements. If your end user needs a part that survives 500 assembly cycles, that is your test target. If they need a housing that fits within a 40mm envelope, that is your constraint. Defining these upfront prevents the most expensive mistake in prototyping: building the wrong thing well.
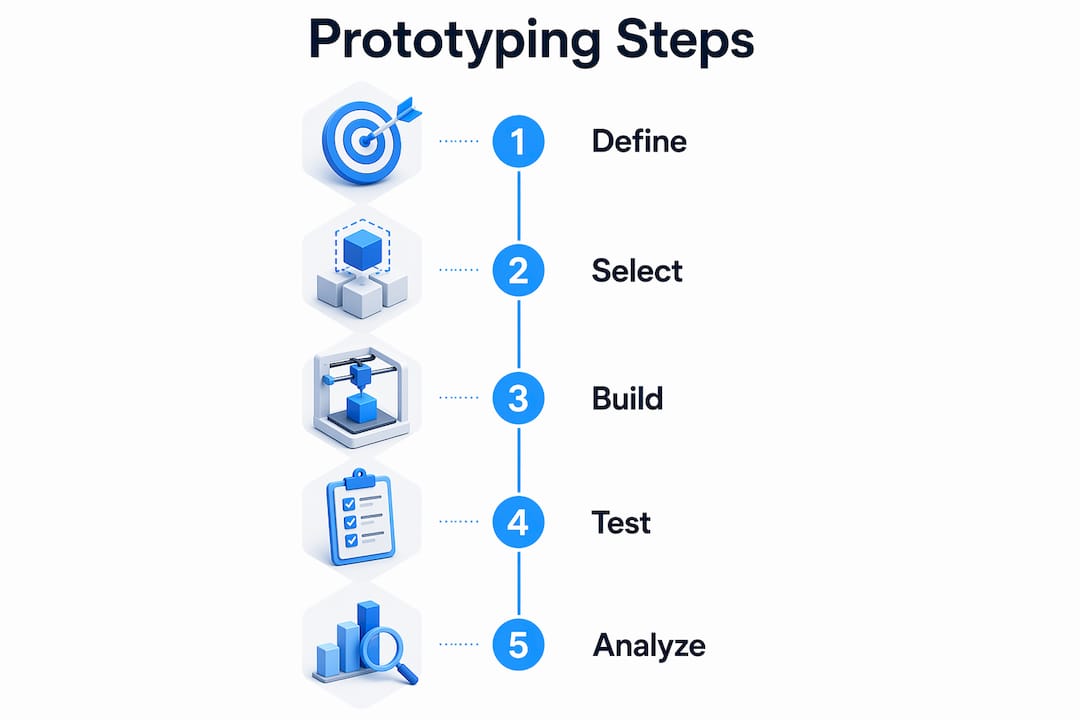
Infographic illustrating five prototyping steps

Tools and materials comparison

The right tool depends on what you are testing. Here is a direct comparison of the most common prototyping methods:

Method Best for Material options Speed Cost
FDM 3D printing Fit, form, and light functional tests PLA, PETG, ABS, Nylon, TPU Fast (hours) Low
SLA/resin printing Fine detail, smooth surfaces Photopolymer resins Fast (hours) Low to medium
CNC machining High-stress mechanical parts Aluminum, steel, acetal Medium (days) Medium to high
Urethane casting Small batch functional parts Polyurethane resins Medium Medium
Injection mold tooling Production-intent validation Any thermoplastic Slow (weeks) High

Tooling and materials for prototypes vary widely; production-intent materials are ideal but substitutions balance cost and functionality. FDM printing with Nylon or PETG, for example, handles most mechanical validation tasks at a fraction of CNC cost.

Pro Tip: Match your material to your test, not to the final product spec. If you are testing snap-fit geometry, PLA works fine. If you are testing fatigue under cyclic load, use the production material or its closest analog.

How do you create a functional prototype step by step?

The functional prototype process follows a clear sequence. Skipping steps does not save time. It creates rework.

  1. Define the test question. Write one sentence describing what the prototype must prove. “This bracket must support 50 lbs without deflecting more than 2mm.” Every decision after this flows from that sentence.

  2. Sketch low-fidelity concepts. Hand sketches or rough digital wireframes identify geometry and assembly logic before committing to CAD. This step takes hours, not days, and catches obvious problems early.

  3. Build the CAD model. Use Fusion 360, SolidWorks, or Onshape to create a parametric model. Design for the manufacturing method you plan to use. FDM parts need wall thickness above 1.2mm and should avoid unsupported overhangs beyond 45 degrees.

  4. Prepare and print or machine the part. Export your CAD file as an STL or STEP file. For FDM printing, slice the file in software like Bambu Studio, Cura, or PrusaSlicer. Set infill, layer height, and support strategy based on the functional load the part will carry.

  5. Assemble and conduct initial internal testing. Fit the prototype into its intended assembly context. Check clearances, fastener alignment, and mechanical travel. Document every failure point with photos and measurements.

  6. Iterate the design. Return to CAD, correct the identified issues, and reprint. For iterative prototyping to work efficiently, each iteration should address only the issues found in the previous test. Changing multiple variables at once makes it impossible to know what fixed the problem.

  7. Prepare for user testing. Once internal testing confirms basic function, move to external validation with real users. This is where most teams underinvest.

Choosing manufacturing methods matched to performance metrics is critical at step four. A part tested for fluid flow needs watertight walls, which FDM alone may not provide without post-processing. A part tested for impact resistance needs ABS or Nylon, not PLA.

How do you test and validate functional prototypes effectively?

Run tests with real users, not just your team

Testing a prototype with 5 real users uncovers 85% of usability issues. That finding from usability research holds true for physical products as much as software. Five users is not a large sample. It is the minimum effective dose for surfacing the most critical problems.

Internal team feedback is not a substitute for user testing. Engineers and designers carry domain expertise that blinds them to usability flaws. A team member who designed the assembly sequence will not struggle with it. A first-time user will. Avoid confusing internal feedback with real user validation, because domain expertise consistently obscures usability problems.

Common pitfalls to avoid

  • Testing too late. Waiting until the prototype is “ready” delays feedback by weeks. Test rough versions early.
  • Changing too many variables between iterations. One change per cycle keeps your data clean.
  • Ignoring failure modes. If a part breaks during testing, that is data. Document it, do not discard it.
  • Skipping quantitative metrics. Subjective feedback like “it feels loose” needs a measurement behind it. Define pass/fail criteria before testing begins.
  • Over-finishing the prototype. Sanding, painting, and polishing a prototype before function is confirmed wastes time and distorts user feedback.

When to stop prototyping

Stop prototyping when three consecutive user tests yield no new issues. Further refinement at that point wastes resources and delays production. The prototype has served its purpose. Shift focus to production tooling and manufacturing documentation.

“Functional prototypes are experiments for validation, not final products.” — A Practical Guide to Prototyping

That framing changes how you approach every build. An experiment that fails is still a success if it answers the question.

Pro Tip: Write your test criteria before you build the prototype. If you cannot define what “pass” looks like, you are not ready to test.

3D printing vs. other prototyping methods: which should you choose?

The choice of prototyping method determines what questions you can answer. No single method covers every scenario. Here is how the most common approaches compare for functional engineering prototypes:

Method Geometric complexity Functional accuracy Lead time Cost per part
FDM 3D printing High Medium (material dependent) Hours Very low
SLA printing Very high Medium (brittle resins) Hours Low
CNC machining Medium Very high 1–5 days High
Urethane casting High High 3–7 days Medium
Sheet metal fabrication Low Very high 3–10 days Medium to high

FDM 3D printing wins on speed and cost for early-stage functional tests. It handles complex geometry that CNC cannot reach without multi-axis setups. The tradeoff is material performance. FDM parts printed in standard PLA will not survive high-temperature or high-stress environments. For those conditions, CNC machining in aluminum or engineering-grade filaments like PEEK and carbon-fiber-reinforced Nylon close the gap.

Functional prototyping acts as a systematic validation gateway, aligning manufacturing methods with performance tests. That means the method you choose should be driven by the test parameter, not by habit or convenience. If you are validating a load-bearing bracket, CNC aluminum gives you real-world data. If you are validating assembly geometry, FDM is faster and cheaper. You can learn more about choosing the right 3D printing type for specific prototype and production goals.

Key Takeaways

Functional prototyping succeeds when you define specific test objectives, match your manufacturing method to those objectives, and validate with real users before investing in production tooling.

Point Details
Define objectives first Clear functional goals increase market success rates and prevent costly late-stage redesigns.
Match method to test FDM suits geometry and fit tests; CNC machining suits high-stress mechanical validation.
Test with real users Five users uncover 85% of usability issues that internal teams consistently miss.
Iterate one change at a time Changing multiple variables between builds makes it impossible to isolate what worked.
Know when to stop Three consecutive tests with no new findings signal the prototype has done its job.

What I’ve learned after watching hundreds of prototypes fail

The most consistent mistake I see product developers make is treating the prototype as a preview of the final product. They spend weeks perfecting surface finish and color before the core mechanism has been tested once. That instinct is understandable. Showing a polished prototype to stakeholders feels safer. But over-investing in prototype fidelity too early is one of the most documented failure modes in product development. Build only what is necessary to answer the specific question in front of you.

The second mistake is using the engineering team as the primary test audience. I have watched teams convince themselves a product is ready based on internal reviews, then see it fail immediately in user testing. Your team knows too much. They know the workarounds, the intended assembly sequence, the quirks. Real users do not. Get the prototype in front of people who have never seen it as early as possible, even if it is rough.

The third lesson is about method selection. Engineers often default to the method they know best rather than the method that fits the test. If your question is about ergonomics and grip, a foam model answers it faster than a printed part. If your question is about thermal performance, no amount of FDM printing replaces a test with the actual material. Align the method to the question, every time. That discipline is what separates teams that iterate fast from teams that spin their wheels.

— Justin

How Cc3dlabs supports your prototype builds

Product developers near Philadelphia and across the country use Cc3dlabs for on-demand filament-based 3D printing that fits directly into the iterative prototype cycle. Whether you need a single test part overnight or a batch of functional assemblies for user testing, the turnaround is built for speed.

https://cc3dlabs.com

Cc3dlabs offers professional 3D printing services for prototypes and functional parts, including multi-material options and CAD support for teams that need design-to-print help. The project gallery shows real functional parts across industries, from mechanical assemblies to enclosures. If you want to see what filament-based printing can do for your next prototype, request a free online estimate directly on the site.

FAQ

What is a functional prototype?

A functional prototype is a working model that performs the core functions of a product under realistic conditions. It is used to validate design decisions before committing to production tooling.

How many users do you need to test a prototype?

Testing with a handful of real users uncovers the large majority of usability problems. That threshold applies to physical product testing as well as software usability research.

When should you stop iterating on a prototype?

Stop prototyping when three consecutive user testing rounds produce no new findings. At that point, the design is validated and resources should shift to production preparation.

Is 3D printing good enough for functional prototypes?

FDM 3D printing handles fit, form, and light mechanical testing effectively. For high-stress or high-temperature applications, CNC machining or engineering-grade filaments like Nylon and PEEK are more appropriate.

What is the biggest mistake in functional prototyping?

Over-investing in prototype fidelity before answering the core functional question. Build the minimum version that tests what you need to know, then refine based on real data.
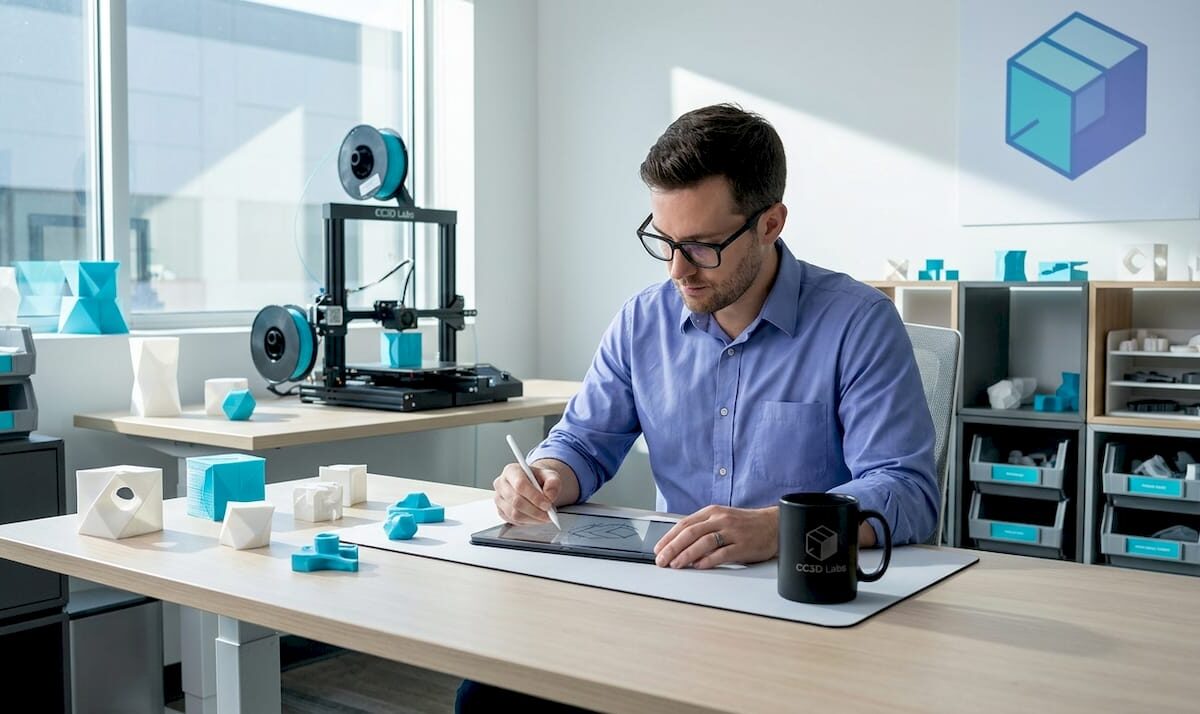
Product developer working on prototype sketches

What Is Iterative Prototyping for Product Developers


TL;DR:

  • Iterative prototyping is a cyclic process of building, testing, and refining prototypes to reduce uncertainty and improve product quality. It enables faster learning, stakeholder alignment, and cost savings by validating assumptions early and continuously throughout development. Proper fidelity selection and hypothesis framing are crucial to maximizing the benefits of each iteration cycle.

Iterative prototyping is defined as a cyclic process of building, testing, and refining prototypes to progressively improve a product’s quality and alignment with user needs. Each cycle produces documented learning that drives the next version forward. Methodologies like Agile, Lean Startup, and the Build-Measure-Learn loop all depend on this principle. Prototype fidelity ranges from paper sketches and Figma wireframes to functional 3D-printed models, and choosing the right level at each stage determines how much useful feedback you actually collect.

What is iterative prototyping and why does it matter?

Iterative prototyping is the structured practice of creating a prototype, exposing it to real testing conditions, analyzing what you learn, and feeding those findings directly into the next version. It is not a single event. It is a repeating cycle where each pass reduces uncertainty and sharpens the product’s direction.

The core value is risk reduction. Changes made early in development cost a fraction of what they cost after manufacturing or launch. A team that discovers a critical ergonomic flaw in a third-iteration 3D-printed model avoids the far greater expense of retooling production parts. This is why product teams at companies like Apple, IDEO, and Google have embedded iterative cycles into their standard development workflows.

Iterative prototyping also separates assumption from evidence. Before you test a physical or digital prototype, your product concept is a collection of guesses. After testing, it becomes a set of validated decisions. That shift from assumption to evidence is what iterative methods provide that sequential, waterfall approaches cannot.

“Prototypes shift stakeholders from imagining to observing and reacting to concrete designs, improving feedback specificity and decision-making.” — Medium, Prototyping Insights

The benefits of iterative prototyping extend beyond error prevention:

  • Faster learning cycles. Short sprint-based iterations surface problems in days or weeks rather than months.
  • Stakeholder alignment. Physical or interactive prototypes replace abstract descriptions with tangible objects, making feedback concrete and specific.
  • Reduced development cost. Catching structural or usability issues before production tooling saves significant budget.
  • Higher product-market fit. Repeated user testing ensures the final product reflects real needs, not internal assumptions.

Pro Tip: Set a clear learning objective before each prototype cycle. “Does this grip feel comfortable for extended use?” is a testable question. “Is this good?” is not. Specific questions produce specific answers.

How does the iterative prototyping cycle work?

The iterative design process follows a repeating four-step cycle. Understanding each step prevents teams from treating iteration as a vague concept and helps them execute it with discipline.

  1. Build the prototype. Create a version of the product or feature at the fidelity level appropriate to your current question. This could be a paper sketch, a foam model, a Figma mockup, or a functional 3D-printed part.
  2. Test with real users or stakeholders. Expose the prototype to the people who will actually use or evaluate the product. Observe behavior rather than just collecting opinions.
  3. Analyze the feedback. Identify patterns in what users struggled with, misunderstood, or responded positively to. Separate signal from noise.
  4. Refine and repeat. Apply findings to the next version. Document what changed and why, so the team builds institutional knowledge rather than cycling through the same problems.

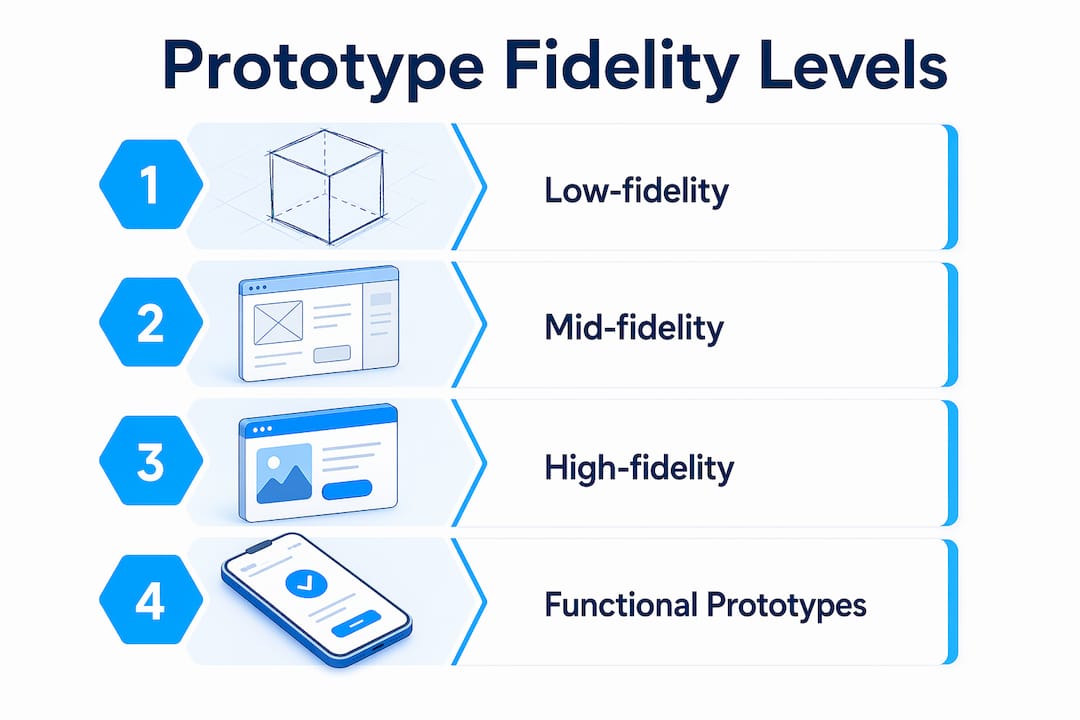
Fidelity selection is where many teams make costly mistakes. Low-fidelity prototypes deliver the largest leverage early in development because they validate structure and core concepts before any significant investment is made. A paper sketch of a product’s assembly sequence costs an hour to create and can reveal fundamental workflow problems. A polished CAD render of the same product costs days and tends to attract feedback about surface finish rather than function.

The table below shows how fidelity maps to the type of question you should be asking at each stage:

Fidelity level Best for Example format
Low fidelity Validating flow, structure, and core concept Paper sketches, foam models, rough wireframes
Mid fidelity Testing layout, navigation, and component relationships Figma wireframes, basic 3D-printed shells
High fidelity Evaluating interaction, realism, and final usability Functional 3D-printed parts, interactive digital prototypes

Infographic showing prototyping fidelity levels

Engineer inspecting 3D printed prototype on workbench

Matching fidelity to uncertainty type optimizes both learning quality and resource use. Premature high-fidelity prototypes shift stakeholder attention to visual polish and away from the structural or usability questions that actually matter at that stage.

Pro Tip: When you move to high-fidelity physical prototypes, filament-based 3D printing gives you functional geometry at a fraction of injection-molded cost. You can test snap fits, wall thickness, and ergonomics before committing to hard tooling.

How iterative prototyping fits into Agile, Lean, and rapid development

Iterative prototyping does not exist in isolation. It is the practical engine inside the frameworks that modern product teams already use.

In Agile development, work is divided into sprints that permit feedback and adaptation at multiple stages. Prototyping within Agile serves as a discovery mechanism that runs ahead of or alongside development sprints. A team building a new hardware product might prototype the physical enclosure in parallel with firmware development, using each sprint review to validate both dimensions simultaneously.

Lean Startup’s Build-Measure-Learn loop is structurally identical to iterative prototyping. Build the simplest version that tests your riskiest assumption. Measure real user response. Learn whether to pivot or continue. The critical discipline in this loop is shortening iteration cycles to weeks rather than months, which compresses the time between assumption and validated knowledge.

Agile rapid prototyping treats prototypes explicitly as learning tools rather than deliverables. This is a meaningful distinction. A deliverable is judged by its finish quality. A learning tool is judged by the quality of the insight it generates. Teams that confuse the two tend to over-invest in prototype polish and under-invest in structured testing.

The contrast with waterfall development is stark. In a traditional waterfall process, prototyping happens once, early, and feeds into a specification that drives the entire build. Feedback arrives late, when changes are expensive. Iterative approaches distribute feedback across the entire development timeline, so validated learnings continuously feed back into the product backlog and refinement decisions.

You can explore the broader context of rapid prototyping frameworks to see how iterative cycles connect to manufacturing-ready development pipelines.

Common pitfalls in iterative prototyping and how to avoid them

Iterative prototyping produces results only when each cycle generates genuine learning. Several common patterns prevent that from happening.

  • Faster waterfall thinking. Without framing each cycle as a testable hypothesis, iteration risks becoming a faster version of sequential development. You produce more versions but reduce no more uncertainty. The fix is to define a specific question before each build, not after.
  • Confusing visual polish with design quality. A prototype that looks finished tends to receive feedback about aesthetics rather than function. Teams that present high-fidelity visuals too early get comments on color and typography when they need answers about usability and structure.
  • Skipping documentation. Each iteration should produce a written record of what was tested, what was learned, and what decision was made. Without this, teams repeat the same experiments across cycles and lose institutional knowledge when team members change.
  • Collecting vague feedback. Prototypes work best as conversation tools that generate honest, specific assessments. Asking “What do you think?” produces vague commentary. Asking “Walk me through how you would assemble this” produces observable behavior and concrete insights.
  • Ignoring risk prioritization. Risk exposure should determine when and what to prototype. Prototype the highest-impact uncertainties first. Spending iteration cycles on low-risk details while structural assumptions remain untested is a common and expensive mistake.

Pro Tip: Before each iteration, write one sentence: “We believe [X]. We will test this by [Y]. We will know we are right if [Z].” This single habit eliminates vague iteration and produces decisions, not just versions.

Key takeaways

Iterative prototyping works because each cycle converts assumptions into validated decisions, and that compounding knowledge is what separates products that ship right from products that ship and fail.

Point Details
Define the cycle clearly Build, test, analyze, and refine in documented cycles that produce specific decisions.
Match fidelity to the question Use low-fidelity prototypes early for structure; reserve high-fidelity for interaction and realism testing.
Frame each iteration as a hypothesis Write a testable claim before each build to avoid cycling without reducing uncertainty.
Integrate with Agile and Lean Prototyping serves as the discovery engine inside sprints and Build-Measure-Learn loops.
Prioritize by risk exposure Prototype the highest-impact unknowns first to allocate effort where it reduces the most uncertainty.

Why fidelity decisions are the real skill in iterative prototyping

Most articles on iterative prototyping focus on the cycle itself. The harder skill, in my experience, is fidelity judgment. I have watched teams spend three weeks building a polished interactive prototype to answer a question that a two-hour paper sketch would have resolved. The result was not just wasted time. It was distorted feedback, because stakeholders reacted to the visual finish instead of the underlying structure.

The insight that changed how I think about this came from working on a physical product enclosure. We had two competing assembly approaches. Instead of modeling both in CAD, we built foam mockups in an afternoon. Users immediately showed us which approach created confusion during assembly. That single session saved weeks of CAD revision and tooling cost.

The other pattern I see consistently is teams treating iteration as output production rather than learning production. They measure success by how many versions they shipped rather than how many assumptions they resolved. The hypothesis-driven framing from Jasiri’s iterative design research is the most practical correction I know. Write the hypothesis. Run the test. Document the outcome. If you cannot state what you learned from a cycle, the cycle did not count.

For physical product teams, 3D printing has genuinely changed the economics of high-fidelity iteration. The ability to validate 3D designs with functional printed parts before committing to tooling is not a minor convenience. It compresses what used to be a months-long feedback loop into days.

— Justin

Accelerate your iterations with professional 3D printing

Physical prototypes close the gap between digital design and real-world performance faster than any other method. When your iteration cycle depends on functional parts, material accuracy, and fast turnaround, the quality of your printing service directly affects the quality of your learning.

https://cc3dlabs.com

Cc3dlabs, based near Philadelphia, provides professional 3D printing services built for product developers who iterate fast. From filament-based functional prototypes to multi-color concept models, Cc3dlabs supports every fidelity level your development cycle requires. You can get a free online estimate, request design support, or ship parts directly to your team. If you want to understand how 3D printing drives product innovation at each stage of development, Cc3dlabs has the capability and the expertise to support your next iteration.

FAQ

What is iterative prototyping in product development?

Iterative prototyping is a cyclic process of building a prototype, testing it, analyzing feedback, and refining the design across multiple rounds. Each cycle reduces uncertainty and improves product quality before final production.

How many iterations does a typical prototype cycle require?

There is no fixed number. The cycle continues until the highest-priority uncertainties are resolved and the product meets validated user and performance requirements. Most hardware products go through three to seven major iteration cycles before production readiness.

What is the difference between low-fidelity and high-fidelity prototypes?

Low-fidelity prototypes validate structure, flow, and core concepts using minimal resources, such as paper sketches or foam models. High-fidelity prototypes test realistic interaction and final usability using functional models or detailed digital mockups.

How does iterative prototyping connect to Agile methodology?

Agile divides development into sprints that allow feedback and adaptation at each stage. Iterative prototyping functions as the discovery mechanism within those sprints, testing assumptions before they become expensive development commitments.

What is the biggest mistake teams make in iterative prototyping?

The most common mistake is iterating without a defined hypothesis, which turns the process into a faster version of sequential development without genuine uncertainty reduction. Each cycle must begin with a specific, testable question to produce real learning.

Developer inspecting physical functional prototype

What Is Functional Prototyping for Product Developers


TL;DR:

  • Functional prototyping involves creating operational models that produce measurable engineering data before manufacturing begins. It encompasses methods like CNC machining, 3D printing, and sheet metal fabrication, chosen to match specific validation goals and performance parameters. This process is essential for reducing design risks, verifying fit, strength, and thermal performance, and accelerating product development through iterative testing.

Functional prototyping is defined as the process of building physical or digital models that replicate a product’s production-intent form, fit, and function closely enough to generate valid engineering data before full-scale manufacturing begins. Unlike appearance models or concept sketches, a functional prototype must perform. It carries load, transfers motion, conducts current, or executes software logic under conditions that mirror real use. Methods like CNC machining, filament-based 3D printing, and hybrid software prototyping each serve distinct validation goals, and choosing the right one determines whether your test data is trustworthy or misleading.

What is functional prototyping and how does it differ from other types?

Functional prototyping is the practice of replicating production geometry, material behavior, and assembly interfaces in a working model to produce test data that drives production decisions. The word “functional” is the operative distinction. A prototype that looks right but cannot be loaded, cycled, or measured tells you almost nothing about whether your design will survive manufacturing and real-world use.

Three prototype categories define the spectrum product teams work across:

  • Appearance prototypes replicate visual form and surface finish but use no production-equivalent materials or tolerances. They are useful for marketing reviews and investor presentations, not engineering sign-off.
  • Proof-of-concept models demonstrate a principle works at a basic level, often with off-the-shelf components and rough geometry. They answer “can this work?” not “will this work at scale?”
  • Functional prototypes incorporate production-representative materials, controlled tolerances, and realistic assembly interfaces. They answer measurable questions: Does this joint hold 200 N of force? Does this housing dissipate heat within spec? Does this software flow handle 500 concurrent users?
Prototype type Material accuracy Tolerance control Test capability
Appearance model Low Low Visual review only
Proof-of-concept Moderate Low Principle validation
Functional prototype High High Engineering and performance testing

The table makes the trade-off clear. Functional prototypes cost more to produce than appearance models, but they replace design assumptions with measured test data under controlled conditions. That trade-off is almost always worth it before committing to production tooling.

What manufacturing methods are used in functional prototyping?

The method you choose to build a functional prototype determines the quality of the data you get back. Three manufacturing approaches dominate the field, each suited to different validation objectives.

CNC machining of prototype part in workshop

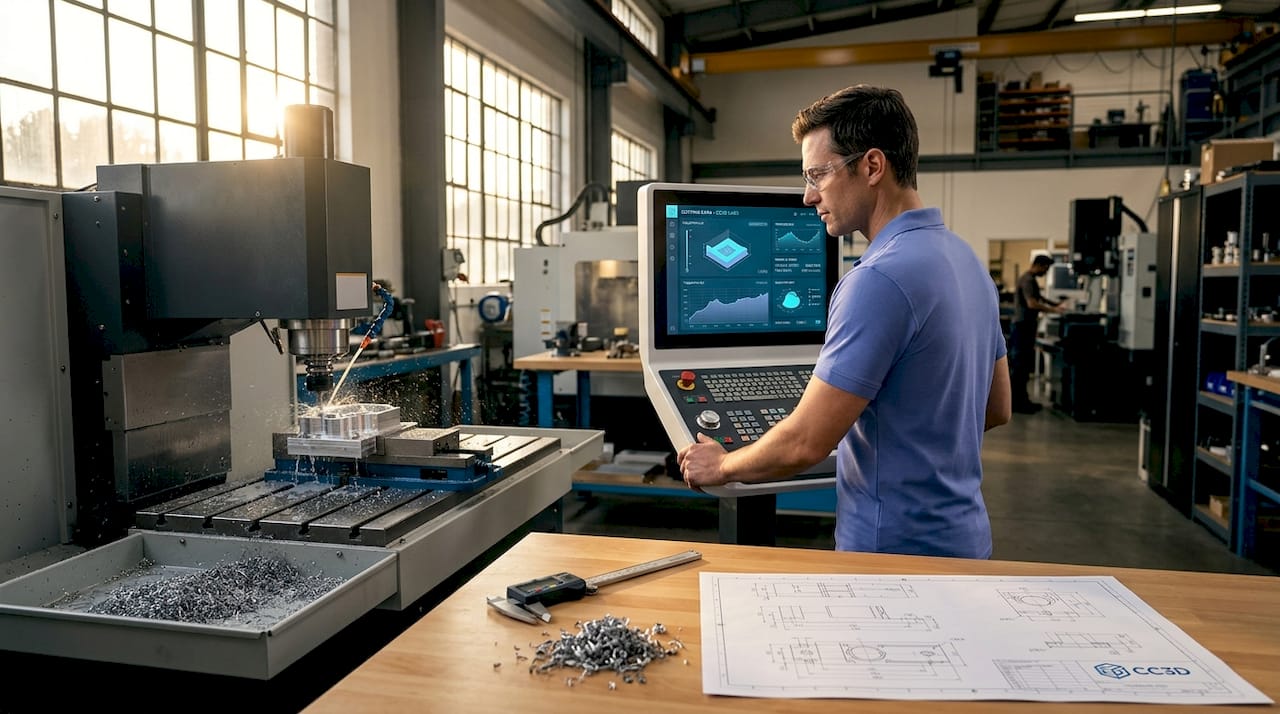
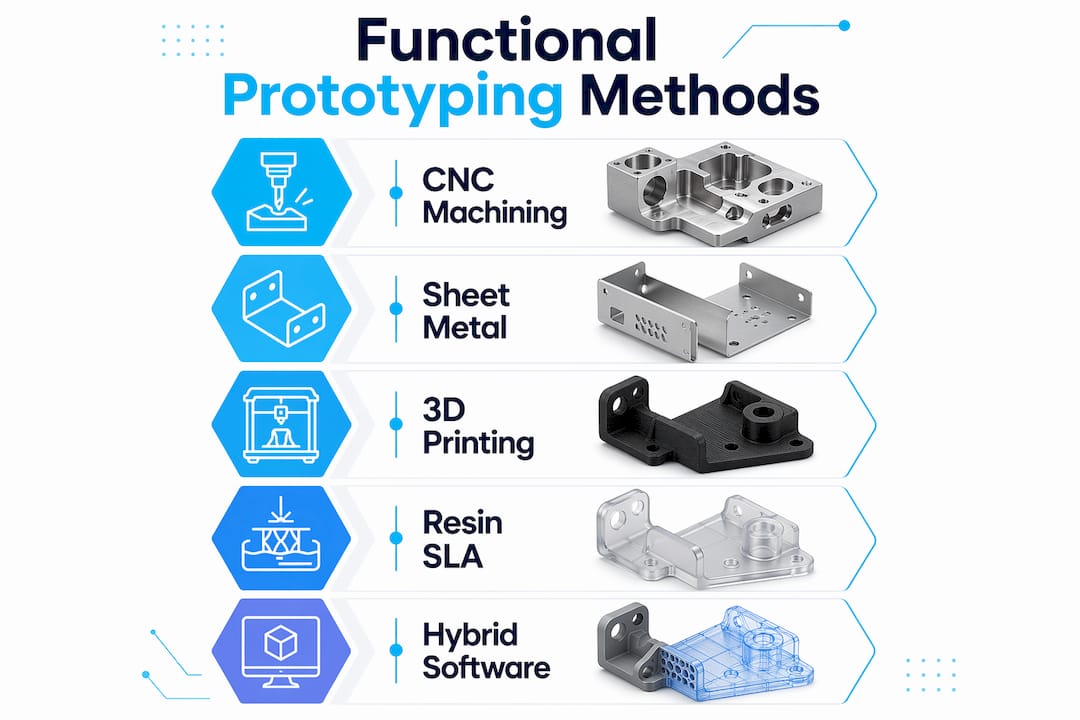
CNC machining is the standard for load-bearing and safety-critical parts. CNC rapid prototyping produces parts from production-grade metals and engineering plastics with realistic tolerances, making it the right choice when you need to test fit, fatigue, or manufacturability under real conditions. A medical device housing, an automotive bracket, or a hydraulic manifold all demand CNC-level dimensional accuracy before you can trust the test results.

Sheet metal fabrication serves structural assemblies where wall thickness, bend radius, and weld joint behavior must be validated. Enclosures, frames, and chassis components built from sheet metal prototypes reveal assembly interference and structural compliance issues that no simulation catches reliably.

3D printing covers the widest range of functional prototyping scenarios where rapid iteration outweighs the need for full production realism. Filament-based FDM printing with materials like PETG, ASA, or Nylon produces parts that withstand mechanical loading, thermal cycling, and chemical exposure well enough for early-stage validation. Resin-based SLA printing delivers finer feature resolution for snap-fit mechanisms and optical components. You can review filament prototype examples to understand how material selection directly affects test outcomes.

Infographic of main functional prototyping manufacturing methods

In software development, functional prototypes move beyond clickable wireframes. Hybrid functional prototyping implements actual backend logic and real data flows, allowing teams to test user behavior and system performance rather than just screen transitions.

Pro Tip: Match your manufacturing method to the specific failure mode you are testing for. If you are validating thermal behavior, material equivalency matters more than surface finish. If you are validating assembly clearance, dimensional accuracy matters more than material strength.

What engineering goals does functional prototyping achieve?

Functional prototypes are test instruments. Every build should map to a specific engineering question, and the answer should come back as a number, not an opinion.

  1. Fit and assembly verification. Mating surfaces, fastener patterns, and clearance envelopes are confirmed against production drawings. This catches interference issues before tooling is cut, where corrections cost orders of magnitude more.
  2. Structural and mechanical performance. Load testing, fatigue cycling, and deflection measurement validate that geometry and material choices meet specification. Performance testing measures output parameters like force, speed, and displacement rather than relying on simulation alone.
  3. Thermal and environmental validation. Prototypes exposed to operating temperature ranges, humidity, and UV confirm that material selection and wall thickness choices hold up. A housing that warps at 60°C in testing saves a costly field recall.
  4. Electrical and software functionality. PCB assemblies and embedded firmware tested in a functional prototype reveal signal integrity issues, power draw anomalies, and timing failures that schematic review misses.
  5. System integration testing. Subsystems assembled together for the first time in a functional prototype reveal interface conflicts between mechanical, electrical, and software domains that individual component tests never surface.

Functional prototyping represents the point where risk becomes measurable, replacing CAD assumptions with data collected under controlled test conditions. That shift from assumption to measurement is the core value of the entire process.

Pro Tip: Replicate the exact mating interfaces and tolerances from your production drawings, not approximations. Effective engineering validation depends on precise interface control. A prototype that fails because of a loose fit you introduced during fabrication teaches you nothing about your design.

Best practices and common pitfalls in functional prototyping

Getting useful data from a functional prototype requires discipline in how you build and test it. The most common mistakes are not about budget or schedule. They are about mismatched fidelity and poor test planning.

  • Match fidelity to the validation objective. A prototype built to test ergonomics does not need production-grade material strength. A prototype built to test fatigue life does. Building every prototype to the highest fidelity wastes resources and slows iteration.
  • Never underestimate material behavior differences. Using production-equivalent materials is critical when validating strength, thermal response, and wear behavior. A PLA prototype tested for heat resistance will fail at temperatures that PETG or Nylon handles without issue, and that failure reflects the material choice, not the design.
  • Control mating surfaces precisely. Loose or oversized interfaces in a prototype introduce false failures. If a seal leaks because the prototype housing is 0.3 mm out of spec, you have learned nothing about your seal design. You have only confirmed that sloppy fabrication produces sloppy results.
  • Plan iteration cycles before you build the first prototype. Building fast and rough versions to test assumptions reduces expensive errors later. Teams that plan three or four iteration cycles from the start converge on viable designs faster than teams that try to get everything right in one expensive build.
  • Manage the cost-versus-realism trade-off deliberately. CNC machining delivers the highest fidelity but costs more per part. 3D printing delivers faster turnaround at lower cost but with material and tolerance limitations. The right answer depends on what you are testing, not on what the budget allows by default.

For software functional prototypes, the equivalent pitfall is building UI flows that look interactive but contain no real logic. Actual backend implementation is what separates a functional software prototype from a clickable mockup, and only the former produces meaningful user behavior data.

Pro Tip: Use your 3D design validation process to define acceptance criteria before fabrication starts. Knowing what pass and fail look like before you run the test prevents post-hoc rationalization of ambiguous results.

Key takeaways

Functional prototyping is the most direct method for replacing design assumptions with engineering data before production tooling commits your budget to a fixed design.

Point Details
Definition is performance-based A functional prototype must generate measurable test data, not just represent the product visually.
Method must match validation goal CNC machining suits load-bearing tests; 3D printing suits rapid iteration; sheet metal suits structural assemblies.
Material equivalency is non-negotiable Using the wrong material class produces test results that do not predict final product performance.
Interface precision prevents false failures Mating surfaces and tolerances must match production drawings to avoid prototype-induced test errors.
Iteration speed drives convergence Planning multiple short build-and-test cycles reaches a viable design faster than one high-cost build.

Why functional prototyping is the most underrated step in product development

Most product teams I work with treat functional prototyping as a checkpoint, something you do once before you hand off to manufacturing. That framing is wrong, and it costs teams real money. Functional prototyping is a learning engine. Every build should answer a specific question, and the answer should change something about the next build.

The industry misconception I see most often is the belief that simulation replaces physical testing. Finite element analysis and CFD are powerful tools, but they model the geometry and material properties you input. A functional prototype tests the geometry and material behavior you actually produced. Those two things are never identical, and the gap between them is where product failures live.

What has changed in 2026 is the accessibility of the methods. Filament-based 3D printing with engineering-grade materials, combined with affordable CNC services and cloud-based CAD tools, means a two-person startup can run the same validation workflow that a Fortune 500 engineering team ran a decade ago. The barrier is no longer equipment access. It is knowing what question to ask and building the prototype that answers it precisely.

The teams that win at product development are not the ones with the biggest prototyping budgets. They are the ones that prototype the right thing, measure the right parameter, and iterate faster than their competitors. That discipline starts with understanding what functional prototyping actually is and what it is not.

— Justin

How Cc3dlabs accelerates your functional prototyping workflow

https://cc3dlabs.com

Cc3dlabs, based near Philadelphia, produces functional prototypes using filament-based 3D printing with engineering-grade materials including PETG, ASA, Nylon, and carbon-fiber-reinforced filaments. Their 3D printing services cover single prototypes through batch production runs, with CAD support and professional handheld 3D scanning (accuracy to ~0.1 mm) available for parts that require dimensional verification after fabrication. For teams that need fast turnaround on on-demand prototype parts without minimum order requirements, Cc3dlabs offers free online estimates and local pickup near Philadelphia or direct shipping. If your validation cycle depends on getting accurate, durable parts quickly, their team is built for exactly that workflow.

FAQ

What is a functional prototype?

A functional prototype is a working model that replicates a product’s production-intent geometry, material behavior, and assembly interfaces closely enough to generate valid engineering test data. It differs from an appearance model by performing under real load, thermal, or operational conditions.

How do functional prototypes differ from proof-of-concept models?

Proof-of-concept models demonstrate that a principle works using rough geometry and off-the-shelf components. Functional prototypes use production-equivalent materials and controlled tolerances to validate whether the design performs to specification under realistic conditions.

What are the most common functional prototyping methods?

CNC machining, filament-based 3D printing, resin SLA printing, and sheet metal fabrication are the primary methods. The right choice depends on the specific performance parameter being tested and the tolerance accuracy required for valid results.

Why is material selection critical in functional prototyping?

Manufacturing processes affect material properties significantly, so prototypes must use production-grade or equivalent materials to accurately validate strength, thermal response, and wear behavior. A prototype built from the wrong material class produces test data that does not predict final product performance.

How many prototyping iterations are typically needed?

The number depends on design complexity and how many subsystems require independent validation, but teams that plan multiple short build-and-test cycles consistently converge on viable designs faster than teams that attempt a single high-fidelity build.

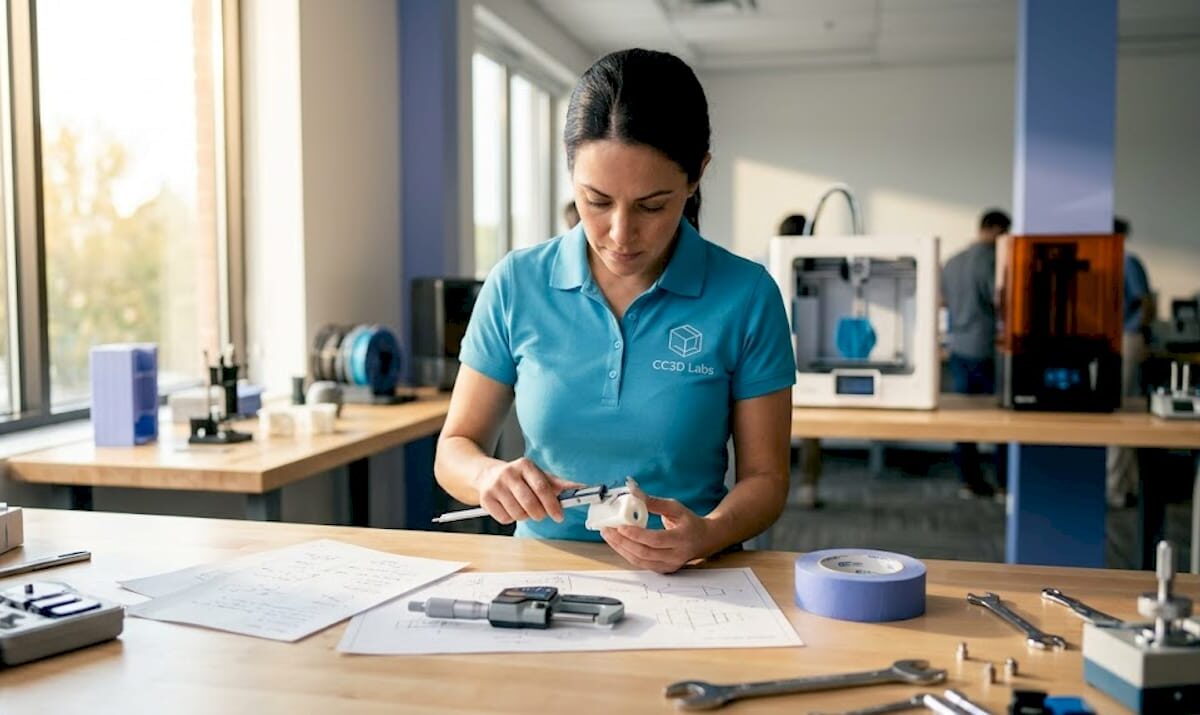
Engineer inspecting 3D printed part at workbench

The Role of Part Validation in 3D Printing for Manufacturers


TL;DR:

  • Part validation in 3D printing ensures a process consistently produces conforming parts, not just individual successful prints.
  • Implementing structured IQ/OQ/PQ procedures and using multiple validation techniques reduces scrap, enhances quality, and meets regulatory standards.

Most manufacturers assume that once a 3D printer finishes a job, the part is ready to use. That assumption is expensive. The role of part validation in 3D printing is far more critical than most production teams realize, and the gap between “it printed” and “it works reliably” is where quality problems, warranty failures, and regulatory risks pile up. Projects that skip validation show 3 to 5 times higher scrap rates in the first three months of production. This article breaks down what validation actually involves, which techniques work, and how to build a process that protects your parts and your bottom line.

Table of Contents

Key takeaways

Point Details
Validation goes beyond inspection Process validation confirms repeatable results across all future builds, not just one good part.
Multiple techniques compound accuracy Combining dimensional checks, 3D scanning, and functional testing catches defects that single-method inspection misses.
Business impact is measurable Proper validation dramatically reduces scrap, rework costs, and machine downtime across production runs.
Regulated industries require it Medical, aerospace, and defense applications mandate formal IQ/OQ/PQ validation before production parts ship.
Continuous monitoring sustains quality SPC systems fed by validation data catch process drift before it becomes a defect wave.

The role of part validation in 3D printing explained

Part validation and product inspection are not the same thing, and confusing the two is one of the most common mistakes manufacturers make when scaling from prototype to production. Inspection checks whether a specific part meets specifications. Validation proves that the process consistently produces conforming parts within defined parameters, every time, without relying on 100% inspection to catch failures.

Think of it this way: inspecting one part from a batch of 500 tells you about that one part. Validating the process tells you whether all 500 are likely to be good before you even measure them.

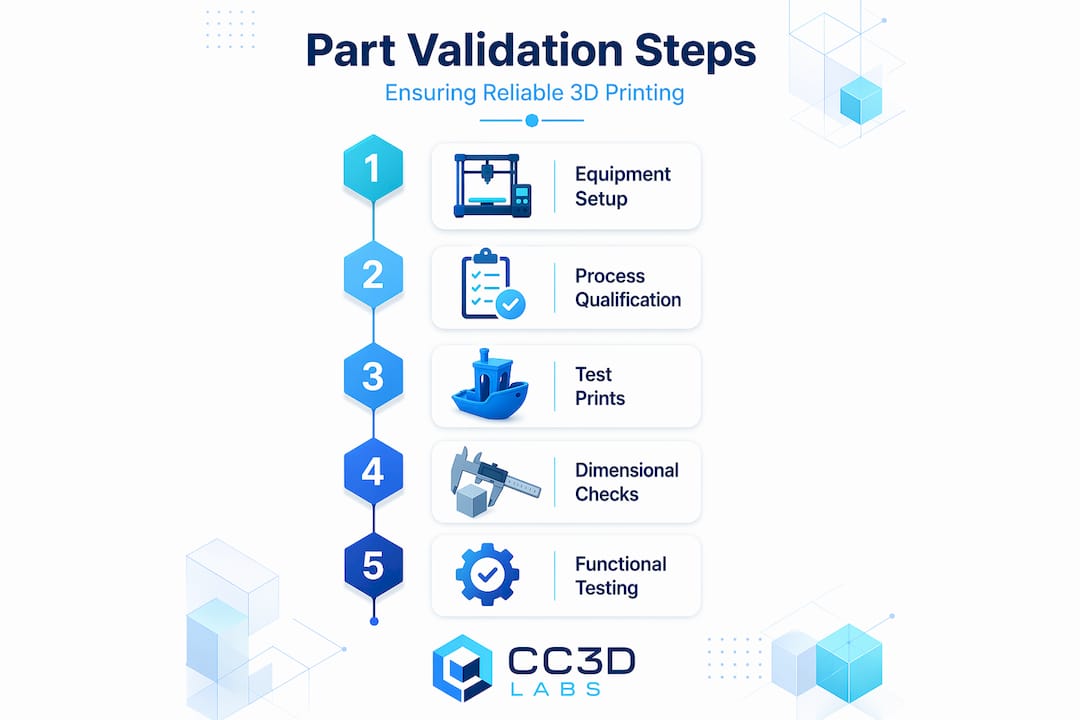
Infographic showing steps in 3D print part validation

In regulated industries, this distinction carries legal weight. Process validation is mandatory for medical devices, aerospace components, and pharmaceutical manufacturing equipment. Regulatory bodies require documented evidence that the process, not just the product, is under control. But even outside those industries, validation is the framework that separates reactive quality control from proactive quality assurance.

The most widely adopted framework is IQ/OQ/PQ, adapted directly from pharmaceutical and medical device manufacturing:

  • Installation Qualification (IQ): Confirms the printer and supporting equipment are installed correctly, calibrated, and operating within manufacturer specifications.
  • Operational Qualification (OQ): Tests whether the process produces conforming parts across the defined operating range, including edge conditions.
  • Performance Qualification (PQ): Demonstrates that the validated process consistently delivers acceptable output under real production conditions over time.

Equipment qualification follows this IQ to OQ to PQ sequence as a prerequisite to process validation, and skipping any stage undermines the entire framework. This structure forces manufacturers to think systematically rather than relying on operator intuition.

Pro Tip: When starting a validation program for 3D printing, document your IQ stage meticulously. Calibration records, environmental conditions, and software version logs protect you during audits and give you a meaningful baseline when troubleshooting future deviations.

Methods for part validation that actually work

Choosing the right validation technique depends on part geometry, material, application criticality, and whether you need destructive or non-destructive data. Most production environments benefit from layering multiple approaches rather than relying on any single method.

Dimensional measurement and 3D scanning

Calipers and coordinate measuring machines (CMMs) remain reliable for straightforward geometries. However, for complex organic shapes, thin walls, or surfaces that require full-field data, structured-light or laser 3D scanning delivers far more information per measurement cycle. Aerospace manufacturers illustrate the scale of this advantage: Boeing has publicly described AI-assisted validation tooling that saves hours of inspection time per aircraft.com/news/how-boeing-is-using-ai-for-rapid-parts-validation/” rel=”nofollow noopener noreferrer” target=”_blank”>AI-powered validation tool saves 17 or more hours per aircraft during inspection, while reducing gauge repeatability and reproducibility variance to 0.93%. That level of measurement consistency would be impossible with manual methods alone.

Functional and mechanical testing

Dimensional accuracy tells you if a part is shaped correctly. Functional testing tells you if it performs correctly under load, temperature, chemical exposure, or repeated cycling. For structural components, this might mean tensile or compression testing. For enclosures, it might mean IP rating validation. Destructive testing is sometimes the only honest way to understand failure modes, particularly for safety-critical parts where the cost of a field failure far exceeds the cost of the test sample.

Statistical process control and capability metrics

  1. Collect baseline data across multiple print runs using consistent measurement methods and operator protocols.
  2. Calculate Cpk and Ppk to quantify how well the process holds critical dimensions within specification limits.
  3. Set up control charts for key process variables like nozzle temperature, layer adhesion, and print speed.
  4. Establish control limits based on your baseline and trigger revalidation when measurements drift outside them.
  5. Feed data back into your process settings to tighten variation over time.

Validation data integrates directly with SPC systems for early detection of variation and continuous process improvement. This transforms validation from a one-time event into an ongoing quality intelligence system.

Pro Tip: Do not target a Cpk of exactly 1.0 when setting your process capability goals. Aim for 1.33 or higher. That margin gives your process room to drift before parts fall out of spec, which means fewer emergency stops and more predictable output.

A comparison of common validation techniques by application:

Technique Best for Destructive? Cost level
CMM dimensional inspection Prismatic, tight-tolerance parts No Medium
Structured-light 3D scanning Complex geometry, full-field data No Medium to high
Tensile and compression testing Structural or load-bearing parts Yes Low to medium
CT scanning Internal features, porosity detection No High
Functional performance testing End-use assemblies, fit checks Sometimes Varies

Learning more about ways to validate 3D designs can help you choose the right combination for your specific production environment.

Business impact of rigorous part validation

The financial argument for validation is not abstract. Filament runout and mid-print failures waste real material and machine time on any print farm, and proper process validation dramatically reduces those losses. That is one failure mode. Multiply it across material inconsistency, temperature variation, and calibration drift, and the cumulative cost of unvalidated 3D printing operations becomes significant.

Manufacturers who build validation into their workflow see measurable improvements across four areas:

  • Scrap and rework reduction: Catching process drift early prevents entire batches from becoming waste. The difference between catching a problem at print cycle 3 versus print cycle 300 is the difference between a minor correction and a production crisis.
  • Customer confidence: Validated parts ship with documented proof of conformance. For product developers sourcing parts from contract manufacturers, this documentation is the difference between an acceptable supplier and a preferred supplier.
  • Regulatory readiness: Companies in medical, aerospace, or defense supply chains cannot bid on regulated contracts without validated processes. Building that infrastructure now opens market doors later.
  • Scalability from prototype to production: A prototype can tolerate variability. A production run cannot. Validation is what makes the transition from “it worked once” to “it works every time.”

Scaling production without validation is like building a house on a foundation you have never tested. It might hold, but you will not know until something fails. A well-documented validation record also reduces engineering review time when design changes trigger revalidation, since your process baseline is already defined.

Challenges in validation and how to address them

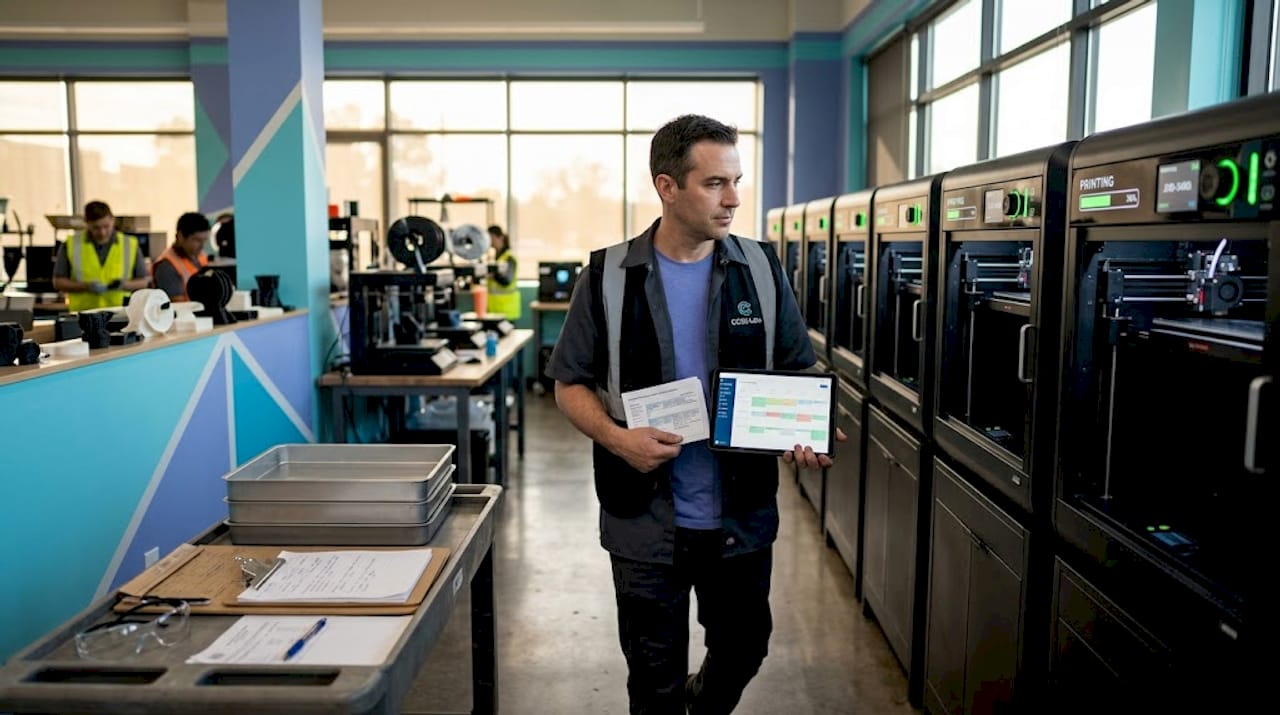
Supervisor reviewing production in 3D print facility

Integrating part validation into a 3D printing workflow is not without friction, especially for manufacturers who built their operations around rapid iteration rather than process rigor.

The most persistent challenge is measurement uncertainty. Knowing that a part is within tolerance requires that your measurement system is itself accurate and repeatable. Misaligned mating parts caused by unclear dimensional definitions often trace back to incomplete GD&T on drawings rather than actual process failures. Fixing the drawing is faster and cheaper than retesting the process, but you have to know which problem you are actually solving.

Environmental variability is another overlooked factor. Humidity, ambient temperature, and even vibration from nearby equipment affect print quality in ways that are invisible until validation data reveals the pattern. This is where the distinction between Factory Acceptance Testing and Site Acceptance Testing becomes practical. FAT confirms equipment performance in a controlled environment, while SAT validates that same performance under your actual production conditions. A printer that passes FAT may still behave differently on your shop floor, and SAT validates real-world performance for long-term stability.

Best practices for making validation sustainable:

  • Start with a risk-based sampling plan. Not every part or every batch needs 100% inspection. Identify your highest-risk features and focus measurement resources there.
  • Define revalidation triggers upfront. Material lot changes, nozzle replacements, firmware updates, and facility moves all warrant revalidation. Write them down before production starts.
  • Build documentation habits early. Validation reports are only useful if they reflect what actually happened. Standardize your data capture formats from day one.
  • Treat print accuracy insights as a continuous feedback loop rather than a pass/fail gate at the end of a run.

Pro Tip: If you are launching a validation program with limited resources, start with your most critical dimension on your most common part. Validate that one feature thoroughly, document your results, and build from there. A narrow validation done well is more useful than a broad validation done superficially.

My take on where validation fits in your strategy

I’ve talked with a lot of manufacturers who treat part validation as something you do for auditors. You prove compliance, file the paperwork, and move on. In my experience, that framing costs them more than they realize.

What I’ve seen work is treating validation as a data collection strategy. Every measurement you take, every capability study you run, every batch you document gives you a clearer picture of what your process is actually doing versus what you think it’s doing. The manufacturers who use that data proactively, adjusting parameters before scrap rates climb rather than after, are the ones who scale 3D printing production without the chaos that typically comes with it.

The other thing I’d push back on is the idea that validation is only for regulated industries. I’ve seen product developers lose significant time and money when a part that worked perfectly in prototyping failed consistently in production, specifically because no one validated the transition. The process that produced five good prototypes is not automatically the same process that will produce five hundred reliable production parts.

Start lean. Start with one part, one critical feature, one documented study. The insights you get from that first real validation run will tell you more about your process than months of informal inspection. And when you’re ready to scale your 3D printing with confidence, you’ll have the data to back every decision.

— Justin

How Cc3dlabs supports your validation needs

Reliable 3D printed parts start with a process built for quality from the first layer to the final inspection. At Cc3dlabs, we bring professional handheld 3D scanning (accuracy to ~0.1 mm), precision filament-based printing, and design support together under one workflow, so product developers and manufacturers get parts they can actually validate.

https://cc3dlabs.com

Whether you need functional prototypes with documented dimensional reports, batch production runs with consistent quality, or scanning services to compare printed parts against CAD geometry, Cc3dlabs has the equipment and experience to back it up. Our 3D printing services are built around the kind of accuracy and repeatability that makes validation straightforward, not a burden. Get a free online estimate today and see how a quality-focused print partner changes what’s possible for your production program.

FAQ

What is part validation in 3D printing?

Part validation in 3D printing is the process of confirming that a print workflow consistently produces parts meeting defined specifications, not just that a single part passed inspection. It focuses on the process, not just the product.

Why do manufacturers skip part validation?

Most manufacturers skip validation because they perceive it as time-consuming or only required for regulated industries. In practice, skipping validation leads to 3 to 5 times higher scrap rates in early production, making it far more costly than the validation itself.

What methods are used for part validation in 3D printing?

Common methods include CMM dimensional inspection, structured-light 3D scanning, functional mechanical testing, CT scanning for internal features, and statistical process control using Cpk metrics to track process capability over time.

How does the IQ/OQ/PQ framework apply to 3D printing?

IQ confirms correct printer installation and calibration, OQ tests the process across its operating range, and PQ demonstrates consistent output under real production conditions. This sequence is a prerequisite for regulatory compliance and is increasingly adopted in non-regulated 3D printing operations as a best practice.

When should a manufacturer revalidate their 3D printing process?

Revalidation is required after material lot changes, equipment repairs or replacements, firmware or software updates, facility moves, and any design changes that affect critical dimensions. Documenting these triggers upfront prevents gaps in your quality record.