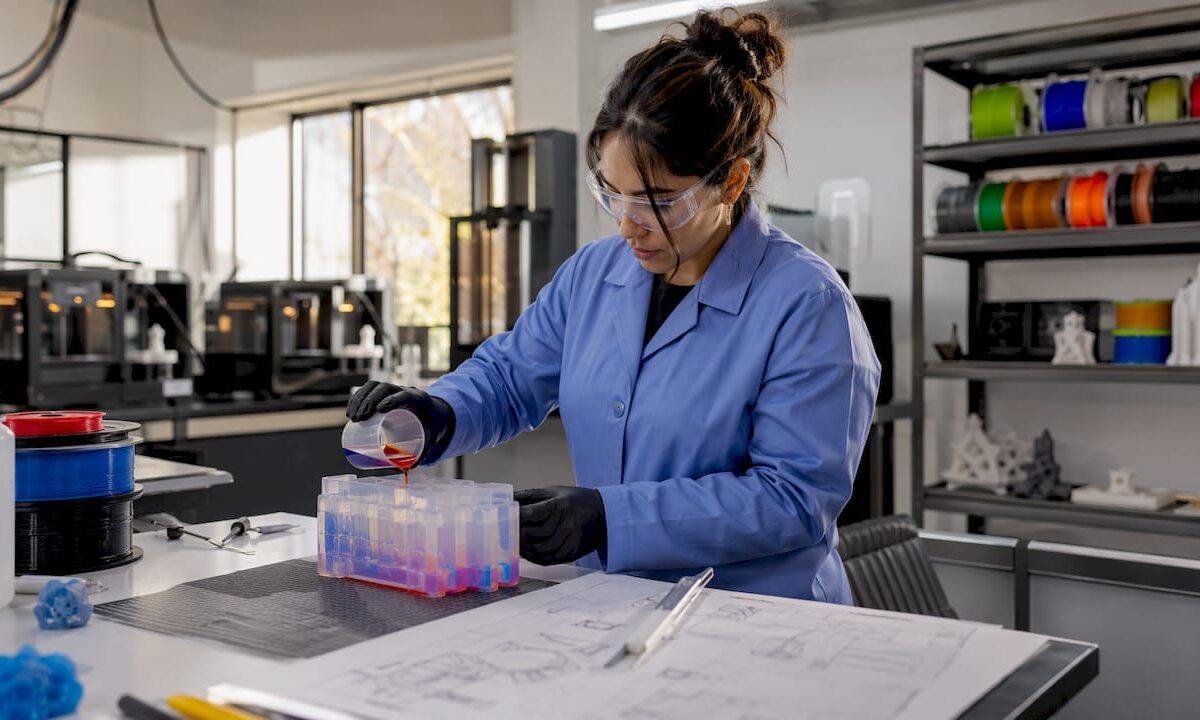
Technician inspecting 3D-printed polymer prototype

Why Use Additive Materials in Manufacturing and Prototyping

Additive manufacturing materials are the substances, ranging from engineering polymers and metal powders to ceramics and fiber-reinforced composites, that 3D printers deposit layer by layer to build a finished part directly from a digital file. The core case for using them is straightforward: the U.S. Department of Energy reports that additive manufacturing can reduce energy use significantly and lower material and waste costs substantially compared to traditional methods. That combination of efficiency and design freedom is why engineers, product developers, and manufacturers across the country are shifting to additive processes for everything from aerospace brackets to medical implants.

The five main material categories are:

  • Polymers (PLA, ABS, PETG, nylon, TPU): the most widely used group, covering prototypes and functional end-use parts
  • Metal powders and wires (titanium, stainless steel, Inconel, aluminum alloys): for structural, high-temperature, and load-bearing applications
  • Composites (carbon fiber or glass fiber reinforced polymers): higher stiffness and strength-to-weight ratios than base polymers alone
  • Ceramics (alumina, zirconia): suited for heat shields, dental restorations, and electronic substrates
  • Sand and binder-jetting materials: used primarily for casting molds and cores in foundry applications

Industry bodies including ASTM International and ISO/TC 261 publish the standards that govern how these materials are tested and qualified for production use.

What types of additive manufacturing materials are available?

Understanding the material options is the first step toward choosing the right one for a given application. Each category has a distinct performance profile, and picking the wrong one wastes both time and money.

Material Typical strength Flexibility Relative cost Common applications
Polymers (PLA/ABS) Low–medium Medium–high Low Prototypes, housings, jigs
Engineering polymers (nylon, PEEK) Medium–high Low–medium Medium Functional parts, brackets
Metal powders (Ti, SS, Inconel) High Low High Aerospace, medical implants
Composites (CFRP) Very high Low Medium–high Structural, motorsport parts
Ceramics High (brittle) Very low High Heat shields, dental, electronics
Sand/binder-jet N/A N/A Low–medium Casting molds and cores

Overhead view of polymers comparison table on table

Polymers dominate prototyping because they are inexpensive, easy to process, and available in a wide range of mechanical properties. Flexible grades like TPU handle living hinges and gaskets; rigid engineering grades like PEEK withstand continuous service above 200°C.

Metal powders unlock the full potential of additive processes for industrial parts. Powder bed fusion (PBF) and directed energy deposition (DED) can produce titanium or Inconel components with internal lattice structures and cooling channels that no subtractive process could replicate. The trade-off is cost: metal feedstock and machine time are expensive, which pushes metal AM toward low-volume, high-value parts.

Composites bridge the gap between polymer accessibility and metal performance. Continuous carbon fiber reinforcement, deposited alongside a nylon or PETG matrix, can produce parts that rival aluminum in stiffness at a fraction of the weight. Aerospace and motorsport teams have adopted this approach for brackets, ducts, and structural panels.

Ceramics and sand occupy specialized niches. Ceramic AM produces dental crowns and heat-resistant components with geometries impossible to achieve by traditional pressing or slip casting. Sand binder jetting prints mold cavities overnight that would take a pattern shop days to machine, compressing foundry lead times dramatically.
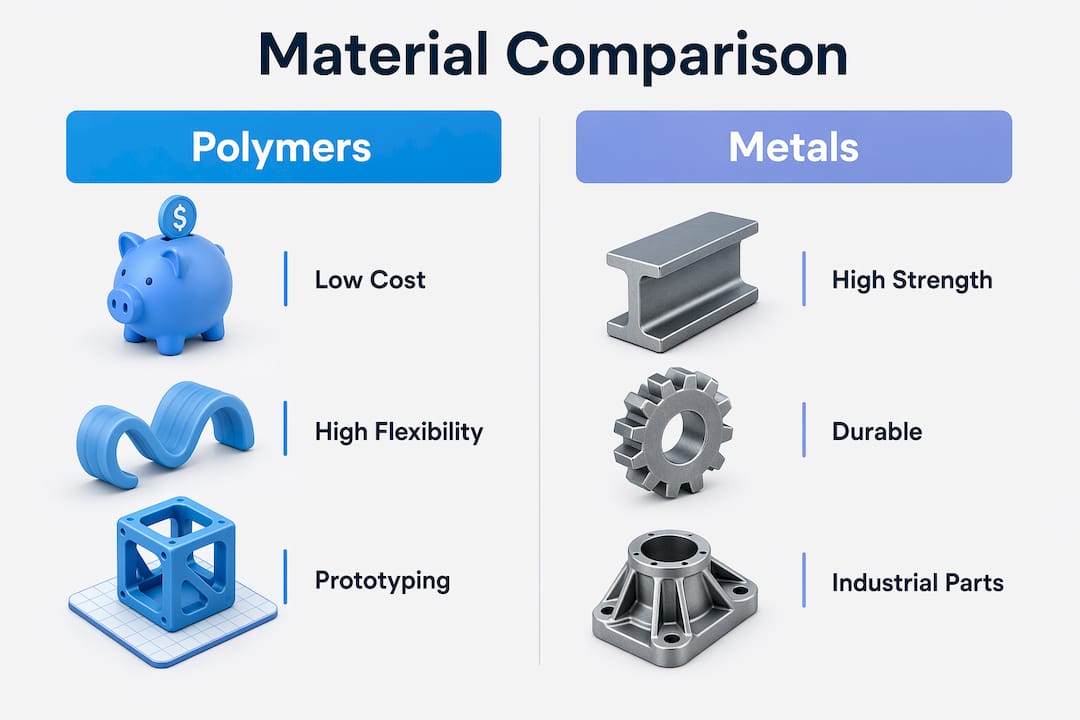
Infographic showing polymers versus metals comparison in additive manufacturing

Pro Tip: When selecting a material, start with the end-use environment, not the printer. A part that must survive 150°C and chemical exposure needs PEEK or a metal, not PLA, regardless of how convenient PLA is to print.

Why use additive materials? The core advantages

The benefits of additive materials in manufacturing go well beyond “you can print complex shapes.” Each advantage connects to a measurable outcome in cost, time, or performance.

Design freedom that traditional processes cannot match

Additive processes build geometry by addition, so internal channels, lattice infill, and organic topology-optimized shapes are no harder to produce than a solid block. Topology optimization, which uses software to remove material from low-stress regions while preserving load paths, can reduce part weight substantially across multiple industries according to comparative lifecycle studies. Lighter parts mean lower fuel consumption in aerospace and automotive applications, which creates environmental and operating-cost benefits that extend well beyond the factory floor. You can read more about how design-for-manufacturing principles apply to this in Cc3dlabs’s guide on DFM in 3D printing.
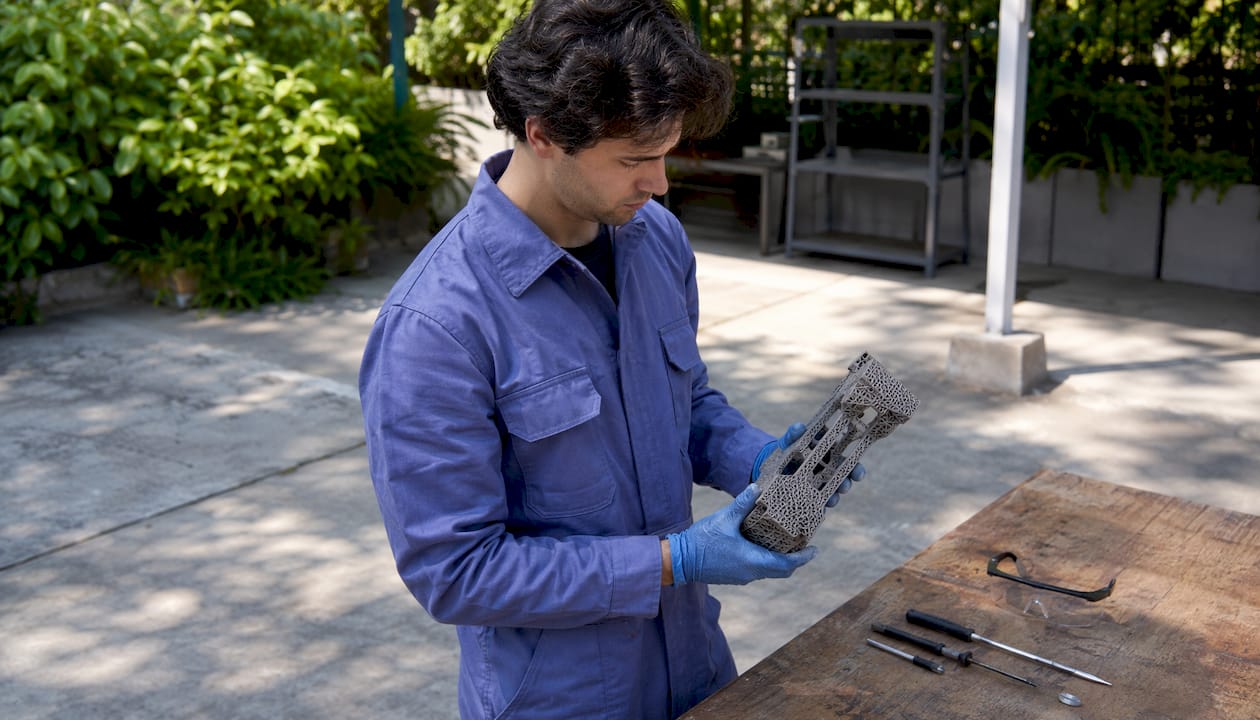
Engineer inspecting complex 3D printed aerospace part

Material efficiency that subtractive methods cannot approach

Subtractive manufacturing such as CNC milling can waste a large majority of the starting billet, particularly in aerospace applications where titanium billets are machined down to thin-walled brackets. Additive processes typically achieve high material utilization rates, depositing material only where the geometry requires it. That gap in buy-to-fly ratio is one of the clearest economic arguments for additive materials when feedstock is expensive.

Tooling cost elimination for low-volume production

Traditional injection molding or die casting requires hard tooling that can exceed 80% of total production costs for a given part. Additive manufacturing skips that step entirely. No mold, no die, no fixture. For production runs below roughly 1,000 parts per year, this makes additive the cost-effective choice in most geometries. Aerospace, medical, defense, and energy sectors recognized this early because they routinely produce high-mix, low-volume parts where tooling amortization would be prohibitive.

Supply chain simplification through localized production

Localized additive manufacturing reduces dependence on distant suppliers by enabling on-demand production close to the point of use. Instead of warehousing thousands of spare parts, a facility can store digital files and print what it needs when it needs it. That shift cuts inventory carrying costs and reduces the risk of supply disruption, a lesson that became painfully clear to many U.S. manufacturers during recent global logistics crises.

Sustainability advantages at the right production scale

  • Additive processes generate less scrap than subtractive methods, reducing raw material extraction and disposal burdens.
  • Eliminating tooling removes the energy and emissions embedded in mold manufacturing.
  • Lighter parts produced through topology optimization reduce fuel consumption during a product’s service life.
  • AM has lower environmental impacts than traditional manufacturing when production volumes are low or part geometry would cause high material waste conventionally.

Key figure: The U.S. Department of Energy reports additive manufacturing can cut waste and material costs by up to 90% compared to traditional production.

What is driving the development and adoption of additive materials?

The growth of additive materials is not happening in a vacuum. Several converging forces are pushing manufacturers, product developers, and researchers to invest in this technology.

  • Demand for customization. Consumer and industrial markets increasingly expect products tailored to specific users or operating conditions. Additive materials make one-off or small-batch customization economically viable without the penalty of tooling costs.
  • Rapid prototyping pressure. Shortening development cycles is a competitive necessity. Additive processes compress the time from CAD file to physical part from weeks to hours, letting engineering teams iterate faster and catch design flaws earlier.
  • Advances in printer capability. Multi-material printers, higher-temperature build chambers, and in-situ monitoring systems have expanded the range of materials that can be processed reliably. Machine learning and digital twins are now accelerating process stabilization and reducing qualification lead times.
  • Lightweighting requirements in aerospace and automotive. Electrification of vehicles increases the premium on structural weight reduction because battery mass must be offset elsewhere. Additive materials, combined with topology optimization, deliver weight savings that material substitution alone cannot achieve.
  • Regulatory and sustainability pressure. U.S. and international regulations on emissions and waste are pushing manufacturers toward processes that use less material and generate less scrap. Additive materials align with those goals at appropriate production scales.
  • Declining system and material costs. Between 2001 and 2011, the average price of additive manufacturing systems fell 51% after adjusting for inflation. That trend has continued, broadening access beyond aerospace and defense to mid-market manufacturers and startups.

The industries that adopted additive materials earliest, aerospace, medical, and defense, share a common profile: high part complexity, low production volumes, and high material value. Automotive and heavy transportation followed as lightweighting needs intensified. Dental and jewelry sectors adopted additive processes because personalization commands a price premium that justifies the per-unit cost. Each new sector that crosses over expands the material ecosystem and drives further cost reductions.

Research findings and U.S. industrial examples that show real-world impact

The performance claims around additive materials are well-documented, but the nuances matter as much as the headline numbers.

Energy and waste savings: what the data actually shows

The U.S. Department of Energy’s figures, up to 25% energy reduction and up to 90% material cost savings, represent the upper bound of what is achievable under favorable conditions. Those conditions are low production volume, complex part geometry, and expensive feedstock. A systematic review of comparative lifecycle studies found that AM has lower environmental impacts than traditional manufacturing when annual production volumes stay below approximately 1,000 parts, or when the part geometry would generate high material waste if machined conventionally. At higher volumes, the calculus flips: slow build rates and energy-intensive feedstock production can make additive processes less efficient than injection molding or stamping.

Industrial case study: on-site maintenance manufacturing

An industrial maintenance application documented by Kennametal demonstrated what on-site additive manufacturing can deliver in practice. Producing replacement parts additively rather than through traditional machining and forging reduced part weight by 50% and cut emissions by 45%. Those results came from combining topology-optimized designs with metal AM, exactly the kind of geometry-plus-process pairing that makes additive materials most effective.

The hidden costs engineers need to account for

Additive manufacturing carries costs that do not show up in a simple part-weight comparison. Feedstock production and post-processing are both energy-intensive and can significantly increase the environmental footprint of an additively manufactured part. Metal powder atomization, support structure removal, heat treatment, and surface finishing all add time, labor, and energy. Studies that omit these steps from their scope tend to overstate the sustainability advantage of additive processes. A complete cradle-to-gate analysis, covering feedstock, build phase, and post-processing, is the only reliable way to compare additive and traditional routes.

Design knowledge as a prerequisite

Realizing the full benefits of additive materials requires topology optimization and design-for-AM approaches that most engineers trained on subtractive processes have not yet internalized. Internal lattice structures, self-supporting geometries, and integrated cooling channels are not default outputs of conventional CAD workflows. Organizations that invest in this design knowledge consistently outperform those that simply substitute additive for subtractive without redesigning the part. Cc3dlabs’s manufacturing-grade 3D printing guide covers how these design principles translate into production-ready parts.

The honest picture of additive materials is one of genuine, well-documented advantages bounded by real constraints. The technology is not universally superior to traditional manufacturing. It is specifically superior for complex geometries, low volumes, expensive materials, and applications where design freedom creates downstream performance gains. Understanding where those boundaries sit is what separates engineers who get results from those who get expensive prototypes.


Key Takeaways

Additive manufacturing materials deliver their greatest advantages at low production volumes, with complex geometries, and when design freedom is used to reduce weight and eliminate tooling costs.

Point Details
Material utilization advantage Additive processes achieve utilization rates above 90%; subtractive methods can waste up to 90% of starting material.
Energy and cost savings The U.S. Department of Energy reports up to 25% energy reduction and up to 90% material cost savings versus traditional methods.
Tooling cost elimination Tooling can exceed 80% of total production costs in injection molding; additive manufacturing removes that expense entirely.
Optimal production volume AM is most cost-effective and environmentally favorable at roughly 1,000 parts per year or fewer, or for high-waste geometries.
Hidden costs require full analysis Feedstock production and post-processing are energy-intensive; a complete lifecycle assessment is needed for accurate comparison.

Put additive materials to work for your next project

https://cc3dlabs.com

Cc3dlabs operates near Philadelphia and specializes in filament-based 3D printing, multi-material production, and professional handheld 3D scanning (accuracy to ~0.1 mm) for businesses, product developers, and engineers across the U.S. Whether you need a single functional prototype or a batch of production parts, the team works from your CAD file to a finished, inspected part with fast turnaround. Explore the full range of professional 3D printing services or get a free online estimate to see what additive materials can do for your specific application.
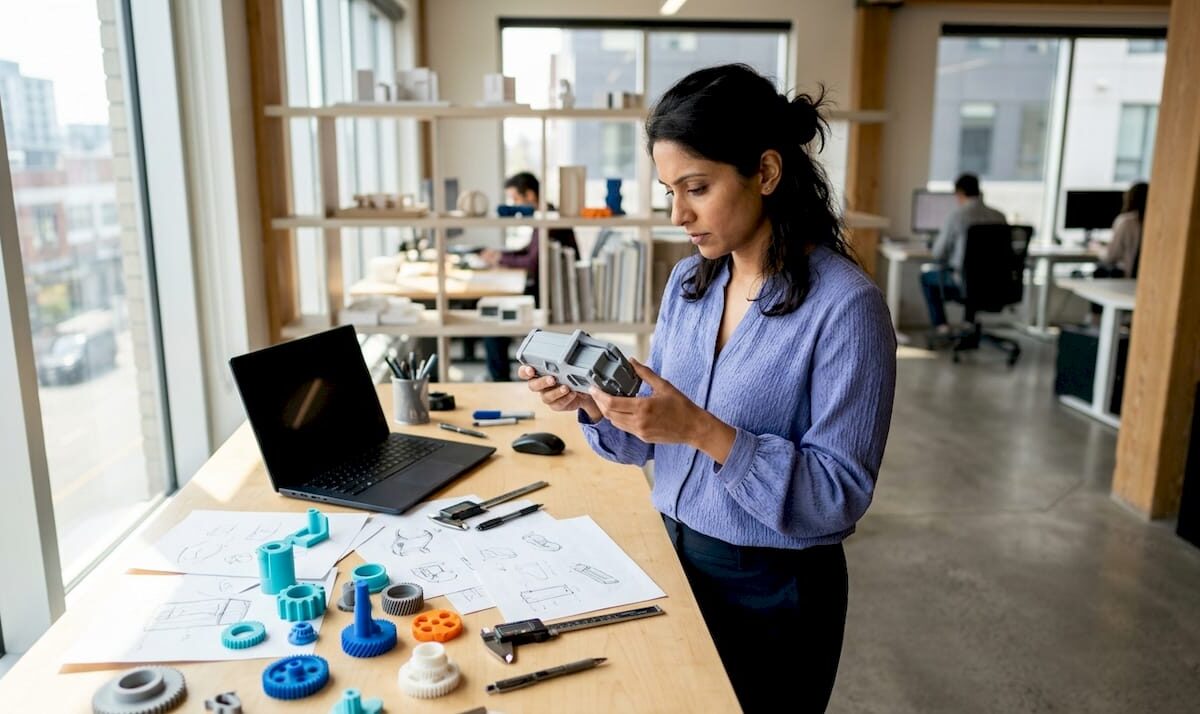

User testing a prototype model in design lab

What Is Prototype Validation? A Guide for Developers


TL;DR:

  • Prototype validation tests early product versions with real users to identify usability issues and confirm design choices. It helps prevent costly errors by focusing on specific risks and using evidence-based data rather than opinions.

Prototype validation is defined as the process of testing early, tangible versions of a product with real users to uncover usability issues, validate design choices, and refine concepts before full-scale development begins. The industry also calls this design validation, and the two terms are interchangeable in most product development contexts. Fixing issues after launch costs 10–100 times more than catching them during the prototyping phase. That single fact explains why prototype validation is not optional for product developers and entrepreneurs who care about shipping something that works.

What is prototype validation and why does it matter?

Prototype validation is a structured testing process that answers one question: does this design actually solve the problem it was built to solve? Without it, teams build on assumptions. With it, they build on evidence.

Developers discussing prototype in meeting room

The importance of prototype validation shows up most clearly in cost. Every design flaw you catch before engineering commits to a solution saves weeks of rework and thousands of dollars. Teams that skip validation often discover problems only after launch, when the cost to fix them is highest and the damage to user trust is already done.

Validation also replaces opinion with data. Instead of debating which design is better in a conference room, your team watches real users interact with a prototype and lets behavior decide. That shift from subjective debate to evidence-based decisions is what validation introduces as a standard across product organizations.

What are the key objectives and benefits of prototype validation?

The core objectives of prototype validation are specific and measurable. Each one maps directly to a risk your product faces before launch.

  • Uncover usability friction early. Real users reveal where a design breaks down, often in ways no internal review would catch.
  • Confirm the design solves the right problem. A prototype can look great and still fail to address the user’s actual need.
  • Reduce late-stage rework costs. Catching a structural design flaw in week two is far cheaper than catching it in week twelve.
  • Build stakeholder confidence. Evidence from real user tests replaces gut-feel arguments and aligns teams around concrete findings.
  • Prioritize features with data. Validation tells you which features users actually need, not which ones the team assumed they would.

Stat callout: Testing with just 5 users uncovers approximately 85% of usability issues in early prototype validation. That means you do not need a large sample to get actionable signal.

The role of prototypes in product development extends beyond testing. Prototypes serve as communication tools that align designers, engineers, and business stakeholders around a shared, tangible reference point.

Pro Tip: Define your success metrics before you build the prototype, not after. Teams that skip this step often lose credibility with stakeholders because they cannot prove whether the test passed or failed.

How does the prototype testing process work step by step?

A well-run prototype testing process follows a repeatable cycle. Each step builds on the last, and skipping any one of them weakens the entire test.

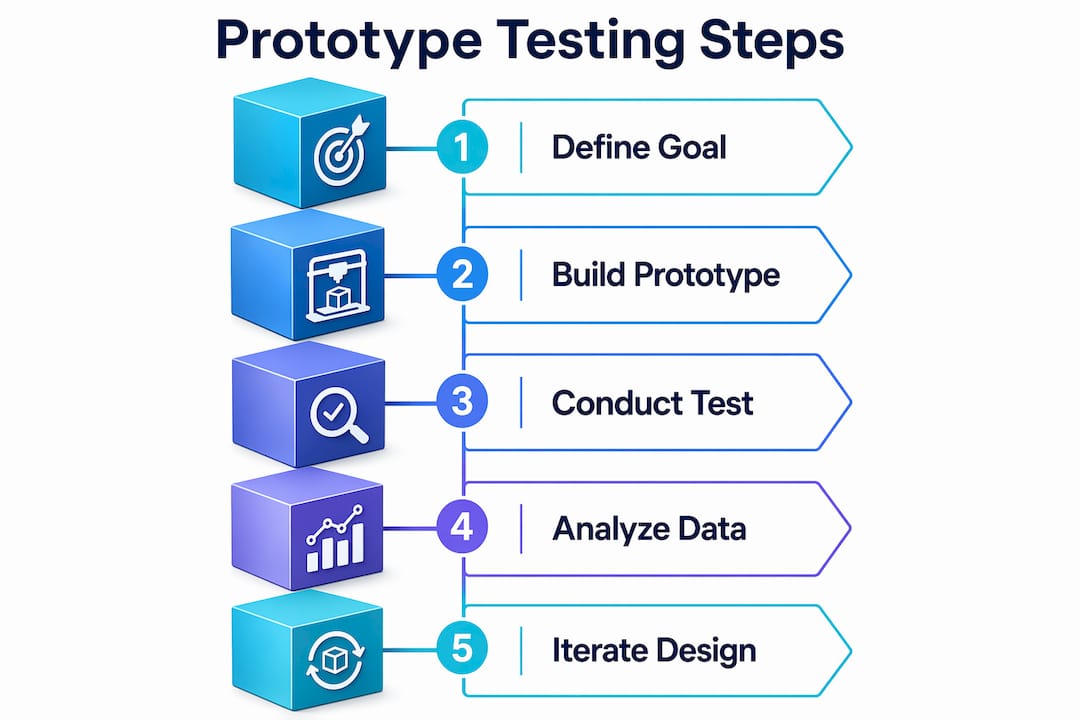
  1. Define a testable hypothesis. Write a specific, measurable statement before you build anything. For example: “Users will find the contact form in under 10 seconds, with an 80% success rate.” A testable hypothesis anchored to outcomes keeps your test focused on one risk at a time.

  2. Choose the right prototype fidelity. Low-fidelity prototypes (paper sketches, wireframes) work well for testing information architecture and flow. High-fidelity prototypes (clickable, near-final designs) work better for testing usability and visual hierarchy. Prototype fidelity should match the risk type you are trying to retire, not default to whatever is easiest to build.

  3. Recruit representative users. Recruit 5–8 users who match your target audience. Testing with the wrong users produces misleading results, no matter how well the session is run.

  4. Run moderated or unmoderated sessions. Moderated sessions let you ask follow-up questions in real time. Unmoderated sessions scale faster and reduce moderator bias. Choose based on what your hypothesis requires.

  5. Collect qualitative and quantitative data. Track task completion rates, time on task, error counts, and recovery rates. Record sessions when possible. Behavioral data outweighs verbal feedback every time.

  6. Analyze and identify patterns. Look for repeated friction points across multiple users. One user struggling is an outlier. Three users struggling in the same place is a design problem.

  7. Iterate and retest. Validation cycles should last 1–2 weeks per iteration to maintain speed. Three cycles of prototyping, testing, analysis, and adjustment typically produce a solid solution. If fundamental changes persist after five cycles, the problem definition likely needs revisiting.

Pro Tip: Treat each iteration as a separate experiment. Change one variable at a time so you know exactly what caused any improvement or regression in user behavior.

The iterative prototyping process is what separates teams that converge on good solutions quickly from those that spin in circles.

Infographic showing prototype validation steps

What common pitfalls should you avoid in prototype validation?

Most prototype validation failures trace back to a small set of repeatable mistakes. Knowing them in advance is the fastest way to avoid them.

  • Over-polishing the prototype. When a prototype looks too finished, users focus on colors and fonts instead of functionality. Use just enough fidelity for the specific risk you are testing. Nothing more.
  • Skipping success criteria. Running a test without predefined metrics means you cannot objectively interpret results. You end up with opinions, not findings.
  • Testing too broadly. Trying to validate everything in one session produces shallow data on every question and deep data on none. Focus each test on one specific risk or assumption.
  • Relying on what users say instead of what they do. Users often report confidence in tasks they actually struggle to complete. Behavioral observation beats self-reported feedback every time.
  • Letting cycles run too long. Validation cycles that stretch beyond two weeks slow learning and invite scope creep. Speed is a feature of good validation practice.

Pro Tip: Before every test session, write down the one decision this test needs to inform. If you cannot name that decision, the test is not ready to run.

The functional prototyping guide covers how to match prototype type to test goal, which directly reduces the risk of over-building before you have validated the core concept.

How to interpret prototype validation results and apply insights

Reading test results correctly is where most teams leave value on the table. Raw data from a prototype session means nothing without a clear framework for interpretation.

Prototype validation metrics include task completion rate, time on task, error and recovery rates, system usability scores, and intent to use. Each metric tells a different story about where the design succeeds and where it fails.

Metric What it measures How to use it
Task completion rate Whether users can finish a goal Compare against your predefined success threshold
Time on task How long a task takes Flag tasks that take significantly longer than expected
Error rate How often users make mistakes Identify design elements that consistently mislead users
System usability score Overall perceived ease of use Benchmark across iterations to track improvement
Intent to use Whether users would adopt the product Gauge product-market fit signal early

Once you have the data, prioritize fixes by two factors: impact on user success and risk to the business. A friction point that blocks task completion ranks higher than one that slows a secondary flow. Linking test results to business metrics like activation or retention rates closes the feedback loop and keeps product decisions grounded in outcomes, not aesthetics.

Validation evidence also serves a second purpose: it builds stakeholder trust. When you walk into a product review with behavioral data instead of design opinions, the conversation changes. Decisions get made faster, and teams align around evidence rather than hierarchy.

Key Takeaways

Prototype validation is the most cost-effective way to confirm a design works before engineering commits, using real user behavior as the decision standard.

Point Details
Define metrics first Set measurable success criteria before building any prototype to keep tests objective.
Match fidelity to risk Use low-fidelity prototypes for flow testing and high-fidelity for usability validation.
Five users is enough Testing with 5 users uncovers approximately 85% of usability issues in early validation.
Keep cycles short Limit each iteration to 1–2 weeks to maintain learning speed and prevent scope creep.
Behavior beats opinion Prioritize what users do over what they say to get reliable, actionable findings.

Why I think most teams misuse prototype validation

Most product teams treat prototype validation as a checkbox. They run one test, collect some notes, and move on. That approach misses the entire point.

Prototype testing is a decision system, not a formality. Its job is to retire specific risks before engineering spends time and money building the wrong thing. Every test should be tied to a business-critical assumption. If you cannot name the assumption your test is retiring, you are running a demo, not a validation.

The teams I have seen get the most out of validation share one habit: they align each prototype to a single, specific risk. Not “does the user like this?” but “can the user complete checkout without help?” That specificity is what makes results usable.

I have also watched teams waste weeks building high-fidelity prototypes for feasibility tests that a paper sketch would have answered in a day. The highest-order use of a prototype is to discover a successful product solution, and that discovery happens faster when you resist the urge to over-build before you have validated the core assumption.

Iterative testing is not a sign of failure. It is the mechanism by which good products get made. Three focused cycles of build, test, and adjust will get you further than one exhaustive test that tries to answer every question at once.

— Justin

How Cc3dlabs helps you validate faster with 3D printing

Physical prototype validation requires physical prototypes. That is where speed and material accuracy matter most.

https://cc3dlabs.com

Cc3dlabs, based near Philadelphia, produces filament-based 3D printed prototypes with fast turnaround times for product developers who need to test form, fit, and function quickly. Whether you are running your first validation cycle or your fifth, having a reliable 3D printing service behind your process means you spend less time waiting for parts and more time learning from real user tests. Cc3dlabs also offers CAD modeling support and professional handheld 3D scanning (accuracy to ~0.1 mm), which means your prototype geometry stays accurate across every iteration. Request a free online estimate and keep your validation cycles moving.

FAQ

What is prototype validation in product development?

Prototype validation is the process of testing early product versions with real users to confirm that a design solves the intended problem before full development begins. It combines usability testing, behavioral observation, and measurable success criteria to produce evidence-based design decisions.

How many users do you need for prototype testing?

Testing with 5 users uncovers approximately 85% of usability issues in early prototype validation. That sample size is sufficient for qualitative friction point identification in most product development contexts.

What metrics should you track during prototype validation?

Key metrics include task completion rate, time on task, error and recovery rates, system usability scores, and intent to use. These metrics quantify how well a prototype meets usability and acceptance criteria against predefined thresholds.

How long should a prototype validation cycle take?

Each validation cycle should last 1–2 weeks per iteration to maintain rapid learning and prevent scope creep. Three cycles of prototyping, testing, analysis, and adjustment typically produce a solid product solution.

What is the difference between low-fidelity and high-fidelity prototypes?

Low-fidelity prototypes (wireframes, paper sketches) test information architecture and user flow. High-fidelity prototypes test usability and visual hierarchy. The right choice depends on which specific risk you are trying to retire in that iteration.

Team discussing product prototype model

Why Prototypes Matter in Product Development


TL;DR:

  • Prototypes are essential for reducing product development risks by enabling early flaw detection at lower costs. Iterative testing with the right fidelity accelerates learning, improves design quality, and facilitates stakeholder agreement. Speedy prototyping, especially through 3D printing and digital tools, can significantly cut time and expenses in bringing products to market.

A prototype is a preliminary, low-cost model built to test a product idea before full-scale development, and it is the single most effective tool for reducing risk in any product pipeline. The core argument for why prototypes matter is simple: fixing a design flaw during prototyping costs a fraction of what it costs after launch. Companies that integrate rapid prototyping cut development time by 50% and reduce production costs by roughly one-third. That is not a marginal gain. That is the difference between a product that ships on budget and one that bleeds cash through endless post-launch patches.

Why do prototypes matter for reducing time and cost?

Teams that skip prototyping spend 3–5 times more on redesign after development, because fixing usability issues post-launch costs 10–100 times more than catching them early. That multiplier is the clearest financial argument for building before you build at scale. Every hour spent on a rough prototype is buying information that would otherwise cost ten hours of engineering rework.

Engineer sketching low fidelity prototype

Rapid prototyping techniques, including filament-based 3D printing, paper mockups, and digital wireframes, compress iteration cycles from weeks to days. Shorter cycles mean more tests per dollar spent. The role of prototypes in design is not just aesthetic validation. It is a systematic way to surface structural, functional, and usability problems before they become expensive commitments.

Scenario Typical cost impact Time to fix
Fix caught during prototyping Low Hours to days
Fix caught during development Moderate Days to weeks
Fix caught post-launch Very high (10–100x more) Weeks to months
Skipping prototyping entirely 3–5x redesign cost increase Unpredictable

Pro Tip: Build your first prototype with the explicit goal of breaking it. The faster you find what fails, the less you spend fixing it later.

What are the main types of prototypes used in development?

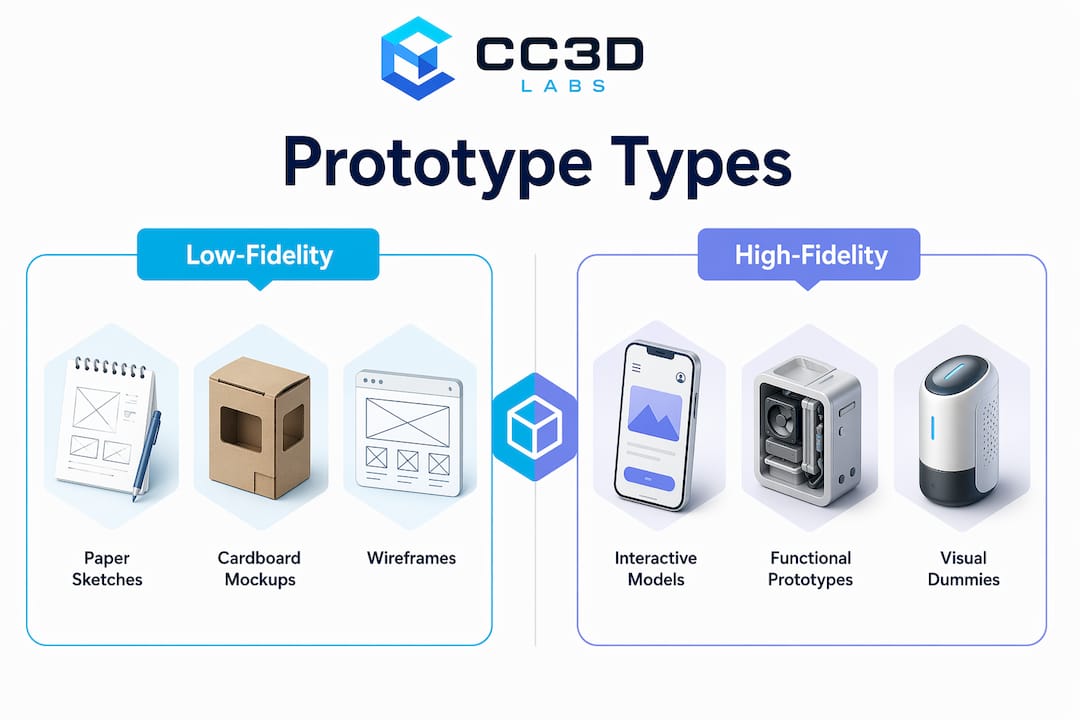
Prototype fidelity describes how closely a model resembles the final product, and selecting the right fidelity depends entirely on what you are trying to learn. Low-fidelity prototypes are fast and cheap. High-fidelity prototypes are detailed and testable. Using the wrong type at the wrong stage wastes both.

Infographic comparing low-fidelity and high-fidelity prototypes in product development

Low-fidelity prototypes

Low-fidelity models include paper sketches, cardboard mockups, and basic digital wireframes. They are built for concept validation, not visual polish. The goal is to test whether the core idea holds up before investing in detail.

High-fidelity prototypes

High-fidelity prototypes are built for usability testing, stakeholder approval, and developer handoffs. They replicate the look, feel, and interaction of the final product closely enough to generate reliable user feedback. A high-fidelity physical prototype produced via 3D printing, for example, lets testers grip, assemble, and stress-test a part under real conditions.

Fidelity level Best use case Typical format
Low-fidelity Concept validation, early brainstorming Paper sketches, foam models
Mid-fidelity Flow testing, layout review Digital wireframes, basic CAD
High-fidelity Usability testing, stakeholder sign-off Interactive mockups, 3D prints
Functional prototype Engineering validation, stress testing Printed or machined parts

The best practice is to start low and move high only when the concept is stable. Jumping straight to a high-fidelity model before validating the core idea is one of the most common and expensive mistakes in product development.

  • Match fidelity to your learning goal, not your timeline pressure.
  • Use low-fidelity models to kill bad ideas cheaply.
  • Reserve high-fidelity builds for questions that require realistic interaction.
  • Document what each prototype is designed to test before you build it.

Why does prototype iteration matter for better products?

Rapid prototyping prioritizes speed over polish, enabling teams to fail fast and learn fast. That phrase is not a startup cliché. It is a description of how information compounds. Each iteration answers a specific question, and the answer shapes the next version. Teams that iterate five times before launch arrive at a fundamentally better product than teams that iterate once.

Structuring tests around measurable hypotheses improves feedback quality and stakeholder confidence. Vague questions produce vague answers. Asking “Can users complete checkout in under 90 seconds?” generates data. Asking “What do you think of the design?” generates opinions.

Effective prototype testing requires setting clear expectations with users before the session begins. Without that framing, testers fixate on missing images or visual glitches instead of evaluating the core functionality. That misdirected feedback wastes a test session and can send a team in the wrong direction.

Pro Tip: Before each test session, tell participants: “This is an early model. We are testing the concept, not the visuals. Please ignore anything that looks unfinished.”

The best iteration cycles follow a tight loop: build a focused prototype, test one hypothesis, record the result, and update the design. Repeating that loop six times produces more learning than one elaborate test at the end of a development sprint.

  • Define one primary hypothesis per prototype.
  • Set a task completion metric before testing begins.
  • Debrief the team within 24 hours of each session.
  • Update the prototype based on findings before the next round.
  • Track which assumptions have been validated and which remain open.

What practical steps help teams implement prototyping effectively?

The first step is identifying your riskiest assumption. Every product concept rests on a stack of assumptions, and not all of them carry equal risk. The assumption most likely to kill the product if wrong is the one to test first. Building a prototype around a low-risk assumption wastes a cycle.

Once the target assumption is clear, choose the fastest format that can test it. For digital products, tools like Figma allow interactive prototypes in hours. For physical products, rapid prototyping via 3D printing produces testable parts in days rather than weeks. The format should match the question, not the team’s preferred workflow.

Collaboration is the second major lever. Interactive prototypes replace lengthy written specs in stakeholder meetings. A product manager who walks into a review with a working model instead of a slide deck controls the conversation. The model makes the product tangible, and tangible things get decisions made faster.

  1. List every major assumption your product concept depends on.
  2. Rank them by risk: which one, if wrong, kills the product?
  3. Build the simplest prototype that tests the top-ranked assumption.
  4. Run a structured test with at least three users or reviewers.
  5. Record results against your hypothesis, not against general impressions.
  6. Update the design and repeat for the next assumption on the list.
  7. Escalate fidelity only after the core concept survives low-fidelity testing.

Balancing speed and detail is a judgment call that improves with practice. The guiding principle is that a prototype should be just detailed enough to answer the question it was built to answer. Anything beyond that is waste. Teams that internalize this principle ship faster and spend less. Manufacturers looking to stay ahead can also benefit from digital marketing trends that align product validation with go-to-market timing.

How do working prototypes improve stakeholder communication?

Working prototypes provide more influence and credibility than static specs among product teams and stakeholders. A written requirement document describes a product. A prototype demonstrates one. That difference in mode changes how people respond.

Abstract debates about features, layouts, and user flows collapse when a prototype enters the room. Stakeholders stop arguing about what something might feel like and start reacting to what it actually does. That shift from speculation to reaction accelerates decisions and reduces the risk of building the wrong thing based on executive assumptions.

“Prototypes short-circuit abstract debates and make project viability tangible. When stakeholders can interact with a model, they stop debating what the product should do and start evaluating whether it works.”

Top product managers use prototyping as a career-advancing tool to gain data, influence, and credibility faster than writing documentation. Shipping multiple prototypes builds professional momentum that formal product requirement documents simply cannot match. The prototype is the argument.

Key Takeaways

Prototypes are the most cost-effective tool in product development because they convert untested assumptions into validated decisions before full-scale production begins.

Point Details
Early fixes cost far less Post-launch fixes cost 10–100 times more than changes made during prototyping.
Match fidelity to the goal Use low-fidelity models for concept validation and high-fidelity builds for usability testing.
Iterate with a hypothesis Define one measurable question per prototype to generate useful, specific feedback.
Prototypes beat written specs Working models accelerate stakeholder decisions by making the product tangible, not abstract.
Speed beats polish early on Rapid iteration cycles produce more learning per dollar than one polished prototype at the end.

The uncomfortable truth about prototyping most teams ignore

Most teams treat prototyping as a phase. They schedule it, complete it, and move on. That framing misses the point entirely.

Prototyping is a mindset. The question “how can I test this assumption cheaply before committing?” should run through every stage of development, not just the weeks labeled “prototyping” on a Gantt chart. I have watched product teams spend three months building a feature that a two-day paper prototype would have killed in week one. The cost was not just money. It was morale, momentum, and market timing.

The other mistake I see constantly is over-investing in fidelity too early. Teams build beautiful, detailed models before they have validated the core concept. They fall in love with the prototype and lose the objectivity needed to kill it when the data says to. James Dyson’s discipline is instructive here. He treated each of his failed prototypes as a targeted inquiry, buying information at a fraction of the cost of a failed launch. That framing removes the emotional sting of scrapping a version and replaces it with a clear-eyed view of what was learned.

The career impact is real too. Product managers who prototype frequently build a track record of data-driven decisions. That is a different professional identity than the manager who writes detailed specs and waits for engineering to validate them. One of those people controls the room. The other hopes the room agrees with their document.

Start ugly. Test early. Iterate fast. The polish comes later, and it lands on a foundation that has already been stress-tested.

— Justin

Cc3dlabs turns your prototype concepts into physical reality

Product developers who need physical prototypes fast have a direct path at Cc3dlabs, a professional 3D printing and scanning service near Philadelphia. Whether you need a single functional part to stress-test an assumption or a batch of models for a stakeholder review, Cc3dlabs produces high-quality 3D printed prototypes with tight tolerances and quick turnaround times.

https://cc3dlabs.com

Cc3dlabs also offers high-accuracy 3D scanning for design accuracy, which feeds precise measurements directly back into your CAD workflow. That closed loop between physical testing and digital refinement is exactly what rapid iteration demands. Request a free online estimate and move your next prototype from concept to testable model faster than your current process allows.

FAQ

What is the main benefit of prototyping in product development?

Prototyping catches design flaws and usability problems before full-scale production begins. Teams that prototype reduce development time by 50% and cut production costs by roughly one-third.

When should you use a low-fidelity vs. a high-fidelity prototype?

Use low-fidelity prototypes for early concept validation when speed matters most. Switch to high-fidelity prototypes when you need reliable usability data or stakeholder sign-off.

Why does prototype iteration matter more than a single test?

Each iteration answers one specific question and shapes the next version. Teams that run multiple short cycles arrive at better products than those that test once at the end of development.

How do prototypes help with stakeholder buy-in?

Working prototypes make a product tangible, which shifts stakeholder conversations from abstract debate to direct evaluation. That shift speeds up decisions and reduces the risk of building the wrong feature.

Can 3D printing be used for rapid prototyping?

Yes. Filament-based 3D printing produces testable physical parts in days, making it one of the fastest methods for functional prototype development in hardware and product design.

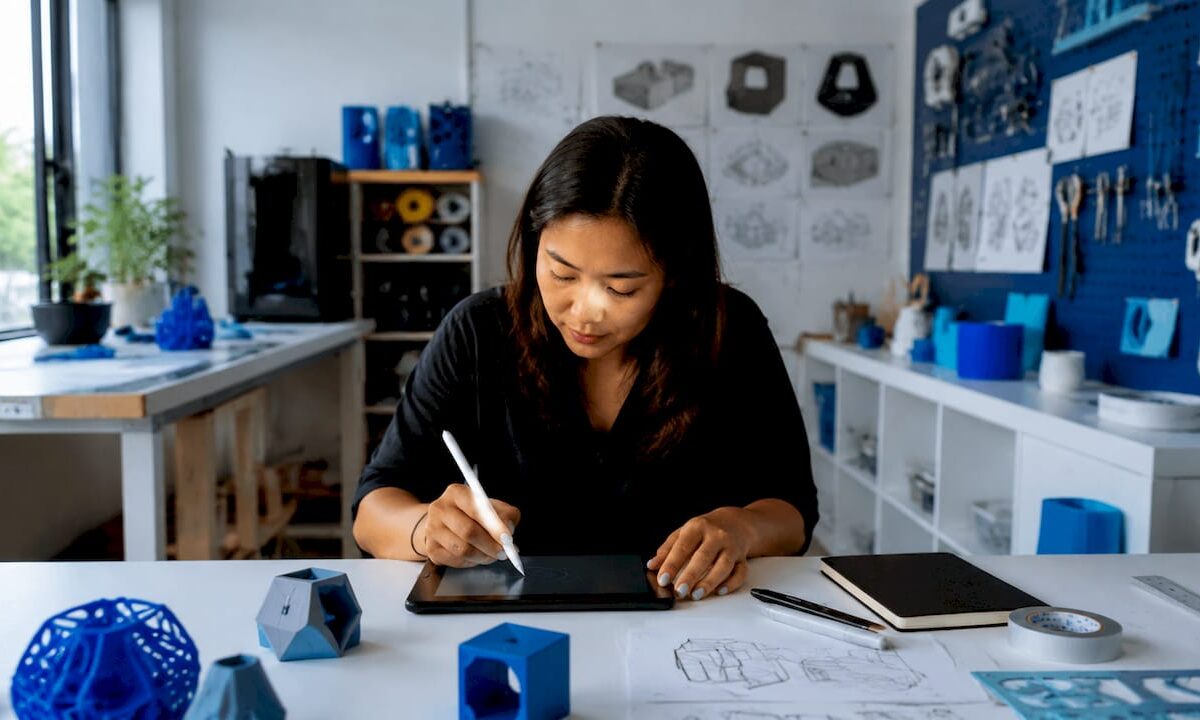
Designer sketching prototype goals at drafting table

How to Create Custom Prototypes: A Practical Guide


TL;DR:

  • Custom prototyping involves creating targeted models to test specific design assumptions before full production. It emphasizes selecting appropriate fidelity, materials, and tools to answer focused questions efficiently. Rapid iteration and early testing help identify issues and protect intellectual property effectively.

Custom prototyping is the process of building a targeted physical or digital model to test a specific design assumption before committing to full production. The industry term for this practice is rapid prototyping, and it covers everything from paper sketches to full CAD-driven 3D prints. Knowing how to create custom prototypes well means choosing the right fidelity, the right materials, and the right testing method for each stage of development. Tools like Figma, Fusion 360, and FDM 3D printers each serve different stages of the process. This guide walks you through every step, from goal definition to final iteration.

How to plan your custom prototype: defining goals and choosing tools

The single most important step in custom prototype design is defining one clear, testable question before you build anything. Defining a single testable question focuses the effort and improves the quality of feedback you collect. Examples include: can users complete a checkout flow without guidance, or does a layout surface the most critical information first?

Once you have that question, set explicit success criteria. Decide in advance what a passing result looks like. Without that benchmark, feedback becomes noise.

Protect your idea before you build. Securing IP protection via a provisional patent and documented creation dates is advisable before investing significant time and money in prototypes. Work with an IP attorney early, not after your design is already in someone else’s hands.

Tool selection follows goal definition. The table below maps common prototyping tools to their best use cases:

Tool Best for Fidelity Cost
Paper sketches Early concept exploration Low Minimal
Figma Digital UI and UX flows Low to medium Low
Fusion 360 / SolidWorks CAD modeling for physical parts High Medium to high
FDM 3D printing Functional physical prototypes Medium to high Medium
SLA / resin printing High-detail visual models High Medium to high
Foam / cardboard Form and ergonomics testing Low Minimal

Pro Tip: Start with the cheapest tool that can answer your question. If a cardboard mockup can validate the shape, do not spend three days in CAD first.

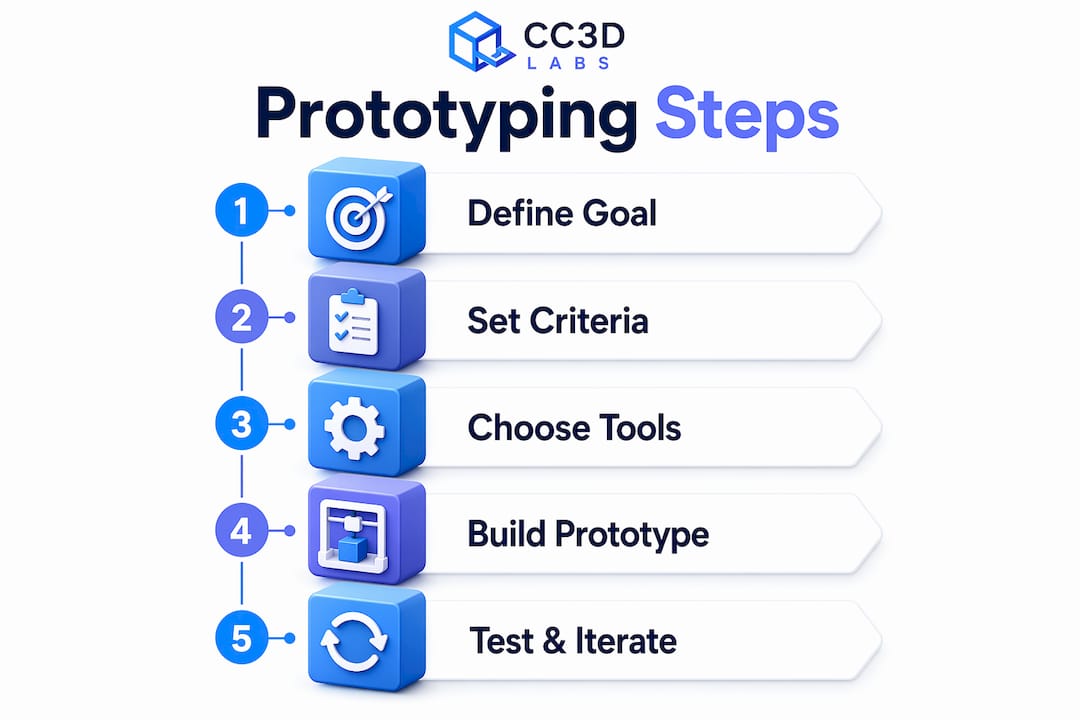
Infographic showing prototyping step-by-step guide

What are the common types of prototypes and when to use them?

Prototype types fall into four main categories, each suited to a different stage of development. Choosing the wrong type wastes time and produces misleading feedback.

  • Lo-fi (paper or digital wireframes). Best for early-stage concept validation. Rough sketches and Figma wireframes let you test layout and flow without building anything physical. Rough prototypes reduce distraction from surface polish and accelerate honest feedback from users. The downside is that they cannot validate physical fit, material feel, or mechanical function.

  • Looks-like prototypes. These focus on aesthetics and form without delivering full function. A resin-printed shell with no working electronics is a looks-like prototype. Use them for investor presentations, ergonomic reviews, and packaging fit checks. They are fast to produce but tell you nothing about whether the product actually works.

  • Works-like prototypes. These prove mechanical or software function without matching the final appearance. A breadboard circuit in a foam housing is a classic example. Use them to validate engineering assumptions and stress-test core mechanisms before spending money on cosmetics.

  • Combined works-like-looks-like prototypes. These integrate both form and function. They are expensive and time-consuming, so reserve them for late-stage validation before tooling or manufacturing investment.

  • Pre-production prototypes. Built to production specifications, these are used for final regulatory testing, manufacturing trials, and investor sign-off. They represent the highest cost and fidelity in the prototyping sequence.

The key rule: match prototype type to the specific risk you are testing at that moment. Do not build a pre-production prototype to answer a question a paper sketch could resolve in an afternoon.

Step-by-step guide to building and testing your custom prototype

A structured workflow separates developers who ship products from those who stay stuck in endless revision cycles. Iterative prototyping outperforms linear models because each cycle answers one question and feeds directly into the next build.

Follow these steps for creating effective prototypes:

  1. Sketch the concept. Draw the core idea by hand or in Figma. Focus only on the elements that relate to your testable question. Skip details that do not affect the outcome.

  2. Build the minimum viable prototype. Digital prototyping follows a path of research, sketching, interactive creation, testing, and refining. For physical builds, move from sketch to CAD model in Fusion 360 or SolidWorks. Keep geometry simple at this stage.

  3. Run a design for manufacturability (DFM) check. Before printing, review wall thickness, overhangs, and tolerances. This step prevents failed prints and wasted material.

  4. Print or fabricate. 3D printed prototypes are built via CAD modeling, DFM checks, print setup, and post-processing specific to the technology used. Print times range from 2 to 24 hours depending on part size and technology. FDM works for functional tests; SLA delivers finer surface detail for visual reviews.

  5. Post-process the part. Sand, prime, or paint as needed. For FDM prints, support removal and light sanding are standard. For SLA, UV curing is required after printing.

  6. Test with real users. Use moderated testing when you need to understand why users behave a certain way. Use unmoderated testing when you need behavioral data at scale. Frequent small validation cycles outperform one large test late in the process.

  7. Document findings and iterate. Record what worked, what failed, and what the next testable question is. Then repeat the cycle.

Pro Tip: Set a hard time limit on each build window, such as two days maximum per iteration. A constrained timeline forces you to prioritize the one feature that answers your question rather than adding scope.

A typical early-stage physical prototype cycle runs two to five days from sketch to tested part. Digital UI prototypes in Figma can complete a full cycle in under 24 hours. The faster your cycle, the more you learn before committing to expensive tooling.

How to choose materials and methods for custom prototypes

Material and method selection directly determines what questions your prototype can answer. The wrong combination produces data that does not transfer to the final product.

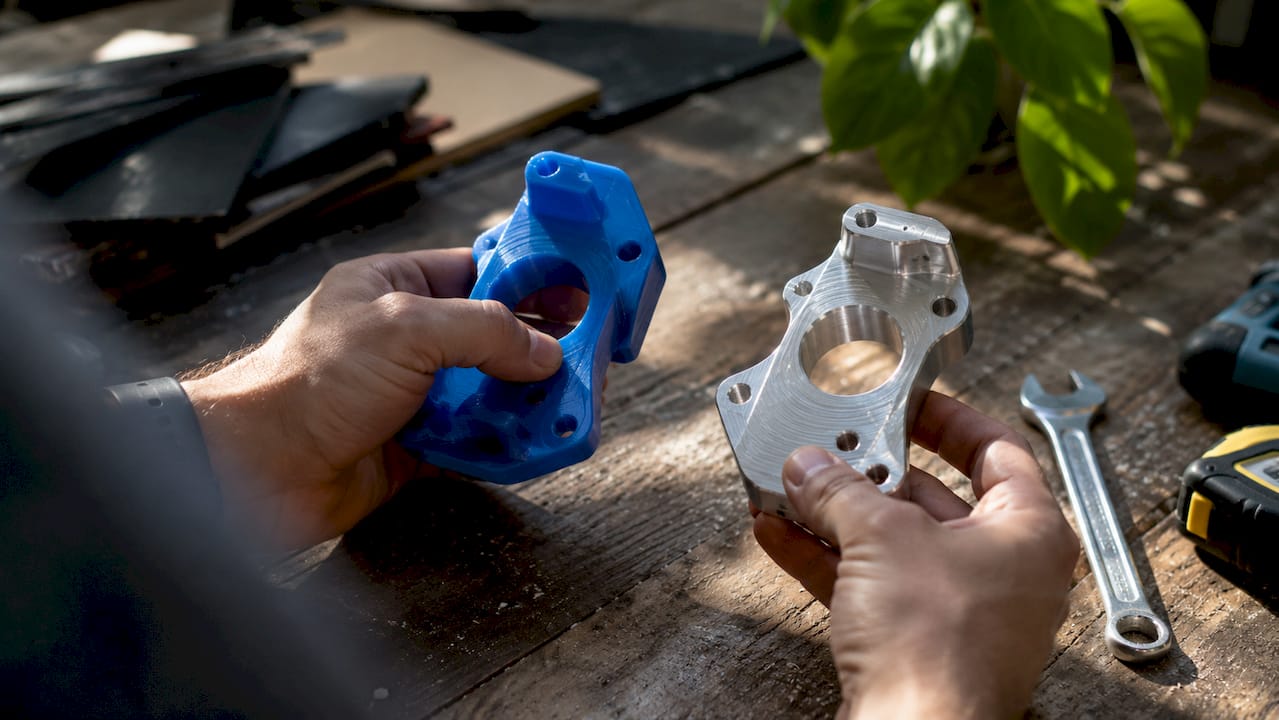
Hands comparing prototype materials in workshop

Method Material options Speed Detail level Relative cost
FDM 3D printing PLA, ABS, PETG, TPU Fast Medium Low
SLA / resin printing Standard, tough, flexible resins Medium High Medium
SLS 3D printing Nylon, glass-filled nylon Medium High High
CNC machining Aluminum, acetal, HDPE Slow Very high High
Handcrafting / foam Foam, cardboard, silicone Very fast Low Minimal
Silicone molding Silicone, urethane Medium High Medium

FDM printing with PLA or PETG is the fastest and most affordable path for functional fit-and-form testing. SLA resin printing produces finer surface detail, making it the right choice for consumer product aesthetics reviews. SLS nylon parts offer the best mechanical properties among 3D printing methods, which makes them suitable for load-bearing functional tests.

CNC machining delivers the tightest tolerances and is the correct choice when you need metal parts or production-equivalent material behavior. The tradeoff is cost and lead time. For early-stage work, CNC is rarely justified.

Choosing the right 3D printing type depends on the prototype’s purpose, required surface finish, and mechanical demands. A consumer electronics housing needs SLA for its surface quality. A bracket that must survive load testing needs SLS or CNC.

Pro Tip: Test material behavior separately from geometry. Print a small coupon of your chosen material and stress it before committing to a full prototype build. This saves hours of reprinting.

What common pitfalls should you avoid when creating custom prototypes?

Most prototyping failures share the same root cause: building too much before testing anything. Constraining features prevents prototype sprawl and the delays that come with it.

  • Skipping goal definition. Building without a testable question produces a prototype that looks impressive but answers nothing. Every build must trace back to a specific risk or assumption.

  • Starting at high fidelity too early. A polished prototype signals to users that the design is finished. That perception suppresses honest feedback. Low-fidelity early prototypes enable more honest and actionable user feedback by removing the distraction of surface polish.

  • Testing too late and too rarely. One large test at the end of a development phase is the most expensive way to find problems. Small, frequent tests catch issues while they are still cheap to fix.

  • Ignoring what users actually do. Developers often watch users struggle with a prototype and instinctively explain the interface rather than observing. Let users fail. Their confusion is the data.

  • Neglecting IP protection. Sharing a prototype with manufacturers or investors before filing a provisional patent exposes your design to risk. Document creation dates and consult an IP attorney before any external sharing.

“Prototyping creates options for product development by testing single moments of value quickly and iteratively, maximizing learning speed and leverage.”

Scope creep is the silent killer of prototype cycles. Every feature you add beyond the testable question extends your build time and dilutes your results. Treat each prototype as a focused experiment, not a product preview.

Key Takeaways

Effective custom prototyping requires a defined question, the right fidelity for each stage, and short iterative cycles that build knowledge faster than any single large test.

Point Details
Define one testable question Every prototype must answer a specific risk before you build anything.
Match fidelity to the stage Use lo-fi sketches early; reserve high-fidelity builds for late-stage validation.
Choose materials by purpose FDM suits functional tests; SLA suits visual reviews; SLS suits load-bearing parts.
Test early and often Frequent small cycles outperform one large test late in the process.
Protect IP before sharing File a provisional patent and document creation dates before external exposure.

What I’ve learned from years of watching prototypes succeed and fail

The most common mistake I see from product developers is treating the first prototype as a draft of the final product. It is not. It is a question written in physical form. The moment you start adding features that are not tied to your testable question, you have stopped prototyping and started building. Those are very different activities.

The second lesson is that material choice reveals things CAD cannot. I have watched engineers spend weeks perfecting a model in Fusion 360, only to discover that the chosen material flexes in a way the simulation never predicted. A two-hour coupon test with the actual filament or resin would have caught that on day one. Physical behavior is not fully predictable from a screen.

Collaboration across disciplines also changes prototype outcomes in ways that are hard to overstate. When a mechanical engineer, a UX designer, and a manufacturing specialist review the same prototype together, they catch three different categories of problems in a single session. Siloed review misses the intersections where real product failures live.

My honest recommendation for anyone new to iterative prototyping: start with the lowest fidelity that can answer your question, set a hard deadline on the build, and get it in front of a real user within 48 hours. Speed of learning beats quality of prototype at every early stage.

— Justin

Cc3dlabs can help you build your next prototype faster

Physical prototyping moves faster when you have reliable print quality and material options behind you. CC 3D Labs, based near Philadelphia, offers custom 3D printing services covering FDM and multi-color (AMS) printing for prototypes, functional parts, and batch production runs.

https://cc3dlabs.com

Whether you need a single concept model or a series of iterated parts, Cc3dlabs provides CAD support, design for manufacturability review, and fast turnaround with local pickup or shipping. Their team works with product developers and engineers who need accurate, durable parts without long lead times. If you want to see how 3D printing drives product innovation at every stage of development, Cc3dlabs is a direct path from CAD file to tested physical prototype.

FAQ

What is a custom prototype in product development?

A custom prototype is a targeted model built to test a specific design assumption or risk before full production. It can be physical, digital, or a combination of both, depending on what question it needs to answer.

How long does it take to build a custom prototype?

Physical 3D printed prototypes typically take 2–24 hours to print, plus additional time for post-processing and testing. Digital prototypes in tools like Figma can complete a full build-and-test cycle in under 24 hours.

What materials work best for physical prototypes?

FDM materials like PLA and PETG work best for functional fit tests. SLA resin delivers finer surface detail for visual reviews. SLS nylon is the strongest option for load-bearing functional prototypes.

Should I protect my IP before prototyping?

Filing a provisional patent and documenting creation dates before sharing your prototype with any external party is the standard recommendation. Consult an IP attorney before showing your design to manufacturers or investors.

What is the difference between a works-like and a looks-like prototype?

A works-like prototype validates mechanical or software function without matching the final appearance. A looks-like prototype matches the final form and aesthetics without delivering working function. Each type answers a different category of design risk.

1 2 3 7