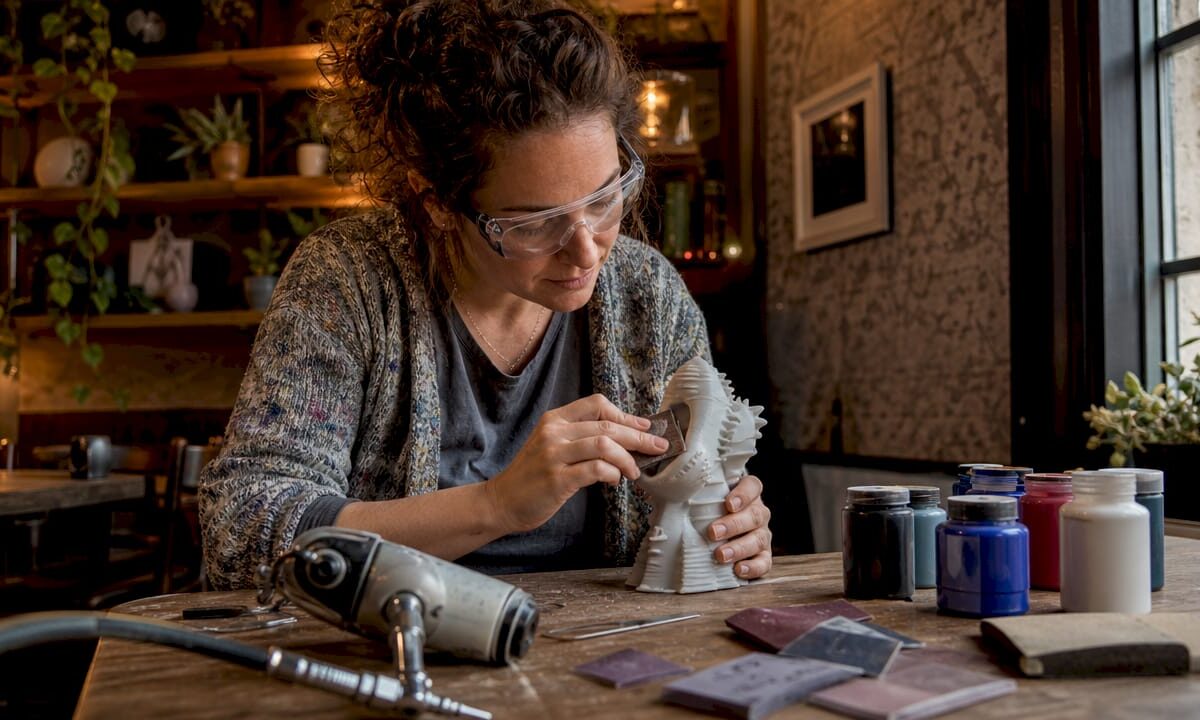
Artist sanding 3D printed sculpture

Ways to Paint 3D Printed Artwork: Artist’s 2026 Guide


TL;DR:

  • Painting 3D printed artwork requires careful surface preparation, compatible materials, and layered application. Patience during drying and sanding ensures a smooth, durable finish with realistic depth and detail.

Painting 3D printed artwork is defined as a multi-step post-processing workflow covering support removal, surface cleaning, sanding, priming, topcoat application, and sealing. The complete process spans 24–48 hours of drying and curing time between steps. Skipping any stage produces peeling, uneven color, or obscured detail. Artists and hobbyists who follow a disciplined sequence consistently achieve finishes that rival hand-sculpted pieces. The ways to paint 3D printed artwork covered here apply to both FDM filament prints and resin prints, with technique adjustments for each material.

Hands painting 3D printed artwork

1. Ways to paint 3D printed artwork start with surface preparation

Surface preparation is the most time-consuming phase of the entire process. Sanding and priming activity may take a few hours, but curing and drying total 1–2 days. Skipping this phase causes paint adhesion failures that no topcoat can fix.

For FDM prints, wash the part with warm soap and water to remove oils and dust. Remove all supports carefully with flush cutters or needle-nose pliers, then file or sand any nubs flush with the surface.

For resin prints, the process is different. For resin prints, wash in 99% isopropyl alcohol for about 5 minutes and cure fully under UV light; FDM (filament) prints just need a soapy-water wash and a quick IPA wipe. A tacky, uncured surface will reject paint regardless of how well you prime it.

Once clean and dry, begin sanding. Start with 120 or 180 grit to knock down layer lines, then progress through 220, 400, and 800 grit for a smooth base. Each grit removes the scratches left by the previous one. The goal is a surface that feels uniform to the touch.

Pro Tip: Matte filaments require significantly less sanding than glossy or silk variants because their microscopically rougher texture grips primer better. Choosing matte PLA or matte PETG before printing saves real time at the finishing stage.

2. Choosing the right primer for your 3D print

Primer does three jobs: it promotes adhesion, reveals surface flaws, and fills minor scratches. Choosing the wrong primer wastes every hour spent sanding. Understanding surface finish fundamentals helps you match primer type to material correctly.

The two main primer categories are:

  • Filler primers: Thick formulas that fill small scratches and layer lines. Ideal for FDM prints with visible texture. Apply in thin coats and sand between layers.
  • Adhesion promoters: Thin chemical primers that bond to slick or specialty plastics. Required before any standard primer on Nylon, polypropylene, or carbon-fiber-filled filaments.
  • Spray primers: Fast, even coverage. Best for organic shapes and complex geometry. Hold the can 25–30 cm from the surface and use sweeping passes.
  • Brush-on primers: Better control for small details or touch-ups. Thin with water or the manufacturer’s recommended solvent to avoid brush marks.

Specialty filaments like Nylon reject standard primers entirely. Apply a plastic adhesion promoter first, or the paint will peel regardless of surface prep quality.

Apply primer in 2–3 thin coats rather than one heavy coat. Let each coat dry fully before adding the next. Rushing this step causes solvent bubbling or wrinkling on the surface.

Pro Tip: After the first primer coat dries, lightly sand with 400 grit and look for shiny low spots. Those spots are depressions that need more filler primer. This is the start of the guide-coat method.

3. The guide-coat technique for a flawless base

The guide-coat method is the single biggest difference between amateur and professional paint results. Sand primer until bare plastic shows through in spots, which reveals low areas that need more filling. Shiny areas are low. Sanded-through areas are high. Fill the low spots with spot putty or another primer coat, then sand again.

This iterative process sounds tedious. It produces a surface where paint lays flat and color reads true. Without it, topcoats magnify every imperfection instead of hiding them.

Repeat the prime-and-sand cycle until the entire surface sands evenly with no shiny low spots remaining. Two or three cycles is typical for FDM prints with visible layer lines. Resin prints often need only one cycle.

4. Painting techniques that enhance 3D printed artwork aesthetics

Acrylic paints are the standard choice for painting 3D prints. They dry fast, thin with water, and bond well to primed surfaces. They also work with both brush and airbrush application.

The core rule for topcoats is the same as for primer: apply 2–3 thin, even coats instead of one thick coat. Thick coats pool in recesses, obscure fine detail, and take far longer to cure. Thin coats dry in minutes and build color gradually.

Beyond base coats, two techniques separate flat color from genuine artistic depth:

  • Washes: Thin dark paint (or dedicated wash medium) to a near-water consistency and apply it over the entire piece. Capillary action pulls the wash into recesses, creating natural shadows. Wipe excess off raised surfaces with a damp cloth before it dries.
  • Dry brushing: Load a stiff brush with a light color, then wipe almost all paint off on a paper towel. Drag the nearly dry brush lightly across raised edges and surface texture. The tiny amount of paint left catches only the highest points, simulating light hitting edges.

Washes and dry brushing are the techniques professional artists rely on to produce realistic depth and highlights beyond simple color coats. A figure painted with only base coats looks flat. The same figure after a wash and dry brush looks like it belongs in a display case.

“The difference between a painted print and a painted sculpture is almost entirely in the detailing stage. Base coats set the color. Washes and dry brushing set the story.”

Pro Tip: Thin your acrylic paints with a dedicated acrylic medium rather than plain water. Water breaks down the binder at high dilution ratios, causing the paint to bead or crack. Acrylic medium maintains the binder while lowering viscosity.

5. Matching paints and primers for compatibility

Paint and primer compatibility is a real technical constraint, not a preference. Solvent-based primers can dissolve water-based topcoats. Oil-based paints over acrylic primers may never cure fully. The safest approach is to stay within one paint family throughout the entire job.

For most artists, an all-acrylic system works well. Use an acrylic filler primer, acrylic base coats, acrylic washes, and an acrylic clear coat. Every layer speaks the same chemical language.

If you use a rattle-can spray primer, check the label for the base chemistry. Lacquer-based spray primers are common and fast-drying, but they require lacquer-compatible topcoats. Applying water-based acrylics over a fresh lacquer primer before it fully outgasses causes wrinkling.

Read the filament-specific finishing guide for your material before choosing a paint system. Flexible filaments like TPU need flexible paints. Rigid PLA accepts almost any acrylic system without issue.

6. Sealing and protecting your finished paint job

A clear coat seals the paint, protects against handling wear, and controls the final surface sheen. Skipping the clear coat means fingerprints and minor abrasion will damage the paint within weeks.

Clear coat options:

  • Matte clear coat: Eliminates surface shine. Best for realistic figures, terrain, and organic subjects where gloss looks artificial.
  • Satin clear coat: A middle ground. Works well for vehicles, armor, and objects that would have a slight sheen in real life.
  • Gloss clear coat: Maximum shine. Correct for candy-colored pieces, jewelry-style prints, and anything meant to look lacquered.

Apply clear coat the same way as primer and topcoat: thin, even passes at 25–30 cm distance. Let each coat dry fully before adding another. Two coats provide solid protection. Three coats are worth the extra time on pieces that will be handled frequently.

Allow the final clear coat to cure for at least 24 hours before handling the piece. The coat may feel dry to the touch in an hour, but full hardness takes longer. Handling too soon leaves fingerprints pressed into the surface.

7. Common mistakes and how to avoid them

The most common mistake in painting 3D prints is rushing drying times. Patience between coats is the single factor that separates a professional-grade finish from a frustrating one. Active brush or spray time may be minutes. Total curing can take days.

Other frequent errors:

  • Skipping adhesion promoter on specialty filaments: Nylon and carbon-fiber-filled materials will peel standard paint regardless of how well the surface was sanded. The adhesion promoter is not optional.
  • Applying paint too thick: One heavy coat obscures detail and takes far longer to dry than three thin coats combined.
  • Not sanding between coats: A light 400-grit pass between primer coats removes dust nibs and improves adhesion for the next layer.
  • Mixing incompatible paint systems: Lacquer over fresh acrylic, or oil over acrylic, causes chemical reactions that wrinkle or crack the surface.

Pro Tip: Sand lightly between every primer coat with 400 grit, and between base coats with 800 grit. This removes any dust contamination and gives each new layer a mechanical key to grip. The extra 5 minutes per coat pays back in a noticeably smoother final surface.

Key takeaways

Successful painting of 3D printed artwork requires proper surface preparation, compatible materials, and patient layering from primer through clear coat.

Point Details
Surface prep is non-negotiable Wash, sand through multiple grits, and cure resin prints before any primer touches the surface.
Match primer to filament type Specialty materials like Nylon need an adhesion promoter before standard primer to prevent peeling.
Use multiple thin coats Thin coats dry faster, preserve detail, and build stronger adhesion than one thick coat.
Washes and dry brushing add depth These two techniques transform flat base coats into realistic, handcrafted-looking finishes.
Seal every finished piece A compatible clear coat in matte, satin, or gloss protects paint from handling wear and controls final sheen.

What I’ve learned from years of painting 3D printed pieces

The advice I give most often is the advice beginners resist most: slow down between coats. Every artist wants to see the finished piece. That impatience is exactly what produces wrinkling, peeling, and the frustration of stripping a piece and starting over.

The technique that changed my results most was the guide-coat method. Before I used it, I thought my surfaces were smooth enough. After the first time I sanded through primer and saw the shiny low spots, I realized I had been painting over a surface full of invisible depressions. The guide-coat method made that visible and fixable.

My other strong recommendation is to invest in washes and dry brushing before you invest in an airbrush. An airbrush is a great tool, but it does not replace the depth that a well-applied wash creates. I have seen hand-brushed pieces with washes and dry brushing outperform airbrushed pieces that skipped the detailing stage entirely.

Material choice matters more than most hobbyists realize before they start. Matte PLA is genuinely easier to finish than silk PLA. The surface texture difference is real, and it shows up in how much sanding you need and how well the first primer coat sticks. If you have not yet printed the piece, choose matte filament. It is a free head start on the finishing process.

The post-processing workflow is not a chore you do after the real work. It is half the work. Treat it that way and the results will show.

— Justin

Cc3dlabs can help you start with a better print

A great paint job starts with a great print. Cc3dlabs, based near Philadelphia, produces custom 3D printed parts with the surface quality and dimensional accuracy that make finishing work faster and more rewarding.

https://cc3dlabs.com

Cc3dlabs offers filament-based printing, multi-color printing, and CAD modeling support for artists and hobbyists who want a reliable foundation for their finishing work. Whether you need a single art piece or a batch of display models, the team provides free online estimates and ships locally and internationally. Browse the project gallery to see the quality of prints that go out the door before a single brush stroke is applied.

FAQ

What paints work best on 3D printed plastic?

Acrylic paints bond well to primed 3D prints and dry fast enough for multi-coat workflows. An all-acrylic system from primer through clear coat avoids chemical compatibility problems.

Do I need to sand before painting a 3D print?

Sanding is required for good paint adhesion on FDM prints. Progress through multiple grits from 120 up to 800 to remove layer lines and create a surface the primer can grip.

How do I paint resin 3D prints without peeling?

Wash resin prints in 99% isopropyl alcohol for about 5 minutes, then cure fully under UV light before priming. An uncured or unwashed resin surface causes paint to peel regardless of primer quality.

What is the guide-coat method for 3D prints?

The guide-coat method involves sanding primer until bare plastic shows through in spots, which reveals low areas that need additional filling. Repeating this cycle produces a flat, uniform surface before topcoats are applied.

How long should I wait between coats when painting 3D prints?

The full drying and curing process between steps often totals 24–48 hours. Paint may feel dry to the touch in minutes, but rushing the next coat before full cure causes wrinkling, peeling, or adhesion failure.
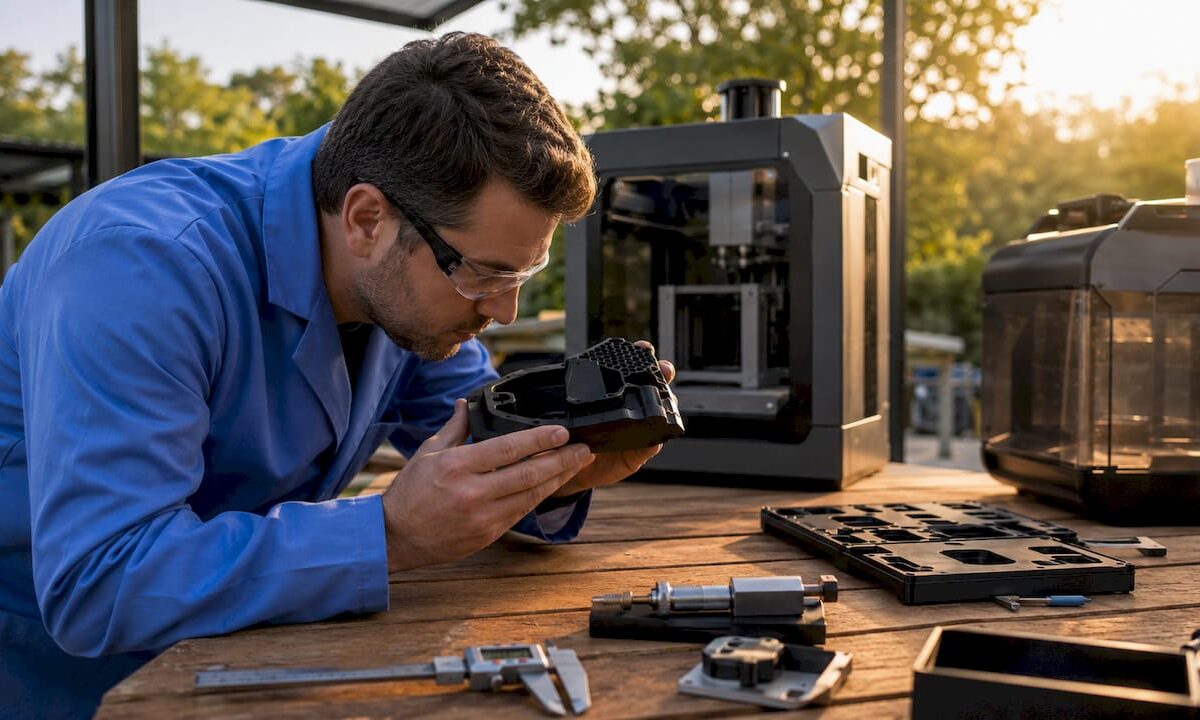
Engineer inspecting 3D printed part surface finish

The Role of Surface Finish in 3D Printing for Manufacturers


TL;DR:

  • Surface finish in 3D printing determines the texture, performance, and longevity of printed parts, requiring early specification. Different technologies like FDM, SLA, SLS, and metal fusion produce distinct Ra ranges, influencing post-processing needs. Proper design orientation, material choice, and targeted post-processing ensure optimal functional and aesthetic outcomes.

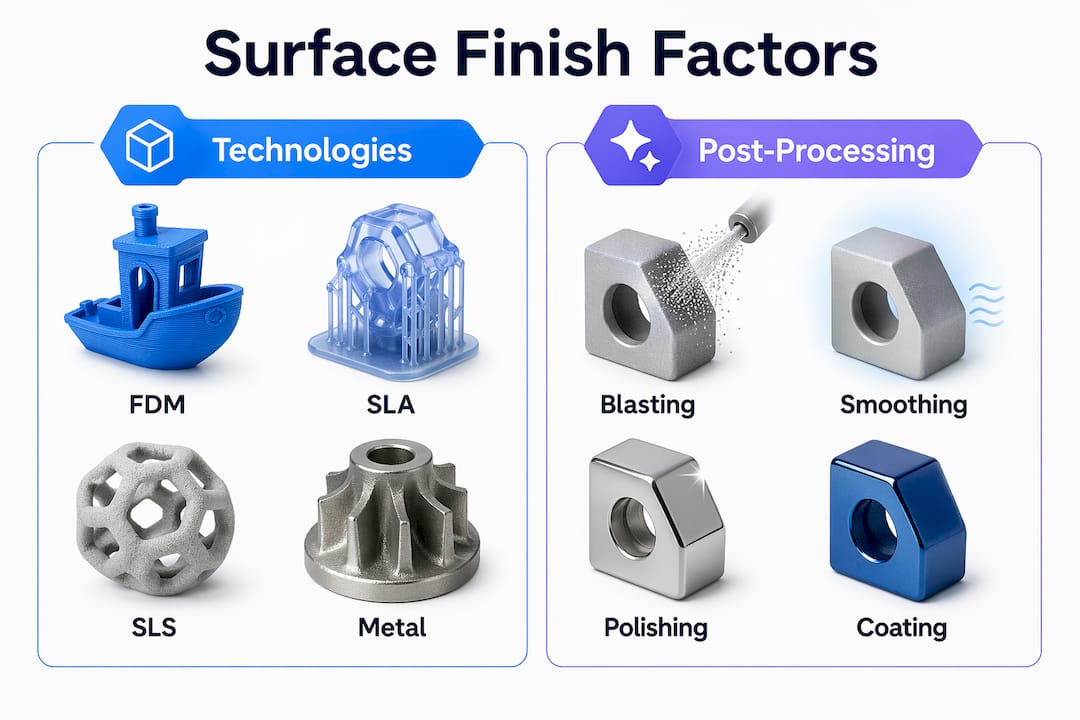
Surface finish in 3D printing is defined as the measurable texture and topography of a printed part’s outer layer, and it directly determines whether that part succeeds or fails in its intended application. The role of surface finish in 3D printing extends far beyond appearance. It governs fit, friction, fatigue life, sealing performance, and fluid dynamics. Manufacturers working with FDM, SLA, SLS, or metal powder bed fusion processes each encounter distinct surface characteristics tied to their technology. Surface quality is quantified using roughness average (Ra), measured in micrometers, and this single metric carries significant weight in aerospace, medical, and industrial component qualification. This article covers how printing technology, post-processing, and design decisions each shape the final surface outcome.

How do different 3D printing technologies influence surface finish?

Every additive manufacturing process produces a characteristic surface texture, and understanding those defaults is the starting point for any finish specification. The root cause of most surface imperfections is the layer-by-layer build process, which creates a staircase effect on curved and angled surfaces. The severity of that staircase depends on layer height, material behavior, and process physics.

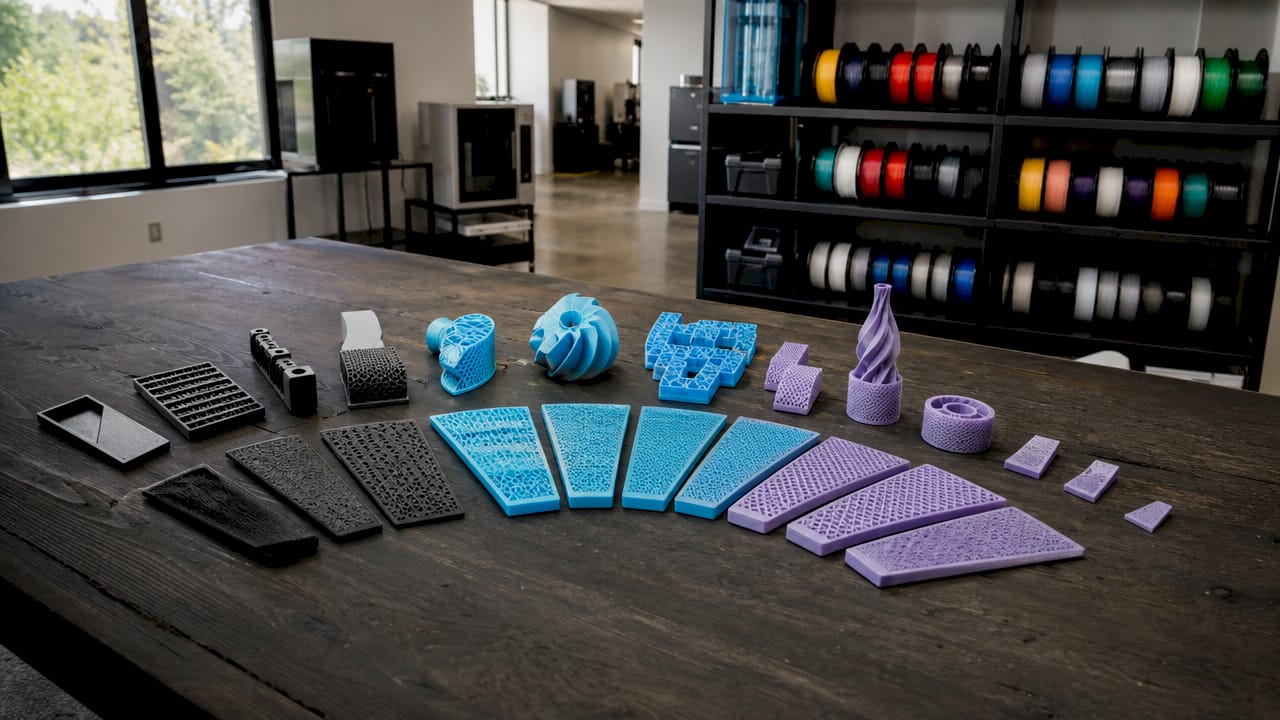
Different 3D printed surface textures on desktop

FDM (Fused Deposition Modeling) produces the most visible layer lines of any common process. Typical Ra values for FDM parts range from 10 to 30 μm, depending on layer height and material. PLA and ABS parts printed at 0.2 mm layer height show clear bead extrusion ridges that require sanding or chemical smoothing before use in consumer-facing applications.

SLA (Stereolithography) uses a UV laser to cure liquid resin, producing surfaces with Ra values as low as 1 to 3 μm right off the printer. The result is a near-glassy finish that requires minimal post-processing for aesthetic parts. However, support attachment points leave small scars that must be addressed before final use.

SLS (Selective Laser Sintering) fuses nylon powder, leaving a grainy, matte texture with Ra values typically between 6 and 12 μm. The surface has a sandpaper-like quality that works well for functional prototypes but needs bead blasting or dyeing for production parts.

Metal powder bed fusion processes, including DMLS and SLM, produce surfaces with Ra values ranging from 6 to 20 μm. Residual powder particles fused to the surface and layer lines both contribute to roughness. Post-machining or electropolishing is standard for sealing surfaces and bearing interfaces.

Technology Typical Ra Range Primary Surface Issue
FDM 10–30 μm Visible layer lines, bead ridges
SLA 1–3 μm Support scars, resin blush
SLS 6–12 μm Grainy powder texture
Metal DMLS/SLM 6–20 μm Fused powder, staircase effect
Material Jetting 1–4 μm Waxy surface, UV sensitivity

Infographic comparing 3D printing technologies and post-processing methods affecting surface finish

Print orientation compounds these effects. Surfaces printed at shallow angles relative to the build plate show the most pronounced staircase stepping. Vertical walls on FDM parts are smoother than 45-degree overhangs because the layer transitions are less visible. Surface finish in additive manufacturing is a critical functional parameter that affects fit, fluid dynamics, wear resistance, and fatigue life across all of these technologies.

What post-processing techniques enhance surface finish?

Post-processing is where manufacturers close the gap between as-printed texture and production-grade quality. The right method depends on material, geometry, required Ra value, and whether the part needs dimensional stability after finishing.

Media blasting and bead blasting are the most common first steps for SLS and metal parts. Blasting removes loose powder, smooths texture, and creates a uniform matte finish. It does not significantly alter dimensions, making it safe for tight-tolerance features. Media blasting and chemical smoothing effectively eliminate stair-stepping effects inherent to layered printing.

Chemical vapor smoothing works by exposing a part to solvent vapor that melts and redistributes the outermost surface layer. For FDM ABS parts, acetone vapor smoothing can reduce Ra from 20 μm down to 2 to 4 μm in minutes. The trade-off is slight dimensional change and the need for controlled ventilation. For nylon SLS parts, dedicated vapor smoothing systems like AMT PostPro3D achieve similar results with better repeatability.

Tumbling and vibratory finishing use abrasive media in a rotating drum to smooth small parts uniformly. This method works well for batches of small, geometrically simple parts but is size-limited and can round sharp edges that are functionally important.

Sanding and polishing remain the most controllable methods for achieving very low Ra values on accessible surfaces. Progressive grits from 120 to 2000, followed by polishing compound, can bring SLA or FDM parts to a mirror finish below 0.5 μm. The limitation is labor cost and the inability to reach internal channels or complex geometry.

Painting and dyeing add color and a protective layer simultaneously. Dyeing is particularly effective for SLS nylon, penetrating the surface rather than coating it, which preserves dimensional accuracy. Painting adds thickness, typically 50 to 100 μm per coat, which must be accounted for on mating surfaces.

Method Best For Ra Improvement Key Trade-off
Bead blasting SLS, metal Moderate Matte only, no gloss
Vapor smoothing FDM ABS, nylon High Slight dimensional change
Tumbling Small batch parts Moderate Size and geometry limited
Sanding/polishing Accessible surfaces Very high Labor intensive
Painting/dyeing Aesthetics, protection Low (coating) Adds thickness

Pro Tip: Specify your required Ra value before selecting a post-processing method. Working backward from the functional requirement, such as Ra 0.8 μm for a sealing surface, prevents over-processing and unnecessary cost. Learn more about the full spectrum of options in this 3D print finishes guide.

How does surface finish affect functional performance?

Surface roughness is an engineering variable with direct consequences for part performance. Mismanaging surface finish causes technical failures including leaking gaskets, seized parts, and premature fatigue because surface anomalies initiate stress cracks. This is not a cosmetic concern. It is a structural one.

The fatigue life relationship is quantitative. Reducing surface roughness from Ra 3.2 μm to 0.8 μm in metal parts produces fatigue strength improvements of 15 to 30%. For a load-bearing bracket or a cyclic-stress component in a medical device, that improvement can be the difference between a 10-year service life and a premature failure.

Friction and wear behavior depend on surface texture in ways that are not always intuitive. Rough surfaces create higher initial friction and accelerate wear in sliding contact. However, some applications require specific surface textures to retain lubricants, and over-finishing can starve mechanical assemblies of necessary lubrication. A bearing journal polished to Ra 0.1 μm may actually perform worse than one finished to Ra 0.4 μm because the lubricant film cannot be maintained.

Sealing performance adds another layer of complexity. Both too rough and too smooth surfaces can cause leaks or micro-leaks in gasket interfaces. A controlled Ra value, typically between 1.6 and 3.2 μm for most elastomeric gaskets, creates enough texture for the gasket to conform without allowing leak paths through deep valleys.

Fluid dynamics in internal channels are also affected. Rough internal surfaces in printed manifolds or heat exchangers increase turbulent flow and pressure drop. For high-flow hydraulic components, this translates directly to energy loss and heat generation. Electropolishing or abrasive flow machining of internal channels is standard practice in precision fluid systems.

Dimensional accuracy at assembly depends on finish as well. A shaft printed to nominal diameter with Ra 15 μm will measure differently than one finished to Ra 1.6 μm because the roughness peaks add effective material. Understanding this relationship is covered in detail in precision 3D part qualities that every engineer should account for at the design stage.

What design decisions optimize surface finish from the start?

The most cost-effective surface finish strategy begins in CAD, not at the finishing bench. Surface finish is a decisive factor in lifecycle costs and reliability, and decisions made during design and print setup determine how much post-processing will be required.

  1. Orient critical surfaces away from support contact. Support structure removal causes surface scarring that compromises dimensional accuracy if not accounted for at the design stage. Placing cosmetic or functional surfaces on self-supporting faces eliminates this problem entirely.

  2. Rotate parts to minimize staircase effects on key features. Rotating parts by 45 or 90 degrees optimizes surface finish on sloped features and reduces post-processing time and cost. A cylindrical bore printed vertically will have a smoother inner wall than one printed horizontally.

  3. Reduce layer height on finish-critical parts. Dropping from 0.2 mm to 0.1 mm layer height on an FDM part roughly halves the visible staircase amplitude. Print time increases, but post-processing time decreases, and the net cost is often lower for small-batch production.

  4. Specify Ra requirements on your drawing before quoting. Suppliers cannot hit a target they have not been given. Defining Ra values for sealing surfaces, bearing interfaces, and cosmetic faces at the RFQ stage prevents mismatched expectations and rework.

  5. Account for finishing stock in your CAD model. If a surface will be sanded or machined after printing, add 0.3 to 0.5 mm of material to that face. This preserves final dimensions after material removal.

Pro Tip: For manufacturing-grade 3D printed parts, treat surface finish as a design input, not an afterthought. Document finish requirements in your technical drawing the same way you would a tolerance or material callout.

Support structure scarring is a major contributor to surface defects, and anticipating this during CAD design reduces costly rework and maintains accuracy. The best manufacturers build finish considerations into their design review checklist, not their inspection report.

Key takeaways

Surface finish in 3D printing is a functional engineering parameter that must be specified, designed for, and controlled from the first CAD decision to the final post-processing step.

Point Details
Technology sets the baseline FDM, SLA, SLS, and metal processes each produce distinct Ra ranges that define your starting point.
Post-processing closes the gap Methods like vapor smoothing, bead blasting, and polishing can reduce Ra by an order of magnitude.
Finish drives functional outcomes A 15 to 30% fatigue strength gain is achievable by reducing Ra from 3.2 μm to 0.8 μm in metal parts.
Over-finishing carries real risk Surfaces polished below optimal Ra can fail to retain lubricant, causing premature wear in assemblies.
Design orientation is the cheapest fix Rotating a part 45 to 90 degrees during setup reduces staircase effects without adding cost.

Surface finish is the variable most manufacturers underestimate

I have reviewed hundreds of part drawings from product developers who specify tight dimensional tolerances down to 0.05 mm but leave the surface finish field blank. That blank field is where failures are born. A gasket surface with Ra 12 μm will leak under pressure cycling regardless of how accurate the bore diameter is. A sliding shaft with Ra 25 μm will wear its mating bore in weeks, not years.

The misconception I encounter most often is that surface finish is a cosmetic concern addressed at the end of the process. The reality is the opposite. Finish requirements should appear on the drawing before the first print parameter is set. The technology choice, orientation, layer height, and post-processing sequence all flow from that specification.

What I find genuinely encouraging is how much the as-printed baseline has improved. 3DEO’s Intelligent Layering technology produces production-grade metal parts with smooth surfaces and tight tolerances directly off the printer, which challenges the assumption that additive manufacturing always requires heavy post-processing. That capability is spreading across the industry. The gap between additive and machined surface quality is narrowing every year.

My practical advice: treat surface finish as a first-class design parameter. Write it on the drawing. Discuss it with your print supplier at the quoting stage. And if you are unsure what Ra value your application requires, look at the equivalent machined part specification and use that as your target. The post-processing methods available today can hit almost any target. The question is whether you have defined the target clearly enough to hit it.

— Justin

How Cc3dlabs helps manufacturers achieve production-grade surface finish

https://cc3dlabs.com

Cc3dlabs, based near Philadelphia, works with manufacturers and product developers who need more than a rough prototype. Their FDM printing capabilities cover a range of engineering-grade materials, and their post-processing options include sanding, painting, and finishing tailored to functional requirements. Every project starts with a design review that includes surface finish specification, so parts arrive ready for assembly, not for rework. For teams managing batch production or iterating on functional components, Cc3dlabs offers fast turnaround, free online estimates, and direct design support. Explore their full range of capabilities on the 3D printing services page and request a quote for your next production run.

FAQ

What is surface finish in 3D printing?

Surface finish in 3D printing refers to the texture and roughness of a part’s outer surface, measured as roughness average (Ra) in micrometers. It affects how a part looks, how it fits with mating components, and how it performs under mechanical stress or fluid pressure.

Which 3D printing process produces the smoothest surface?

SLA and material jetting produce the smoothest as-printed surfaces, with Ra values as low as 1 to 3 μm. FDM produces the roughest baseline finish, typically between 10 and 30 μm, and almost always requires post-processing for functional or cosmetic applications.

How does surface roughness affect fatigue life?

Reducing Ra from 3.2 μm to 0.8 μm in metal parts improves fatigue strength by 15 to 30%. Surface irregularities act as stress concentration points where fatigue cracks initiate, so smoother surfaces directly extend component service life.

Can over-polishing a 3D printed part cause problems?

Yes. Some mechanical assemblies require a specific surface texture to retain lubricant. Polishing a surface below the optimal Ra value can prevent lubricant film formation, leading to metal-to-metal contact and accelerated wear.

When should surface finish be specified in the design process?

Surface finish requirements should be specified on the technical drawing before the first print parameter is selected. Early specification allows the print supplier to choose the correct technology, orientation, and post-processing sequence to hit the target at the lowest cost.

Technician inspecting 3D print finishing tools

Types of 3D Print Finishes: Your 2026 Practical Guide


TL;DR:

  • D print finishes involve post-processing methods like mechanical, chemical, thermal, or coating treatments, affecting appearance and durability. Proper selection depends on material compatibility and desired surface qualities, with multi-step workflows yielding optimal results. Combining techniques such as sanding, primer, and topcoat consistently produces professional-grade, surface-improved parts.

3D print finishes are defined as post-processing treatments that transform raw printed surfaces through mechanical, chemical, thermal, or coating methods. The right finish determines whether a part looks prototype-grade or production-ready, and whether it survives real-world use or fails under stress. From sanding PLA with 2000-grit wet paper to electroplating ABS with copper, the range of post-processing methods available in 2026 covers every aesthetic and functional need. Tools like Smooth-On XTC-3D epoxy coating, acetone vapor smoothing chambers, and glass bead blasting rigs each solve a different surface problem. Choosing correctly starts with knowing what each category does.

1. Types of 3D print finishes: the four core categories

Surface finishes for 3D prints fall into four distinct categories: mechanical, chemical, thermal, and coatings or plating. Each category addresses a different surface problem and suits different materials. Mechanical methods physically abrade or reshape the surface. Chemical methods dissolve or bond with the outer layer. Thermal methods use heat to reflow material. Coating and plating methods add an entirely new surface layer on top of the print.

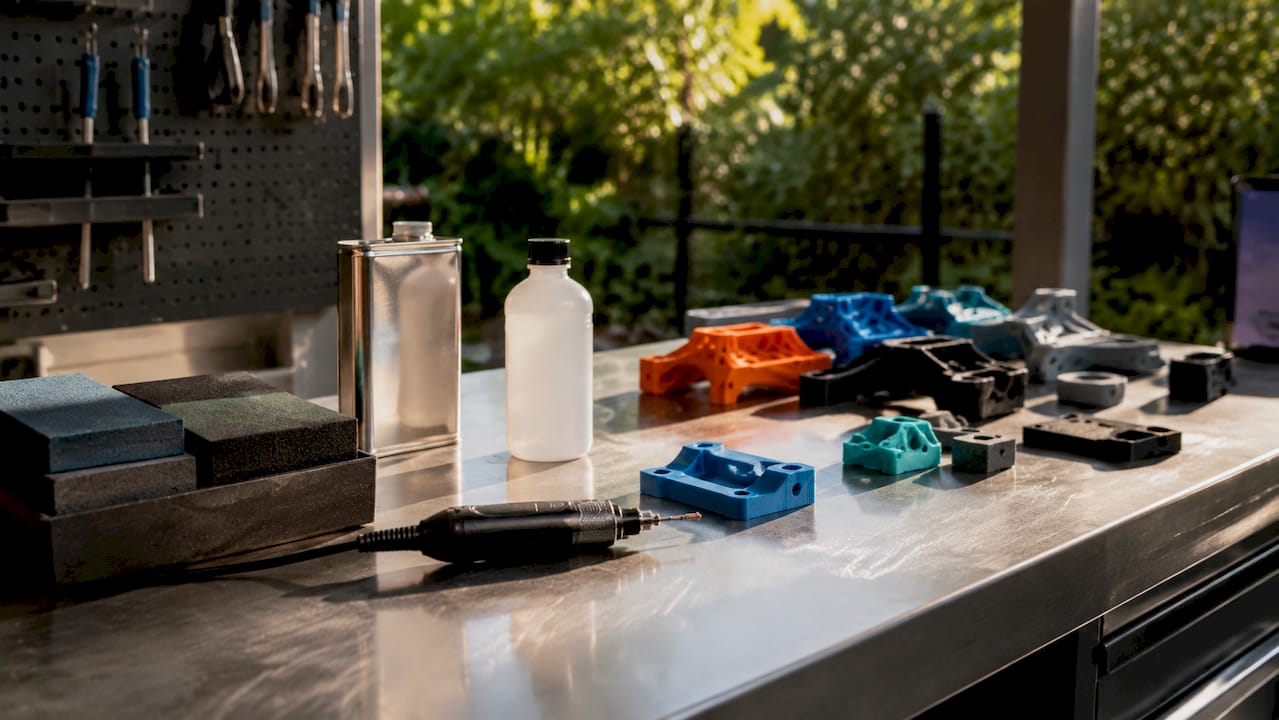
Overhead view of 3D print finishing supplies and parts

Understanding these categories prevents costly mistakes. Applying acetone vapor to a PLA print, for example, does nothing useful because PLA does not dissolve in acetone. Knowing which category fits your material and goal is the first decision every finisher must make.

2. Sanding: the foundation of mechanical finishing

Sanding is the most accessible mechanical finishing technique for 3D prints, and it works across PLA, ABS, PETG, and resin. The process follows a progressive grit sequence. Start coarse to remove layer lines, then move finer to refine the surface.

A standard sanding grit progression runs as follows:

  • 120 to 220 grit: removes visible layer lines and high spots
  • 320 to 400 grit: smooths the surface and removes coarse scratches
  • 600 to 800 grit: fine smoothing before primer or topcoat
  • 1000 to 2000+ grit: polishing stage for near-gloss results

Wet sanding above 600 grit is the correct approach for PLA and PETG. Dry sanding at fine grits generates friction heat that can deform fine details on these lower-temperature materials. Water acts as a lubricant and carries away debris, keeping the surface cool and the paper cutting cleanly.

Pro Tip: Sand in circular motions at coarse grits, then switch to straight strokes aligned with the print’s longest axis at fine grits. This prevents swirl marks from showing through primer.

3. Media blasting: fast, uniform surface treatment

Media blasting uses pressurized abrasive particles to strip layer lines and texture surfaces in seconds. The result depends entirely on the media geometry. Spherical glass beads peen the surface rather than cut it, producing a smooth satin finish with minimal material removal at depths of 2 to 15 micrometers. Angular crushed glass cuts into the surface and creates a rougher anchor profile, which is ideal when you need a coating to grip the part afterward.

Glass bead blasting suits decorative metal prints and delicate plastic parts where dimensional accuracy matters. Crushed glass blasting suits parts that will receive paint, cerakote, or epoxy, because the anchor profile dramatically improves adhesion. Choosing the wrong media for the job produces either a surface that is too rough for display or too smooth for coating.

4. Tumbling: batch finishing for small parts

Tumbling places parts inside a rotating barrel with abrasive media, letting friction do the finishing work over hours. It excels at deburring and polishing small metal prints in large batches without manual labor. Tumbling media selection determines the result:

  1. Ceramic media cuts aggressively and removes burrs and sharp edges from metal prints.
  2. Plastic media deburrs gently and polishes without removing significant material, suited for softer metals and plastics.
  3. Steel media burnishes surfaces to a bright shine, ideal for stainless steel or tool steel prints.
  4. Organic media such as walnut shell or corn cob provides the lightest action, used for final polishing and cleaning.

Tumbling cannot reach internal channels or fine recessed details. For parts with complex geometry, combine tumbling for external surfaces with hand sanding for recessed areas.

5. Acetone vapor smoothing: chemical finishing for ABS and ASA

Acetone vapor smoothing is the most dramatic chemical finishing technique available for desktop 3D printing. The process works by suspending ABS or ASA parts above liquid acetone inside a sealed, transparent chamber. Acetone vapor rises, contacts the surface, and melts the outer layer, which then reflows into a smooth, glossy finish as the solvent evaporates.

The standard setup uses paper towels soaked with acetone placed at the bottom of a sealed glass or metal container. The part hangs above the towels on a wire rack, never touching the liquid. Exposure time controls the finish. Short exposure produces a light smoothing effect. Longer exposure creates a high-gloss surface but risks losing fine detail or causing the part to sag.

Material compatibility is non-negotiable here. Acetone vapor does not work on PLA or PETG because these polymers are not soluble in acetone. Attempting it wastes time and materials.

Safety note: Acetone vapor is highly flammable. Vapor smoothing safety requires working outdoors or in a well-ventilated space, away from open flames or sparks. Never use a microwave or oven to accelerate the process.

6. Epoxy coatings: chemical finishing for any material

Epoxy coatings like Smooth-On XTC-3D apply to almost any 3D print material, including PLA, PETG, ABS, and resin. XTC-3D is a two-part brush-on epoxy that self-levels into layer lines and cures to a hard, glossy surface within four hours. It adds structural rigidity to thin-walled parts as a side benefit.

The application process matters as much as the product. Mix the two components at the correct ratio, apply a thin coat with a foam brush, and let surface tension pull the material into layer lines. A second coat after light sanding with 400-grit paper produces a near-flawless base for paint. Skipping primer before painting causes uneven texture and poor paint adhesion, even on epoxy-coated surfaces.

Pro Tip: Warm the XTC-3D components slightly in warm water before mixing. Lower viscosity means better self-leveling and fewer brush marks on complex geometry.

7. Thermal finishes: laser polishing and burnishing

Thermal finishing uses controlled heat to reflow surface material without adding or removing mass. Laser polishing directs a focused laser beam across the surface, melting the peaks of layer lines so they flow into the valleys. The result is an ultra-smooth surface achieved without abrasives or chemicals. This method is primarily industrial, used on metal and polymer prints in manufacturing environments where dimensional tolerance must be maintained.

Burnishing applies to metal prints specifically. Steel tumbling media or hand burnishing tools compress and polish the surface through pressure rather than abrasion. The process work-hardens the outer layer slightly, improving wear resistance alongside surface finish. Thermal methods outperform mechanical finishing on metal prints when surface roughness below 1 micrometer is required, a threshold that sanding rarely achieves consistently.

8. Electroplating and metal coatings: functional surface layers

Electroplating plastic 3D prints involves making the surface electrically conductive, then depositing metals like copper, nickel, or chrome through an electrochemical bath. The result is a true metal surface on a plastic core, combining low print weight with metallic appearance and properties. Copper plating adds electrical conductivity for EMI shielding applications. Nickel plating adds corrosion resistance. Chrome plating adds hardness and a mirror finish.

The table below compares the most common coating and plating options for 3D printed parts:

Finish type Best material Primary benefit Typical use case
Electroplating (copper) ABS, resin Electrical conductivity EMI shielding, decorative
Electroplating (nickel) ABS, resin Corrosion resistance Functional hardware
Cerakote Metal prints Wear and chemical resistance Firearms, industrial parts
Anodizing Aluminum prints Color and oxidation resistance Aerospace, consumer products
Epoxy topcoat PLA, PETG, ABS Waterproofing, gloss Display models, prototypes

Cerakote and anodizing apply to metal prints from processes like Direct Metal Laser Sintering. Anodizing aluminum prints produces a hard oxide layer that accepts dye for precise color coding of functional parts in assemblies. Surface preparation before any coating is critical. Contamination from oils or release agents causes adhesion failure regardless of coating quality.

9. How to choose the right finish for your print

Selecting the best finish for a 3D printed model starts with three questions: What material is the print? What is its end use? What is the budget? The answers narrow the field quickly.

  • PLA prints: Sanding plus filler primer plus topcoat is the standard workflow. Avoid solvent smoothing. XTC-3D epoxy works well for display models.
  • ABS and ASA prints: Acetone vapor smoothing is the fastest route to a smooth finish. Follow with paint for color. Electroplating is viable for functional hardware.
  • PETG prints: Wet sanding is the correct mechanical approach. PETG resists most solvents, so chemical smoothing options are limited. Epoxy coatings adhere well.
  • Resin prints: Resin surfaces are already smoother than FDM prints. Light sanding with 400 to 800 grit followed by UV-cure clear coat produces excellent results.
  • Metal prints: Tumbling for deburring, then burnishing or laser polishing for final finish. Cerakote or anodizing for protection.

Best finishes consistently come from combining steps: sand, apply filler primer, sand again, then topcoat. This multi-step workflow fills micro-imperfections that single-step finishing misses. Budget-conscious makers can achieve near-professional results with sandpaper, rattle-can filler primer, and patience. Professional shops add media blasting, electroplating, or cerakote for production-grade output.

Pro Tip: Always test your finishing sequence on a scrap print of the same material before committing to the final part. Finishing reactions vary by filament brand, color pigment, and print settings.

Key takeaways

The most effective 3D print finishing workflow combines mechanical preparation, a chemical or thermal smoothing step, and a protective topcoat matched to the print material and end use.

Point Details
Four finish categories Mechanical, chemical, thermal, and coating methods each solve different surface problems.
Material compatibility first Acetone vapor works on ABS and ASA only; epoxy coatings work across nearly all materials.
Combine methods for best results Sanding plus filler primer plus topcoat produces more uniform surfaces than any single step.
Media geometry matters Spherical glass beads create satin finishes; angular crushed glass creates anchor profiles for coatings.
Thermal and plating for professionals Laser polishing and electroplating deliver sub-micron smoothness and functional surface properties.

Why I always tell clients to finish in stages, not shortcuts

After years of working with printed parts at Cc3dlabs, the single most common finishing mistake I see is skipping steps to save time. Someone sands to 400 grit, sprays paint directly, and wonders why the finish looks textured under light. The layer lines did not disappear. They were just covered, not filled.

The finishing techniques that produce truly impressive results are almost always multi-stage. Sand mechanically, fill chemically with primer or epoxy, sand again, then coat. Each stage does a specific job that the next stage cannot compensate for. Trying to skip mechanical prep by applying thick epoxy just traps imperfections under a glossy surface.

I am also direct with clients about safety. Acetone vapor smoothing is genuinely useful, but it belongs outdoors or in a dedicated ventilated space. The number of makers who run it in a closed garage with a space heater nearby is alarming. The finish quality is not worth the risk when a simple setup change eliminates it.

The finishing trend worth watching in 2026 is cerakote application on FDM parts. Shops are now applying cerakote to high-temperature filament prints like PEEK and Ultem, producing parts with extraordinary wear resistance for industrial use cases. It is not a hobbyist technique yet, but the results are changing what clients expect from precision 3D parts in production environments.

Experiment with your finishing sequence. Document what works for each material. The investment in test prints pays back every time you get a production part right on the first attempt.

— Justin

Get production-ready finishes with Cc3dlabs

https://cc3dlabs.com

Cc3dlabs delivers professional 3D printing near Philadelphia with quality control built into every stage of production. Whether you need a single display model with a flawless epoxy finish or a batch of functional parts ready for cerakote or plating, the team handles material selection, print settings, and surface preparation to spec. Explore 3D printing services that cover everything from filament selection to post-processing guidance, or get a free online estimate for your next project. Local pickup and shipping options are available for clients across the US and internationally.

FAQ

What are the main types of 3D print finishes?

The four main categories are mechanical (sanding, blasting, tumbling), chemical (vapor smoothing, epoxy coatings), thermal (laser polishing, burnishing), and coatings or plating (electroplating, cerakote, anodizing). Each category suits different materials and end uses.

Can you sand all 3D print materials the same way?

No. PLA and PETG require wet sanding above 600 grit to prevent heat deformation, while ABS tolerates dry sanding more readily. Resin prints start smoother and typically need only fine-grit finishing before topcoating.

Is acetone vapor smoothing safe for home use?

Acetone vapor smoothing is safe when done outdoors or in a well-ventilated space away from ignition sources. Acetone vapor is highly flammable, so closed indoor spaces and any open flames or electrical sparks create serious hazards.

What finish works best for display models?

Sanding through progressive grits followed by filler primer and a gloss topcoat produces the best results for display models. Smooth-On XTC-3D epoxy coating is a strong alternative that self-levels into layer lines and cures to a hard, glossy surface.

Do I need primer before painting a 3D print?

Primer is not optional for quality results. Skipping primer causes uneven texture and poor paint adhesion, even on sanded surfaces. Apply filler primer in two to three light coats, sanding with 400 to 600 grit between coats, before any topcoat.

Woman removing supports from 3D print at workbench

What Is Post-Processing in 3D Printing and Why It Matters


TL;DR:

  • Post-processing in 3D printing includes support removal, cleaning, curing, sanding, and surface treatments that determine part functionality and appearance. It is essential for achieving professional quality, mechanical strength, and compliance with industrial standards, especially for metal or high-stakes components. Properly matching techniques to end-use and planning sequences early optimizes results and reduces errors in additive manufacturing.

Most people assume the hard work ends when the print finishes. It doesn’t. What is post-processing in 3D printing? It’s every step you take after the printer stops: removing supports, cleaning away residue, sanding surfaces, applying coatings, or running parts through advanced finishing treatments. These steps determine whether your print is a rough prototype or a production-ready component. Skip them, and even a technically perfect print can fail a fit test, look unprofessional, or break under load. Master them, and you unlock the full potential of additive manufacturing.

Table of Contents

Key Takeaways

Point Details
Post-processing defines final quality The printing process creates geometry, but finishing determines whether a part is functional and presentable.
Core steps apply across technologies Cleaning, support removal, and curing are foundational regardless of whether you use FDM, SLS, or resin printing.
Surface finishing changes mechanics Spray painting and sanding affect not just appearance but also hardness, roughness, and dimensional accuracy.
Advanced methods meet industrial standards Metal parts often require electro-polishing, laser treatment, or plating to satisfy aerospace and medical certifications.
Match technique to end-use A visual prototype needs different finishing than a load-bearing functional part. Knowing the difference saves time and money.

What is post-processing in 3D printing: the fundamentals

Before you decide which finishing method to use, you need to understand the three foundational steps that apply to almost every print technology. These aren’t optional. They’re where you prepare the part for any further work.

Support removal and cleaning

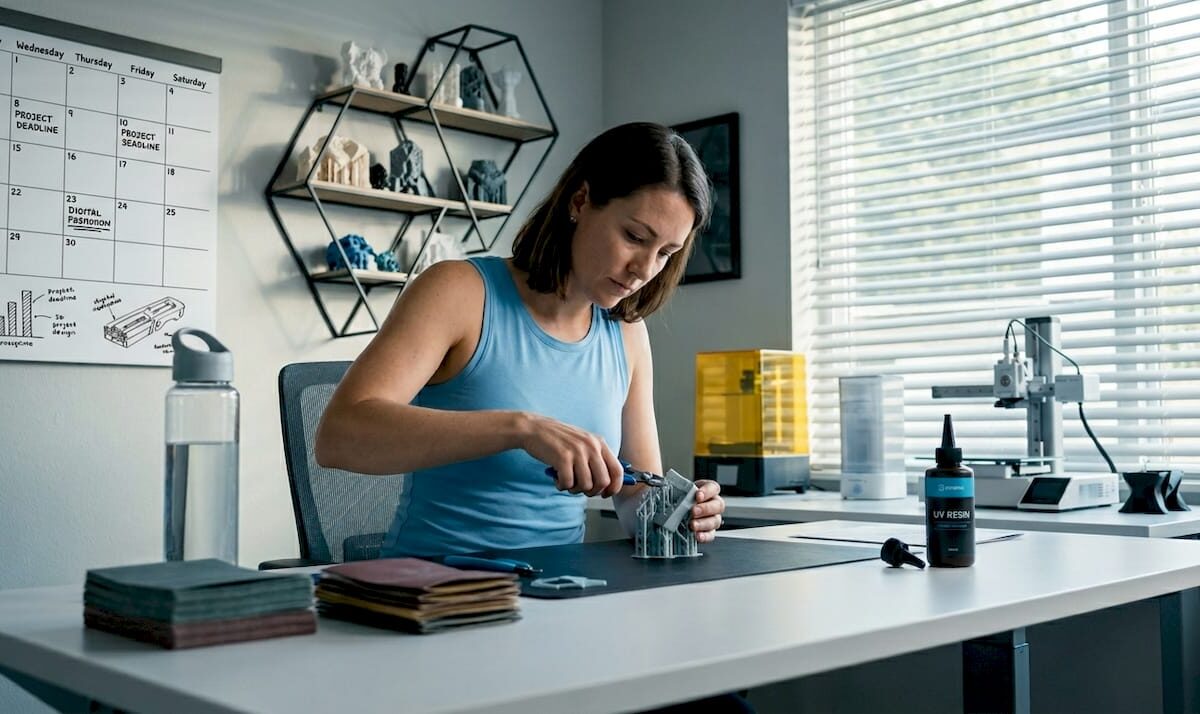
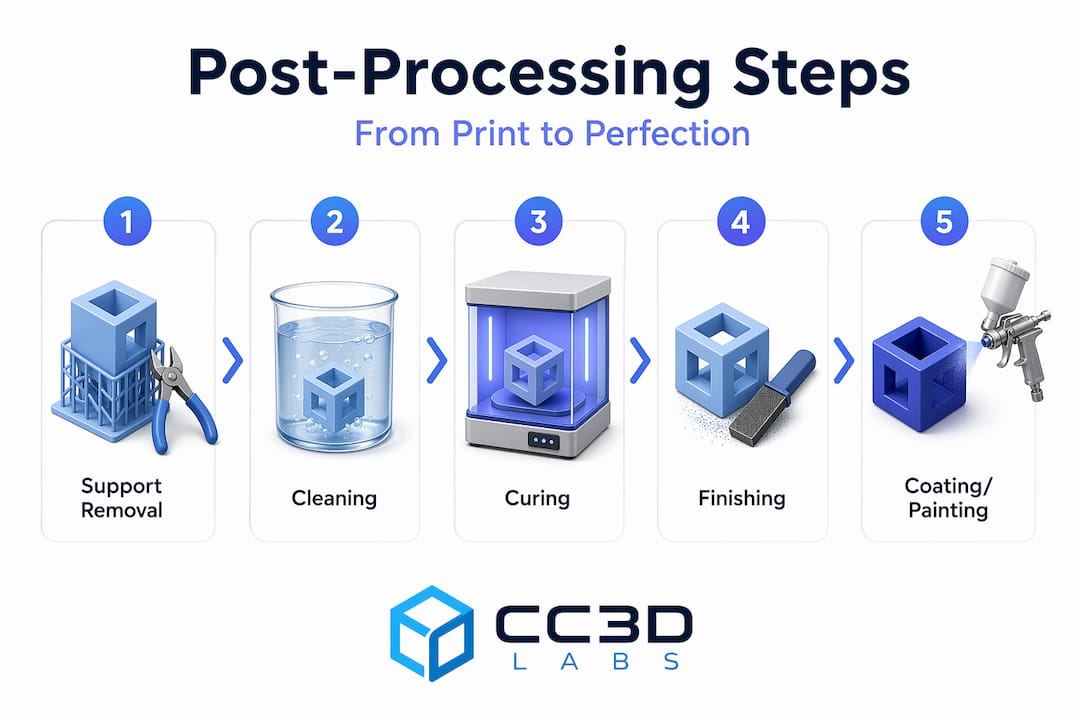
Support structures are temporary scaffolding. For FDM prints, you typically snap or cut them away with flush cutters and pliers. For resin prints, you dissolve or peel them off after washing the part in isopropyl alcohol. The material matters here. Water-soluble PVA supports can simply dissolve in water when used with dual-extrusion FDM printers, which is a genuine convenience for complex geometries.

Cleaning is equally non-negotiable. Resin prints must be washed to remove uncured liquid resin before UV curing. SLS powder-bed prints are covered in semi-sintered powder that has to be removed before any other step. Automated media blasting can reduce SLS cleaning time to as little as 5 minutes, compared to the labor-intensive brushing that used to be standard. And for parts with complex cavities, automated blasting cleans negative features that a brush simply cannot reach.

Curing for resin-based prints

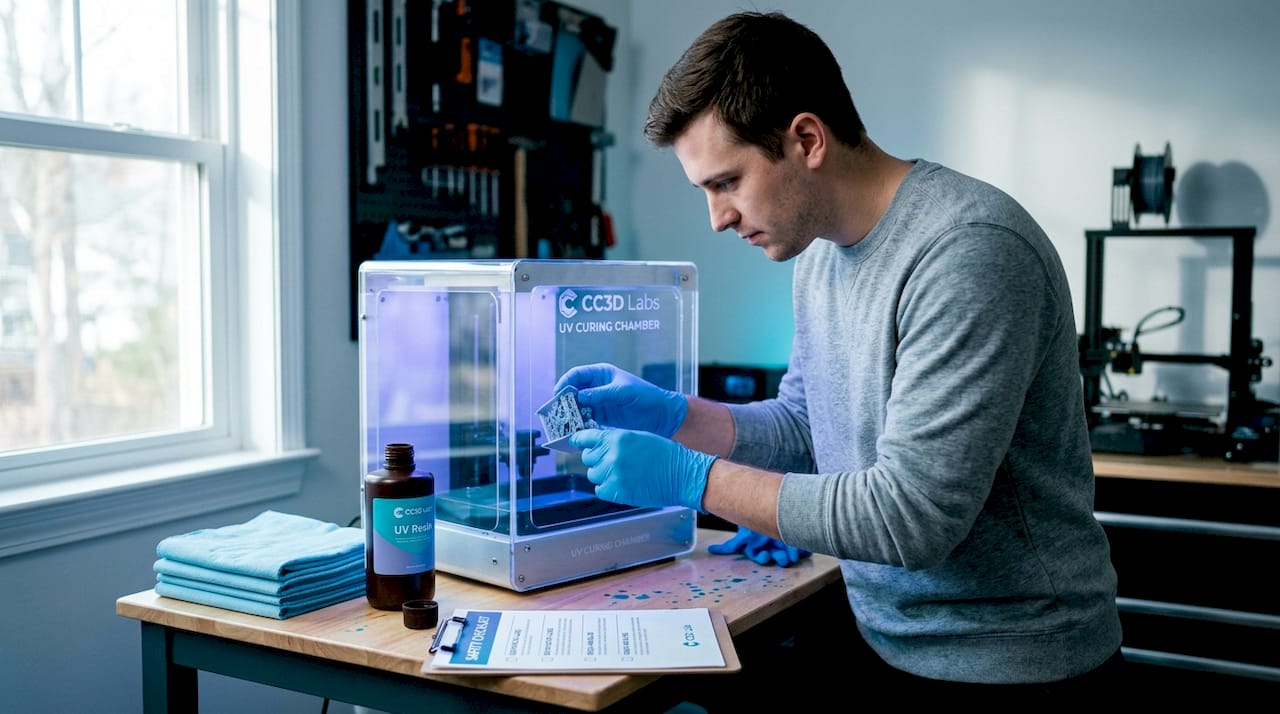
UV curing is mandatory for any photopolymer print. Without it, the part remains brittle, sticky, and chemically unstable. Most desktop users cure parts in a dedicated UV curing station for 2 to 15 minutes depending on part thickness and resin type. Industrial setups use calibrated UV ovens with temperature control to achieve consistent mechanical properties across a production batch.

Man curing resin 3D print in UV chamber

Pro Tip: After curing a resin part, let it cool completely before handling. Warm resin is softer and more prone to warping under pressure from your fingers.

Surface finishing techniques and their trade-offs

Once your part is clean and structurally stable, surface finishing determines how it looks and how it performs. This is where the role of post-processing in 3D prints becomes most visible, and most consequential.

Sanding and mechanical polishing

Sanding is the most accessible 3D printing finishing method available. You start with a coarse grit (around 120 to 200) to knock down layer lines, then work progressively toward finer grits (400, 800, 2000) for a smooth surface. For tight geometries or internal channels, flexible sanding sticks or rotary tools work better than flat sandpaper.

Mechanical polishing with a buffing compound after wet sanding can bring FDM parts to an almost glass-like finish. This works particularly well on PETG and ABS. The trade-off: sanding removes material, so if your part has tight tolerances, you need to account for that. To understand how dimensional accuracy interacts with prototype reliability, it’s worth thinking about finishing from the design stage, not after the fact.

Chemical smoothing

Acetone vapor smoothing is the most well-known chemical finishing method for ABS parts. You expose the part to acetone vapor in a controlled container, and the solvent melts the surface layer just enough to flow and fuse the layer lines. The result looks injection-molded. The downside is real: acetone vapor smoothing reduces roughness but softens the material, which can compromise tensile strength and dimensional accuracy.

For PLA, tetrahydrofuran (THF) or ethyl acetate can produce similar effects, though they require careful handling due to toxicity. These chemical approaches are best reserved for appearance models, not load-bearing parts.

Coatings and painting

Painting is underrated as a finishing technique, particularly when you look at the numbers. Spray painting ABS parts reduces surface roughness by 70% and increases hardness by 19%, outperforming acetone dipping and copper sputtering in surface quality improvement. The key is surface preparation: primer first, then two or three light coats, with light sanding between layers.

Infographic showing five steps of post-processing

Finishing method Roughness reduction Effect on hardness Best for
Spray painting ~70% +19% Aesthetics and light mechanical improvement
Acetone vapor (ABS) Significant Slight decrease Visual models only
Sanding (manual) Moderate No direct effect Any material, tight tolerance parts
Shot blasting (metal) 62% to 70% Varies Metal MEX parts

Pro Tip: Apply a UV-resistant clear coat as your final layer on any painted or primed exterior part. It prevents yellowing and surface degradation when the part is used outdoors or under shop lighting.

Advanced post-processing for metal and industrial parts

When you move into metal additive manufacturing or parts destined for aerospace, biomedical, or heavy industrial applications, the types of 3D printing post-processing required change substantially. The stakes are higher, and so are the methods.

Electro-polishing, chem-polishing, and plating

For stainless steel parts produced by laser powder bed fusion or material extrusion, a multi-stage finishing sequence delivers the best results. Combining chemical polishing, electro-polishing, and electroless nickel plating maximizes surface finish and mechanical durability. The optimal sequence is chemical polishing first, then electro-polishing, then electroless nickel plating. Each stage builds on the previous one.

Electroless nickel plating specifically improves corrosion resistance, wear resistance, and surface hardness on AM stainless steel parts. Getting the process parameters right matters: bath temperature, pH, and immersion time all affect coating uniformity and adhesion. This level of finishing is why certain additively manufactured components can pass requirements that were previously only achievable through subtractive machining.

Laser-based surface modification

Laser treatments are among the most precise post-processing techniques available. Laser polishing uses controlled surface melting to smooth surface asperities while maintaining dimensional fidelity. Laser shock peening takes a different approach: it induces compressive residual stresses in the surface to improve fatigue life without adding heat to the bulk of the part.

These techniques matter because post-processing greatly influences fatigue life, corrosion resistance, and dimensional precision of metal parts. Minor surface imperfections can reduce durability significantly when a part cycles through stress millions of times. Shot blasting on metal MEX parts has shown roughness reductions of 62% to 70% on lateral surfaces. That’s not cosmetic. That’s structural.

Regulatory standards and qualification

Post-processing for high-stakes applications isn’t just about performance. It’s about documentation and compliance. Post-processing choices critically impact part certification, requiring rigorous validation protocols especially in aerospace and medical sectors. ASTM and NASA standards define acceptable surface conditions, and hybrid finishing processes often require custom validation plans to demonstrate durability under fatigue, corrosion, and wear conditions.

For manufacturers navigating these requirements, understanding part validation in 3D printing is not optional. You need traceability, documented process parameters, and test results that prove each post-processing stage contributed to the final mechanical specification.

Choosing the right post-processing approach

The benefits of post-processing are only realized when you match the method to the goal. Here’s how to think through that decision systematically.

  1. Define the end-use first. Post-processing method selection should be driven by whether the goal is visual prototyping or mechanical testing. A concept model shown at a client meeting needs a smooth, painted surface. A functional bracket needs dimensional accuracy and structural integrity. Conflating these goals leads to over-processing or under-processing.

  2. Match finishing to material. PLA is difficult to chemically smooth and doesn’t respond well to acetone. ABS is ideal for vapor smoothing but softens if over-treated. Resin requires UV curing before any mechanical finishing. Metal parts need abrasive or electrochemical treatments that plastics never require.

  3. Plan your sequence before you start. The order of operations matters. For a painted FDM part, the correct sequence is: support removal, sanding (coarse to fine), primer coat, light sanding, color coat, clear coat. Skipping primer leads to paint adhesion failures. Skipping coarse sanding before primer wastes fine coats on a rough substrate.

  4. Consider the tolerance budget. Every finishing step removes or adds material. If your part has a 0.1 mm press-fit tolerance, track how much material each step removes. Sanding, vapor smoothing, and coating all affect final dimensions. Build this into your 3D print design workflow from the start.

  5. Prototype your finishing process. Before committing a final production run to a new post-processing sequence, run the process on a test print. This is especially true for chemical treatments and coatings on unfamiliar materials.

Pro Tip: When working with resin parts that will be sanded and painted, cure them at least 30% longer than the manufacturer’s recommended time. A fully cured part sands more cleanly and holds primer without micro-chipping.

My honest take on post-processing

I’ve seen people spend weeks perfecting their print settings and then rush the finishing in an afternoon. That’s backwards. In my experience, the finishing stage regularly accounts for 40 to 60 percent of the time it takes to produce a high-quality, presentation-ready part. The printing is the easy part now. The finishing is where skill actually shows.

What surprises most people I work with is that post-processing isn’t just about aesthetics. I’ve watched parts that looked perfect off the printer fail fatigue tests because the surface condition was inconsistent. The research is clear on this: surface region condition is decisive for long-term durability. That’s not an abstract concern for aerospace engineers. It applies to any functional part that will see repeated stress.

The other thing I’d push back on is the idea that more finishing is always better. I’ve seen parts chemically smoothed into dimensional failure. I’ve seen coatings applied so thickly that mating surfaces no longer fit. Choosing the right print type from the beginning reduces how much corrective finishing you need later. Post-processing is powerful, but it isn’t a fix for poor design decisions or the wrong material choice.

My advice: treat finishing as part of the design process, not an afterthought. Know what your part needs before the print even starts.

— Justin

Let Cc3dlabs handle the finish work

https://cc3dlabs.com

At Cc3dlabs, near Philadelphia, post-processing isn’t something we bolt on at the end. It’s built into every project from the start. Whether you’re working with filament-based prototypes that need a clean, professional surface or functional parts that require consistent dimensional accuracy across a batch, our team applies the right finishing methods for the job. We handle diverse materials, manage tight tolerances, and support clients from single-part prototyping through production-scale orders. Explore our professional 3D printing services to see how we integrate finishing into every part we deliver, locally or shipped anywhere.

FAQ

What does post-processing mean in 3D printing?

Post-processing in 3D printing refers to all steps performed after a part is printed, including support removal, cleaning, curing, sanding, painting, and advanced surface treatments. These steps transform a raw print into a functional or visually finished part.

Why is post-processing important for 3D printed parts?

Post-processing directly affects surface quality, mechanical performance, and dimensional accuracy. Without it, most prints have visible layer lines, rough surfaces, and reduced durability compared to traditionally manufactured parts.

What post-processing technique works best for FDM prints?

For FDM prints, mechanical sanding followed by primer and spray paint is one of the most effective methods, reducing surface roughness by up to 70% while also improving surface hardness. Acetone vapor smoothing works well for ABS appearance models but can reduce mechanical strength.

Do metal 3D printed parts need post-processing?

Yes. Metal additively manufactured parts almost always require post-processing to meet mechanical and regulatory standards. Techniques like electro-polishing, chem-polishing, and electroless nickel plating improve surface finish, corrosion resistance, and fatigue life, which are critical for aerospace and medical applications.

How do I choose the right post-processing method?

Match the method to the end-use. Visual prototypes benefit from sanding, priming, and painting. Functional parts require treatments that preserve or improve mechanical properties without compromising dimensional accuracy. Material type also dictates which chemical or mechanical methods are safe to apply.