
TL;DR:
- Modern 3D printing reduces prototyping costs by up to 90% and speeds lead times from weeks to days.
- Rapid iteration with 3D printing enables early testing, reduces risks, and improves team communication.
- Combining in-house and outsourced 3D printing strategies enhances design flexibility and functional quality.
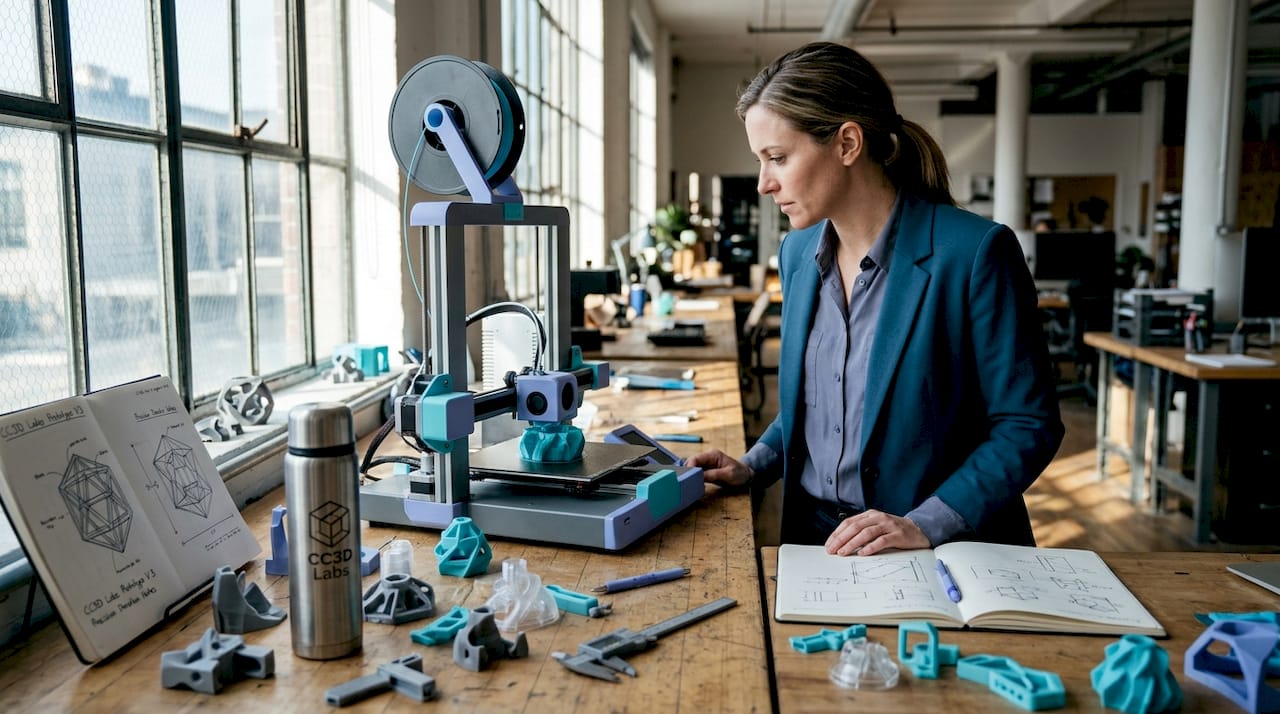
Prototyping has a reputation problem. Most engineers still think of it as the slow, expensive phase where momentum dies and budgets bleed out. But that assumption belongs to a different era. Modern 3D printing has rewritten the math entirely, cutting prototype costs by 50-90% compared to traditional CNC machining and collapsing lead times from weeks down to a matter of days. This article breaks down the real mechanics behind that shift, how to apply it across your workflow, and where most product teams still leave speed and money on the table.
Table of Contents
- How 3D printing transforms the speed of design
- The design iteration advantage: Rapid cycles and instant feedback
- Integrating 3D printing with traditional manufacturing
- Maximizing reliability: Print accuracy, material selection, and quality control
- Why most teams underestimate the true impact of 3D printing
- Accelerate your next design project with expert 3D solutions
- Frequently asked questions
Key Takeaways
| Point | Details |
|---|---|
| Speed up prototyping | 3D printing reduces prototype lead times from weeks to days for faster feedback. |
| Cut iteration costs | Switching to 3D printing can slash per-iteration costs by up to 90%. |
| Choose the right workflow | Hybrid workflows leverage both rapid 3D printing and validation with traditional techniques for optimal results. |
| Validate early and often | Regular testing and empirical tolerance checks ensure functional and reliable designs using 3D printing. |
| Material matters | Selecting the correct material and process is essential for turning prototypes into production-ready parts. |
How 3D printing transforms the speed of design
Speed in prototyping used to mean cutting corners. With 3D printing, it means eliminating the steps that never added value in the first place.
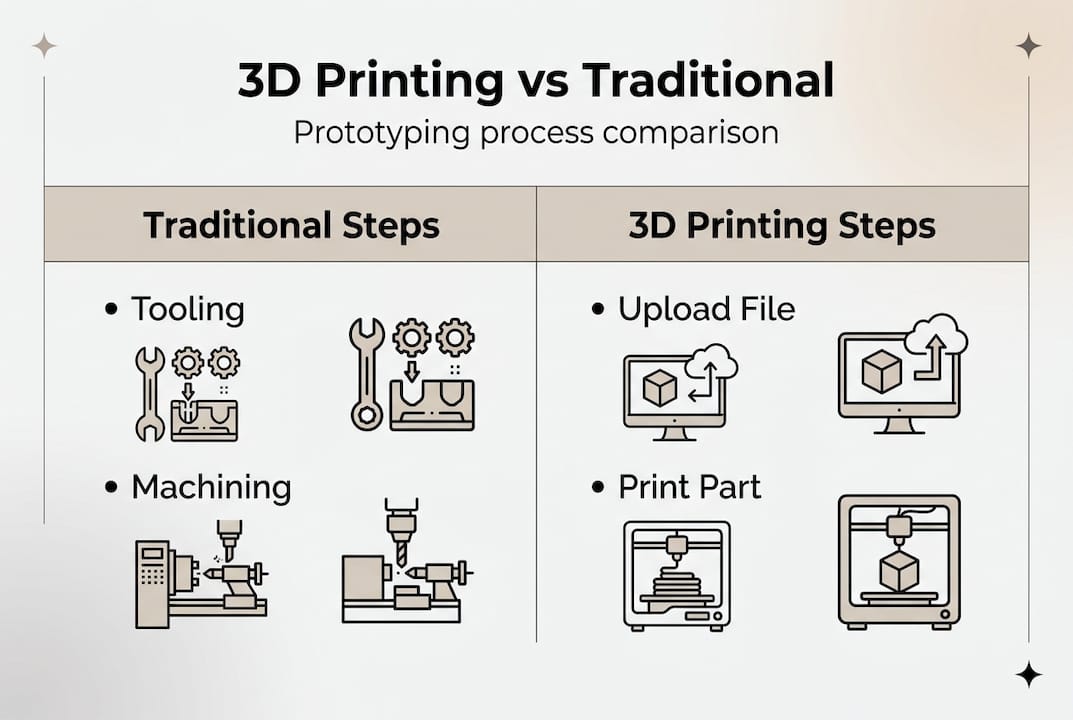
Traditional manufacturing requires tooling. Before a single part can be made, molds need to be designed, machined, and tested. That process alone can take two to four weeks and cost thousands of dollars before a designer even holds a physical prototype. Then if the design has a flaw, the process starts over. 3D printing removes that entire layer. Once your CAD file is ready, the printer starts. No molds, no setups, no waiting on a machine shop.
The empirical data backs this up clearly. Industry benchmarks show a 63% average lead time reduction from Wohlers Associates, a 70% cut in iteration costs documented by PwC, and Ford Motor Company reporting a 90% reduction in the time needed to produce physical models for new vehicle components. These are not outliers. They reflect what well-integrated 3D printing looks like across industries.
The industries feeling this most sharply include automotive, consumer electronics, medical devices, and aerospace, where rapid design cycles directly determine whether a product reaches market ahead of competition or behind it. Consumer product teams that once needed three weeks per prototype iteration now run through four or five cycles in the same time window.
Below is a quick snapshot of what the before and after looks like for a typical product team:
| Metric | Traditional process | With 3D printing |
|---|---|---|
| Prototype lead time | 2 to 6 weeks | 1 to 5 days |
| Cost per prototype | $2,000 to $10,000+ | $50 to $500 |
| Iteration cycles per month | 1 to 2 | 6 to 10 |
| Design change turnaround | 2 to 3 weeks | Same day to 48 hours |
| Tooling cost | $5,000 to $50,000 | None |
Key advantages that drive these numbers include:
- No tooling or setup costs between design changes
- Files go straight from CAD to build platform
- Multiple design variants can print simultaneously overnight
- Complex geometries print without additional cost or machining complexity
- Short runs and one-off parts are economically viable
If you want a structured look at how this fits into a full product development strategy, the rapid prototyping guide covers the foundational principles in depth. For teams that need parts fast without sacrificing quality, fast turnaround 3D printing is the practical application of these principles. External manufacturing cost-saving methods also show how 3D printing fits into broader efficiency strategies beyond just prototyping.
The design iteration advantage: Rapid cycles and instant feedback
After seeing how the numbers measure up, it is important to understand how this process transforms the workflow of real product development teams, especially when fast, iterative changes are on the line.
The single biggest workflow change 3D printing delivers is not speed. It is the freedom to be wrong earlier and more cheaply. When a prototype costs $8,000 and takes four weeks, teams hedge their bets. They over-engineer designs on paper, delay physical testing, and often discover fundamental flaws only after significant resources are committed. When a prototype costs $80 and takes 24 hours, the psychology shifts completely. Testing becomes routine rather than a milestone.
Consider a typical day in the life of a design team using 3D printing compared to one relying on traditional methods:
- Morning design review. The team identifies a clearance issue in the assembly fit from yesterday’s print. A designer opens the CAD file and adjusts the tolerance by 0.3mm.
- File prep and submission. The updated file is sliced, reviewed for printability issues, and sent to the printer by 10 AM.
- Print runs during the day. The printer runs unattended while the team works on other components or adjacent design problems.
- Afternoon evaluation. The new part is ready by mid-afternoon. The team fits it into the assembly, confirms the fix works, and identifies the next issue to address.
- Overnight print queued. A further refined version, incorporating all of today’s findings, is queued to run overnight.
- Next morning. The team arrives to a finished part and repeats the cycle.
Without 3D printing, step one would trigger a new quote request, a lead time negotiation, and a wait period measured in weeks rather than hours. The cost gap between methods is equally stark: traditional CNC prototyping can cost 5 to 20 times more per iteration, which limits how many cycles a team can run within a fixed budget.
Here is a direct comparison of iteration cycles:
| Factor | Without 3D printing | With 3D printing |
|---|---|---|
| Change to physical part | 2 to 4 weeks | 1 to 48 hours |
| Cost per iteration | $1,000 to $10,000+ | $20 to $300 |
| Risk of catching flaws late | High | Low |
| Team feedback loops | Monthly | Daily |
| Cross-functional testing speed | Slow | Fast |
Pro Tip: Use in-house desktop FDM (Fused Deposition Modeling) or SLA (Stereolithography) printers for rapid, low-risk design iterations on geometry and fit. Reserve outsourced SLS (Selective Laser Sintering) or DMLS (Direct Metal Laser Sintering) for functional prototypes that need near-production material properties. The cost difference is significant and the distinction saves time where it matters most.
For teams who want to build physically reliable parts from the start, designing for reliable 3D prototypes is the right starting point before any iteration cycle begins.
Integrating 3D printing with traditional manufacturing
Now that rapid iteration is clear, the crucial question for engineers is how and when 3D printing best fits into the broader manufacturing toolbox.
3D printing is not a replacement for every manufacturing process. It is a precision tool for specific phases and applications, and misapplying it creates its own set of problems. The teams that get the most value are the ones who know exactly when to use it and when to hand off to traditional methods.
Hybrid strategies represent the most effective approach: use 3D printing for early concepts, design exploration, and complex geometries, then transition to CNC machining or injection molding for validation, durability testing, and production-scale parts. This approach captures speed in the phase where speed matters most, without sacrificing the material strength and tolerances that validated production parts require.
Here is a practical breakdown of when to choose each approach:
Use 3D printing when:
- You need a physical prototype within 24 to 72 hours
- The geometry is too complex for traditional machining
- You are running low-volume custom parts (under 100 units)
- You need to test form, fit, or basic function before committing to tooling
- Design is still in flux and changes are expected
Use CNC machining or injection molding when:
- You need tight tolerances under 0.05mm for functional assemblies
- Parts must withstand high mechanical loads or thermal stress
- You are producing more than 500 units of the same design
- Surface finish requirements exceed what FDM or SLA can deliver
- Material certification is required (aerospace, medical implants)
Pro Tip: Build a deliberate handoff point into your development process. Define upfront which prototype generation marks the transition from 3D printing to traditional manufacturing. Many teams delay this handoff too long, running 3D printed parts through stress tests that expose limitations of the process rather than the design.
Always validate tolerances empirically before assuming a design is production-ready. No simulation and no print specification replaces a physical measurement on a calibrated instrument.
Teams looking to apply these principles at low volume will find low-volume 3D printing tips directly useful, while manufacturing-grade 3D printing covers what it takes to push printed parts closer to production quality. The production optimization guide offers complementary strategies for integrating additive methods across the broader manufacturing pipeline.
Maximizing reliability: Print accuracy, material selection, and quality control
To unlock the full potential of 3D printing within your workflow, reliability and quality must be part of every step, not an afterthought after the print is done.
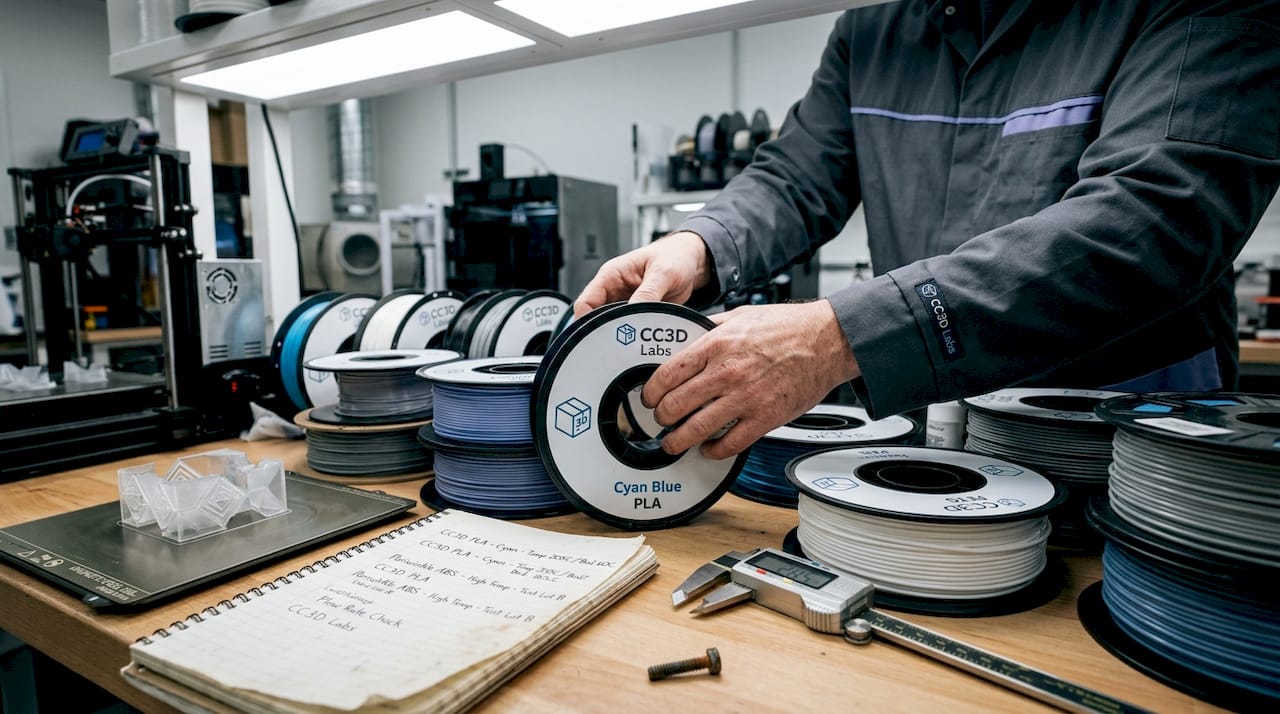
Material selection is the first decision that determines whether a printed part performs or fails. PLA (Polylactic Acid) is fine for concept models and visual prototypes where loads are minimal. PETG (Polyethylene Terephthalate Glycol) brings better impact resistance and heat tolerance, making it suitable for light functional parts. ASA and ABS handle UV exposure and higher temperatures. For truly functional parts requiring near-engineering-grade properties, Nylon, Polycarbonate, or composite filaments with carbon fiber or glass fill are the right materials. Metal printing via DMLS delivers the closest properties to machined metal, but at a significantly higher cost per part.
Accuracy requires attention at the design stage, not just the print stage. Wall thickness, support structures, bridging distances, and orientation all affect dimensional accuracy. A part that looks perfect in CAD can print with 0.5mm of warp if support strategy and material shrinkage are not factored in before slicing.
Empirical validation of tolerances is non-negotiable, particularly for assemblies with mating parts. Prioritize in-house FDM or SLA for iterative design work, and outsource SLS or DMLS when functional prototypes demand tighter tolerances and superior surface quality.
Follow these steps to ensure your printed parts are reliable before scaling up:
- Define the functional requirements first. Determine what loads, temperatures, and fits the part must survive before selecting a material or process.
- Design for printability. Review wall thickness minimums, avoid unsupported overhangs beyond 45 degrees, and design in clearance where mating parts will interface.
- Validate the print setup. Run a test print of a critical feature or cross-section before committing to a full build.
- Measure, not just visually inspect. Use calipers or a CMM (Coordinate Measuring Machine) to verify critical dimensions against your CAD model.
- Test under real conditions. Fit the part into its assembly, apply representative loads, and confirm behavior before declaring the design ready for the next phase.
- Document what worked. Record print settings, material lot, and measured results so you can reproduce the outcome reliably for future builds.
Pro Tip: Never skip design validation before scaling up production quantities. A single print defect that passes visual inspection can become a systematic failure across a batch of 200 parts. Measure first, scale second.
For more on the variables that affect dimensional output, print accuracy for prototyping is a detailed resource on what to control and how.
Why most teams underestimate the true impact of 3D printing
Here is an observation worth sharing directly: most conversations about 3D printing in product development focus on speed and cost savings, as they should. But those are just the most visible benefits. The less obvious and arguably more important impact is what 3D printing does to how teams communicate and make decisions.
When you put a physical prototype on a table during a cross-functional review, something changes. Marketing, manufacturing, QA, and leadership all engage differently with a real object than with a render or a drawing. Feedback becomes concrete. Objections get raised earlier. The kinds of misunderstandings that survive three rounds of 2D documentation rarely survive five minutes with a physical model.
The teams that get the most from 3D printing are not necessarily the ones with the most advanced printers. They are the ones who have built a culture where physical prototyping is routine and expected at every stage of design. They use what their 3D printer can produce not just to test parts but to communicate intent, to challenge assumptions, and to filter out costly mistakes before tooling and capital are on the line.
The conventional framing treats 3D printing as a cost center to be optimized. The more accurate framing treats it as a risk management tool that pays for itself by catching problems at the cheapest possible moment in the development cycle. A $150 print that exposes a fundamental design flaw is worth more than a $15,000 tooling revision that fixes the same problem six months later.
Hybrid approaches, combining desktop FDM or SLA in-house with outsourced SLS or DMLS for functional builds, consistently outperform single-method strategies. But even the best hybrid strategy delivers only part of its potential if the human element is missing. Designer intuition, shop floor experience, and direct stakeholder feedback are not replaced by technology. They are amplified by it.
Accelerate your next design project with expert 3D solutions
Understanding the principles is only the first step. Putting them into practice with the right equipment, materials, and process expertise is where results actually show up.

CC 3D Labs near Philadelphia offers professional 3D printing services built specifically for product developers and engineering teams who need reliable, high-quality results under real project timelines. Whether you need a single concept prototype or a batch of functional parts, the 3D printing on demand service gets your design from file to physical part fast. If you are still scoping what is possible, exploring 3D printing applications shows the full range of what modern filament-based printing can produce for functional, production-grade, and custom needs. Request a free estimate and move your design forward.
Frequently asked questions
How much faster can iterative design cycles be with 3D printing?
Lead times for prototypes can drop from several weeks to as little as 1 to 5 days, enabling up to 63% faster average cycles across the product development process.
Is 3D printing better than CNC machining for all types of parts?
3D printing is the stronger choice for early prototypes and complex geometries, but CNC is preferred for high-strength requirements, tight tolerances, and validated production parts where material properties are critical.
What is the main limitation of using 3D printing in product design?
Material strength and surface finish can lag behind traditional manufacturing, which is why empirical validation of tolerances is essential before any functional prototype moves into production consideration.
Should startups buy a 3D printer or outsource their prototyping?
In-house desktop printers handle rapid, low-cost design iterations well, but outsourcing SLS or DMLS delivers better results for functional, high-precision prototypes that need near-production material performance.