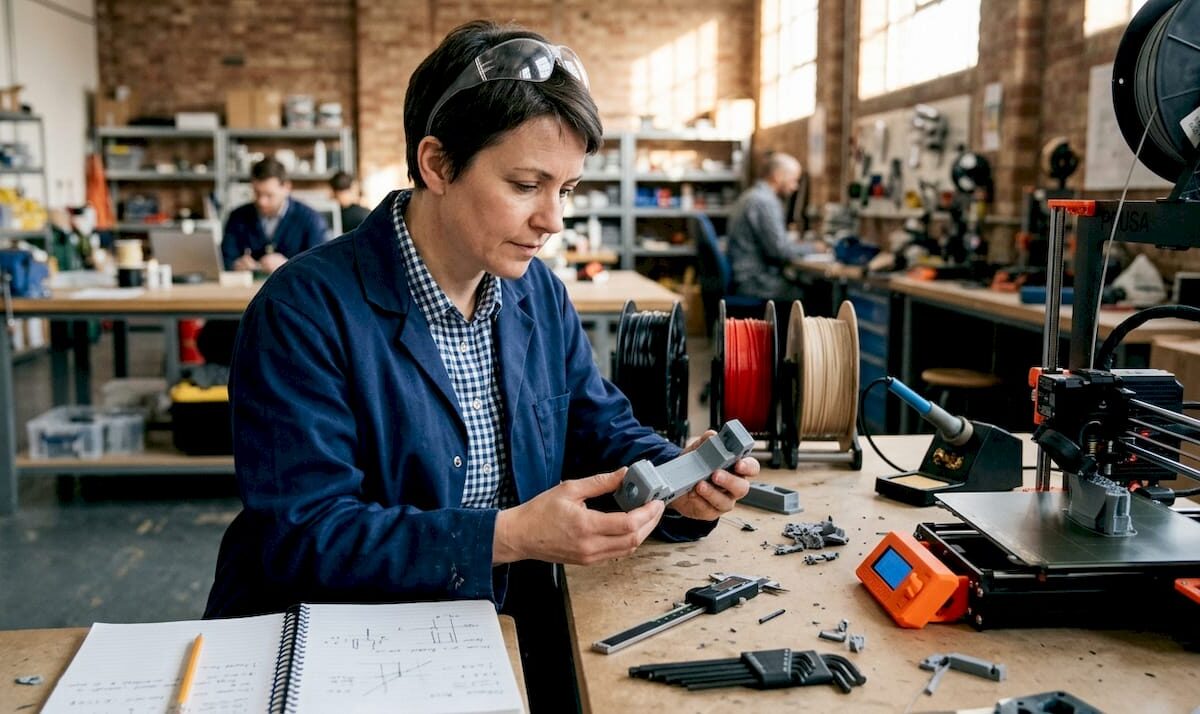
Engineer choosing filament for 3D printing in lab

Why Choose Filament for Engineering Parts: 2026 Guide


TL;DR:

  • Choosing the correct filament is essential for ensuring the performance, durability, and environmental resistance of engineering parts, preventing costly failures.
  • Selecting materials like PETG, nylon, or carbon fiber composites depends on mechanical, thermal, and environmental requirements, with proper process control and supplier reliability being critical for success.

Choosing the wrong filament for an engineering part is not just a performance issue. It can mean a failed prototype, a recalled product, or thousands of dollars in avoidable rework. The question of why choose filament for engineering parts goes deeper than picking the strongest material on the shelf. Engineering-grade filaments are selected for functional performance first, not ease of print, and the spectrum of available materials now spans simple PETG all the way to carbon fiber reinforced composites. Understanding that range, and knowing where each material fits, is what separates parts that work from parts that just look like they work.

Table of Contents

Key takeaways

Point Details
Filament choice drives part performance Mechanical properties like tensile strength and heat deflection temperature directly determine whether a part survives in service.
Environment shapes material selection UV, chemical exposure, and moisture can degrade the wrong filament quickly, making environmental fit as critical as strength.
Printability affects real-world outcomes A material with excellent specs on paper fails if your process cannot reliably print it without warping or delamination.
Cost-effectiveness goes beyond unit price Higher-cost filaments often reduce failure rates and iteration cycles, lowering total project cost over time.
Match material to application, not ego Over-engineering with premium filaments wastes budget. Selecting a fit-for-purpose material is a professional decision, not a compromise.

Why choose filament for engineering parts

Not all 3D printing filaments are created equal, and the engineering world proves that point daily. Professional material selection is a deliberate inquiry that balances load requirements, environmental conditions, and processing demands rather than simply reaching for whatever is labeled “strong.”

The core filament properties that determine suitability for functional parts fall into two categories: mechanical and thermal.
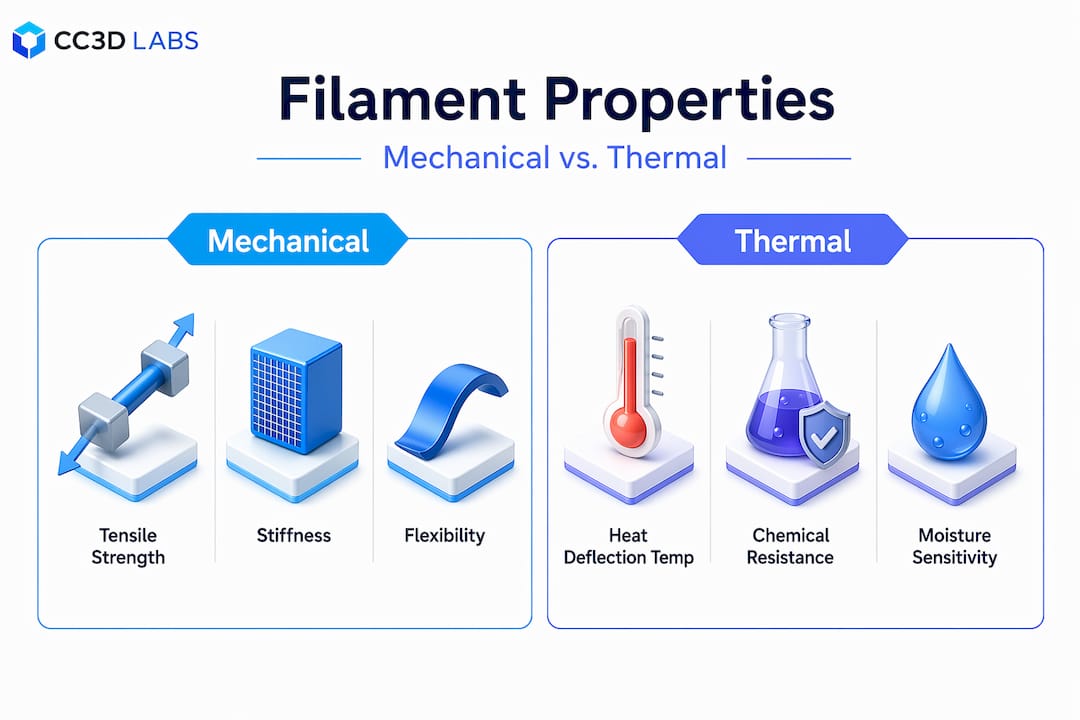
Infographic comparing mechanical and thermal filament properties

Mechanical properties that matter

Tensile strength tells you how much pulling force a part can take before it snaps. Stiffness, measured as elastic modulus, tells you how much it flexes under load. Toughness combines both into a measure of how much energy a part absorbs before fracturing. For engineers, toughness is often more useful than raw strength, especially for parts subject to impact or vibration.

Here is how common engineering filaments compare on key mechanical and thermal benchmarks:

Filament Tensile Strength (MPa) Heat Deflection Temp (°C) Best Use Case
PETG 50 80 Prototypes, housings
ABS 40 98 Interior structural parts
ASA 45 100 Outdoor structural parts
Nylon (PA12) 55 110 Wear parts, gears
Polycarbonate 65 130 High-load brackets
CF Reinforced 80+ 130+ Structural frames, jigs

Carbon fiber reinforced filaments deliver 2 to 3 times higher stiffness and heat deflection temperatures around 130°C compared to unfilled plastics. That gap matters when you are building jigs, fixtures, or any part that must hold dimensional tolerance under temperature cycling.

Thermal properties deserve equal attention. Heat deflection temperature (HDT) is the point at which a part begins to deform under load at elevated temperatures. Glass transition temperature (Tg) marks where the polymer structure softens. A housing printed in PETG with an 80°C HDT will warp inside a vehicle dashboard or near industrial heat sources. That failure is not a print defect. It is a material mismatch.

Technician testing 3D part heat resistance

Pro Tip: When specifying filaments for load-bearing parts, request the material’s datasheet from your supplier. Published HDT values tested under 0.45 MPa load are more conservative and more accurate for engineering use than values tested under 1.82 MPa.

Environmental resistance and filament choice

Knowing how a part performs in a lab is only half the picture. The environment where it will actually live determines whether a perfectly printed part survives a season outdoors, a chemical wash, or a humid warehouse.

The key environmental factors that should drive your filament selection are:

  • UV and weather resistance: ABS degrades noticeably under prolonged UV exposure. ASA filament provides superior UV and weather resistance, making it the go-to choice for outdoor parts that need to last years without significant degradation. It shares ABS’s strength and heat resistance while adding meaningful sunlight stability.
  • Chemical resistance: Nylon and polycarbonate can absorb certain solvents and degrade in acidic environments. PETG offers reasonable chemical resistance for many industrial cleaning agents. For aggressive chemical environments, check material-specific resistance charts before committing to a filament, or reference industrial pipe material guides to see how comparable polymers hold up in practice.
  • Moisture absorption: Nylon is highly hygroscopic. Uncontrolled moisture absorption does not just cause print failures. It directly degrades the mechanical properties of finished parts, reducing tensile strength and increasing brittleness over time. Parts printed from wet nylon are structurally compromised before they leave the printer.

Pro Tip: Dry nylon filament at 70 to 80°C for at least four hours before printing, and store it in a sealed container with desiccant. If you are running production quantities, an inline drying system attached to your printer feed is worth the investment.

For your outdoor parts selection, the Cc3dlabs guide covering outdoor-durable filaments breaks down the top material choices with real-world context.

Printability challenges with engineering filaments

Strong on paper does not mean easy to print. Engineering-grade filaments introduce processing requirements that general-purpose PLA users never encounter, and understanding those requirements before you start is how you avoid wasted prints and failed parts.

Here is the printability spectrum from accessible to highly specialized:

  1. PETG prints cleanly on most desktop FDM machines with a 230 to 250°C nozzle and a 70 to 85°C bed. Warping is minimal, and layer adhesion is reliable. It is the most accessible entry point for durable engineering parts.
  2. ABS and ASA require a heated enclosure to prevent warping, particularly on large footprint parts. Bed temperatures in the 100 to 110°C range and a consistent ambient temperature around 45 to 50°C are necessary for dimensional stability.
  3. Nylon needs a dry filament environment, high bed adhesion (PEI or garolite surfaces work well), and nozzle temperatures around 240 to 270°C depending on grade. Without proper drying, expect stringing, poor layer fusion, and degraded mechanical properties.
  4. Polycarbonate requires nozzle temperatures of 270 to 300°C and is highly prone to warping without an enclosed, heated chamber. It also absorbs moisture aggressively, so storage protocol matters.
  5. Carbon fiber composites need hardened steel or ruby-tipped nozzles. Standard brass nozzles wear out within a few hundred grams of CF-reinforced material. Carbon fiber reinforcement improves dimensional stability by locking the polymer matrix and reducing warping during cooling, which is a major advantage for complex or large parts.
  6. PEEK occupies its own category entirely. PEEK filaments require industrial-grade printers with nozzle temperatures between 360 and 450°C and bed temperatures from 120 to 160°C. Its use is only justified in extreme heat and chemical environments where no alternative material will hold up.

Bringing high-temperature filament capability in-house changes iteration economics significantly, shortening design-test-iterate cycles and reducing time-to-market for engineering teams working on complex assemblies.

Pro Tip: Before scaling a material to production volumes, run a print qualification test: print the same geometry in three separate batches from three separate spools. Variation between batches reveals supplier inconsistency before it becomes a production problem.

Cost-benefit analysis for filament selection

The sticker price of a filament spool is the least useful number in your cost analysis. What actually drives cost in filament-based engineering parts is the total cost of ownership: failed prints, post-processing time, rework rates, and iteration cycles.

Consider this comparison:

Filament Approx. Cost per kg Failure Rate (Est.) Best Total Cost Scenario
PETG $25 to $40 Low High-volume functional prototypes
Nylon PA12 $50 to $80 Medium (if wet) Gears, wear parts
Polycarbonate $60 to $100 Medium-High Structural load applications
CF Nylon $80 to $150 Low (with right setup) Stiff structural components
PEEK $200 to $400+ High without industrial hardware Extreme environments only

PETG is a pragmatic starting material for durable parts not exposed to extreme heat or chemicals. It combines printability with reasonable toughness and is widely available from consistent suppliers. For many functional parts, PETG delivers everything you need at a fraction of the cost of exotic materials.

The trap engineers fall into is over-engineering the material when the design is the actual problem. A polycarbonate bracket printed with poor layer adhesion will outperform nothing. A well-designed PETG bracket printed with optimal parameters will outlast a badly printed polycarbonate one every time.

Pro Tip: Before jumping to premium filaments, audit your print parameters and part design first. Most real-world failures in functional filament parts come from inadequate wall thickness, poor infill strategy, or moisture-degraded material, not from choosing the wrong polymer family.

Real-world applications across filament types

Theory becomes useful when you can connect it to specific parts solving specific problems.

  • Outdoor enclosures and mounting brackets: ASA is the clear choice. Engineering teams building antenna mounts, sensor housings, or outdoor junction boxes routinely use ASA to get ABS-level toughness without the UV degradation risk. Parts produced with ASA maintain structural integrity and color stability after years of direct sun exposure.
  • Wear-resistant sliding parts and bearings: The Igus Iglidur i190PF filament achieves wear rates 100 times lower than standard PETG, tested in a dedicated tribology laboratory against stainless steel. For lubrication-free bushings, guide rails, or any sliding contact application, this class of material changes what is achievable with FDM printing.
  • Structural prototypes and tooling jigs: Carbon fiber reinforced nylon or PETG delivers the stiffness needed for jigs, fixtures, and assembly aids. The dimensional stability under temperature cycling makes CF composites far more reliable than unfilled materials for production floor tooling, where tolerances matter every shift.
  • Functional prototypes bridging to production: PETG and ABS occupy a productive middle ground for prototype engineering parts where you need real mechanical behavior data without committing to expensive materials or processes. They print predictably, iterate quickly, and are cheap enough to run multiple design variants in a single day.

My take on filament selection in the real world

I have seen engineering teams spend weeks debating whether to use carbon fiber reinforced nylon versus PEEK for a bracket that operates at room temperature with a 20-pound static load. That debate was not an engineering decision. It was anxiety wearing the costume of rigor.

In my experience, the biggest mistake engineers make when selecting filaments is conflating material prestige with material fitness. The best filament for your part is the one that meets your mechanical, thermal, and environmental requirements at the lowest total cost with the highest print reliability. Full stop.

What I have found actually separates strong filament workflows from weak ones is not the material choice. It is the testing discipline. Teams that run small print qualification batches before committing to a material, that document their failure modes, and that track print parameters across suppliers iterate faster and waste far less than teams that treat every print as one-off experimentation.

Supplier quality is also wildly underrated. The same nominal filament from two different manufacturers can produce measurably different mechanical outcomes. Diameter consistency, moisture control during shipping, and formulation stability vary more than most engineers expect. Finding a reliable supplier and sticking with them across a project is a real process advantage.

Finally, building your material knowledge through deliberate iteration beats reading datasheets alone. Print the same geometry in three materials. Load test them. Break them. The result will tell you more than any specification document.

— Justin

How Cc3dlabs supports your engineering parts workflow

Working with engineering-grade filaments in-house is a significant capital and process investment. Cc3dlabs offers a ready alternative for teams that need production-quality filament parts without building the infrastructure from scratch.

https://cc3dlabs.com

From functional prototypes in PETG and ASA to advanced composite prints for structural applications, Cc3dlabs handles the material selection, process optimization, and quality validation so your team can focus on design. Their 3D printing services cover everything from single prototype prints to batch production runs, with fast turnaround and material guidance built into the engagement. If your project involves complex geometries, tight tolerances, or high-performance filament requirements, their team near Philadelphia offers both local pickup and shipping, backed by a track record of print accuracy that engineering applications demand. You can also explore how 3D printing drives product innovation to see where filament-based manufacturing fits in the broader product development picture.

FAQ

What filament is best for functional engineering parts?

The best filament depends on your specific load, temperature, and environmental conditions. PETG suits most prototypes and housings, while nylon, polycarbonate, and carbon fiber composites are better for higher-stress or high-temperature applications.

Why use filament instead of other manufacturing methods?

Filament-based 3D printing offers rapid iteration, low tooling cost, and the ability to produce complex geometries without fixturing. It is especially effective in early-stage development when design changes are frequent and speed matters more than per-unit cost.

How does moisture affect engineering filament parts?

Hygroscopic filaments like nylon absorb moisture from the air, which degrades both print quality and finished part strength. Drying filament before use and storing it with desiccant are non-negotiable steps for reliable engineering outcomes.

Is PETG strong enough for load-bearing parts?

PETG handles moderate loads well, with a tensile strength around 50 MPa and an HDT of roughly 80°C. For parts exposed to higher temperatures or impact forces, upgrading to polycarbonate or a carbon fiber reinforced filament delivers meaningfully better performance.

When does it make sense to use PEEK filament?

PEEK is justified only when a part must survive extreme heat above 200°C or aggressive chemical environments where no other filament will hold up. Its processing demands and cost make it impractical for most standard engineering applications.

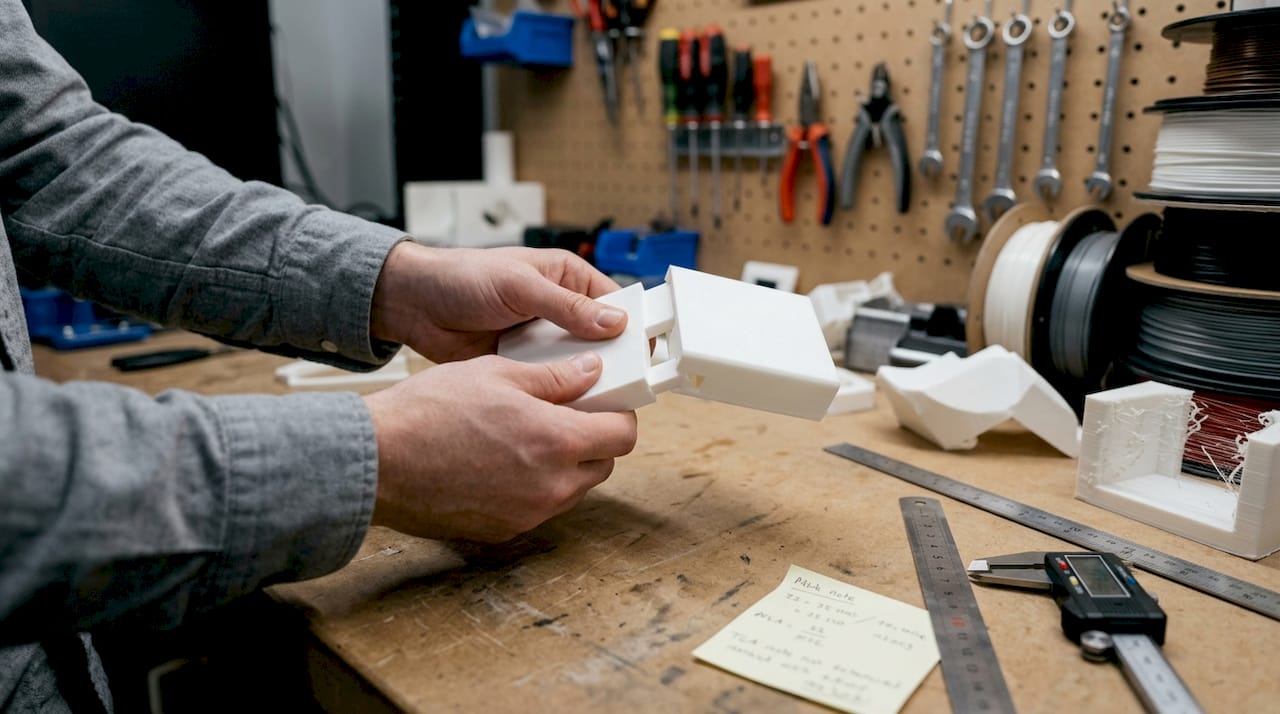
Engineer checks filament tolerance with calipers

Custom filament printing guide: precision for prototypes


TL;DR:

  • Filament diameter tolerance of ±0.02mm ensures consistent, professional-grade 3D printing results.
  • Proper material choice, printer calibration, and controlled environment are crucial for accuracy and repeatability.
  • Systematic verification and measurement across batches prevent variability and enhance manufacturing reliability.

Even a 0.05mm variation in filament diameter can push a prototype over tolerance, trigger failed prints, and delay your product launch by days or weeks. For product developers and small manufacturing teams, that is not a minor inconvenience. It is a real business cost. ±0.02mm filament tolerance is the benchmark separating consistent, professional-grade output from frustrating batch failures. This guide walks you through every stage of custom filament printing, from material selection and printer setup to parameter tuning and quality verification, so you can produce parts that hold tolerance and hold up under real-world conditions.

Table of Contents

Key Takeaways

Point Details
Choose the right filament Proper filament type and tolerance are the foundation for consistent, successful prints for prototypes and production.
Calibrate and control environment Printer calibration and environmental controls are just as critical as material choice for avoiding common failures.
Optimize print parameters Fine-tuning orientation and slicer settings can dramatically boost part strength and accuracy.
Verify print quality Regular, measured quality checks catch inconsistencies early, ensuring confidence in every print run.
Expert help accelerates results Partnering with a specialized 3D printing service speeds up learning, minimizes costly mistakes, and delivers reliable prototypes.

Understand filament types and requirements

Choosing the right filament is not just about matching color to your brand palette. Material selection determines whether your functional prototype survives a stress test, fits into an assembly, or ships with consistent surface quality across a batch. Getting this decision right upfront saves you rework time and material cost.

Core filament types and where they fit:

  • PLA: Easy to print, dimensionally stable, ideal for concept models and display prototypes. Not suited for heat or mechanical stress.
  • PETG: Balances strength and printability. Great for functional parts, but it is hygroscopic and requires drying before use to avoid bubbles and stringing.
  • ABS: Tough and heat-resistant, essential for functional housings and mechanical parts. Needs an enclosure to prevent warping.
  • Nylon: High impact resistance and flexibility, but absorbs moisture aggressively. Drying is non-negotiable.
  • Carbon fiber, glow-in-the-dark, and metal-filled filaments: Abrasive composites that demand hardened steel nozzles, or you will wear through a standard brass nozzle within hours.
Filament Enclosure needed Drying required Nozzle type
PLA No Rarely Brass
PETG Optional Yes Brass or hardened
ABS Yes Rarely Brass
Nylon Yes Yes Hardened steel
Carbon fiber Yes Yes Hardened steel

Tolerance matters more than most developers realize. A filament rated at ±0.02mm produces under 1% volumetric variation, keeping flow rates consistent across long print runs. Once you step down to ±0.05mm, you are looking at nearly 3% volumetric swing, which shows up as over-extrusion on some layers and under-extrusion on others. You can find more material-specific advice in our prototyping filament guide or dig into a side-by-side breakdown with PLA vs PETG vs ABS.

Color additives also affect printability. Dark pigments, particularly black, absorb more heat and may require a slightly lower temperature than a natural or white version of the same material. Always run a temperature tower when switching colorways on a critical production run.

Pro Tip: Store all hygroscopic filaments in sealed containers with silica gel desiccant between print sessions. Even a few hours of open-air exposure in a humid environment can ruin a spool of Nylon or PETG.

Set up your printer for custom filament printing

Once your material is chosen, your printer and workspace need matching attention. A well-selected filament will still produce poor results if the hardware delivering it is out of calibration or operating in an uncontrolled environment.

Start with these setup steps in order:

  1. Level the print bed. A bed that is even 0.1mm off across its surface will cause adhesion failures on the first layer, which cascades into every layer above it.
  2. Clean the hot end. Residual material from a previous filament run causes contamination, especially when switching from a high-temperature material to a lower-temperature one.
  3. Check the extruder tension. Too tight and you grind the filament. Too loose and steps are skipped. Both cause inconsistent flow.
  4. Calibrate your extruder steps per mm. Mark 100mm of filament, extrude it, and measure what actually moved. Adjust until the numbers match.
  5. Set nozzle diameter to match your job. Abrasive filaments require a hardened nozzle. Standard brass erodes fast under carbon fiber or metal-filled materials.

Environment matters too. ±0.05mm diameter variation creates a 2.8% volumetric swing that no software setting can fully compensate for, but ambient temperature swings make things worse. ABS requires a fully enclosed printer to maintain a consistent chamber temperature and prevent warping from drafts. Hygroscopic materials need controlled humidity both in storage and during printing.

A stable printer in a controlled workspace produces more consistent results than a high-end machine sitting in a drafty, humid shop floor. Environment is not optional.

Printer check What to look for Tool needed
Bed level Even first layer adhesion Feeler gauge or probe
Extruder calibration 100mm extrusion accuracy Ruler or calipers
Hot end cleanliness No residue or discoloration Cold pull or cleaning filament
Nozzle condition No erosion on tip Visual inspection

For batch production specifically, you will want to build a pre-run checklist. Our low-volume manufacturing tips walk through setup routines designed to keep quality consistent across dozens of parts. If you are deciding between printer types for your workflow, choosing the right printing type covers that decision in detail.

Pro Tip: Run a small calibration cube before every new filament spool or environmental change. It takes five minutes and tells you immediately if something has drifted.

Woman calibrates 3D printer for new filament

Optimize print parameters for strength and accuracy

Once hardware is ready, fine-tuning print parameters maximizes your results. Slicer settings are where most developers either gain or lose the edge on part performance.

Orientation is the most underestimated variable in filament printing. FDM parts are anisotropic, meaning they are stronger along the layer plane than perpendicular to it. Placing a part so its primary load axis runs parallel to the print bed increases stiffness dramatically. Parameter optimization, including orientation and layer height adjustments, has been shown to boost part stiffness by 81 to 128%. That is not a marginal gain. It is the difference between a prototype that passes mechanical testing and one that snaps during the first use cycle.

Follow this sequence when dialing in parameters for a new job:

  1. Set orientation first. Analyze load direction and place the strongest axis in line with expected stress.
  2. Choose layer height. Thinner layers (0.1mm to 0.15mm) improve surface detail and interlayer bonding for functional parts. Thicker layers (0.2mm to 0.3mm) speed up prototyping when detail is less critical.
  3. Tune temperature. Advanced materials like PETG and Nylon run hotter and benefit from a temperature tower to find the sweet spot for flow and layer adhesion without stringing.
  4. Set print speed. Slower speeds improve accuracy. For precision prototypes, drop below 40mm/s on perimeters.
  5. Adjust cooling. PLA needs active cooling. ABS and Nylon need minimal or no cooling to prevent layer delamination.

Black filaments deserve a specific note. Because of their higher heat absorption, black variants of the same base material often need a temperature reduction of 5°C to 10°C compared to neutral colors. Skipping this step leads to over-melting and oozing on fine features.

For guidance on building print-ready geometry that supports these parameters, our resource on designing reliable prints and optimizing your CAD workflow are worth your time before you hit slice.

Pro Tip: Never rely on a slicer’s default profile for a production run. Always run a first-article part with your specific filament, nozzle, and environment before committing to a full batch.

Quality verification and troubleshooting

With parameters optimized, assess and fix your results for business-grade consistency. Printing one good part is not the goal. Printing forty identical good parts is.

Start with visual inspection on every part:

  • Layer lines: Should be uniform in height and spacing. Inconsistent lines point to extruder slippage or filament diameter variation.
  • Wall smoothness: Rough or pitted walls signal moisture in the filament or a clogged nozzle.
  • Color consistency: Streaks or shade shifts mid-print indicate contamination or temperature instability.

After visual checks, measure. Use calipers to verify critical dimensions against your CAD model. Tolerance variations at ±0.02mm create under 1% dimensional error, while ±0.05mm filament pushes that beyond 2.8%. For parts going into assemblies, even 0.1mm of deviation can mean a misfit. Document your measurements across each batch so you can track drift over time.

Iteration is not failure. Running three calibration parts before a 50-piece batch is a quality investment, not wasted material.

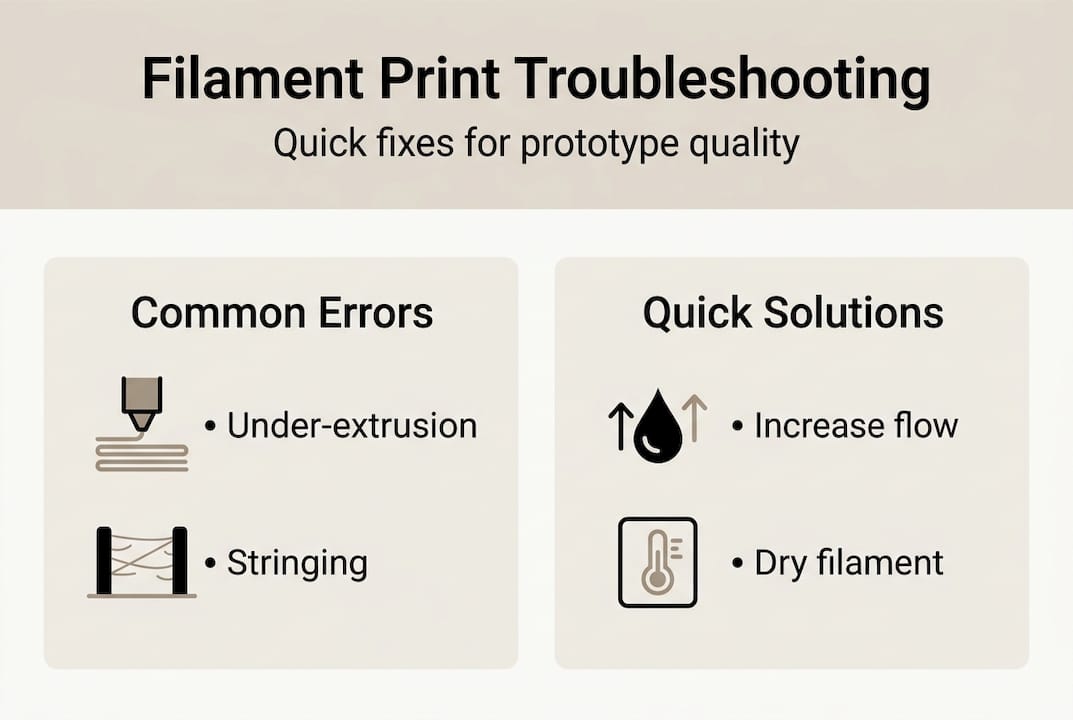
Common error Symptom Solution
Under-extrusion Thin walls, gaps in layers Increase flow rate, check extruder tension
Over-extrusion Blobbing, rough surfaces Reduce flow rate or temperature
Warping Lifted corners Use enclosure, increase bed adhesion
Stringing Fine threads between features Increase retraction, reduce temperature
Layer delamination Cracks between layers Increase temperature, reduce cooling

Infographic with filament troubleshooting and solutions

For visual references of what precision output actually looks like at each stage, our prototype quality examples show real parts printed to specification.

Why most guides miss what actually matters in custom filament printing

Most online guides focus on slicer profiles and temperature charts. Those things matter, but they are not the ceiling. The real ceiling for manufacturing reliability is filament consistency and systematic verification across batches.

Here is what experience teaches you: even a premium slicer profile running on a well-calibrated machine cannot compensate for a filament spool with inconsistent diameter. If the material feeding into your nozzle varies by 0.05mm or more throughout the spool, your flow rate fluctuates regardless of your settings. You can tune all day and still see surface variation on parts 20 and 40 that looked fine on parts 1 and 2.

The second thing most guides skip is the difference between a successful single print and a repeatable process. For a product developer or small manufacturer, repeatability is everything. One good prototype means little if your next run of 30 parts has visible variation. Build a verification step into every run. Measure early, measure often, and document what you find. That process discipline is what separates hobbyist output from professional manufacturing output.

Our additional prototyping strategies go deeper into building that kind of repeatable workflow.

Take your custom filament printing further with CC3DLabs

If you are hitting the limits of what in-house printing can deliver for precision, batch consistency, or advanced materials, working with an experienced team changes the equation.

https://cc3dlabs.com

At CC3D Labs, near Philadelphia, we specialize in custom filament-based 3D printing for product developers and manufacturing teams who need parts that perform, not just parts that look right on a screen. Our 3D printing services cover everything from single prototypes to production runs, with material expertise and quality verification built into every job. Want to know what is possible before you commit? See our printing capabilities and browse real-world prototype case studies to see the standard we hold our work to. Reach out for a free estimate and let us help you get it right the first time.

Frequently asked questions

What is the ideal filament tolerance for precision 3D printing?

A filament diameter tolerance of ±0.02mm delivers the best print consistency for prototypes and low-volume manufacturing, keeping volumetric variation under 1%.

Why do some filaments require drying before printing?

Hygroscopic filaments like PETG and Nylon absorb moisture from the air, which causes bubbling, poor layer adhesion, and stringing unless the material is thoroughly dried before printing.

How does orientation impact 3D printed part strength?

Optimizing part orientation during slicing aligns the strongest axis with the load direction, with research showing stiffness improvements of up to 128% compared to default orientations.

How do you check if your print is accurate?

Measure critical dimensions with calipers and compare them to your CAD model. Tolerance variations above ±0.05mm can push dimensional error past 2.8%, which is unacceptable for assembly-fit parts.

Engineer reviewing 3D printed prototype at workbench

Filament-based prototype examples for high-quality 3D printing


TL;DR:

  • Proper filament selection and print parameter tuning are critical for functional prototype performance.
  • Continuous fiber composites significantly enhance strength but require specialized equipment.
  • Optimized settings for PLA variants yield stronger, more ductile, and application-specific prototypes.

Picking the right filament-based prototype for a functional part is harder than it looks. The wrong material or a poorly tuned print setup can mean a prototype that looks fine on the surface but fails under real load conditions. With so many filament options and FDM process variables in play, product developers and small manufacturing teams need more than gut instinct. They need evidence-backed comparisons. This article breaks down four real-world prototype examples, from continuous fiber composites to medical-grade PLA parts, with the specs, print settings, and performance data you need to make a confident decision.

Table of Contents

Key Takeaways

Point Details
Material optimization matters Fine-tuning FDM parameters and material choice directly affects prototype durability and performance.
High-strength examples Continuous fiber PLA/glass fiber prototypes deliver industry-leading mechanical strengths for demanding applications.
Functional versatility PLA PRO1 and PLA-CF composites enable fit-testing, small-batch manufacturing, and structural prototyping with tailored print settings.
Medical-grade potential FDM-printed PLA parts, such as acetabular liners, meet load and quality requirements for medical and engineering uses.

Criteria for selecting filament-based prototypes

Before you pick a filament, you need a clear framework. Not every prototype has the same job, and the criteria that matter for a structural bracket are very different from those for a medical implant analog or a fit-test housing.

Mechanical strength is usually the first filter. You want to know a material’s tensile strength (how much pulling force it can handle before breaking), flexural strength (resistance to bending), and load-bearing capacity under static or dynamic stress. These numbers directly predict whether a prototype will survive real-world testing.

Application-specific requirements come next. Functional prototypes used in product validation need different properties than structural components or medical device analogs. A jig for an assembly line needs rigidity and repeatability. A surgical guide needs dimensional accuracy and biocompatibility. Knowing your application narrows the field fast.

FDM process parameters are often underestimated. The same material can produce dramatically different results depending on how you print it. The key variables include:

  • Extruder temperature (typically 190 to 230°C depending on material)
  • Bed temperature (affects adhesion and warping)
  • Print speed (slower usually means better layer bonding)
  • Infill percentage (higher infill increases density and load capacity)
  • Raster orientation (the angle of each layer relative to the load direction)

Optimized FDM parameters maximize tensile strength and deliver superior mechanical properties for functional prototypes. That finding reinforces something we see constantly: process tuning is not optional if you want reliable results.

Print quality metrics like porosity, surface finish, and ductility also matter. High porosity weakens a part internally even when the outer surface looks clean. Ductility determines whether a part bends before it breaks, which is critical for parts under cyclic or impact loads.

When choosing filament types, always map your mechanical requirements to both material properties and print settings together. One without the other leaves performance on the table.

Pro Tip: Before ordering a prototype run, define your minimum acceptable tensile strength and surface finish tolerance. These two numbers alone will eliminate most material mismatches before you spend a dollar.

Continuous fiber reinforced PLA/glass fiber prototypes

If your prototype needs to handle serious mechanical stress, continuous fiber reinforced PLA/glass fiber filaments are worth a close look. These are not standard PLA parts with a little filler mixed in. They are engineered composites where continuous glass fiber strands run through the printed part, dramatically changing how it behaves under load.

The performance numbers back this up. Tensile strength of 146.75 MPa and a Young’s modulus of 4.95 GPa have been achieved using a custom FDM setup at just 2.8% fiber volume. For context, standard PLA typically tops out around 50 to 65 MPa tensile strength. That is more than double the performance from a filament that is still fundamentally printable on an FDM machine.

“Continuous fiber reinforced PLA/glass fiber filaments produced via custom FDM setup achieve tensile strength approaching 150 MPa (a continuous-fiber laboratory result — not typical of standard chopped-fiber filaments) and Young’s modulus of 4.95 GPa at 2.8% fiber volume.”

This makes these composites ideal for rapid prototyping applications in demanding industries. Common use cases include:

  • Automotive: Brackets, clips, and structural housings that need to survive vibration and thermal cycling
  • Aerospace: Lightweight structural analogs for fit and form validation
  • Medical devices: Rigid components that need to hold precise geometry under load

The trade-off is real, though. Printing continuous fiber composites requires a specialized FDM setup. Standard desktop printers cannot handle the fiber feed system. The material cost is also higher than commodity PLA. For small teams, this means either investing in the right equipment or partnering with a service provider that already has it.

The rigidity of these parts is a key advantage. A high Young’s modulus means the part resists deformation under stress, which is exactly what you want when a prototype needs to behave like the final production part during testing.

Optimized PLA PRO1 prototype parts

Not every prototype needs continuous fiber reinforcement. For functional housings, fit-test parts, and small-batch production components, PLA PRO1 printed with optimized FDM parameters delivers excellent results at a much lower cost and complexity.

PLA PRO1 is a modified PLA formulation designed for better toughness and layer adhesion compared to standard PLA. The key is dialing in the right process settings. Here is what the research supports:

  1. Extruder temperature: 200 to 220°C
  2. Bed temperature: 40 to 60°C
  3. Print speed: 50 to 60 mm/s
  4. Infill percentage: 30 to 70% depending on load requirements
  5. Layer height: 0.1 to 0.2 mm for a balance of speed and surface quality

Higher infill yields ductile fracture and superior mechanical properties in PLA PRO1 parts. This is a meaningful finding. Ductile fracture means the part deforms visibly before it breaks, giving you a warning rather than a sudden catastrophic failure. For functional prototypes under test loads, that behavior is far safer and more informative.

“Optimized FDM parameters for Ultrafuse PLA PRO1 maximize tensile strength, with higher infill yielding ductile fracture and superior mechanical properties.”

Practical applications for optimized PLA PRO1 prototypes include enclosures for electronics, snap-fit assemblies, ergonomic test parts, and low-volume production housings. The material is forgiving enough for iterative design cycles but strong enough for real functional validation.

Technician testing 3D printed snap-fit assembly

Our filament printing guide covers how to set up your files for the best results, and if you want to understand how to structure your print job optimization for a specific application, that resource walks through the decision points clearly.

Pro Tip: Run a small test matrix before committing to a full prototype batch. Print three samples at 30%, 50%, and 70% infill and do a simple bend test. The difference in ductility is immediately visible and will guide your final setting choice.

PLA-CF composite prototypes for structural applications

PLA-CF composites, meaning PLA reinforced with short chopped carbon fiber, sit between standard PLA and continuous fiber composites in terms of performance and complexity. They are printable on modified FDM machines without a full fiber-feed system, yet they deliver significantly better stiffness and flexural strength than plain PLA.

The numbers are compelling. PLA-CF composites achieve 81 MPa flexural strength when optimized using Taguchi methods, with raster orientation and layer thickness identified as the most influential variables. That flexural strength makes these parts well-suited for jigs, brackets, and load-bearing structural prototypes.

The optimal settings for maximum flexural performance are:

  • Raster orientation: 0 degrees (aligned with the primary load direction)
  • Layer thickness: 0.1 mm
  • Nozzle temperature: 210°C
  • Print speed: 30 mm/s

Here is a quick comparison of PLA-CF versus PLA PRO1 for structural prototype applications:

Property PLA PRO1 (optimized) PLA-CF (optimized)
Primary strength metric Tensile (ductile) Flexural (rigid)
Best application Functional housings, fit parts Jigs, brackets, structural parts
Print complexity Standard FDM Modified FDM (hardened nozzle)
Surface finish Smooth Slightly textured
Cost per part Lower Moderate

For teams working on assembly fixtures, tooling aids, or parts that must resist bending loads without deflecting, PLA-CF is the stronger choice. The workflow optimization required for carbon fiber filaments, particularly using a hardened steel nozzle, is a one-time setup cost that pays off across many print runs.

Medical and engineering prototypes: PLA acetabular liners

FDM-printed PLA acetabular liners represent one of the most demanding prototype applications in this comparison. An acetabular liner is the cup-shaped component in a hip replacement that sits between the femoral head and the pelvis. Printing a functional analog of this part requires both dimensional precision and meaningful mechanical performance.

The results from optimized FDM settings are striking. PLA acetabular liners reach 51 MPa UTS and a Young’s modulus of 3400 MPa, supporting loads equivalent to a 90 kg patient with reduced porosity. These are not cosmetic models. They are functional engineering prototypes.

The print settings that achieve these results:

Parameter Setting
Nozzle temperature 210°C
Print speed 30 mm/s
Layer thickness 0.1 mm
Raster orientation 0 degrees

Key performance outcomes from this setup:

  • UTS: 51 MPa
  • Young’s modulus: 3400 MPa
  • Load capacity: 90 kg static load
  • Porosity: Significantly reduced compared to non-optimized prints

The overlap with PLA-CF settings is not a coincidence. Slow print speeds, thin layers, and aligned raster orientation consistently produce denser, stronger parts across multiple materials. Understanding the 3D printing terminology behind these parameters helps you communicate clearly with your print service provider and get consistent results. For a broader view of how these settings apply across materials, the prototype guide is a useful reference.

Our perspective: Rethinking how to choose filament-based prototypes

Here is something most product teams get wrong: they treat material selection as the primary decision and process settings as an afterthought. The evidence in this article tells a different story. The same PLA material printed at different infill levels, temperatures, or raster orientations produces parts that behave like entirely different materials under load.

Small teams have a real advantage here. You can iterate faster, test more parameter combinations, and apply prototyping insights directly to your specific application without the bureaucratic overhead of a large organization. The teams that win are not the ones with the most expensive filament. They are the ones that treat FDM settings as an engineering variable, not a default checkbox.

Our recommendation: document your process settings for every prototype run. When a part performs well, you need to know exactly why so you can reproduce it. When it fails, the same documentation tells you where to adjust.

Get high-quality filament-based prototypes from CC 3D Labs

Applying these insights to your next prototype run requires more than a good article. It requires the right equipment, calibrated processes, and someone who has already worked through the parameter optimization for the materials that matter to your project.

https://cc3dlabs.com

At CC 3D Labs, we bring that experience directly to your parts. Our 3D printing services cover the full range of filament-based prototypes discussed here, with process expertise tailored to functional and structural applications. Not sure what your design can handle? Explore what can be printed on our platform, or go straight to printing on demand for a fast, flexible path from CAD file to finished prototype. We serve product developers and small manufacturing teams locally near Philadelphia and ship nationally.

Frequently asked questions

What are the mechanical strengths of continuous fiber PLA/glass fiber prototypes?

They can achieve a tensile strength approaching 150 MPa (a continuous-fiber laboratory result — not typical of standard chopped-fiber filaments) and a Young’s modulus of 4.95 GPa at 2.8% fiber volume, making them suitable for high-performance automotive, aerospace, and medical applications.

Which print settings optimize PLA PRO1 prototype performance?

Use extruder temperatures of 200 to 220°C, bed temperatures of 40 to 60°C, speeds of 50 to 60 mm/s, and infill between 30 to 70% for best tensile strength and ductile fracture behavior.

How do PLA-CF composites compare in flexural strength?

PLA-CF composites achieve up to 81 MPa flexural strength with optimized raster orientation and 0.1 mm layer thickness, outperforming standard PLA in bending-critical structural applications.

Can FDM-printed PLA prototypes be used in medical applications?

Yes. PLA acetabular liners printed with optimal FDM settings support 90 kg loads with a UTS of 51 MPa and a Young’s modulus of 3400 MPa, demonstrating real functional potential for medical device prototyping.

Engineer watches filament 3D printer in workshop

Filament 3D printing: Guide for prototyping success


TL;DR:

  • Filament 3D printing is a versatile and capable rapid prototyping platform, not just a hobbyist tool.
  • Proper optimization of materials, design orientation, and parameters can produce strong, functional parts suitable for engineering use.
  • Expert support and understanding of process fundamentals can significantly improve print quality and part performance.

Filament 3D printing gets dismissed as a hobbyist tool far too often. That reputation is outdated and, frankly, costly for any engineer or product developer who buys into it. When you understand the mechanics, material science, and parameter logic behind this process, it becomes one of the most capable rapid prototyping platforms available. This article walks you through how the process works, the complete production workflow, how to choose the right material, how design decisions affect part strength, and how to troubleshoot the most common failures that slow teams down.

Table of Contents

Key Takeaways

Point Details
Layer-by-layer process Filament 3D printing forms objects from melted thermoplastic extruded and fused in sequential layers.
Material selection matters Different filaments like PLA, ABS, and reinforced composites deliver unique properties for prototyping and production.
Design and settings impact strength Orientation, infill, and printing parameters determine mechanical performance and reliability of parts.
Troubleshooting addresses defects Careful adjustment of temperature, retraction, and moisture solves common printer issues like stringing and warping.
FDM is underrated With thoughtful optimization, filament 3D printing rivals high-end methods for low-volume functional prototypes.

How filament 3D printing works

At its core, filament 3D printing is a layer-by-layer extrusion process using heated thermoplastic. A spool of solid plastic filament feeds into a heated nozzle, melts, and gets deposited onto a build platform in precise paths. Each deposited layer fuses to the one below it, and the object builds up from the bottom. It sounds simple. The engineering behind it is anything but.

The nozzle diameter controls resolution and throughput. Standard sizes range from 0.2mm for fine detail work up to 0.8mm for fast structural prints. Layer heights typically fall between 0.1mm and 0.3mm, and print speeds run from 30mm/s for precision work to 100mm/s for draft parts. These three variables interact constantly, and tuning them for your specific material and geometry is where real control begins.

Understanding the 3D printing hardware components helps you make better decisions at every stage. The key hardware breaks down like this:

  • Extruder: Drives the filament forward. Direct drive extruders sit on the printhead and give better control over flexible materials. Bowden setups place the motor remotely, reducing moving mass for faster speeds.
  • Hotend: Melts the filament at a controlled temperature. The heat break separates the melt zone from the cold zone to prevent jamming.
  • Build platform: The surface where parts form. Heated beds reduce warping on materials like ABS and PETG.
  • Motion system: Controls printhead movement in X, Y, and Z axes. CoreXY and bed-slinger configurations each have speed and accuracy trade-offs.

Key components include the extruder, hotend, build platform, and motion system, and each one influences print quality in ways that compound quickly. A well-calibrated machine with mediocre filament will outperform a premium machine running wet or off-spec material every time.

Hand adjusting 3D printer hotend on bench

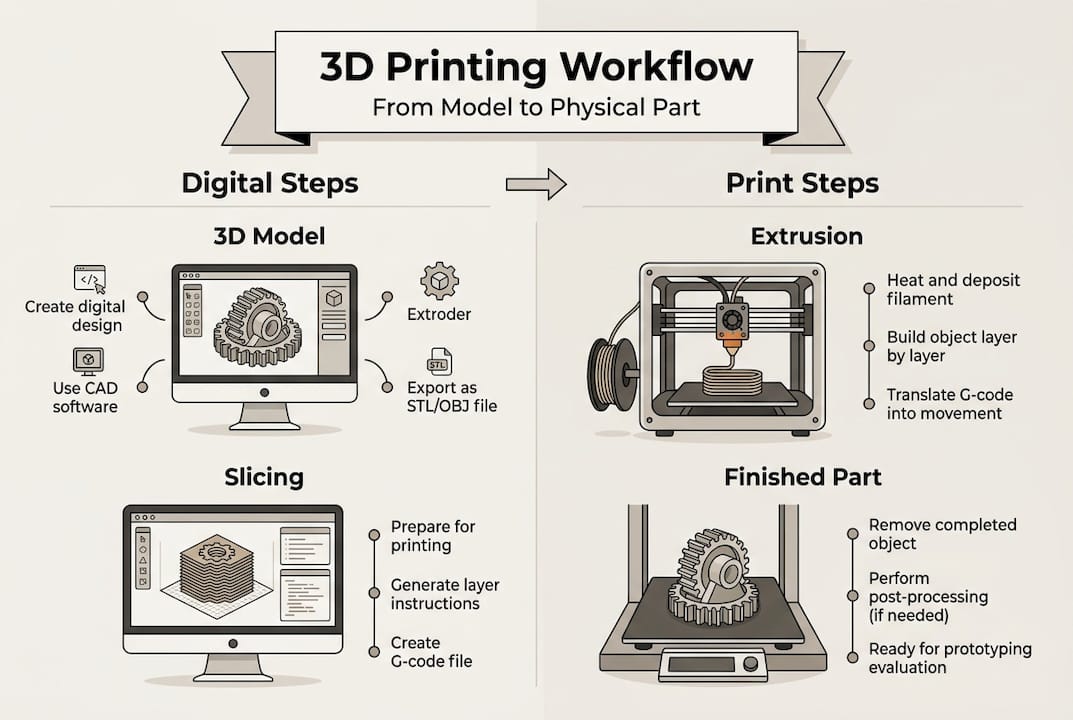
The FDM extrusion process follows a logical sequence: model creation, slicing into toolpaths, filament extrusion through the nozzle, and layer-by-layer deposition until the part is complete. Each step has failure points. Knowing where they are is the first step to avoiding them.

Parameter Typical range Effect on output
Nozzle diameter 0.2 to 0.8mm Detail vs. speed
Layer height 0.1 to 0.3mm Surface quality vs. print time
Print speed 30 to 100mm/s Accuracy vs. throughput
Bed temperature 0 to 110°C Adhesion and warping control

With fundamentals established, it’s important to understand the typical workflow for engineers using filament 3D printing.

The complete workflow: From digital model to physical part

The workflow involves creating a 3D model in STL or OBJ format, slicing it into G-code, feeding filament, melting and extruding, and depositing layers until the part is complete. Each step has real decisions attached to it.

  1. Model creation: Your part starts in CAD software. SolidWorks, Fusion 360, and Onshape are common choices for engineering-grade work. Export as STL or OBJ. Choosing best CAD file formats for your workflow matters more than most engineers realize, especially when tolerances are tight.
  2. Slicing: Import your model into slicing software like Cura or PrusaSlicer. The slicer converts geometry into G-code, the machine-readable instruction set that tells the printer exactly where to move, how fast, and at what temperature. This is where you set layer height, infill, supports, and wall count.
  3. Printer preparation: Load your filament, confirm bed leveling, and set your temperature profiles. A poorly leveled bed is one of the most common causes of first-layer failure. Most modern printers offer automatic mesh bed leveling, but manual verification still matters for critical prints.
  4. Extrusion and deposition: The printer executes the G-code. The nozzle traces each layer path while depositing molten plastic. Cooling fans solidify each layer before the next one lands on top.
  5. Post-processing: Remove the part, strip supports, and inspect. Depending on your application, you may sand, prime, or perform secondary machining.

The filament extrusion process details show how tightly each step connects to the next. A poor model creates slicer problems. A bad slice creates print failures. A miscalibrated printer wastes both.

Pro Tip: Always dry hygroscopic filaments like Nylon and PETG before printing. Even a few hours of ambient exposure causes moisture absorption, which shows up as bubbling, rough surfaces, and inconsistent extrusion. A food dehydrator at 65°C for four hours works well. Also tune retraction carefully, typically 0.5 to 6mm depending on your extruder type, to eliminate stringing between features.

With the workflow clear, the choice of filament material is a critical next step for prototyping and production.

Choosing the right filament material: Options and trade-offs

Common materials include PLA, ABS, PETG, TPU, Nylon, PC, and carbon fiber composites, and each one brings a different set of properties to the table. Picking the wrong one for your application costs time and money.

Material Strength Heat resistance Ease of use Best for
PLA Moderate Low (50-60°C) Very easy Visual prototypes, concept models
ABS Good Moderate (80-100°C) Moderate Functional housings, enclosures
PETG Good Moderate (70-80°C) Easy Food-safe parts, mechanical use
TPU Flexible Low to moderate Moderate Gaskets, grips, flexible components
Nylon High High (120°C+) Difficult Load-bearing, wear parts
PC Very high Very high (130°C+) Difficult Structural, high-temp applications
Carbon fiber composite Very high High Moderate Lightweight structural parts

For early-stage concept models, PLA is hard to beat. It’s cheap, easy to print, and produces clean surfaces for stakeholder reviews. The moment your prototype needs to survive real-world loads, temperatures, or chemical exposure, you need to move up the material stack.

Infographic 3D printing workflow step overview

For a deeper breakdown, the material comparison guide covers mechanical properties in practical terms. If your parts will live outdoors, the outdoor filament options page is worth reviewing before you commit to a material.

The FDM material guide reinforces that material selection is application-driven, not preference-driven. Key considerations:

  • Thermal environment: Will the part see temperatures above 60°C? PLA will fail. PETG, ABS, Nylon, or PC are better choices.
  • Mechanical loading: Static display or dynamic stress? Nylon and carbon fiber composites handle cyclic loads far better than PLA.
  • Chemical exposure: Oils, solvents, moisture? PETG and Nylon resist many common chemicals.
  • Print difficulty: Tight deadline, limited calibration time? Stick to PLA or PETG.

Pro Tip: For functional low-volume parts, carbon fiber reinforced filaments and PC deliver the best strength-to-weight performance. Always dry these materials before printing, as moisture ruins dimensional accuracy and surface quality in high-performance filaments far faster than it does in PLA.

Knowing your material options, the next consideration is how design and print parameters impact the finished part’s properties.

Design and print parameters: Impact on strength and quality

Parts are anisotropic, meaning build orientation and infill pattern critically affect mechanical properties. This is the single most important concept for engineers to internalize before designing for filament printing.

Anisotropy means your part is not equally strong in all directions. Layers bond well within the XY plane but the Z-axis bond between layers is always the weak point. A part loaded perpendicular to its layers will fail earlier than one loaded parallel to them. Design with this in mind from the start.

“70 to 100% infill maximizes mechanical properties. PLA achieves ultimate tensile strength of 38 to 47 MPa at print temperatures of 195 to 220°C.”

Infill pattern and density directly control internal strength. Common options:

  • Gyroid: Excellent for isotropic strength and fluid flow applications.
  • Triangle: Efficient for flat load distribution.
  • Octet: High stiffness, good for structural brackets and fixtures.
  • Grid: Fast to print, adequate for non-critical parts.

Orientation is a design decision, not a printer setting. When you design a load-bearing bracket, orient it so the primary load path runs along the XY plane. Avoid thin vertical walls in the Z direction for structural parts.

For parameter tuning, use a design of experiments (DOE) approach. Vary one parameter at a time: temperature, speed, cooling, and wall count. Print small test coupons before committing to a full run. This saves material and time.

Choosing the right print type for prototypes depends heavily on these parameters. For parts that need to meet real performance specs, engineering-grade prints with optimized settings are the right call. The anisotropy and infill effects on finished parts are well-documented and should drive your parameter choices.

Finally, understanding common printing challenges and how to resolve them is critical for achieving consistent results.

Troubleshooting and optimizing: Common pitfalls and solutions

Stringing, oozing, diameter variance, humidity, and warping are the most common failure modes in filament printing. Each has a clear cause and a clear fix.

  1. Stringing and oozing: Caused by excess heat or insufficient retraction. Reduce print temperature by 5 to 10°C and increase retraction distance. Travel speed also matters. Faster travel gives the molten plastic less time to drip.
  2. Under-extrusion: Usually a partial clog, worn drive gear, or incorrect flow rate. Check filament diameter. Ideal tolerance is ±0.02mm. A filament that measures 1.78mm instead of 1.75mm will cause consistent under-extrusion.
  3. Over-extrusion: Too much material per move. Calibrate your extruder steps-per-mm and run a flow rate test before printing functional parts.
  4. Warping on large parts: Heated bed, enclosure, and brim settings all help. ABS and Nylon are the worst offenders. A 100 to 110°C bed and enclosed build chamber reduce warping significantly.
  5. Moisture-related defects: Bubbling, rough surfaces, and weak layers all point to wet filament. Dry your spools before every critical print run.

For stringing solutions, the fix is almost always a combination of temperature reduction and retraction tuning. For on-demand print troubleshooting, working with an experienced service provider eliminates most of these variables before your parts even start printing.

Pro Tip: Small parameter tweaks solve most problems. A 5 to 10°C temperature drop, a retraction adjustment of 0.5 to 6mm, and a travel speed increase of 20mm/s will resolve the majority of stringing and surface quality issues without requiring a full recalibration.

Why filament 3D printing is underestimated for functional prototyping

Most engineers who write off filament printing for functional work have never actually optimized it. They ran a part at default settings, saw weak layer lines, and moved on. That’s a methodology failure, not a technology failure.

FDM is best for low-volume functional prototypes when strength is prioritized through deliberate design choices. The teams that get real value from filament printing treat it like any other manufacturing process: they design for its constraints and exploit its strengths.

The biggest missed opportunity is ignoring anisotropy at the design stage. When you orient parts correctly, use reinforced filaments, and dial in wall thickness and infill, the results surprise people. We have seen carbon fiber PETG parts replace machined aluminum fixtures in low-load applications. That is not a fluke. It is the result of treating parameter optimization seriously.

Rapid iteration is where filament printing genuinely has no peer at the early hardware stage. You can go from a revised CAD file to a testable part in hours. No tooling, no lead time, no minimum order. For print terminology for engineers who are new to this space, understanding the vocabulary of the process is the first step toward using it strategically.

Pro Tip: Incorporate thicker perimeter walls (3 to 5 shells), use gyroid or octet infill at 40 to 60%, and always dry your filament. Those three changes alone can double the effective strength of a printed functional prototype.

Get expert support for filament 3D printing projects

Filament 3D printing rewards knowledge and punishes guesswork. If you are working on a prototype that needs to perform, not just look good, the material, parameter, and design decisions covered here are exactly where professional support adds the most value.

https://cc3dlabs.com

At CC 3D Labs, we work with product developers and engineers on professional 3D printing services that go beyond basic output. From material selection to parameter optimization and production-ready tolerances, we handle the variables so you can focus on your design. Whether you are exploring parts you can print for the first time or need reliable on-demand prototypes for an active development cycle, we are ready to help. Reach out for a free estimate and let’s build something that works.

Frequently asked questions

What is the difference between FDM and FFF in filament 3D printing?

FDM and FFF are essentially the same material extrusion process but with different names. FDM is a trademarked term, while FFF (Fused Filament Fabrication) is the open-source generic version used across the broader community.

How do I avoid stringing in filament 3D prints?

Reduce printing temperature, increase retraction distance, and raise travel speed. Retraction of 0.5 to 6mm combined with a 5 to 10°C temperature drop resolves most stringing issues without affecting overall print quality.

Which filament material is best for low-volume functional prototypes?

Carbon fiber composites and PC deliver the highest strength for demanding applications. PLA works for non-structural prototypes, but reinforced filaments are the right choice when parts need to survive real-world loading.

Why are 3D printed parts weaker in the Z direction?

Parts are stronger in XY than in Z because inter-layer bonding is mechanically weaker than in-plane deposition. Design your parts so primary loads run along the XY build plane to avoid inter-layer failure.

How do I store filament to prevent humidity issues?

Store filament in airtight containers with desiccant packs. Humidity affects filament flow and causes bubbling, rough surfaces, and weak layer bonding, so dry box storage is essential for hygroscopic materials like Nylon, PETG, and PC.