
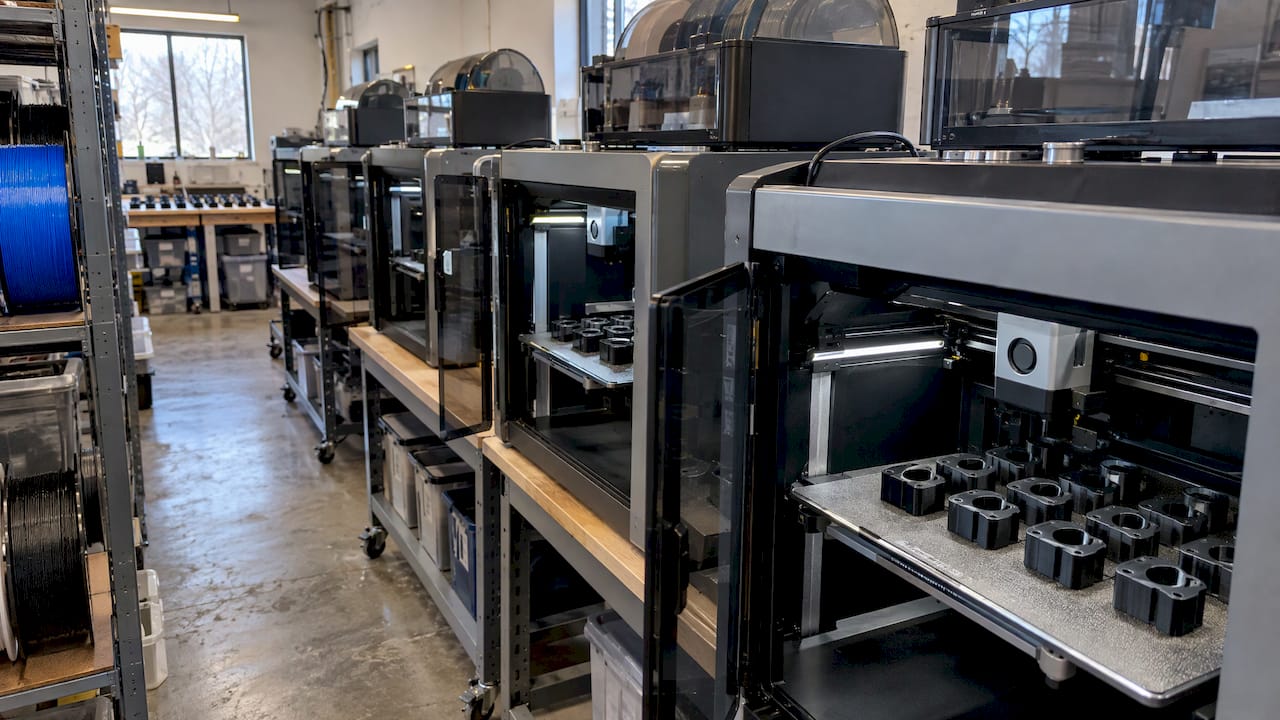
Small-batch FDM production means making real, usable parts in quantities from a handful to a few hundred or more on fused deposition modeling printers, with no mold or tooling cut first. It works best when the part is made of a thermoplastic, fits within roughly 12 inches per side, tolerates ±0.2–0.5 mm, and may still change. At CC 3D Labs, we run a production farm of Bambu Lab FDM printers in Bucks County, PA, and we quote every production job individually after a test print of your actual model, so the batch you approve is the batch you receive.
TL;DR
- FDM suits batches of roughly 1 to 1,000+ parts that need no tooling, a short time to market and thermoplastic materials. Altair’s FDM production guide gives those same limits.
- Plan for ±0.2–0.5 mm tolerances on FDM parts, and design around build orientation, wall thickness and supports before you finalize CAD.
- Pick the material from the environment: PLA softens near 60°C, PETG near 80°C, ABS and ASA near 100°C, and carbon-fiber nylon is the stiff option for jigs and fixtures.
- Consistent batches come from a locked print profile, a test print, a defined inspection plan and scan or caliper checks on sample parts.
- At thousands of simple parts, injection molding usually wins on per-part cost. Below that, FDM avoids tooling and lets you revise the design.
Table of Contents
- What small-batch FDM production actually is
- Who gets the most from a small FDM batch
- Design the part for the process, not the other way around
- Choose the material by the environment
- What drives cost and lead time
- Keeping a batch consistent
- When another process is the better fit
- Our perspective on small-batch FDM
- Start a batch with CC 3D Labs
- FAQ
- Sources
What small-batch FDM production actually is
There are three stages of making a product, and FDM sits in the middle one.
- Prototyping: one to a few parts, built to test fit, form or function. The design is expected to change.
- Small-batch (bridge) production: real parts that ship to customers or go into machines, in counts from tens to several hundred or more, before you commit to expensive tooling.
- Mass production: large runs where a mold or fixture is paid for up front and earned back through a low price per part.
FDM is the most common way to cover stage two with plastic. Altair’s guide to FDM for end-use parts describes bridge production as an interim step between prototyping and full production in which FDM needs no tooling and builds parts in hours instead of the weeks or months a tool can take. Its stated best-fit profile is useful as a screening checklist:
| Screening question | Best-fit range for FDM |
|---|---|
| Quantity | 1 to 1,000+ parts |
| Part size | Under about 300 mm (12 in) per side |
| Material | Thermoplastics rated under about 200°C (390°F) |
| Tolerance | Looser than about ±0.13 mm (0.005 in) |
| Timeline | Days to weeks |
| Design | Custom, configured-to-order or still evolving |
If your part passes that table, a small-batch FDM run is a reasonable plan. If it fails on more than one line, read the section on when to choose another process below.
Who gets the most from a small FDM batch
The buyers we work with fall into a few groups, and each uses batches differently.
- Product developers and inventors run 25 to a few hundred units for pilot customers, field trials or pre-sales, while the design is still being refined. Changing a file costs nothing, while changing a mold does not.
- Small manufacturers make low-volume components such as housings, brackets, covers, spacers, jigs and fixtures that do not justify tooling.
- Automotive shops and restorers reproduce discontinued trim pieces, clips, brackets and interior parts. For those jobs the batch often starts with a 3D scan of the original part, followed by CAD, followed by printing. We offer professional handheld 3D scanning with accuracy to about 0.1 mm for this work, and scan-to-CAD modeling to turn the scan into an editable model.
- Engineers on the plant floor print assembly aids, gauges and fixtures where an in-house tool shop would be slower.
Design the part for the process, not the other way around
Most problems in a small batch are designed in. They get multiplied by the quantity. Five rules prevent the common ones.
Choose build orientation first
FDM parts are anisotropic: they are strongest along the printed layers in the X-Y plane and weaker across layers. AlteM’s design guide for FDM says build orientation has to be decided before detailed design for exactly that reason. Orient the main load path along the layers, not across them. A clip that snaps in the layer direction is a clip that cracks at the layer line, and in a batch of 200 you will see it 200 times.
Respect minimum features and overhangs
The same guide gives a rule-of-thumb minimum feature size of about 0.016 in (0.4 mm), notes that the minimum wall thickness in the Z direction equals the layer thickness, and treats overhangs at 45° or less from vertical, or gaps of half an inch or less, as self-supporting. Anything beyond that needs supports, which add print time and leave surface marks. Chamfering a horizontal edge to 45° is usually cheaper than supporting it.
Set walls as multiples of the line width
Wall thickness on FDM is built from perimeters, each as wide as the extrusion line set by the nozzle diameter. A wall that is not close to a whole multiple of that width forces the slicer to fill gaps or drop a perimeter. Our guide to wall thickness in 3D printing shows how to size walls for strength and for repeatability across a run.
Add fillets and inserts where the part is loaded
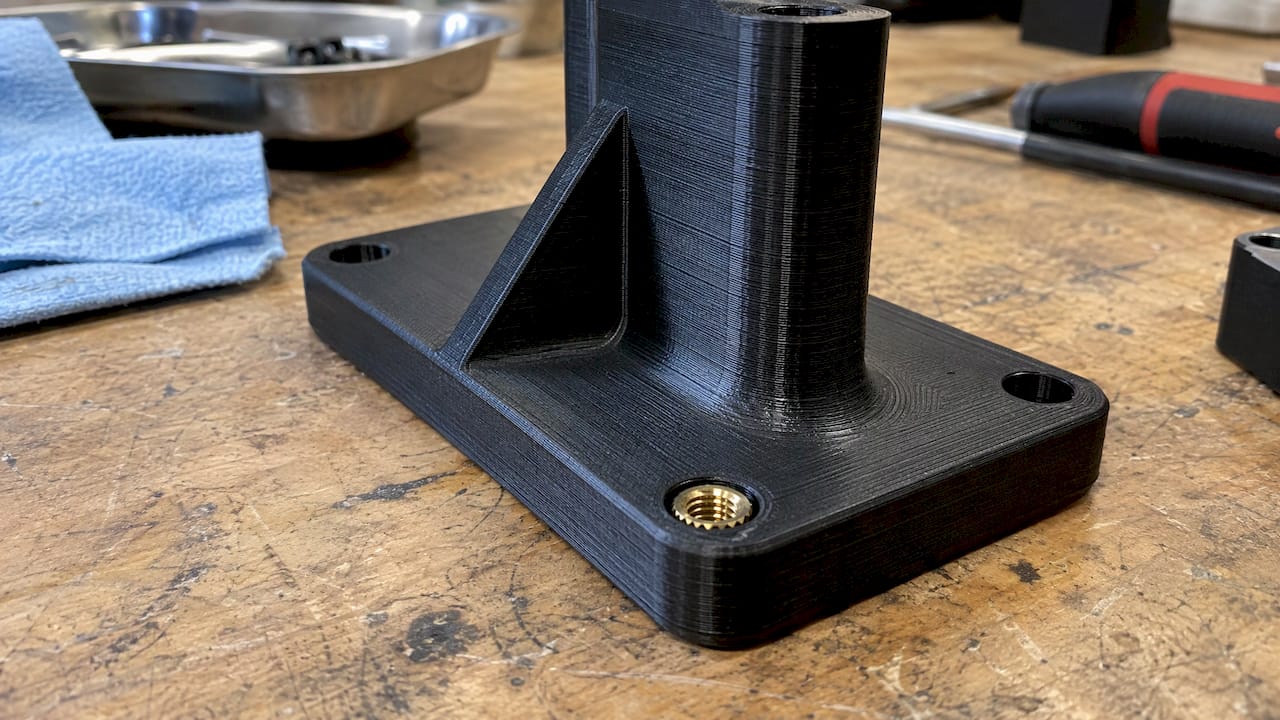
Sharp internal corners concentrate stress and, on large flat bases, encourage warping. A fillet where a wall meets a base spreads the load. For threads that will be assembled and disassembled many times, design a pocket for a brass heat-set insert instead of printing the thread.
Tolerance the part honestly
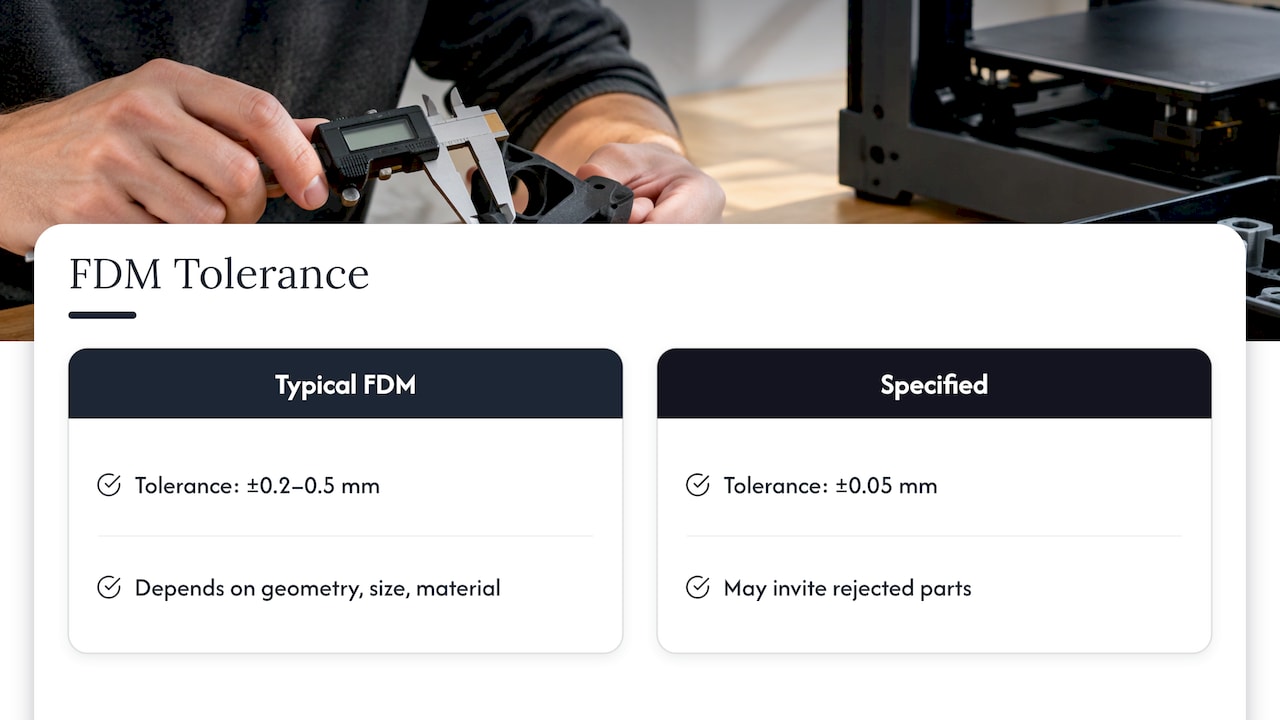
On FDM, the achievable tolerance for most parts is ±0.2–0.5 mm, depending on geometry, size and material. Mating features should include clearance: leave extra gap on press fits and sliding fits, and verify them on a test print. Specifying ±0.05 mm on a printed face invites rejected parts. Where you need tighter control on one feature, tell us at quote time. A better answer than a tighter drawing note is often a design that does not depend on that feature.
Choose the material by the environment
Material choice sets heat resistance, stiffness, UV stability and cost. The glass transition temperature, the point at which a plastic starts to soften, is the number to compare against the worst temperature your part will see. The figures below are typical values for common filament types, so treat them as averages that vary by brand and print settings.
| Material | Approx. softening temperature | Typical use in a batch |
|---|---|---|
| PLA | ~60°C | Visual models, fit checks, indoor display parts |
| PETG | ~80°C | Functional parts, enclosures, covers |
| ABS | ~100°C | Electronics housings, interior automotive parts |
| ASA | ~100°C | Outdoor parts with sun exposure |
| PC | Higher than ABS | Brackets that stay hot |
| Carbon-fiber nylon | Higher still | Stiff jigs, fixtures, frames |
A few notes that matter for production:
- PETG is a strong default for functional work. A 2026 engineering filament guide describes it as the right starting point for almost every functional print, with good moisture and chemical resistance to fuels, oils and mild acids, where PLA softens at around 55°C.
- ASA is the pick for parts that live outdoors, because it resists UV. Sunlight is also what fades exterior plastic trim on vehicles, and restorers who already deal with restoring faded plastic trim know how unforgiving long sun exposure is. We cover this further in our guide to materials for outdoor 3D printed parts.
- Carbon-fiber nylon gives stiffness for jigs, fixtures and frames. SigmaFilament’s framework points out that datasheet strength for these materials varies widely with print orientation and infill, and cites a controlled test in which one 20% carbon-fiber nylon ranged from 22 to 57 MPa depending on infill and build direction. When you specify one, specify orientation as well. Nylons also need to be dried before printing, which the same source puts at 60–70°C for 6–8 hours.
For a head-to-head view of the three most common choices, see PLA vs PETG vs ABS for durable parts. For engineering-grade options, see why filament suits engineering parts.
What drives cost and lead time
In FDM there is no tooling line on the quote, so cost follows machine time, material and labor. Pricing by weight alone misses most of it, which is why we explain in our piece on small batch 3D printing cost why engineers look beyond grams.
The main drivers:
- Print time per part: height, infill, wall count and layer height all change it. Taller parts and finer layers take longer.
- Parts per build plate: packing more parts on a plate cuts handling, but a failed plate then costs more.
- Material: engineering materials cost more per kilogram and often need drying or slower settings.
- Supports and post-processing: removal, sanding, inserts and assembly are labor.
- Machine capability: a peer-reviewed cost model for low-to-medium FDM batches treats energy use, which depends on machine size and capabilities, as a key differentiator, and compares cost per piece across lot sizes and materials.
Because these drivers depend on your geometry, we publish no fixed price list. Every production job is quoted individually after a test print of the actual model, and we make no blanket turnaround promises. Two practical ways to lower the quote are to reduce supports through orientation and to relax tolerances on non-critical faces. Our strategies to cut 3D printing costs go deeper.
Keeping a batch consistent
The hardest part of production is not part one. It is part two hundred matching part one. A repeatable process has five pieces.
- Lock the file and the profile. Once a test print is approved, the model version, material, orientation, layer height, wall count and infill are fixed. A change of any one is a new revision.
- Approve a test print. It exposes warping, fit problems and weak features while only one part has been spent. This is the reason we start every production job there. See engineers, start with one test print for what to check on it.
- Define critical dimensions. Mark the few features that must be in tolerance, such as bore diameters, mounting hole spacing and mating faces. Not every dimension needs inspection.
- Sample the batch. Measure critical features on parts from the start, middle and end of the run, and across different build plates. Calipers handle simple features. For complex surfaces, a 3D scan compared against the CAD model shows deviation across the entire part rather than at a few points, and our handheld scanning is accurate to about 0.1 mm.
- Keep materials dry and consistent. Moisture changes how filament prints, nylon especially. Use one lot of filament for a run where you can.
For runs that need the same result across several batches over months, keeping the profile and the approved sample part on file means a reorder starts from a known baseline.
When another process is the better fit
FDM is a middle-volume tool. It is not the answer to every quantity, and good production planning knows where it stops.
- Many thousands of simple parts. FDM per-part cost stays relatively flat as quantity rises, while a mold’s cost is spread over every part. Past a few thousand units of a stable design, injection molding generally becomes cheaper per part, even with tooling.
- Tolerances tighter than ±0.2–0.5 mm on many features, or sealing and glossy cosmetic surfaces, point toward other processes.
- Temperatures above what thermoplastic filament handles. The Altair guide’s best-fit window ends at thermoplastics rated below about 200°C.
That said, FDM often earns its place even on a path to molding. Printing a pilot batch lets you test with real users, find design flaws and lock the geometry before you invest in a mold. We also print mold masters, so a printed master can serve as a starting point for casting work.
Our perspective on small-batch FDM
We see small-batch FDM as a manufacturing method with its own rules, not as a larger prototype. The rules are that orientation sets strength, walls are built from whole perimeters, and a test print tells you more than a datasheet.
That is why we quote each production job individually after printing your actual model. A batch quoted from a weight estimate can look cheap and then print slowly, warp or fail a fit. A test print answers those questions before they are multiplied.
We run a farm of Bambu Lab printers, so a run can be spread across machines, and we work in PLA, PETG, ABS, ASA, PC and carbon-fiber nylon, with multi-color printing when a part needs it. For automotive shops and restorers, we add handheld scanning and reverse-engineering CAD in the same shop, so an out-of-production part can go from scan to model to printed batch with one contact. We are owner-operated, and you talk directly to the person running your job.
Justin
Start a batch with CC 3D Labs
If you have a CAD file, send it with your material needs, quantity and the dimensions that matter. We will review it, run a test print and quote the batch. If you have only a physical part, we can scan it and rebuild it in CAD first. The overview of what we make is on our services page, and getting a quote for a custom 3D print explains what to include.
Local clients in the Greater Philadelphia area and Bucks County can use residential pickup, since we have no walk-in storefront, and completed orders ship anywhere in the United States. For related reading, see 3D printing on demand for prototypes and custom parts and top tips for low-volume manufacturing.
FAQ
How many parts count as a small batch in FDM?
There is no single cutoff. Altair’s guide treats 1 to 1,000+ parts as the best-fit range for FDM. In practice, tens to a few hundred identical parts is the typical small-batch run. Beyond that, compare against molding once the design is stable.
How accurate are FDM production parts?
Plan on ±0.2–0.5 mm for most parts, depending on size, geometry and material. Accuracy is best on small, simple features and loosens on large, tall or warp-prone parts. Mark your critical dimensions at quote time so they can be checked on the test print and on sample parts from the run.
Which material should I choose for functional end-use parts?
Start with the worst-case environment. PETG (softens near 80°C) suits most functional covers and enclosures, ABS and ASA (near 100°C) suit hotter or outdoor use, and carbon-fiber nylon suits stiff fixtures. PLA (near 60°C) is for parts that stay cool and indoors.
Can you reproduce a part that is no longer made?
Yes, that is a common job for automotive shops and restorers. We scan the original with professional handheld 3D scanning (accuracy to about 0.1 mm), build an editable CAD model, and print the batch. Send details through our scan quote form.
How do I get a quote for a production run?
Send your file, material, quantity and critical dimensions through the 3D print quote form. We quote after a test print of your actual model, so the price reflects the real part. For CAD work, use the 3D modeling and CAD quote form.
Sources
- FDM for End-Use Parts, Altair
- Designing for FDM, AlteM
- Cost Model Framework for Pieces Additively Manufactured in FDM, PMC
- Different Filament Types: 2026 Selection Framework, SigmaFilament
- Best Engineering Filaments for 3D Printing 2026, 3DPrinting.com
- Restore Faded Plastic Trim: Ceramic That Lasts 12–24 Months