

TL;DR:
- Low-volume manufacturing demands high precision, speed, and process discipline for successful outcomes.
- Optimizing 3D printing parameters and selecting suitable materials and technologies are crucial for quality parts.
- Each low-volume run requires meticulous workflow management and strict process control to ensure repeatability.
When you need functional parts fast and in small quantities, the margin for error shrinks fast. Product developers and small manufacturers face a specific pressure: high-volume production tools don’t apply, yet the quality bar stays exactly the same. 3D printing closes that gap, but only when you apply the right strategies. Optimal FDM settings yield a Young’s modulus of 3400 MPa and tensile strength of 51 MPa, proving that parameter discipline directly determines part performance. The difference between a successful low-volume run and an expensive redo often comes down to process knowledge.
Table of Contents
- Key criteria for low-volume manufacturing success
- Optimize 3D printing process parameters
- Select the best 3D printing technology and materials
- Streamline workflow for precision and fast turnaround
- Why precision matters more in low-volume manufacturing than you think
- Take your low-volume manufacturing to the next level with CC3DLabs
- Frequently asked questions
Key Takeaways
| Point | Details |
|---|---|
| Focus on infill | Infill density dramatically shapes part strength and efficiency in low-volume manufacturing. |
| Tune process settings | Process parameters like speed, temperature, and orientation directly impact prototype quality. |
| Choose technology wisely | SLS 3D printing is ideal for strong, functional parts while SLA excels in detail and finish. |
| Streamline workflow | Efficient CAD prep and quality checks accelerate turnaround and minimize costly errors. |
| Partner for success | Expert help and proven solutions ensure low-volume projects stay on time and on target. |
Key criteria for low-volume manufacturing success
Before jumping into specific tips, it helps to define what success actually looks like for low-volume manufacturing. The criteria are different from high-volume production in ways that catch many teams off guard.
Precision is the first pillar. At low volumes, you don’t have statistical averaging across thousands of parts to smooth out variation. Every single part carries full weight. Tolerances that seem acceptable in theory become costly in practice when a mating component doesn’t fit on the assembly line.
Speed is the second. Low-volume runs skip the expensive tooling and setup time of injection molding, but that advantage disappears if your 3D printing workflow isn’t optimized. Lead time discipline matters just as much as print time.
Cost distribution works differently here too. Setup costs, material waste, and post-processing hours get spread across fewer parts, so each unit carries more overhead. Choosing the wrong approach can make low-volume printing more expensive than it needs to be.
Repeatability is where most teams underestimate the challenge. Even with the same file and the same machine, small process variations can produce inconsistent results. Infill density alone accounts for up to 25.66% of the contribution to mechanical strength, meaning a small setting change ripples through your entire batch.
Here’s a quick checklist to assess your project before you start:
- Define your dimensional tolerances before selecting a process
- Identify whether the part is functional, aesthetic, or both
- Estimate your acceptable cost per unit at your target quantity
- Confirm your lead time requirements against your service provider’s capacity
- Decide whether surface finish matters for fit, function, or customer presentation
The most common mistake in low-volume manufacturing is treating it like a scaled-down version of mass production. It isn’t. It’s a different discipline with different tradeoffs, and the teams that recognize that early save significant time and money.
For a deeper look at how design choices affect outcomes, the guidance on reliable 3D print design covers the foundational decisions that set your project up for success from the start.
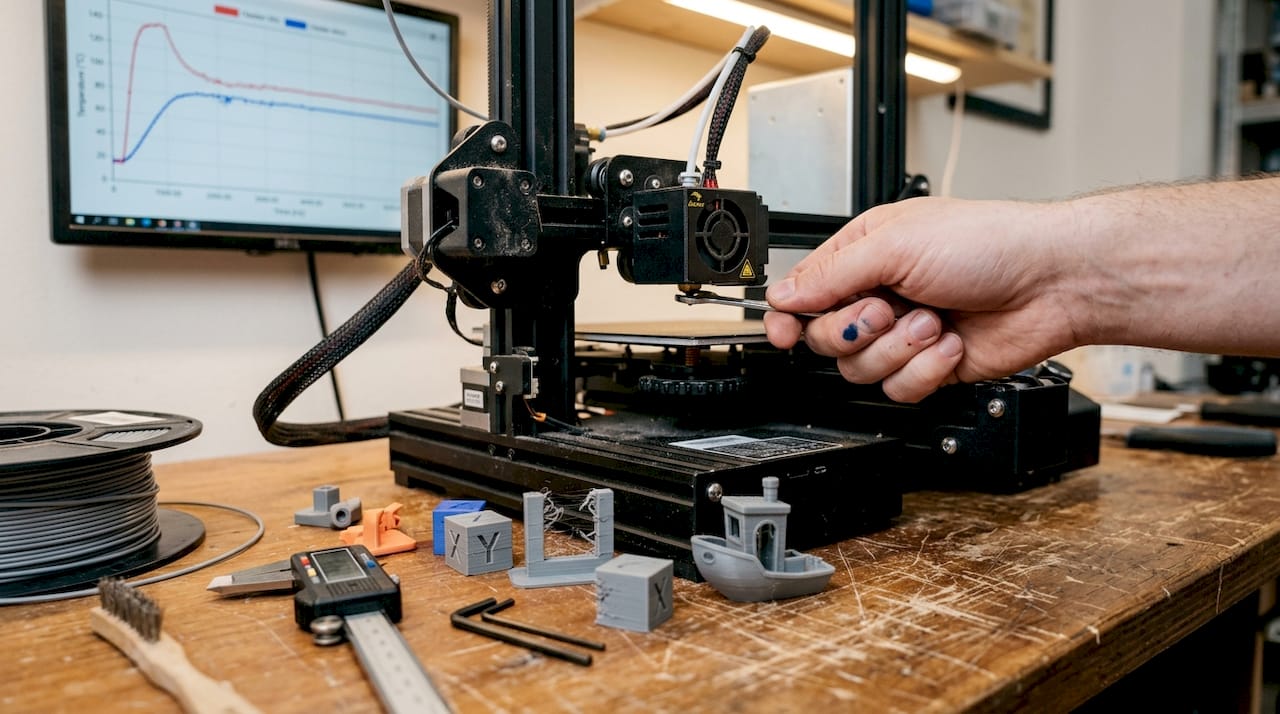
Optimize 3D printing process parameters
Once you know what matters most for your parts, the next step is tailoring your 3D printing parameters for maximum performance. This is where many teams leave significant quality on the table by using default settings.
For FDM printing with PLA, research-backed optimal FDM PLA settings point to a nozzle temperature of 210°C, print speed of 30mm/s, layer height of 0.1mm, and a 0° raster angle. These settings consistently produce parts with tensile strength of 51 MPa and a Young’s modulus of 3400 MPa. That’s not just a lab number. It translates directly to real-world part durability.
Here’s a quick parameter reference to guide your setup:
| Parameter | Recommended setting | Impact |
|---|---|---|
| Nozzle temperature | 210°C (PLA) | Affects layer adhesion and flow |
| Print speed | 30 mm/s | Slower speeds improve bonding |
| Layer height | 0.1 mm | Finer layers increase precision |
| Raster angle | 0° | Maximizes tensile strength |
| Infill density | 20-50% (functional) | Strongest predictor of strength |
Part orientation is another variable that product developers often overlook. Printing a part flat versus upright changes where the layer lines run relative to the load direction. For parts that experience bending or tension, orienting the strongest axis along the load path can make a measurable difference in service life.
Pro Tip: Use conservative parameters (lower speed, higher infill) for end-use functional parts, and faster, lower-infill settings for early-stage appearance prototypes. This lets you move quickly on concept validation without burning material budget on parts that will change anyway.
For a full breakdown of how each variable interacts, the 3D printing parameter guide walks through the logic behind each setting in practical terms. If you’re still getting familiar with the vocabulary, the 3D printing terminology resource is a solid starting point before diving into parameter tuning.
Select the best 3D printing technology and materials
Optimizing your process only works if you start with the right technology and materials. The choice between FDM, SLA, and SLS isn’t just a cost question. It shapes what your part can actually do.
SLS offers stronger mechanics for functional parts, while SLA excels in surface aesthetics and fine detail. FDM sits in the middle, offering the widest material range and lowest cost, but with visible layer lines and more post-processing for smooth finishes.
Here’s a side-by-side comparison to help you decide:
| Technology | Strength | Surface finish | Cost | Best for |
|---|---|---|---|---|
| FDM | Moderate | Visible layers | Low | Functional prototypes, enclosures |
| SLA | Moderate | Excellent | Medium | Aesthetic models, dental, jewelry |
| SLS | High | Good | Higher | Functional end-use parts, complex geometry |
Material selection matters just as much as technology. Here’s a quick breakdown:
- PLA: Easy to print, good for visual prototypes, not ideal for heat or impact
- PETG: Better chemical resistance and flexibility than PLA, great for functional parts
- ABS: Strong and heat-resistant, but warps without enclosure control
- Advanced polymers (Nylon, TPU, PC): For demanding functional applications requiring flexibility, high heat, or impact resistance
Matching your material to your application is non-negotiable. A housing that looks identical in PLA and PETG will behave very differently in a warm environment or under repeated stress. For a detailed comparison of how materials hold up under real conditions, the guide on material selection for durability is worth reviewing before you finalize your spec. If you’re still deciding between technologies, the printing technology comparison breaks down the tradeoffs in practical terms.
Streamline workflow for precision and fast turnaround
With your process and materials set, integrating smart workflow habits will unlock true low-volume agility. The gap between a smooth run and a frustrating one is usually in the steps before and after printing.
Here’s a proven workflow sequence for low-volume 3D printing runs:
- Design for manufacturing (DFM) review: Check wall thickness, overhangs, and feature sizes before sending any file. Catching a design issue at this stage costs nothing. Catching it after printing costs time and material.
- File preparation: Export in STL or STEP format. Check for non-manifold geometry and repair errors using slicer software before submission.
- Slicer review: Confirm support placement, layer orientation, and infill settings match your part’s functional requirements.
- First article inspection: Print one part first. Measure critical dimensions before committing to the full batch.
- Mid-run quality check: For batches above five parts, inspect a sample mid-run to catch any machine drift early.
- Post-processing review: Confirm that any sanding, priming, or hardware insertion meets spec before the parts ship or go to assembly.
Tuning every step of the process is what ensures repeatability and reliable part quality, especially at low volume where there’s no buffer for bad parts.
Pro Tip: Before your first production run with a new 3D printing partner, share your tolerance requirements and intended use case upfront. A good partner will flag potential issues before they become reprints. That conversation saves more time than any single parameter tweak.
For teams working with complex file structures or multiple CAD tools, the resource on CAD workflow optimization covers the file format decisions that affect print accuracy from the start.
Why precision matters more in low-volume manufacturing than you think
Here’s a perspective that doesn’t get enough airtime: low-volume manufacturing actually demands more process discipline than high-volume production, not less. That’s counterintuitive, but it’s true.
In mass production, variation averages out. You get thousands of data points, statistical process control kicks in, and outliers get caught before they reach customers. In a 10-part batch, one bad part is a 10% failure rate. Two bad parts and you’ve missed your delivery.
The conventional advice to “move fast and iterate” can backfire badly in this context. Skipping a first article inspection or using default slicer settings to save 20 minutes can produce a batch that fails dimensional checks entirely. The rework cost dwarfs the time saved.
Real-world functional parts require application-specific process control, not just impressive lab benchmarks. The teams that succeed in low-volume manufacturing treat each run with the same rigor they’d apply to a production line. They document settings, track results, and build a process knowledge base that makes every subsequent run faster and more reliable.
Working with a partner who applies that same discipline matters. The design discipline in prototype printing resource reflects exactly this mindset, where the goal is reliable outcomes, not just fast ones.
Take your low-volume manufacturing to the next level with CC3DLabs
Applying these strategies takes expertise, the right equipment, and a partner who treats your 10-part run with the same care as a 1,000-part order. That’s exactly what CC 3D Labs delivers.

Whether you need precision functional prototypes, small-batch production parts, or expert guidance on material and process selection, our 3D printing services are built for product developers who can’t afford to compromise on quality or speed. Explore 3D printing on demand for fast turnaround on custom parts, or see the range of prototypes to functional parts we produce for clients across industries. Request a free online estimate today and put these tips into practice with a team that knows exactly how to execute them.
Frequently asked questions
What is the ideal infill percentage for strong, low-volume 3D printed parts?
For most functional prototypes, an infill of 20-50% balances strength and material efficiency. Infill density is the single most critical parameter for tensile and compressive strength in FDM parts.
Which 3D printing method is best for functional, low-volume parts?
Selective Laser Sintering (SLS) is typically the strongest choice for functional, low-volume parts. SLS outperforms SLA on mechanical properties, while SLA leads on surface aesthetics.
Can adjusting print speed affect the durability of low-volume parts?
Yes, slower print speeds improve inter-layer bonding and increase overall part strength. 30mm/s print speed is the research-backed optimum for PLA FDM parts targeting maximum tensile performance.
What file format should I use for submitting 3D print jobs?
STL and STEP files are the preferred formats for most 3D printing workflows. They ensure broad compatibility with slicer software and preserve dimensional accuracy during file transfer.
Recommended
- How to achieve a high quality 3D scan for manufacturing
- How to design 3D prints: reliable prototypes & parts
- Choose the right 3D printing type for prototypes & production
- Filament 3D printing: Guide for prototyping success
- 7 Essential DTF Printing Cost-Saving Tips for Apparel Brands – Transfer Kingz