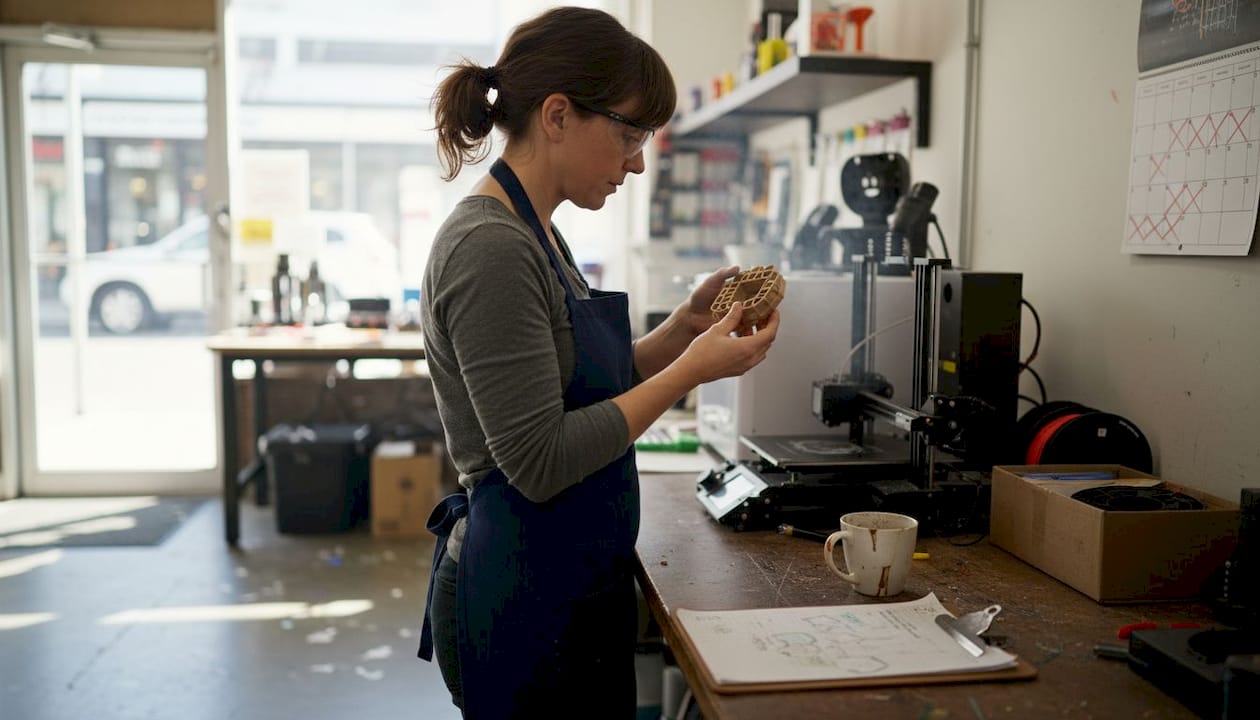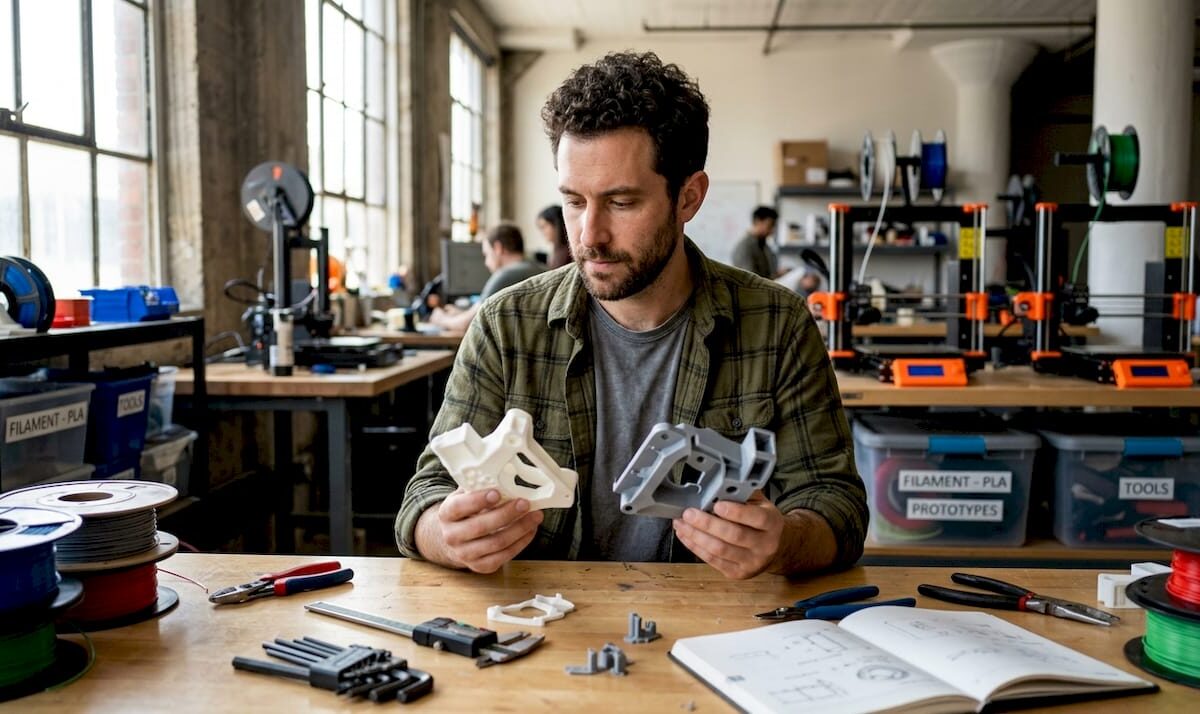
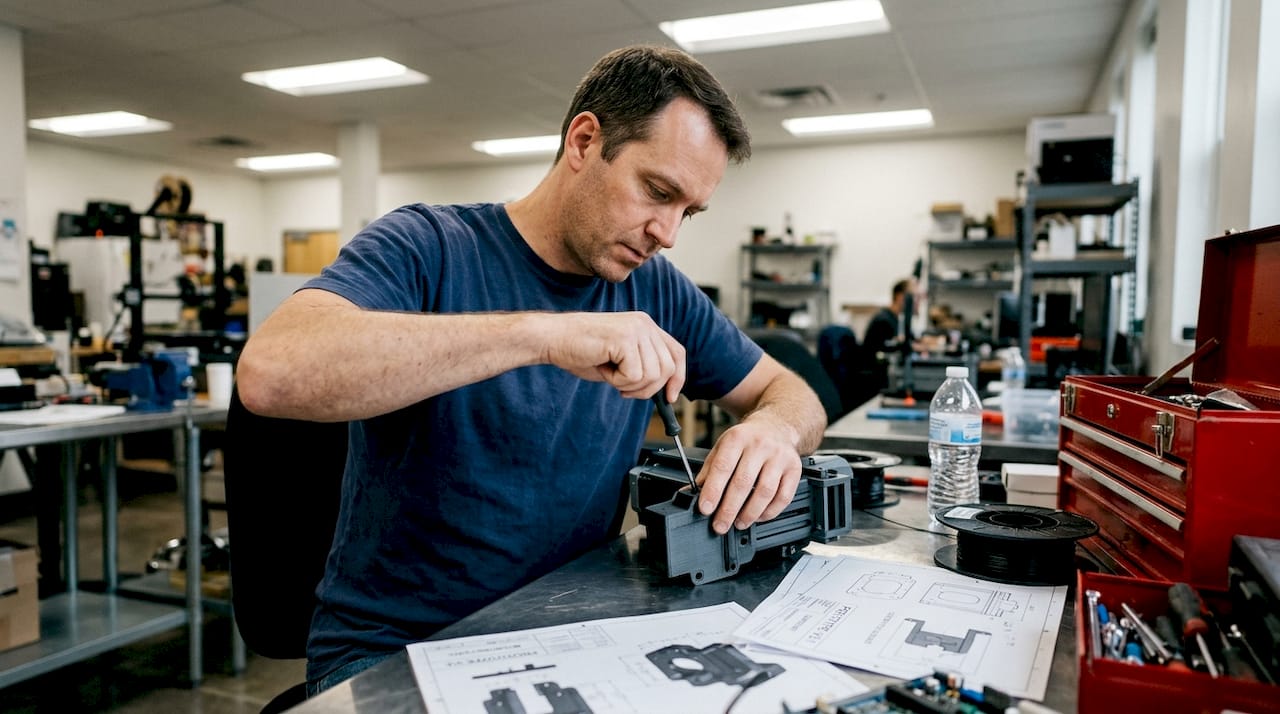
Engineer examines 3D printed prototypes at workbench

Choose the right 3D printing type for prototypes & production


TL;DR:

  • Selecting the appropriate 3D printing process based on project needs is crucial to avoid costly rework.
  • FDM is cost-effective for prototypes and fixtures but has limitations in accuracy and strength direction.
  • Resin-based methods like SLA/DLP excel in surface finish and detail, suitable for visual prototypes and casting masters.

Choosing the wrong 3D printing process can cost you weeks of rework and thousands in wasted material. For product developers moving from concept sketches to functional prototypes and into low to mid-volume production, the stakes are real. FDM, SLA, SLS, MJF, DMLS — each process delivers a different combination of accuracy, surface finish, material strength, and cost per part. Pick the wrong one and your prototype won’t test what you need it to test. This guide breaks down every major printing type, the technical benchmarks that separate them, and a clear framework for matching process to project goals.

Table of Contents

Key Takeaways

Point Details
Selection framework Match print process to function, tolerance, strength, and finish for best results.
FDM for prototypes FDM/FFF offers the lowest cost and largest build volumes for design validation and jigs.
SLA/DLP for detail SLA and DLP provide the finest accuracy and smoothest surface for visual prototypes.
Powder bed for function SLS/MJF excel in functional nylon parts and DMLS/SLM leads for metal.
Comparison tools Use quick-reference tables to compare tolerances, properties, and applications for each 3D printing type.

How to evaluate 3D printing types: Key criteria

Before comparing technologies, you need a structured way to filter them. The right process depends on a combination of factors, and skipping this step leads to expensive mismatches between what the print can deliver and what your part actually needs.

Here are the core criteria to assess before selecting a process:

  • Intended function: Is this a visual mock-up, a fit/form check, a functional stress test, or an end-use production part?
  • Mechanical properties: Tensile strength, flexural modulus, impact resistance, and isotropy all vary significantly by process.
  • Surface finish: Measured in Ra (roughness average), finish affects aesthetics, sealing, and post-processing requirements.
  • Dimensional tolerance: Critical for mating parts, press fits, and precision assemblies.
  • Part size: Build envelope limits differ widely — FDM machines can print large enclosures; resin printers are typically smaller.
  • Material options: Engineering polymers, flexible TPU, high-temp resins, metal alloys — process determines what’s available.
  • Budget and volume: Cost per part drops with some processes at volume; others stay flat.

A useful way to think about this: tolerance requirements alone can cut your list in half. Types of 3D printing for prototypes and production show that SLA achieves ±0.05mm, SLS and MJF land around ±0.2–0.25mm, and FDM typically runs ±0.5mm. If your part has tight mating tolerances, FDM is off the table immediately.

Anisotropy — the directional difference in mechanical strength — is another filter most teams miss early. Parts printed in FDM are significantly weaker in the Z direction. SLS and MJF are near-isotropic, meaning strength is consistent regardless of build orientation. Understanding this upfront shapes not just process selection but also part orientation strategy.

Post-processing needs matter too. Sanding, priming, dyeing, and support removal all add time and cost. Knowing how to pick the right process before you send a file saves iterations. For early-stage teams, a solid quick prototyping guide can clarify how process selection ties directly to development speed.

Extrusion-based printing (FDM/FFF): Workhorse for prototypes and jigs

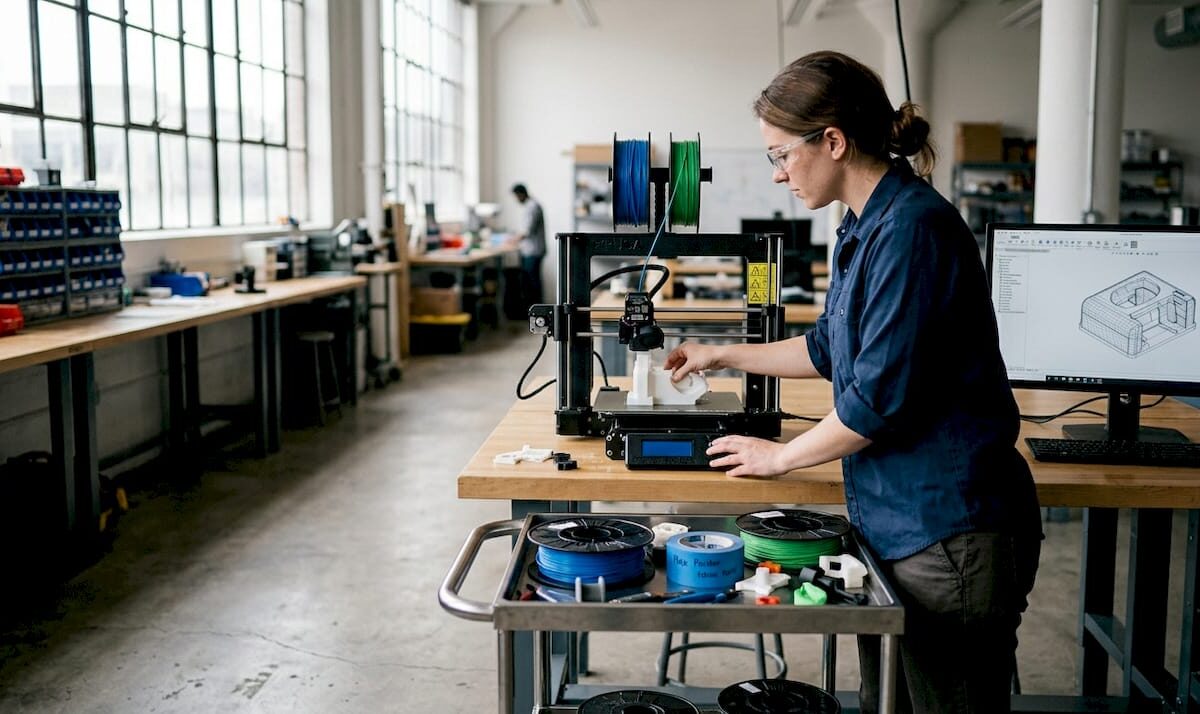
FDM (Fused Deposition Modeling) and its open-source counterpart FFF (Fused Filament Fabrication) work by melting a thermoplastic filament and depositing it layer by layer. The process is straightforward, scalable, and compatible with a wide range of engineering-grade materials including PLA, PETG, ABS, ASA, Nylon, TPU, and high-temp options like PEEK.

Strengths of FDM for engineering applications:

  • Lowest cost per part among all major processes
  • Widest range of build volumes — some industrial FDM machines exceed 1,000mm in a single axis
  • Broad material library with well-documented mechanical properties
  • Fastest turnaround for large, low-detail parts

Limitations to plan around:

  • Visible layer lines require sanding or coating for smooth surfaces
  • Z-axis weakness due to layer adhesion — parts can delaminate under load
  • Tolerances of ±0.5mm limit use in precision assemblies

FDM is the cost-effective choice for jigs, fixtures, enclosures, and early-stage prototypes where geometry validation matters more than surface quality. The FDM process mechanics — including temperature control, support structures, and layer adhesion — are well understood, which makes troubleshooting predictable.

“FDM gives development teams the fastest path from CAD to physical object at a price point that supports multiple design iterations without budget pressure.”

Pro Tip: Reorienting a part 45 degrees and adjusting infill pattern can boost effective tensile strength by up to 20% without changing material or process. This is one of the most underused levers in FDM design.

For teams choosing between materials, understanding the tradeoffs between FDM materials like PLA, PETG, and ABS directly affects whether the prototype survives functional testing or fails at the first load cycle.
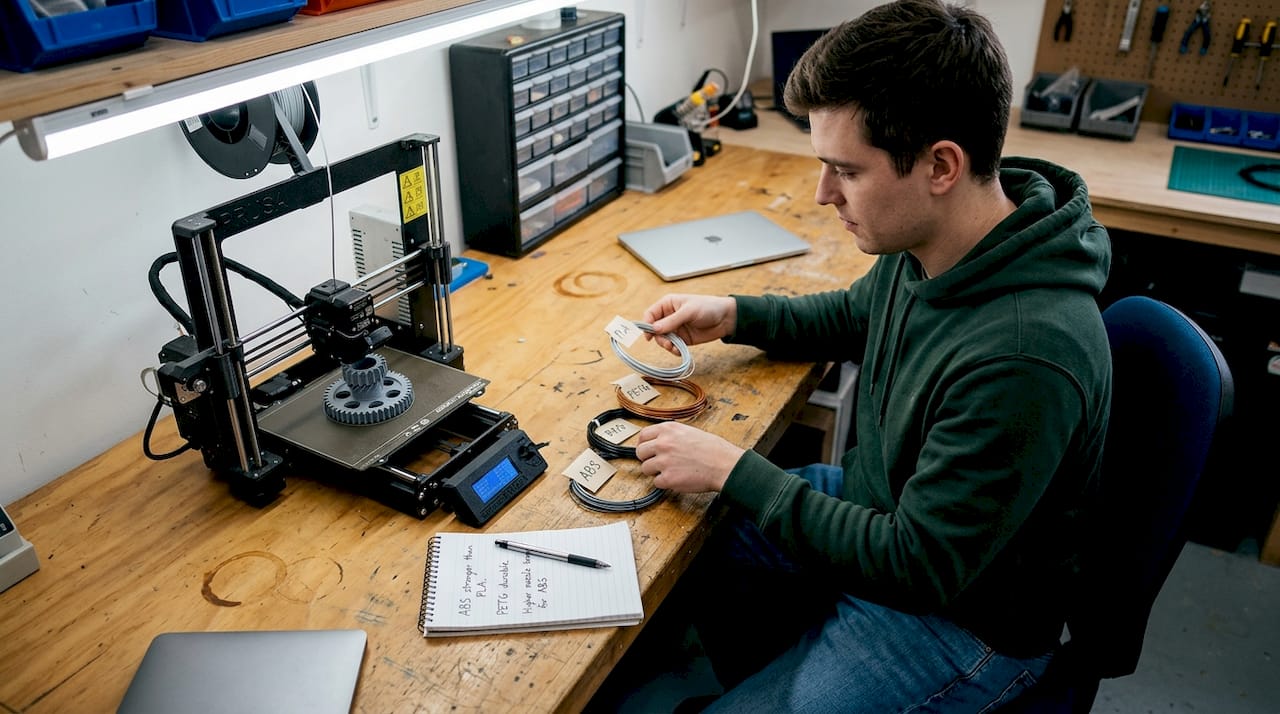
Professional comparing FDM 3D printing materials

Photopolymerization (SLA/DLP): Precision and surface detail

SLA (Stereolithography) uses a UV laser to cure liquid resin point by point, while DLP (Digital Light Processing) flashes an entire layer at once using a projector. Both produce parts with exceptional surface quality, but the mechanics create meaningful differences in speed and accuracy.

Key advantages of resin-based printing:

  • Surface finish as low as Ra 1–3µm — the smoothest of any common 3D printing process
  • SLA achieves ±0.05mm tolerance, DLP typically ±0.10mm
  • Excellent for fine features, thin walls, and complex organic geometry
  • Ideal for casting masters, dental models, and visual presentation prototypes

Where resin processes fall short:

  • Most standard resins are brittle and not suited for load-bearing applications
  • UV exposure over time degrades mechanical properties — outdoor use is limited
  • Build volumes are smaller than FDM, limiting large-part applications
  • Post-curing is required, which adds time and affects final properties

A 2025 flexural study found SLA flexural strength at 93MPa, outperforming DLP at 70MPa — a meaningful gap when you’re validating parts that need to flex under load. DLP’s speed advantage makes it attractive for batch runs of small, detailed parts where per-layer cure time is the bottleneck.

Pro Tip: Post-curing under controlled UV exposure increases hardness and flexural strength, but over-curing increases brittleness. Run a calibration cure test on sample parts before committing to a full batch.

For teams who need to communicate surface finish definitions to clients or manufacturing partners, understanding Ra values and how they map to process output prevents misaligned expectations at review.

Powder bed fusion (SLS, MJF, DMLS/SLM): From functional polymers to metal parts

Powder bed fusion covers a family of processes that fuse material layer by layer from a powder bed. No support structures are needed for polymers — the surrounding powder acts as support — which enables highly complex geometries that other processes can’t achieve.

SLS (Selective Laser Sintering) uses a CO2 laser to sinter nylon powder. It produces parts with ±0.25mm tolerance and tensile strength around 48MPa for PA12. Parts are durable, chemically resistant, and suitable for functional testing and low-volume production runs.

MJF (Multi Jet Fusion) uses inkjet-deposited fusing agents activated by infrared energy. It’s faster than SLS, produces denser parts, and achieves near-isotropic mechanical properties — meaning orientation during printing has minimal effect on strength. This matters enormously for end-use parts.

DMLS/SLM uses a fiber laser to fuse metal powder — titanium alloys, stainless steel, Inconel, aluminum. Parts reach >99.5% density with tolerances of ±0.10mm, making them viable for aerospace, medical, and industrial end-use applications.

Powder bed processes offer the best combination of geometric freedom and mechanical isotropy for functional polymer and metal parts — a combination no other process family can match at this scale.

Process Tolerance Key material Relative cost Best use case
SLS ±0.25mm PA12 Nylon Medium Functional prototypes, low-run production
MJF ±0.20mm PA12, PA11 Medium-high End-use parts, near-isotropic loads
DMLS/SLM ±0.10mm Ti6Al4V, steel High Metal qualification, aerospace, medical

For teams working on functional polymer and metal prints, SLS and MJF are often the bridge between prototype validation and production-ready components. The SLS and MJF mechanics — including powder management, thermal stress, and post-processing — require more process knowledge than FDM but reward that investment with significantly better part performance.

Quick reference comparison: Picking the right 3D printing process

With all four major process families covered, here’s a consolidated view for engineering teams making a final call.

Process Tolerance Surface finish Cost tier Production fit
FDM ±0.5mm Moderate (Ra 10–20µm) Low Prototypes, jigs, fixtures
SLA ±0.05mm Excellent (Ra 1–3µm) Medium Visual prototypes, casting masters
DLP ±0.10mm Excellent (Ra 1–3µm) Medium Detailed small parts, dental
SLS/MJF ±0.20–0.25mm Good (Ra 6–10µm) Medium-high Functional parts, low-volume runs
DMLS/SLM ±0.10mm Good (Ra 4–10µm) High Metal end-use, qualification parts

Based on tolerance and cost benchmarks across processes, here are scenario-based recommendations:

  1. Visual prototype for stakeholder review: Use SLA or DLP. Surface quality and accuracy make the part presentation-ready without secondary finishing.
  2. Fit and form check on an assembly: FDM is fast and cheap enough to iterate. If tolerance is critical, step up to SLA.
  3. Functional part for stress or environmental testing: SLS or MJF. Near-isotropic nylon parts survive real-world loads and chemicals.
  4. Metal part qualification for production: DMLS/SLM. The density and tolerance match machined metal for most non-critical applications.
  5. Special cases: Binder Jetting works well for full-color models and metal sintering at lower cost than DMLS. PolyJet handles multi-material and overmold simulations. Both are worth considering when standard processes don’t fit.

Exploring real-world 3D printing applications across industries shows how these process choices play out in practice. For teams ready to act, reviewing on-demand project examples gives a concrete sense of what each process delivers at production scale.

Our take: Why context matters more than specs in 3D printing selection

Datasheets are a starting point, not a decision. We’ve seen engineers spend weeks comparing tolerance specs between SLS and MJF for a prototype that only needed to survive two weeks of fit testing. The 0.05mm difference was irrelevant. What mattered was turnaround time and cost per iteration.

The limitations people worry about most — anisotropy in FDM, brittleness in SLA resins — are often manageable with smart design choices. Anisotropy becomes an advantage when you orient a part so the load direction aligns with the strongest axis. Resin brittleness stops being a problem when the part is a casting master, not a structural component.

Our honest advice: run a test iteration before committing to a process for a full batch. A single test print reveals more than any datasheet. And revisit process selection as your design matures. What works for a first-round prototype often isn’t the right call for a 500-unit production run. Focus on fit-for-purpose, and let the design evolution guide the process evolution. For teams navigating that transition, working through bespoke 3D print jobs with experienced partners accelerates that learning significantly.

Get expert 3D printing for your next project

At CC 3D Labs, we work with product developers and engineers across every stage of the product lifecycle — from first-round prototypes to low and mid-volume production runs. Whether you need FDM for rapid iteration, SLA for presentation-quality parts, or specialty materials for functional testing, we match the process to your actual requirements, not just the closest available option.

https://cc3dlabs.com

We handle custom material requests, multi-color printing, and CAD support for teams that need more than a file upload and a quote. If you’re unsure which process fits your current project, explore our 3D printing services or browse what parts are printable for your application. Ready to move? Submit your file and project details through our on-demand custom projects page for a fast, accurate estimate.

Frequently asked questions

Which 3D printing type delivers the strongest mechanical properties for end-use parts?

SLS and MJF produce near-isotropic nylon parts that approach injection-molded strength, while DMLS/SLM yields metal components with greater than 99.5% density for demanding structural applications.

What are the main limitations of FDM versus SLS or SLA?

FDM is weaker along the Z axis and shows visible layer lines, while SLS offers better isotropy and SLA provides the best surface finish but lower load-bearing capacity. Each process has tradeoffs that make it better suited for specific applications.

How do I choose the best 3D printing type for visual prototypes?

SLA delivers the finest detail and smoothest surface finish for visual prototypes, making it the top choice when appearance and dimensional accuracy are the primary goals.

Are 3D printed materials suitable for outdoor or high-temperature use?

Engineering polymers like PEEK and metals like Ti6Al4V handle high temperatures reliably, but SLA resins degrade under prolonged UV exposure and are not recommended for outdoor applications without protective coating.

Can powder bed fusion create both polymer and metal parts?

Yes. SLS and MJF process nylon and other polymer powders for durable functional parts, while DMLS and SLM fuse metal powders to produce dense, high-strength metal components.
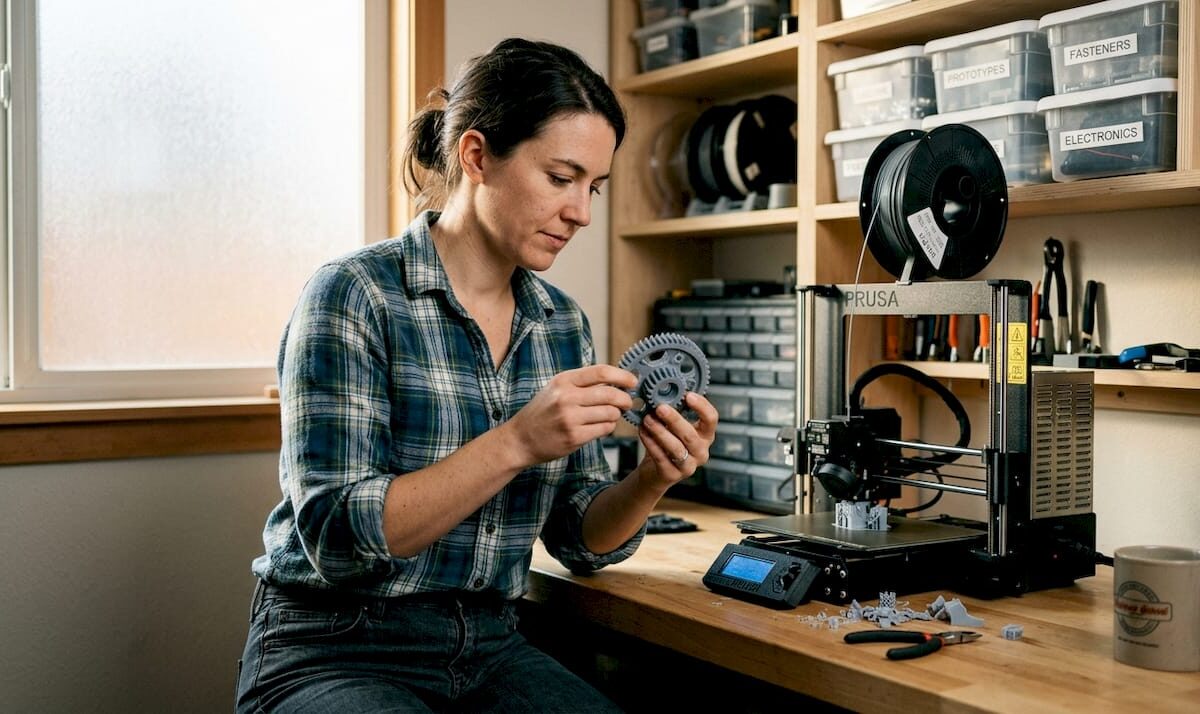
Woman checks 3D printed prototype at workbench

What can a 3D printer make? Prototypes to functional parts

Most people picture cheap plastic toys when someone mentions a 3D printer. That mental image is about 15 years out of date. Today, 3D printing shapes aerospace and medical devices, producing brackets that fly in aircraft and splints fitted to individual patients. Whether you’re a product developer trying to shorten your prototype cycle or a hobbyist chasing a one-of-a-kind build, understanding what a 3D printer can actually produce changes how you approach every project. This guide covers materials, real limitations, design considerations, and industry applications so you can make smarter decisions from day one.

Table of Contents

Key Takeaways

Point Details
Material choice matters The strength and function of 3D printed items depend on selecting the right material and understanding its limits.
Know what’s possible 3D printers are not limited to simple models—they can create robust prototypes, functional parts, and unique custom pieces.
Design affects outcomes Smart design choices and proper post-processing can dramatically enhance the performance and finish of printed parts.
Industry adoption grows Businesses in aerospace, medical, and consumer sectors are increasingly adopting 3D printed solutions for real use cases.

Core materials and their printable properties

Now that we’ve dispelled the myth that 3D printers only make small trinkets, let’s break down the materials that unlock their practical uses.

The most common printable materials fall into three broad categories: thermoplastic filaments, photopolymer resins, and powders for sintering. Each category behaves differently under stress, heat, and repeated use, so picking the wrong one can mean a failed part even when the print looks perfect.

Common thermoplastics and their key traits:

  • PLA (Polylactic Acid): Easy to print, biodegradable, great for visual models and low-stress parts
  • ABS (Acrylonitrile Butadiene Styrene): Tougher and more heat-resistant than PLA, but prone to warping without an enclosure
  • PETG (Polyethylene Terephthalate Glycol): Combines PLA’s ease of printing with better chemical resistance
  • Nylon: Flexible, wear-resistant, and excellent for functional gears and hinges
  • Resins (SLA/MSLA): Deliver fine surface detail but are brittle without post-curing
  • Powders (SLS): Produce strong, complex geometries without support structures

Benchmarked tensile data shows PLA ranging from 28 to 57 MPa, ABS at roughly 28 MPa, and Nylon outperforming both in applications requiring repeated flex. That spread matters when you’re specifying a part that will actually carry load.

Material Tensile strength Best use case Heat resistance
PLA 28–57 MPa Visual prototypes, display models Low
ABS ~28 MPa Functional enclosures, automotive Medium
PETG 40–53 MPa Chemical-resistant housings Medium
Nylon 50–80 MPa Gears, hinges, wear parts Medium-high
Resin (SLA) 25–65 MPa Fine-detail parts, dental Low–Medium

One property that catches engineers off guard is anisotropy, meaning a part’s strength varies by direction. FDM (Fused Deposition Modeling) prints are notably weaker along the Z axis because layers bond by heat rather than fusing chemically. SLA and SLS prints are nearly isotropic, meaning strength is more consistent in all directions. If your part will experience stress from multiple angles, that distinction matters a lot. You can explore engineering-grade materials like ULTEM and carbon-fiber-filled Nylon for applications where standard filaments fall short.

For a deeper look at how these terms apply to your workflow, the 3D printing terminology guide is a solid starting point.

Pro Tip: Match your infill pattern and density to the stress direction of your part. Gyroid infill distributes load in all directions, while rectilinear infill is strongest along one axis. Don’t default to 20% infill just because it’s the slicer preset.

What can (and can’t) you print? Use cases with real business impact

With an understanding of material strengths and weaknesses, let’s examine exactly what can and can’t be created with a 3D printer.

What you can print:

  • Functional prototypes: brackets, enclosures, jigs, and fixtures
  • Medical devices: patient-specific splints, CPAP helmet components, prosthetic sockets
  • Aerospace hardware: lightweight ULTEM clips, duct covers, interior panels
  • Consumer products: custom phone holders, replacement parts, product packaging mockups
  • Hobbyist items: miniatures, cosplay armor, personalized tools

FDM handles custom functional parts affordably, while SLS and MJF (Multi Jet Fusion) are preferred for complex geometries and commercial-grade strength. The right process depends on your volume, tolerance requirements, and budget. If you’re still deciding, the guide on 3D printing on demand breaks down when each process makes financial sense.

Engineer assembling 3D printed part in workshop

Process Best for Strength Cost per part Detail level
FDM Functional prototypes, large parts Medium Low Medium
SLA/MSLA Fine-detail models, dental, jewelry Medium Medium High
SLS/MJF Robust commercial prototypes, complex geometry High High High

What you can’t print:

  • Objects made from natural materials like wood, cloth, or leather
  • Features thinner than 0.5 mm wall thickness without significant risk of failure
  • Fully isotropic FDM parts without post-processing like annealing or fiber reinforcement
  • High-volume production runs where injection molding is faster and cheaper per unit

Understanding these limits upfront saves real money. A part designed with 0.3 mm walls might look great in CAD but will fail on the print bed. The article on choosing a 3D print job helps you match your design intent to the right process before you spend a dollar. For a broader view of where additive fits in your supply chain, the additive manufacturing guide covers the full picture.

From prototype to product: Design considerations for print success

Understanding what is possible and what isn’t sets the stage for designing 3D models that deliver in real-world use.

Design for manufacturability (DFM) in 3D printing isn’t the same as DFM for injection molding. The rules are different, and ignoring that difference is one of the most common reasons parts fail or require expensive reprints.

Key design steps for print success:

  1. Set wall thickness correctly. Minimum 1.2 mm for structural walls in FDM; thicker for load-bearing parts.
  2. Limit overhang angles. Keep overhangs under 45 degrees from vertical or plan for support structures.
  3. Choose the right raster angle. Raster angle, infill, and layer height directly affect strength and surface finish. A 45-degree raster often balances strength and print time well.
  4. Optimize infill for function. Structural parts need 40 to 80% infill. Visual models can go as low as 10 to 15%.
  5. Plan for tolerances. FDM parts typically hold tolerances of ±0.2 to ±0.5 mm. If you need tighter fits, design in clearance or plan for post-processing.
  6. Prototype in stages. Print a first article at lower infill to check fit and form before committing to a full-strength production run.

Post-processing is often the step that separates a good part from a great one. Annealing PLA or ABS in an oven can increase crystallinity and raise the effective heat deflection temperature. Sanding and priming improve surface quality for consumer-facing parts. For precise reference geometry, high quality 3D scans of existing parts can feed directly into your CAD workflow, cutting reverse-engineering time significantly.

If your files aren’t optimized for printing, you’ll lose time in slicing and rework. The guide on optimizing your CAD workflow covers file formats and prep steps that prevent the most common errors.

Pro Tip: Before locking in your final design, print a single-wall test piece of your most critical geometry. It costs almost nothing and reveals fit issues, layer adhesion problems, and surface defects before you commit to a full build.

Real-world applications: Industry and hobby success stories

Now that we’ve explored how to design and optimize printed parts, let’s see where these efforts are delivering value across industries and communities.

3D printing now produces everything from medical fittings to aerospace hardware, and the range of applications keeps expanding as materials improve and costs drop.

Industry applications worth knowing:

  • Medical: Custom splints fitted to a patient’s exact anatomy reduce recovery time and improve comfort. CPAP helmet components printed in flexible TPU conform to facial geometry that off-the-shelf products can’t match.
  • Aerospace: ULTEM 9085, a high-performance thermoplastic, is used for interior aircraft clips and duct covers because it meets FAA flame, smoke, and toxicity requirements while being lighter than metal alternatives.
  • Consumer products: Startups use 3D printed prototypes to validate product concepts before tooling investment. A phone holder prototype that would cost thousands in injection mold tooling can be tested for under $50.
  • Hobbyist and maker community: Cosplay builders print articulated armor pieces, miniature painters create custom bases and terrain, and repair enthusiasts replace discontinued parts for vintage electronics.

Stat callout: Increasing infill density from 33% to 100% can nearly double part strength in FDM prints, making infill one of the highest-leverage settings in your slicer.

The gap between hobbyist and professional output is narrowing fast. With the right material, process, and design intent, custom 3D prints can meet specifications that would have required machining or molding just five years ago. That’s a genuine shift in what small teams and individual developers can accomplish without large capital investment.

Why 3D printing isn’t just for rapid prototyping anymore

The conventional framing of 3D printing as a “prototyping tool” made sense a decade ago. It doesn’t fully hold up now. We see clients at CC 3D Labs who come in expecting to iterate through a few prototypes and then move to injection molding, and they end up discovering that their final-use parts work better as prints.

Why? Because 3D printing allows geometry that molding physically cannot produce: internal channels, lattice structures, and organic shapes that reduce weight without sacrificing strength. When you combine smart design with proper post-processing, printed parts in Nylon or PETG can outlast molded equivalents in low-to-medium volume applications.

What most guides miss is that the process itself is only half the equation. A poorly designed part printed in premium material will still fail. A well-designed part in standard PLA, annealed and finished correctly, can surprise you. The real edge comes from treating 3D printing as a production method in its own right, not a stepping stone. On-demand manufacturing at small volumes is now economically viable in ways that weren’t true even three years ago. Businesses that experiment now will have a meaningful head start.

Unlocking your next custom print: How CC3D Labs can help

Whether you’re developing a product or launching a creative passion project, expert guidance can elevate your results.

https://cc3dlabs.com

At CC 3D Labs, near Philadelphia, we work with product developers, engineers, and hobbyists who need more than a printer. They need a partner who understands materials, tolerances, and design intent. From 3D printing on demand for quick-turn prototypes to engineering-grade prints in carbon-fiber-filled nylon and polycarbonate, we match the process to your actual requirements. Need something unique and personalized? Our custom 3D prints service handles everything from single pieces to batch runs. Get a free online estimate and let’s build something worth printing.

Frequently asked questions

Can a 3D printer create fully functional mechanical parts?

Yes, with the right material and process, 3D printers produce fully functional mechanical parts, particularly for prototypes and short production runs. SLS and MJF are especially suited for robust commercial applications.

What materials are commonly used for 3D printing parts meant for business applications?

Business applications typically rely on Nylon, PETG, and ULTEM for strength and durability, along with resins for high-detail parts. Mechanical benchmarks confirm Nylon outperforms PLA and ABS in most load-bearing scenarios.

Are there any objects that cannot be printed on a 3D printer?

3D printers cannot produce objects from natural materials like wood or cloth, and features under 0.5 mm are too thin to print reliably on most systems.

How does print orientation or infill affect finished part strength?

Higher infill and an optimized raster angle increase strength significantly, while FDM parts remain weaker along the Z axis due to layer bonding. Infill and raster angle are two of the most impactful settings you can adjust in your slicer.

Technician preparing 3D printed prototype in studio

3D printing on demand: prototypes and custom parts

Choosing the wrong 3D printing process can cost you weeks of rework, wasted material, and parts that simply don’t fit. Most businesses ordering on-demand prints for the first time underestimate how much the technology choice matters. FDM, SLA, SLS, and MJF each produce dramatically different results in strength, surface finish, and dimensional accuracy. This guide walks you through every critical decision point, from selecting a process to designing for reliable outcomes, so your next prototype or production run lands right the first time.

Table of Contents

Key Takeaways

Point Details
Choose the right process Match your application—prototype, functional part, or batch production—to the optimal 3D printing technology.
Design for manufacturability Set proper tolerances, wall thickness, and load orientation for reliable and accurate parts.
Leverage expert providers Use established on-demand services for speed, quality, and cost efficiency, especially for business-critical projects.
Optimize for scalability Powder-bed processes shine for batches of 50–5000 parts, while instant quoting platforms speed up prototyping.
Combine scanning and printing Incorporate 3D scanning to achieve precise digital models and hybrid print plus machining for critical features.

What is 3D printing on demand?

On-demand 3D printing means you upload a digital file, choose a material and process, and receive finished parts without owning any equipment. There’s no minimum order, no tooling cost, and no long lead time tied to traditional manufacturing. You pay only for what you need, when you need it.

This model works especially well for specific project types:

  • Functional prototypes that need to be tested before committing to injection molding
  • Custom jigs and fixtures built for a single production run
  • Small batch parts in quantities from 1 to a few hundred units
  • Replacement components that are no longer available through standard supply chains

On-demand 3D printing is ideal for rapid prototyping and small batch production.”

The business case is straightforward. You compress your development timeline, reduce upfront capital risk, and iterate faster than any traditional process allows. Services like Protolabs have made it possible to receive parts within days rather than weeks. For a deeper look at what these services cover, the on-demand 3D printing overview at CC 3D Labs outlines the full range of options available. You can also browse the complete list of 3D printing services to understand what’s possible before you commit to a project.

With the core concept defined, let’s explore the technologies powering these services.

Major technologies and processes: FDM, SLA, SLS, and MJF

Not all 3D printing is the same. The process you choose determines your part’s strength, surface quality, dimensional accuracy, and cost. Here’s how the four dominant technologies compare.

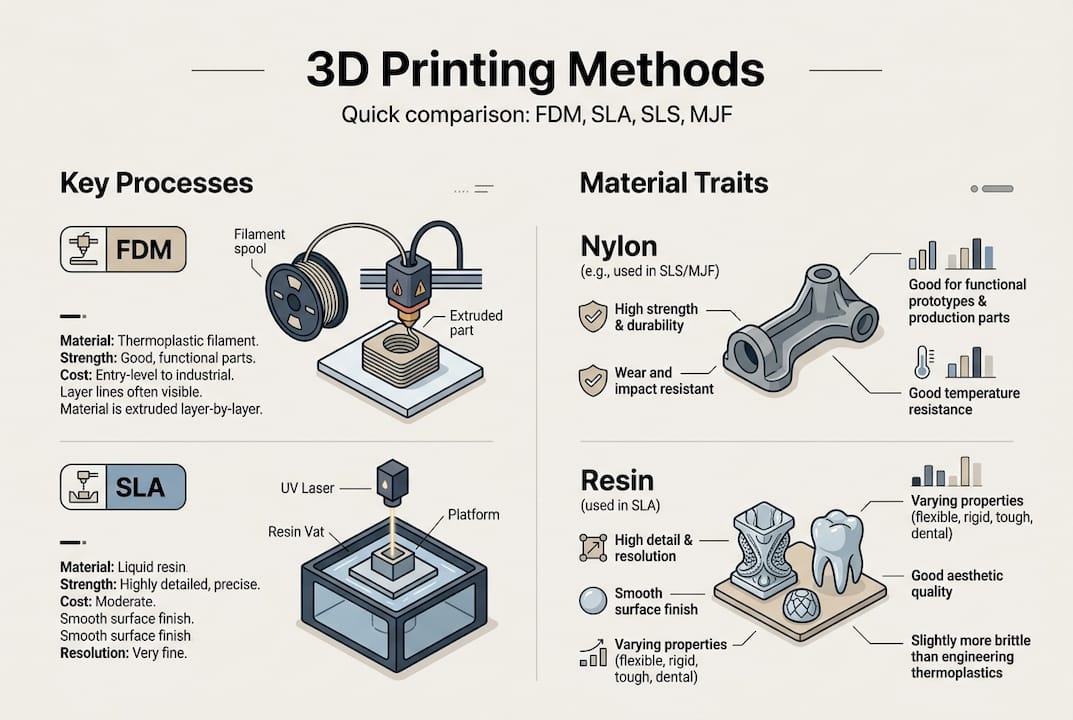
Infographic compares main 3D printing methods

FDM (Fused Deposition Modeling) melts thermoplastic filament and deposits it layer by layer. It’s the most affordable option and works well for concept models and cost-sensitive functional parts. However, FDM tolerances run ±0.5mm and layer lines are visible, which limits cosmetic applications.

SLA (Stereolithography) uses a UV laser to cure liquid resin. It produces the finest surface detail of any process, with SLA tolerances as tight as ±0.05mm. It’s the right choice for dental models, jewelry masters, and parts where surface finish matters more than toughness.

SLS (Selective Laser Sintering) and MJF (Multi Jet Fusion) both use powder-bed fusion to build nylon parts without support structures. SLS and MJF hold ±0.25mm tolerances and produce parts with near-isotropic strength, meaning they’re nearly as strong in every direction. This is a significant advantage over FDM, where layer orientation directly affects part strength.

Process Typical tolerance Typical industry cost per part (not our pricing) Best use case Strength profile
FDM ±0.5mm $3–$50 Concept models, brackets Anisotropic
SLA ±0.05–0.13mm $15–$80 Detail models, masters Brittle
SLS ±0.25mm $20–$100 Functional parts, batches Near-isotropic
MJF ±0.25mm $20–$90 Production runs, complex geometry Near-isotropic

For a broader look at how these processes fit into manufacturing workflows, the additive manufacturing guide covers the full picture. If you’re still deciding which process fits your specific job, finding the best print job breaks it down by application. You can also compare provider capabilities directly through Xometry’s service options.

Now that you understand the main processes, let’s look at how real-world businesses select the right service for their needs.

Selecting the right on-demand 3D printing service

The provider you choose matters as much as the process. Different platforms specialize in different things, and picking the wrong one adds cost and delays.

Provider Strength Best for
Protolabs Speed 1–2 day prototypes, fast iteration
Xometry Scale and quoting Instant quotes, large order flexibility
Stratasys Direct Industrial grade High-performance materials, aerospace

Protolabs delivers 1–2 day prototypes, making it the go-to for fast design validation. Xometry offers instant quotes and scales well for larger orders. Stratasys Direct specializes in industrial-grade parts where material certification matters. The MakerVerse service guide provides a useful comparison of these platforms.

For batch production between 50 and 5,000 parts, powder-bed processes like SLS and MJF are the clear leaders. They pack multiple parts into a single build volume, which reduces per-unit cost significantly at scale.

Here’s a simple decision process to follow:

  1. Define your requirements. What tolerances, materials, and quantities do you need?
  2. Match to a process. Use the table above to narrow down FDM, SLA, SLS, or MJF.
  3. Evaluate providers. Check quoting speed, DFM (design for manufacturing) feedback, and lead times.
  4. Run a test batch. Order a small quantity first to validate fit and finish before scaling.
  5. Iterate fast. Use instant quoting platforms to test design changes without long approval cycles.

Pro Tip: Always look for providers that offer DFM analysis before printing. Catching a wall thickness issue or an unsupported overhang before the job runs saves you a full reprint cycle.

For a deeper look at how prototyping fits into product development, the rapid prototyping guide is worth reading before you place your first order. If you’re new to the terminology, the printing terminology guide clears up the jargon quickly.

Once you’ve chosen a provider, understanding design and engineering nuances ensures success with your parts.

Engineering for on-demand 3D printing: Tolerances, orientation, and post-processing

Most print failures aren’t caused by bad machines. They’re caused by designs that weren’t built with the process in mind. A few engineering principles make the difference between a part that works and one that warps, cracks, or doesn’t assemble.

Engineer checks 3D printed part against laptop design

Wall thickness is the first thing to check. Thin walls under 1.2mm fail in FDM; SLA can go as thin as 0.6mm. Going below these minimums produces fragile, incomplete walls that break during post-processing or assembly.

Overhangs and supports are the next concern. Overhangs beyond 45 degrees require support structures in FDM and SLA. SLS and MJF eliminate this problem entirely because unfused powder acts as a natural support. If you’re designing complex geometry, powder-bed processes save significant cleanup time.

Holes print undersized in most processes due to thermal contraction and layer adhesion. Use 0.3–0.5mm clearance for loose fits and 0.15–0.25mm for snug fits. This is one of the most common mistakes in first-time prints.

Key design principles to follow:

  • Add fillets and ribs to reduce stress concentrations at corners and joints
  • Orient load paths in the XY plane to maximize FDM part strength
  • Use hybrid print plus machining for holes, threads, or mating surfaces that need tight tolerances
  • Plan post-processing steps like sanding, priming, or vapor smoothing into your timeline

“Fillets and ribs reduce stress; orient loads in XY; hybrid print and machining for critical features.”

Pro Tip: If a feature is truly critical, such as a bearing seat or a threaded insert, design it slightly undersized and machine it to final dimension after printing. This hybrid approach gives you the geometry freedom of additive manufacturing with the precision of subtractive finishing.

For parts that demand tight tolerances and verified accuracy, engineering-grade prints and a high quality scan process can validate your as-built geometry against your CAD model. The ProtoLabs design tips page is also a reliable reference for process-specific design rules.

For real business results, let’s see how these factors play out in practical applications.

Practical applications and best practices for business success

The businesses that get the most value from on-demand 3D printing treat it as a system, not a one-off tool. They build iteration into their workflow and match the process to the job rather than defaulting to whatever is cheapest.

Common high-value applications include:

  • Prototyping enclosures and housings before committing to injection mold tooling
  • Custom assembly jigs that improve consistency on the production floor
  • End-use brackets and mounts for low-volume products where tooling cost isn’t justified
  • Replacement parts for legacy equipment no longer supported by the original manufacturer

Powder-bed processes are preferred for production durability, SLA delivers the best cosmetic finish, and FDM handles cost-sensitive jobs where surface quality isn’t critical. Matching the process to the actual requirement, rather than defaulting to the cheapest option, is the single biggest factor in getting usable parts on the first try. The TPM3D comparison breaks this down clearly by application type.

The most common mistakes businesses make:

  • Skipping a test fit before ordering a full batch
  • Ignoring orientation in FDM parts that carry mechanical loads
  • Ordering cosmetic parts in FDM when SLA would cost only slightly more
  • Not accounting for post-processing time in the project schedule

Pro Tip: Use 3D scanning on your first physical prototype before ordering a production batch. Scanning reveals dimensional drift between your CAD model and the actual printed part, so you can correct the design before scaling up.

For guidance on producing reliable functional parts or understanding what makes a prototype truly production-ready, the rapid prototyping insights page covers the full development cycle.

Connect with expert 3D printing and scanning services

Ready to put these insights into action? CC 3D Labs offers professional, on-demand printing and scanning solutions built for businesses that need accurate, reliable parts without the overhead of in-house equipment.

https://cc3dlabs.com

Whether you need a single prototype or a batch of several hundred parts, the team at CC 3D Labs handles the full process from file review to finished part. Explore the complete range of CC3DLabs services to find the right fit for your project. For precision work, custom 3D prints covers filament-based solutions with tight tolerances and fast turnaround. If your project involves reverse engineering or dimensional verification, the 3D scanning lab provides high-accuracy scans that feed directly into your design workflow. Get a free online estimate and see how quickly your next part can move from file to finished product.

Frequently asked questions

Which 3D printing process is best for functional parts?

Powder-bed processes like SLS and MJF are best for durable, functional parts because they produce near-isotropic strength and require no support structures, which simplifies post-processing.

How do I ensure dimensional accuracy when printing?

Set tolerances appropriate to your process, add 0.3–0.5mm clearance for loose fits, and consider post-machining for critical features. FDM holds ±0.3–0.5mm, while SLA achieves ±0.1mm and SLS/MJF lands around ±0.2–0.3mm.

What are typical turnaround times for on-demand printing?

Protolabs delivers prototypes in 1–2 days; larger or more complex batches typically take 3–7 business days depending on material and quantity.

Is SLA or FDM more cost-effective for prototyping?

FDM is more cost-effective for basic form-and-fit prototypes, with FDM parts running $3–$50 compared to SLA at $15–$80 per part. Choose SLA when surface detail or fine features matter.

Can 3D scanning improve my 3D printing outcomes?

Yes. Scanning your printed prototype reveals dimensional drift from your CAD model, and hybrid print and scanning enables precise corrections before you commit to a production batch.

Engineer reviewing 3D printed prototype in loft

Find the best 3D print job for custom prototypes & parts

Sourcing a reliable custom 3D print job sounds straightforward until you’re staring at a dozen providers, each promising fast turnaround and flawless quality. For product developers and businesses, the wrong choice means delayed launches, wasted budgets, and parts that fail in the field. The good news is that a clear, structured approach to evaluating providers cuts through the noise fast. This guide walks you through the exact criteria, options, and quality checks you need to confidently place your next order and get parts that actually perform.

Table of Contents

Key Takeaways

Point Details
Selection matters Choosing the right 3D print job provider ensures speed, quality, and cost-effectiveness.
Option diversity Service bureaus, specialty providers, and online platforms offer varied strengths for custom projects.
Quality assurance Request portfolios and verify protocols to guarantee the final product meets specifications.
Decision checklist Match criteria and provider strengths to your unique project needs for best outcomes.

Key criteria for selecting a 3D print job

Before you request a single quote, you need a firm grip on what your job actually demands. Not every provider is built for every application, and mismatching your requirements to a provider’s capabilities is the most common and costly mistake in custom manufacturing.

Rapid prototyping is increasingly central to modern product development cycles, which means the pressure to find the right provider quickly is real. Here are the core criteria to evaluate before committing:

  • Material compatibility: Does the provider stock the specific filament or engineering-grade composite your part requires? ABS, PETG, nylon, and TPU all behave differently under load.
  • Turnaround time: From quote approval to finished part in hand. Some jobs need 48 hours; others can tolerate a week.
  • Dimensional accuracy and tolerances: What is the provider’s stated tolerance range? For functional parts, this is non-negotiable.
  • Quality assurance process: Do they inspect parts before shipping, or is it print-and-ship?
  • Portfolio and technical expertise: Has the provider handled jobs similar to yours in complexity, material, or volume?
  • Cost structure: Per-part pricing, batch discounts, and setup fees all affect your total cost.

Pro Tip: Always ask a potential provider for a sample print of a geometry similar to your part before placing a full order. A small upfront investment in a test print saves significant rework costs later.

Once you know what your job requires, the next step is understanding where to source it. The market has expanded significantly, and each type of provider comes with real trade-offs.

Local specialty shops offer direct communication, faster iteration cycles, and the ability to inspect parts in person before accepting delivery. For businesses near a capable provider, this is often the fastest path from design file to finished part.

Technician inspects fresh print in local 3D shop

National service bureaus operate at scale, which means broader material libraries and competitive pricing on larger batches. The trade-off is less personalized support and longer communication chains when revisions are needed.

Online marketplaces and platforms connect you with a network of independent printers. They work well for simple, low-stakes jobs but can be inconsistent for precision engineering applications.

Specialty engineering shops are the right call when your part needs tight tolerances, specific certifications, or materials that general providers don’t stock. On-demand 3D printing services within this category offer the flexibility to source complex prototypes on tight timelines without sacrificing accuracy.

  • Local shops: Best for fast iteration and hands-on communication
  • National bureaus: Best for volume pricing and broad material access
  • Online platforms: Best for simple, low-complexity jobs
  • Specialty shops: Best for functional parts, prototypes and repair parts, and engineering-grade applications

Pro Tip: If your project involves multiple design iterations, a local or specialty provider with direct design support will save you far more time than a cheaper online platform that requires you to manage all revisions yourself.

Comparison of major 3D print job options

Side-by-side comparisons make trade-offs obvious. Use this table to quickly map your job requirements to the right provider type.

Provider type Speed Quality level Material range Support Pricing
Local specialty shop Fast (1-3 days) High Moderate Direct, personal Mid to high
National service bureau Moderate (3-7 days) High Wide Limited Competitive on volume
Online marketplace Variable Inconsistent Variable Minimal Low to mid
Specialty engineering shop Fast to moderate Very high Specialized Expert, hands-on Premium

A few things stand out in this comparison. Online marketplaces look attractive on price, but the quality inconsistency makes them a risky choice for anything that needs to function under real-world conditions. Specialty shops carry a premium price tag, but engineering-grade prints deliver the precision and material performance that technical prototypes demand.

For most product developers running iterative design cycles, the sweet spot is a local or specialty provider that combines speed, quality, and direct technical support. Volume buyers may find national bureaus more cost-effective once designs are locked and validated.

Ensuring quality for your 3D print job

Quality assurance is not something you verify after the parts arrive. It starts before you place the order. Here is a practical sequence to follow:

  1. Request portfolio samples relevant to your application. Look for surface finish, dimensional consistency, and layer adhesion in the examples they share.
  2. Ask for tolerance documentation. A reputable provider will tell you their standard tolerance range (typically ±0.2mm to ±0.5mm for FDM printing) and flag when your design pushes those limits.
  3. Understand their post-processing steps. Does the provider sand, prime, or anneal parts? Post-processing affects both aesthetics and mechanical performance.
  4. Review inspection protocols. Do they use calipers, CMM (coordinate measuring machine) equipment, or visual inspection only? For critical parts, high-accuracy inspection matters.
  5. Check certifications and standards. ISO compliance or industry-specific certifications signal a provider that takes process control seriously.

“The difference between a good print and a great one often comes down to what happens after the print finishes, not during it.”

Strict scanning and design protocols are foundational to quality assurance in professional 3D printing. If you’re new to the technical side, reviewing 3D printing terminology before your first provider conversation will help you ask the right questions and evaluate answers accurately.

Making the right decision for your next 3D print job

All the criteria, comparisons, and quality checks come down to one practical question: which provider fits this specific job right now? The answer changes depending on where you are in your development cycle.

Additive manufacturing helps manufacturers reduce cost and accelerate innovation, but only when the right process and provider are matched to the job. Here is how to think through the final decision:

  • Prioritize speed when you’re in early-stage prototyping and need fast design feedback. A 48-hour turnaround from a local shop beats a 7-day wait from a national bureau at this stage.
  • Prioritize quality and accuracy when parts are moving toward functional testing or end-use applications. Tolerance errors at this stage are expensive.
  • Prioritize price only after speed and quality requirements are confirmed. Cost optimization on a part that fails testing is not a saving.
  • Prioritize support when your design is complex or still evolving. A provider with in-house CAD and design support is worth the premium.

Use this final checklist before placing any order:

  • Material confirmed and available at the provider
  • Turnaround time meets your project deadline
  • Tolerance range documented and acceptable
  • Sample or portfolio reviewed
  • Post-processing and inspection steps confirmed
  • Pricing structure understood including setup fees and batch rates

Matching provider to job type is not complicated once you have a clear picture of your requirements. The mistake most teams make is skipping the evaluation step and defaulting to the cheapest or most familiar option.

Where to find top custom 3D print jobs and services

When your project demands precision, speed, and a provider that actually understands engineering requirements, the choice of partner matters as much as the design itself.

https://cc3dlabs.com

At CC 3D Labs, we specialize in custom filament-based 3D printing services for product developers and businesses that need parts done right the first time. From single prototypes to batch production runs, our team handles material selection, design support, and quality inspection in-house. Browse our 3D print gallery to see the range and quality of work we deliver across industries. Ready to move forward? Request a free estimate for your custom 3D printing project and get a fast, accurate quote with no obligation.

Frequently asked questions

How fast can a 3D print job be completed?

On-demand services can produce prototypes within 24 to 48 hours, while more complex jobs typically take 3 to 7 days depending on part geometry, material, and finishing requirements.

What materials are available for custom 3D print jobs?

Most providers offer PLA, ABS, PETG, and nylon as standard options. Engineering-grade printing services extend that range to include high-performance composites and specialty filaments suited for functional and structural applications.

How do I ensure quality when ordering a 3D print job?

Request sample prints, review the provider’s stated tolerances, and ask for documentation on their inspection process. Strict scanning protocols and post-processing steps are strong indicators of a quality-focused provider.

Are 3D print jobs suitable for functional prototypes?

Absolutely. With the right material selection and a provider that maintains tight tolerances, prototypes and repair parts produced through 3D printing can meet demanding functional and mechanical requirements.