Person measuring 3D print at a tidy workbench

Ensure 3D print accuracy: step-by-step guide for reliable results


TL;DR:

  • Achieving precise 3D prints relies on proper hardware calibration, environment control, and process documentation.
  • Follow a systematic calibration sequence: E-steps, flow rate, temperature, XY compensation, then verify with a calibration cube.
  • Consistent accuracy requires rigorous QC, documentation, and functional testing rather than solely relying on test models.

A single millimeter of dimensional error can turn a promising prototype into a costly restart. For product developers and small manufacturers, a bracket that doesn’t seat properly, a housing that won’t close, or a functional part that binds under load isn’t just frustrating — it’s a schedule killer. The good news is that most accuracy failures in FDM 3D printing trace back to a handful of fixable root causes: uncalibrated hardware, poorly chosen parameters, and skipped verification steps. Work through those systematically, and you can hit repeatable tolerances that actually serve your design intent.

Table of Contents

Key Takeaways

Point Details
Preparation is key Gather the right tools, environment, and expectations to set the stage for print accuracy.
Follow calibration order Calibrate extruder steps, flow rate, and temperature in sequence for the most consistent results.
Tweak parameters wisely Adjust speed, temperature, and layer height according to your printer and project needs.
Verify and troubleshoot Always measure finished prints and address issues like shrinkage, over-extrusion, and first layer errors.
Quality control drives consistency Document processes and apply standards for repeatability and reliability in production.

What you need for precise 3D printing

Before diving into specific steps, understand what gear and setup you need for successful, accurate prints. Skipping this foundation is one of the most common reasons teams struggle with dimensional consistency even after hours of calibration work.

Essential hardware and tools:

  • A printer with a rigid frame and quality linear motion components (linear rails improve consistency significantly)
  • Digital calipers accurate to 0.01mm for measuring test prints
  • A feeler gauge set for bed leveling
  • A known-weight filament spool from a reputable supplier
  • Calibration test models (single-wall cubes, calibration towers, XY compensation squares)

Software requirements:

  • A capable slicer such as PrusaSlicer, Cura, or OrcaSlicer with calibration tools built in
  • Firmware that supports input shaping and pressure advance (Klipper or Marlin 2.x)
  • A spreadsheet or calibration log to track every change you make

Your environment matters more than most people expect. Temperature swings in your print space directly affect filament viscosity and cooling behavior, both of which shift your dimensions. Aim for a room temperature between 65°F and 75°F with minimal airflow drafts around the printer. Enclosures help with materials like ABS and Nylon that are sensitive to ambient temperature.

Set realistic expectations based on your hardware. Industry benchmarks show tuned mid-range FDM printers achieve ±0.1–0.2mm, well-tuned linear-rail systems reach roughly ±0.1–0.15mm in best cases, and Stratasys industrial FDM systems hold dimensional variation within 2%. Understanding print accuracy basics before you start calibrating helps you avoid chasing tolerances your hardware simply can’t deliver.

Printer type Typical achievable tolerance Best use case
Budget FDM (Cartesian) ±0.2–0.4mm Concept models, non-critical parts
Tuned mid-range FDM ±0.1–0.2mm Functional prototypes, fixtures
Linear rail FDM ±0.05–0.15mm Precision parts, snap fits
Industrial FDM (Stratasys) ±0.05–0.1mm Production-grade components

For manufacturing-grade 3D printing that needs to meet engineering specs, investing in a quality machine and a controlled environment isn’t optional — it’s the baseline.

Pro Tip: Keep a dedicated calibration kit in a labeled box next to your printer: a set of calipers, a test print USB or SD card, and a printed log sheet. Calibration done without documentation is just guessing.

Step-by-step calibration for dimensional accuracy

Once you have what you need, follow these concrete steps to calibrate your printer for true dimensional accuracy. The order matters. Skipping ahead or doing steps out of sequence creates compounding errors that are very hard to trace.

The correct calibration sequence is: calibrate extruder E-steps first, then flow rate using a single-wall test, followed by temperature tuning, XY compensation, and finally verify everything with a calibration cube.

Calibration sequence:

  1. Calibrate E-steps. Measure 100mm of filament from the extruder entrance, command the extruder to feed 100mm, and measure what actually moved. Adjust E-steps with the formula: New E-steps = (Current E-steps × 100) ÷ Actual mm fed. This is your foundation. Every other calibration assumes your extruder is delivering accurate filament length.

  2. Tune flow rate with a single-wall test. Print a single-wall box (no infill, no top/bottom layers) and measure wall thickness with calipers. Your measured wall should equal your nozzle diameter. If it reads 0.48mm on a 0.4mm nozzle, reduce flow rate by approximately 17%. The formula: New flow = (Nozzle diameter ÷ Measured wall) × Current flow %. This step catches over-extrusion that inflates all your external dimensions.

  3. Run a temperature tower. Print a temperature tower model and inspect each section for stringing, layer adhesion, and surface quality. Pick the temperature zone that gives the cleanest surface with no stringing. For PLA this is typically 195°C to 215°C, but it varies by brand and color.

  4. Apply XY compensation. Print a calibration square and measure the actual outer dimensions versus the model dimensions. Most slicers let you apply an XY contour compensation value (typically 0.1mm to 0.2mm inward for holes, outward for outer profiles) to correct for systematic over-extrusion on perimeters.

  5. Verify with a calibration cube. Print a 20mm calibration cube and measure all three axes. Your target is within ±0.2mm on a tuned mid-range printer. If Z is off, check your layer height settings and leadscrew pitch.

Calibration step Accuracy impact Difficulty Time required
E-steps Very high Low 10 minutes
Flow rate High Low 20 minutes
Temperature tuning Medium Medium 45 minutes
XY compensation High Low 15 minutes
Calibration cube verify Diagnostic Low 30 minutes

For parts that will be measured against designing reliable prototypes standards, a high quality scan calibration process can validate your physical output against the original CAD geometry, catching errors that calipers alone might miss.
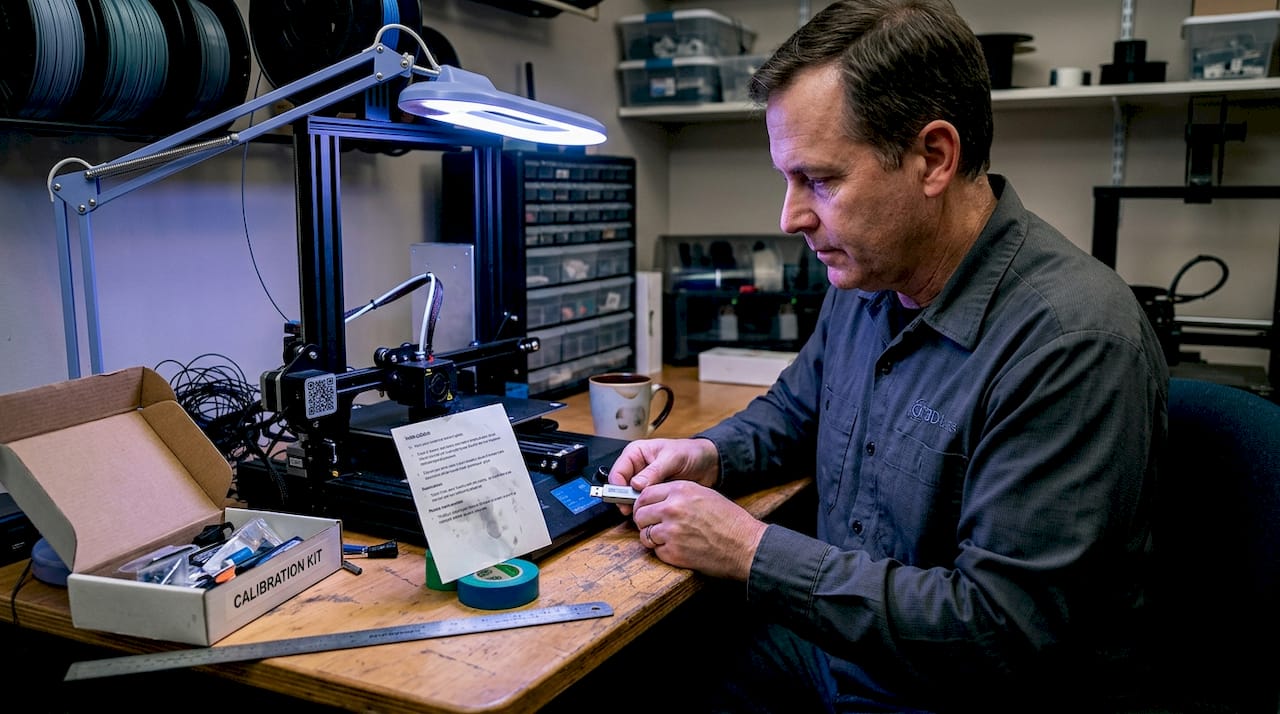
Person calibrating 3D printer with kit and instructions

Pro Tip: Always recalibrate after any maintenance: nozzle swap, belt tension adjustment, or firmware update. What was accurate last week may not be accurate today.

After basic calibration, dial in print parameters for your specific machine and project needs. Calibration sets your baseline, but parameter tuning is where you optimize for the part in front of you.

Research on PLA FDM printing shows that printer-specific optima vary significantly. The Prusa MK4 performs best at lower speeds (20–40mm/s) with a higher nozzle temperature (around 230°C) and small layer heights (0.05mm for fine detail). The LulzBot TAZ Pro handles higher speeds (40–60mm/s) and thicker layers (0.2mm) more effectively. Lower layer heights generally improve XY accuracy by reducing the staircase effect on curved surfaces.

Parameter Prototype run Functional/production part
Print speed 40–60mm/s 20–40mm/s
Layer height 0.15–0.2mm 0.05–0.1mm
Nozzle temperature Manufacturer default Fine-tuned per material batch
Cooling fan 100% 50–80% (material dependent)
Perimeter count 2–3 3–5

Quick tuning tips for production versus prototype runs:

  • For concept prototypes, prioritize speed over fine detail. Use 0.2mm layers and 50mm/s to get a physical model in hand quickly.
  • For functional parts with tight fits, drop to 0.1mm layers and 30mm/s on perimeters. Slow perimeters reduce ringing artifacts that distort edge dimensions.
  • For batch production, lock in a parameter profile and save it as a named preset. Never tweak a production profile mid-run.
  • Use pressure advance (or linear advance in Marlin) to reduce corner bulging, which is one of the most common causes of oversized outer dimensions.
  • Check out this manufacturing optimization checklist for broader process efficiency ideas that complement your print parameter strategy.

For low-volume print tips that balance speed with accuracy, the key is treating each small batch like a mini production run: same parameters, same filament brand, same environment. And if you’re working with specialty materials, our guide to precision with filament printing covers material-specific parameter strategies in detail.

Pro Tip: Document every parameter change per project in a simple spreadsheet. Note the date, filament batch number, temperature, speed, and measured output. Six months from now, when a client reorders, you’ll reproduce the result in one print instead of three.

Verifying accuracy and troubleshooting common issues

Once your parts are printed, verifying their accuracy and resolving any issues should be routine, not an afterthought.

Measuring and verifying part dimensions:

  1. Let parts cool fully before measuring. Warm PLA is slightly flexible and will read smaller than it actually is once rigid.
  2. Use digital calipers for features above 1mm. For bore diameters and precision holes, use a calibrated pin gauge set.
  3. Measure at multiple points on the same feature. A hole that reads 5.00mm at the top may read 4.85mm at the bottom if elephant’s foot is present.
  4. Compare all critical dimensions to your CAD drawing, not just the nominal size. Note deviations by axis and by feature type.
  5. Use PrusaSlicer’s built-in dimensional accuracy test, which includes an XYZ cross gauge with holes to check shrinkage and XY skew simultaneously.

Troubleshooting common accuracy problems:

  • Elephant’s foot: First layer squishes outward by roughly 0.2mm per side. Fix it by increasing the initial layer height slightly or using your slicer’s elephant’s foot compensation setting.
  • Over-extrusion on outer walls: Mimics an E-steps error but is actually a flow rate problem. Calibrate flow first before touching steps/mm.
  • Oversized holes: Apply XY compensation of 0.1 to 0.2mm inward for holes in your slicer. This is separate from your outer profile compensation.
  • XY skew: If your calibration square prints as a parallelogram, use your slicer’s skew correction tool to dial in the actual angle of your motion system.

Material shrinkage matters. PLA shrinks 0.3–0.5% as it cools. For a 100mm part, that’s up to 0.5mm of dimensional loss. Scale your model up by the shrinkage percentage, or use your slicer’s shrinkage compensation field. ABS and Nylon shrink significantly more and require enclosures plus active compensation to hit tight tolerances.

Slicer tools are underused by most teams. PrusaSlicer’s built-in tools include XY skew correction, flow calibration tests, and a dimensional accuracy test model that gives you a complete picture of your printer’s current state in a single print. Run this test after every major calibration session and keep the results in your log.
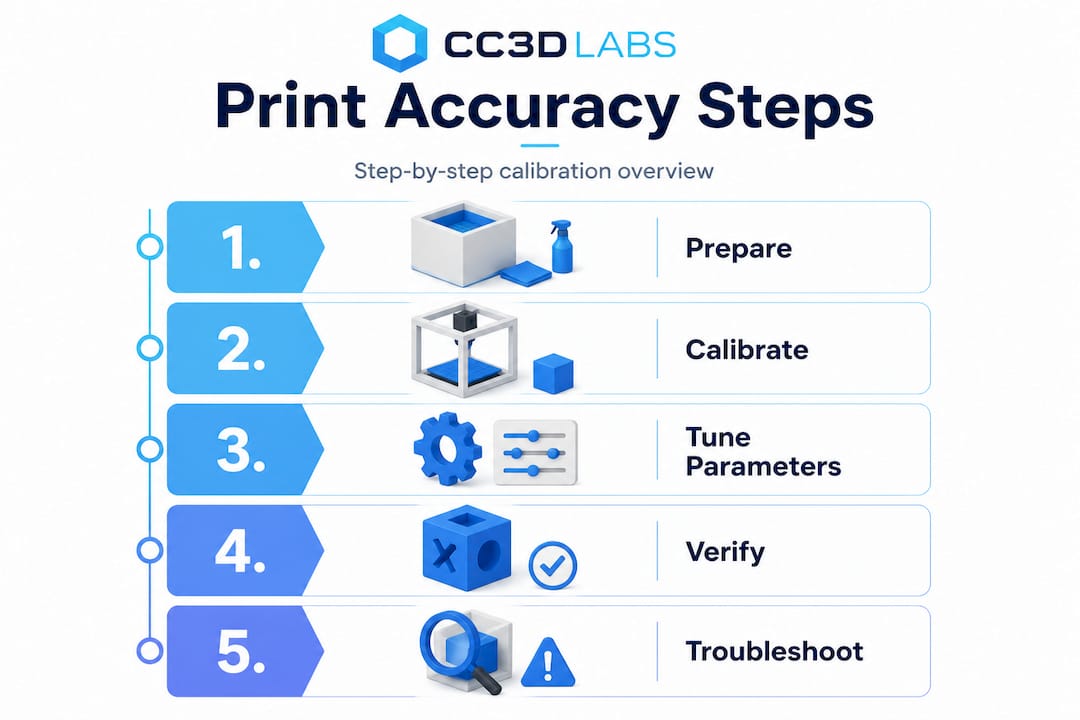
Vertical flow infographic of 3D print calibration steps

For parts where accuracy is truly non-negotiable, review the critical print accuracy factors that go beyond slicer settings and into design and material choices.

Getting repeatable results: Best practices for production and QC

Beyond a single print, consistent accuracy demands reliable quality control. One good print doesn’t mean your process is stable. Repeatability is what separates a calibrated machine from a production-ready process.

Core best practices for process consistency:

  • Write a one-page print process document for each recurring part: material, brand, profile name, bed surface, and post-processing steps.
  • Tag every batch with the filament lot number. Material properties vary between lots, and tracking this is the fastest way to diagnose unexpected dimensional shifts.
  • Perform a first-article inspection on the first part of every new batch. Measure all critical dimensions before committing the full run.
  • Assign specific operators to specific machines where possible. Operator-to-machine consistency reduces variability significantly.
  • Schedule preventive maintenance on a fixed interval: belt tension, nozzle condition, and bed surface replacement. Don’t wait for failures.

ISO 5725 standards define accuracy as bias (how close to true value) and precision as repeatability and reproducibility across operators and time. Applying this framework to your 3D printing process means you’re not just checking one print — you’re validating that your process delivers consistent results across shifts, machines, and team members.

Post-processing is often the final step to hitting the tightest tolerances. Reaming critical bores to a final diameter, light sanding of mating surfaces, or a quick pass with a file on snap-fit features can take a ±0.2mm printed part to a ±0.05mm functional fit. Plan for this in your design and your schedule.

For teams that need precise estimates for QC planning and budgeting, knowing your expected scrap rate and post-processing time per part is essential for accurate project costing.

Our take: Why print accuracy isn’t just about numbers

Here’s something we’ve seen repeatedly: teams spend hours chasing a perfect calibration cube score, then send a functional bracket to assembly and discover it doesn’t fit the mating part. The cube was perfect. The bracket was wrong. Why? Because dimensional accuracy in isolation doesn’t account for how a part actually functions in context.

The real test of print accuracy is assembly fit and end-use performance, not caliper readings on a test model. A hole that measures 5.02mm on a calibration print may still bind on a 5.0mm shaft because of surface texture, material compliance, or thermal expansion in service. Conversely, a part that reads 0.15mm undersized might assemble perfectly because the mating part has a complementary tolerance.

This is where an application-first mindset pays off. Before you set a dimensional target, ask: what does this part actually need to do? A snap-fit clip needs a specific deflection range, not a specific wall thickness. A bearing housing needs a specific press-fit interference, not a perfect 20mm cube score. Design your verification around the functional requirement, not the geometric ideal.

Teams also tend to measure what’s easy (outer dimensions, wall thickness) and skip what’s hard (hole roundness, flatness, perpendicularity). Those harder-to-measure features are often exactly where assembly problems hide.

Our advice: always review printed parts as part of the design and assembly process. Fit them to their mating components. Test the function. Use calipers as a diagnostic tool, not as the final verdict. And when you’re designing parts for tight tolerances, reliable prototypes by design gives you the framework to build accuracy into your geometry from the start.

Accurate 3D printing starts with the right partner

Precision matters at every stage of product development, from the first prototype to a production batch. If your team is spending more time troubleshooting dimensional errors than iterating on design, the problem might not be your calibration skills — it might be the equipment and process behind your prints.

https://cc3dlabs.com

At CC 3D Labs, we bring calibrated, production-ready 3D printing services to product developers and manufacturers who need parts that are right the first time. Whether you’re producing prototypes and functional parts for fit-and-function testing or running a batch of production components, our quality-controlled process handles the calibration, parameter tuning, and first-article verification so you don’t have to. Get started with on-demand 3D printing and request a free online estimate today.

Frequently asked questions

What is a typical tolerance for high-accuracy FDM 3D printing?

Well-calibrated FDM printers can achieve tolerances of about ±0.1 to ±0.2mm, with advanced linear rail systems reaching as tight as ±0.05mm on a well-maintained machine.

How do I fix oversized holes in my 3D prints?

Apply XY hole compensation of 0.1 to 0.2mm inward in your slicer settings, and always calibrate your flow rate before adjusting steps/mm to avoid compounding errors.

Do layer height and print speed affect dimensional accuracy?

Yes; lower layer heights improve XY accuracy by reducing staircase effects on curved surfaces, while slower perimeter speeds reduce corner bulging that inflates outer dimensions.

Why do my prints measure smaller after cooling?

PLA shrinks 0.3–0.5% as it cools from print temperature to room temperature, so scaling your model up slightly or using your slicer’s shrinkage compensation field corrects for this predictable loss.

How can I verify my 3D printer’s repeatability?

Print calibration parts in batches across multiple sessions, measure all critical dimensions, and evaluate results using ISO 5725 bias and precision criteria to confirm consistency across operators and time.

Technician adjusting multi-color 3D printer on workbench

Multi-color 3D printing: methods, challenges, and value


TL;DR:

  • Multi-color 3D printing involves complex methods with tradeoffs in cost, waste, and reliability.
  • Workflow discipline, including filament storage and model preparation, is crucial for success.
  • Choosing the right method depends on your project needs, volume, and desired color fidelity.

Multi-color 3D printing looks like a straightforward upgrade. Add more colors, get better prototypes. Done. Except it rarely works that way. The technology that makes your product models pop with realistic branding and vivid detail can also consume up to 50% more raw filament through purging alone, stall your production timeline, and introduce failure risks that only show up halfway through a 14-hour print. For business owners and product developers, understanding the true mechanics and tradeoffs is the difference between a compelling prototype and a costly mistake.

Table of Contents

Key Takeaways

Point Details
Waste impacts cost Multi-color 3D printing processes can waste up to 50% more material, raising project expenses.
Workflow matters Using dry filament and well-tuned slicer settings is critical for reliable, high-quality multi-color prints.
Tech choice is key AMS, independent nozzle, and toolhead systems each offer unique tradeoffs for business use.
Plan for application Choose your multi-color method based on your product’s needs, volume, and visual requirements.

What is multi-color 3D printing?

Once you understand why multi-color prints attract attention, it’s essential to grasp exactly how these technologies work and what sets them apart.

At its core, multi-color 3D printing is the ability to produce a single printed object using two or more filament colors or materials in one print session. Unlike painting or post-processing, the color is built directly into the part during fabrication. That makes it ideal for product logos, realistic concept models, client presentation pieces, and branded components that need to communicate design intent without extra finishing steps.

Standard single-extruder printers work with one color of filament from start to finish. Multi-color setups break that constraint. The main approaches include:

  • Single-extruder with material switching: An automated device like an AMS (Automatic Material System) feeds different filament colors into the same nozzle. The printer purges old color before switching. Simple, but wasteful.
  • Multi-extruder or independent printhead systems: Each nozzle carries a different color or material. No purging needed between colors, and both can print simultaneously.
  • Tool-changing systems: A robotic carriage swaps entire printheads mid-print. Extremely precise, but more mechanically complex.
  • Full-color inkjet-style 3D printing: Binder jetting or similar processes deposit colored binders layer by layer. Highest color fidelity, but limited material strength.

For 3D printing on demand, the FDM-based methods dominate because they support functional materials like PETG, TPU, and engineering-grade filaments that clients actually need.

Here is where the first hard reality lands:

“Color changes in basic FDM setups are limited to layer-aligned boundaries. Vertical color splits within a single layer require multi-extruder or tool-changing setups. Common failure points include color bleeding from incomplete purging, wet filament jams in AMS units, and non-manifold geometry errors in AI-generated models.”

For business prototypes, this means your slicer settings, model geometry, and filament condition matter as much as the hardware itself. Rushing any of these steps produces prints that look impressive in a render but fall apart in the build chamber.

How multi-color 3D printing works: Key methods compared

After covering what multi-color 3D printing is, the next step is comparing how the main methods perform in a real-world, business-relevant context.

The method you choose determines your cost per part, your waste rate, your failure risk, and ultimately whether your multi-color workflow makes financial sense at scale. Here is a direct comparison:

Method Filament waste Print speed Color accuracy Maintenance load
AMS single-nozzle 30 to 50% extra Moderate Moderate (purge dependent) Low to moderate
Independent multi-nozzle Low (up to 90% less waste) High (up to 800 mm/s) High Moderate
Tool-changing (e.g., Prusa XL) Minimal Moderate Very high Higher
Full-color inkjet Minimal Slow Highest High

AMS systems waste 30 to 50% of extra filament on purges, while systems like the MOVA Palette 300 cut that waste by up to 90% through independent nozzles. Tool-changing systems eliminate purging entirely, and advanced multi-nozzle setups reach print speeds up to 800 mm/s.

Engineer removing wasted filament from printer

For most businesses running a handful of color prototypes per week, AMS setups offer an accessible entry point. But as your run volume grows or your color count increases beyond four, the filament 3D printing economics shift fast. Waste filament is paid filament. At 30 to 50% extra consumption, a $40 material run becomes a $60 one before you factor in failed prints.

Independent nozzle systems cost more upfront but pay back quickly when you factor in reduced waste, faster cycle times, and fewer failed prints. If you are producing client-facing demos, validation prototypes, or small-batch branded parts, that investment compounds.

Pro Tip: Before buying hardware, calculate your projected monthly filament spend at a 40% waste rate. That number alone often justifies upgrading to an independent nozzle or tool-changing system, or outsourcing to a custom filament printing specialist who already runs optimized equipment.

Workflow pitfalls and how to solve them

So, how do you actually operationalize these systems and avoid common errors that can undermine even the most promising prototypes?

The technical capability exists. The workflow discipline is what separates successful multi-color shops from expensive ones. Here are the most common failure points and how to fix them:

  1. Wet filament jams: Moisture-absorbed filament causes bubbling, weak layers, and nozzle clogs. This is the leading cause of failed multi-color prints. Store all filament in sealed containers with desiccant, and dry spools before extended print jobs.
  2. Incomplete purging: When the previous color is not fully flushed from the nozzle, you get color bleeding that ruins logos and brand elements. Increase purge volumes in your slicer, even if it raises waste temporarily.
  3. Poor model geometry: AI-generated models often contain non-manifold geometry, which causes slicer errors and mid-print failures. Always run your STL through a mesh repair tool like Meshmixer or Netfabb before slicing.
  4. Slicer misconfiguration: Wrong retraction settings, color transition zones placed incorrectly, or inadequate purge towers cause visible artifacts. Calibrate slicer profiles specifically for each filament type and color combination.
  5. Underestimating print duration risk: Every additional hour of print time increases failure probability. Low-volume manufacturing runs benefit from scheduling shorter multi-color jobs when possible and monitoring long prints with webcam feeds.

Business trade-offs are real: waste in the 30 to 50% range drives up costs fast in high-volume scenarios, independent nozzle systems cut that by 90%, and longer prints increase failure risk. Prioritize dry filament and tuned slicers before blaming the hardware.

Pro Tip: Plan your purging towers and color transition zones during the design phase, not after slicing. When color change locations are built into the model architecture, you get cleaner transitions and less guesswork during print setup. Review filament-based prototype examples to see how transition planning affects final part quality.

Business impact: Choosing the right solution for your product development

Solving technical hurdles is only half of the journey. Here is how these choices impact real business results and ROI.

The right multi-color method depends on your production context. Here is a simplified cost and use-case comparison to guide your decision:

Scenario Best method Waste impact Ideal for
1 to 3 colors, low run volume AMS single-nozzle 30 to 50% extra Early-stage prototypes
4+ colors, client presentation pieces Independent multi-nozzle Up to 90% less Product demos, branding
Mixed materials, functional validation Tool-changing system Minimal Engineering prototypes
Highest color fidelity, artistic pieces Inkjet-style 3D printing Minimal Display models

Waste drives costs by 30 to 50% in high-volume AMS setups, while independent nozzle systems cut waste by up to 90% and toolhead systems remain superior for multi-material prototypes.

For small-batch client work, the visual impact of accurate multi-color parts accelerates stakeholder buy-in and reduces revision cycles. That is real time saved. For higher-volume runs, the math on waste versus hardware investment becomes critical to your pricing model.

Key decision factors to evaluate before committing:

  • How many distinct colors does your typical prototype require?
  • What is your average print duration, and how does failure risk affect your deadline?
  • Are you producing display models or functional, tested parts?
  • Is waste filament cost currently included in your per-part pricing?
  • Would outsourcing to a specialist reduce total cost compared to in-house hardware?

Explore the full range of applications of 3D printing and review 3D printing trends shaping how businesses are deploying multi-color capabilities in 2026 to benchmark your own approach.

The real cost and opportunity of multi-color 3D printing: A practitioner’s view

Here is the uncomfortable truth we see play out regularly: businesses invest in multi-color hardware because it looks impressive, then spend the next six months troubleshooting waste, jams, and failed prints. The technology gets blamed. But the real issue is almost always workflow and process maturity.

More colors do not automatically produce better prototypes. A two-color print with clean geometry, dry filament, and a calibrated slicer will beat a six-color print with a sloppy workflow every time. Business trade-offs are stark: waste in the 30 to 50% range compounds fast, longer prints increase failure risk, and the organizations that get the best results prioritize process discipline over hardware specs.

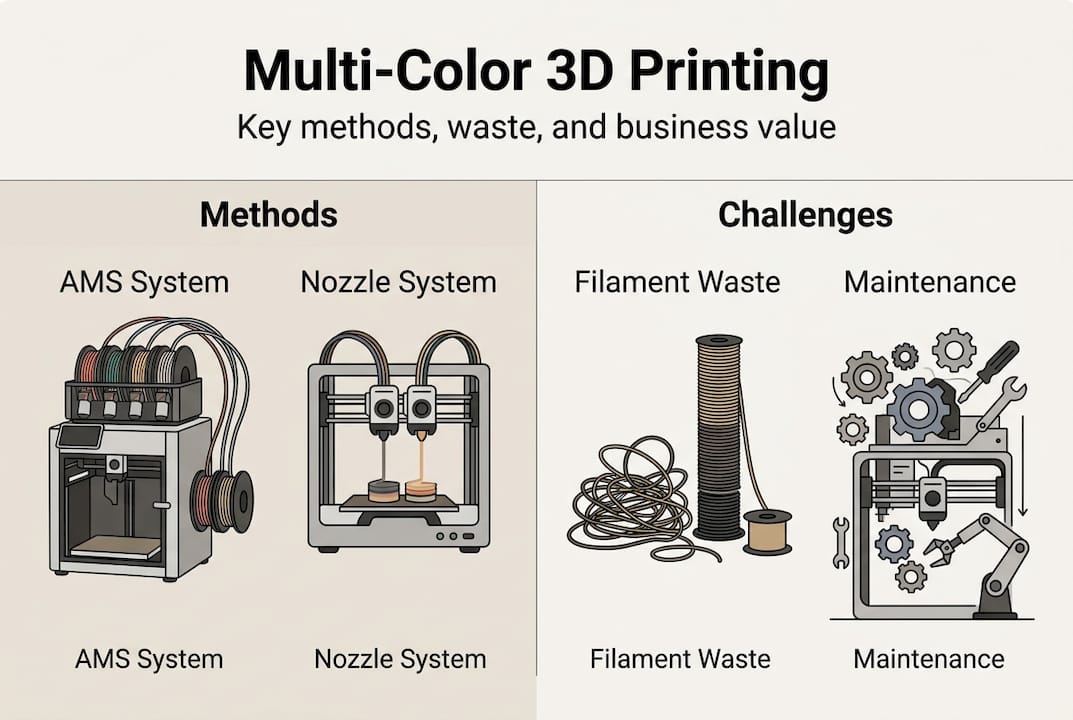
Infographic showing multi-color 3D printing methods and challenges

The overlooked opportunity here is stakeholder engagement. A precise, well-executed multi-color prototype shortens your feedback loop and gets decisions made faster. That speed-to-validation advantage is worth more than the print itself. Before upgrading your printer, upgrade your multi-color printing workflow. Dry your filament. Tune your slicer. Fix your geometry. Then evaluate whether your current equipment is actually the bottleneck.

Explore advanced multi-color 3D printing with CC3DLabs

Ready to go beyond the basics? Here is how we can help accelerate your innovation.

At CC 3D Labs, we run production-grade multi-color and multi-material printing workflows built specifically for business owners and product developers who need accurate, repeatable results without the overhead of managing complex hardware in-house.

https://cc3dlabs.com

Our 3D printing services cover everything from early-stage concept models to small-batch branded components, with optimized setups that minimize material waste and maximize color accuracy. Whether you need a fast-turnaround consultation on what can be printed for your next prototype or a full on-demand prototyping run, our team is ready to scope your project, estimate costs, and get your parts moving. Reach out for a free online estimate today.

Frequently asked questions

How does multi-color 3D printing work with a single extruder?

A single-extruder printer uses an automated filament-switching device to load different colors into the same nozzle at set layer points. AMS systems waste 30 to 50% of extra filament in purge cycles, which limits its efficiency for high-volume runs.

Is multi-color 3D printing good for making functional parts?

For most functional applications, material properties matter more than color, but advanced multi-nozzle systems can produce durable, accurate prototypes with color integrated. Toolhead systems are superior when combining different materials in a single functional part.

What is the biggest challenge with multi-color 3D printing?

Material waste from color purging and the compounding failure risk on long multi-color print jobs are the primary challenges. Longer prints increase failure risk, making process discipline and filament condition critical to every run.

Does multi-color 3D printing cost more than regular printing?

Yes. Between increased material consumption and more complex hardware requirements, the cost per part is higher. Waste drives costs by 30 to 50% in standard AMS setups, which must be factored into your pricing from the start.

Technician reviewing 3D printed prototype at workshop desk

Why Print Accuracy Is Critical for 3D Prototyping


TL;DR:

  • Print accuracy measures how closely a 3D printed part matches CAD design dimensions.
  • Layer height, print speed, material shrinkage, and slicer calibration are key factors affecting accuracy.
  • Incorporating process control and topology optimization enhances reliability and reduces dimensional errors.

A single 0.2mm dimensional error seems insignificant on paper. In practice, it can mean a snap-fit assembly that won’t close, an engineering jig that wobbles under load, or a costly round of reprints that blows your project timeline. For product developers and manufacturers, this is not a hypothetical situation. It happens more often than most teams want to admit. The misconception is that 3D printing is rapid and “close enough” by nature. But when you’re validating a functional prototype or preparing for short-run production, close enough is never actually good enough. This guide explains what print accuracy really means, what drives it, and how to build it into every stage of your workflow.

Table of Contents

Key Takeaways

Point Details
Print accuracy defined Print accuracy is how closely your 3D part matches your design—critical for fit and function.
Settings matter most Layer height, print speed, and material choice determine accuracy much more than printer brand.
Material choice impacts results PLA and PETG offer better dimensional stability than ABS, reducing warping and shrinkage.
Advanced methods boost reliability Using topology optimization and process-aware tools produces more consistent and dependable prints.

What does print accuracy mean in 3D printing?

With the stakes clear, let’s define exactly what print accuracy means and why it isn’t just another technical buzzword.

Print accuracy describes how closely a finished 3D-printed part matches the original design dimensions in your CAD file. If your model calls for a 50mm hole and the printed result measures 49.6mm, you have an accuracy gap. That gap matters enormously once parts need to fit together, pass inspection, or meet a functional specification.

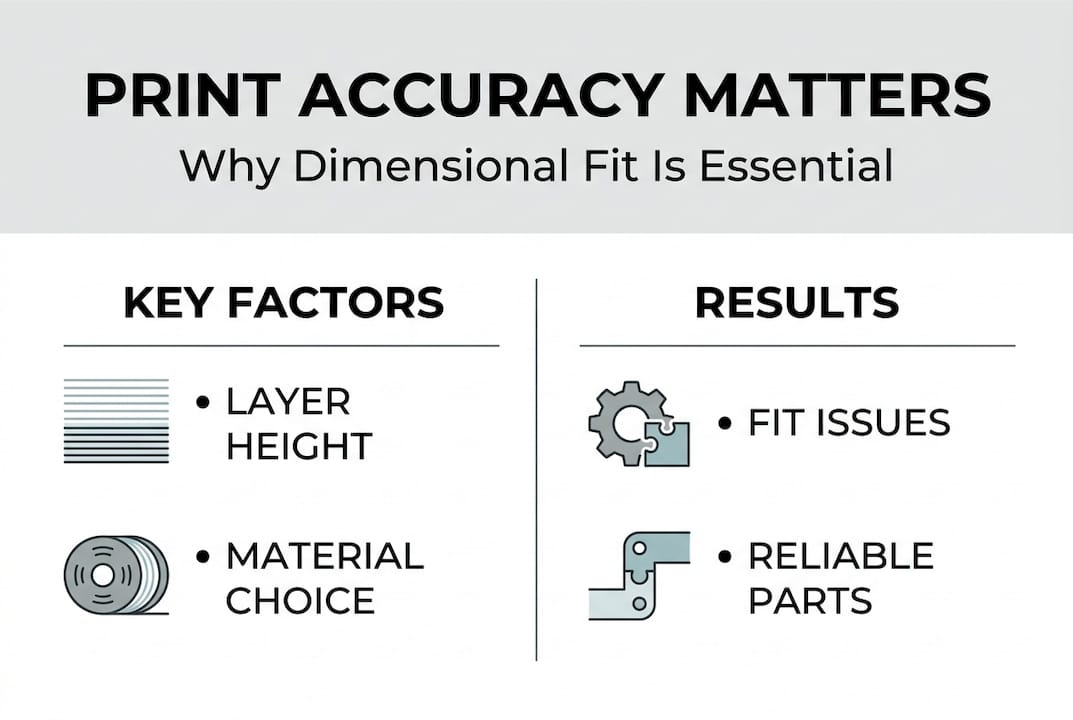
Infographic showing print accuracy essentials and results

It helps to distinguish accuracy from two related concepts. Precision refers to repeatability, meaning how consistently a printer reproduces the same result across multiple runs. Resolution refers to the smallest detail the printer can physically produce, typically expressed in microns. A printer can have high resolution but poor accuracy if it consistently prints features that are the wrong size. A machine can be precise but inaccurate if every part comes out 0.3mm too wide, every single time.

Why does a 0.2mm error wreck a snap-fit prototype? Because snap-fits operate within tight elastic deformation windows. Even a slight oversize on a cantilever arm can prevent engagement entirely. For engineering jigs used to hold, align, or guide other components, dimensional deviation means the jig introduces rather than eliminates error into your process.

Several variables directly control how accurate a print turns out:

  • Layer height: Layer height most significantly affects width and height errors in printed parts
  • Print speed: Faster movement reduces material control and increases deviation
  • Bed leveling: An uneven bed creates first-layer inconsistencies that propagate upward
  • Material shrinkage: All thermoplastics contract as they cool, some more than others
  • Nozzle temperature: Too low causes under-extrusion; too high causes material spread
  • Slicer calibration: Incorrect extrusion multiplier settings skew all feature sizes

Understanding the right 3D printing terminology before you start a project saves time and prevents costly assumptions.

Pro Tip: Before committing a design to a batch run, always compare your CAD tolerances to the documented capability of the printer and material you plan to use. A printer rated for ±0.2mm tolerance should never be trusted for a part that requires ±0.05mm fits without prior test prints.

Major factors that impact print accuracy

Now that it’s clear what accuracy means, let’s see what actually drives accurate and inaccurate results in 3D printing.

Empirical testing gives us the clearest answers. Research on FDM printing with PLA on a Prusa MK4 found that low speed, high temperature, and thin layers such as 20 to 40mm/s, 230°C, and 0.05mm layers delivered the best dimensional accuracy across tested parameters. That’s a meaningful benchmark for anyone running precision work.

Here’s how those findings translate into a practical parameter reference:

Parameter Optimal value for accuracy Effect of deviation
Layer height 0.05 to 0.10mm Thicker layers increase width and height error
Print speed 20 to 40mm/s Higher speed degrades material control
Nozzle temperature 230°C (for PLA) Lower temps cause under-extrusion and gaps
Bed temperature 60°C (for PLA) Incorrect temp causes warping and layer shift
Infill pattern Rectilinear or grid Complex patterns increase internal stress

Beyond settings, physical and process variables also play a major role:

  1. Design review: Check for features that exceed your printer’s capability before slicing
  2. Test piece: Print a calibration cube or representative feature before the full part
  3. Measurement: Use calipers to check test pieces against CAD dimensions before approving a run
  4. Slicer adjustment: Apply compensation values for known shrinkage or offset errors
  5. Post-processing review: Measure critical dimensions after any surface finishing or heat treatment

For guidance on matching material to tolerance requirements, the filament selection for precision guide covers real-world selection logic for demanding applications. If you’re still deciding between materials, see the breakdown of PLA, PETG, or ABS performance for functional parts.

Pro Tip: When dimensional accuracy is critical, reduce layer height and print speed before adjusting any other parameter. These two settings have the most direct and measurable impact on output fidelity.

Material selection and dimensional stability

Even with dialed-in settings, your material pick can make or break dimensional accuracy. Let’s see why.

Every thermoplastic shrinks as it transitions from molten to solid. The rate and consistency of that shrinkage determines how much the final part deviates from the design. Some materials are far more forgiving than others.

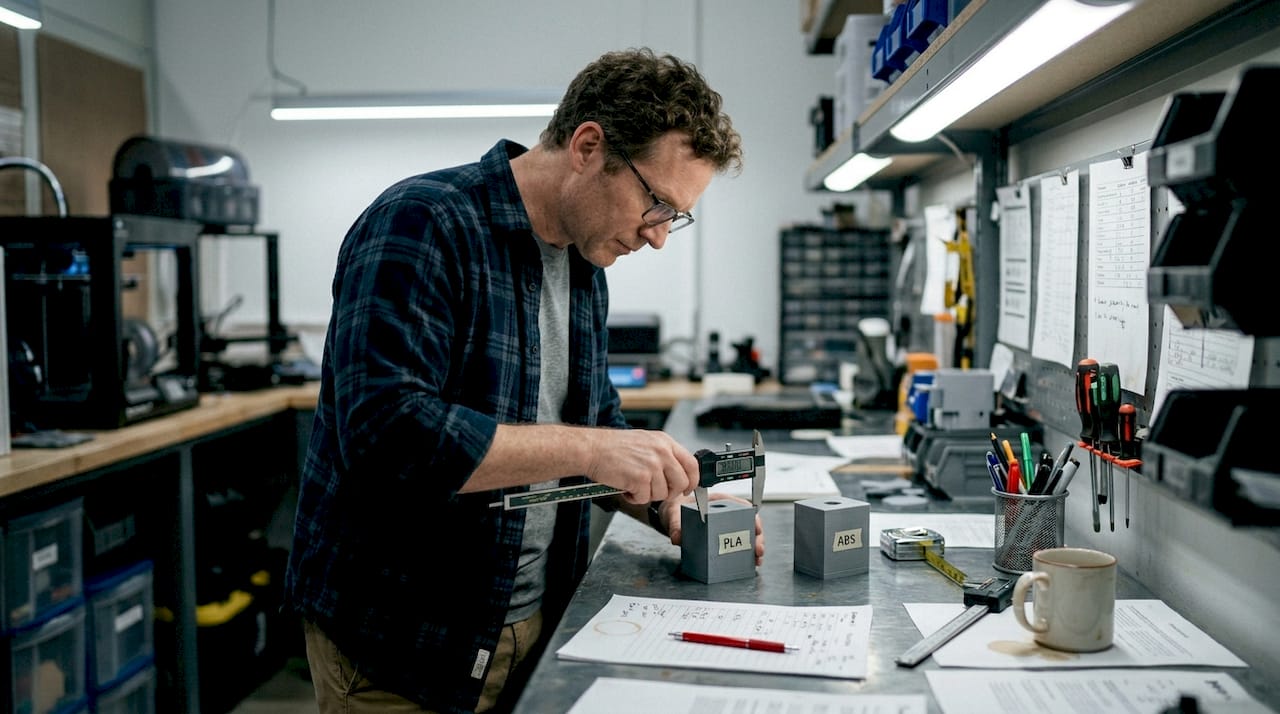
Engineer measuring 3D printed PLA and ABS blocks

Material Shrinkage rate Warping risk Best use cases
PLA Low (0.2 to 0.4%) Low Prototypes, display models, snap-fits
PETG Low to medium (0.3 to 0.5%) Low to medium Functional parts, mild chemical exposure
ABS High (0.7 to 1.6%) High Heat-resistant parts, post-processed components

Warping is the biggest accuracy threat from thermal behavior. Warping primarily comes from uneven cooling and shrinkage, and is best controlled with even cooling, adhesion aids, and choosing low-shrink materials like PLA or PETG when tolerances are tight.

“Warping doesn’t just ruin surface finish. It changes the geometry of a part in ways that are nearly impossible to correct after the fact. One curled edge on a mating surface can cascade into a full fit failure during assembly.” — Dimensional reliability perspective from materials engineering practice

Strategies to reduce warping and protect dimensional stability:

  • Use a heated enclosure for ABS and other high-shrink materials to slow and equalize cooling
  • Apply bed adhesion solutions such as glue stick, PEI sheets, or hairspray for better first-layer grip
  • Reduce part cooling fan speed for materials prone to layer delamination from rapid quenching
  • Orient parts to minimize large flat areas contacting the bed when using high-shrink filaments
  • Use brim or raft supports to anchor edge geometry during printing

One common overcorrection: teams add enclosures when printing low-shrink materials like PLA in cool environments. For most PLA prints, enclosures can actually trap heat and cause softening near the top layers. Know your material’s actual needs before defaulting to every countermeasure at once.

If you’re still narrowing down your options, the decision framework for choosing between PLA, PETG, and ABS breaks down dimensional trade-offs clearly. You can also explore what can be printed to see how material choice maps to real part applications.

Advanced methods: Topology optimization and process control

For truly reliable, repeatable parts, accuracy must extend beyond setup and materials. Here’s how modern approaches help.

Topology optimization is a computational design method that removes unnecessary material from a part while maintaining its structural performance. For 3D printing, it goes further than weight reduction. When the optimization algorithm incorporates the actual behavior of the printer, including how the print head deposits material and how bonding between layers works, the resulting geometry is fundamentally better suited to being printed accurately.

MIT’s advanced technique incorporates print head limitations and inter-layer bonding constraints directly into the topology optimization process, reducing deposition errors and making complex parts more reliable as a result. This is a significant shift from designing a part and hoping the printer handles it, to designing a part that the printer can actually execute with precision.

For manufacturers, the practical benefits are real:

  • Fewer failed prints: Designs that account for printer behavior fail less often mid-run
  • Less over-deposition: Optimized geometries reduce material buildup in corners and transitions
  • More repeatable outcomes: Process-aware designs perform consistently across multiple batches
  • Lower post-processing burden: Parts that print accurately need less sanding, filling, or rework
  • Better structural performance: Optimized designs maintain strength without compensating wall thickness

Process-aware slicing tools are also evolving. Modern slicer software increasingly allows users to input material behavior profiles so the tool can compensate for known shrinkage rates before the file is ever sent to print. Pairing this capability with topology-optimized geometry creates a workflow where accuracy is built in, not chased after.

For more on applying these principles to short-run work, the low-volume manufacturing tips resource covers batch consistency in detail. The designing for reliability guide addresses design-stage decisions that prevent dimensional problems before printing starts.

Why most teams underestimate print accuracy and how to shift your approach

Here’s the uncomfortable reality: most teams treat print accuracy as a printer problem, not a process problem. When a part comes out wrong, the instinct is to adjust a setting or switch machines. But accuracy failures are almost always systemic. They compound across decisions made in design, material selection, slicer setup, and even how results are measured and recorded.

Small errors are particularly dangerous because they feel correctable. A 0.3mm offset seems easy to absorb with a chamfer or a filed edge. But in a multi-part assembly, chain tolerance issues stack. What started as a minor gap at one interface becomes a structural misalignment two components later. By then, the cost of correction has multiplied.

Process discipline beats post-print correction every time. Log your print parameters, measure actual outputs, and compare them to design intent on every meaningful run. Never assume one batch mirrors the last. Filament lots vary, ambient temperature changes, nozzles wear. The low-volume accuracy approach we apply at CC 3D Labs reflects exactly this discipline.

Pro Tip: Keep a simple print log with layer height, speed, temperature, material lot, and measured output dimensions. Over time, this data reveals patterns that setting changes alone never will.

The teams that produce the most reliable prototypes are not the ones with the best printers. They’re the ones who treat accuracy as a non-negotiable standard at every stage, not an afterthought.

Get reliable prototypes with print-perfect accuracy

If you’re ready to leave inconsistency behind and prioritize accuracy, here’s how to take the next step.

At CC 3D Labs, we build dimensional accuracy into every project from file review through final inspection. Whether you need a single precision prototype or a short production run with tight tolerances, our team works through the exact settings and material choices covered in this guide on every job.

https://cc3dlabs.com

Explore our professional 3D printing services to see the full range of capabilities we bring to prototyping and functional part production. If you need parts fast, on-demand 3D prototyping gets you from file to finished part with zero guesswork on accuracy. And if you want to design for the best possible outcome from the start, our reliable print design tips give you a solid foundation before you ever send a file.

Frequently asked questions

What is the difference between print accuracy and precision?

Print accuracy differs from precision in a fundamental way: accuracy measures how closely a part matches the intended design dimensions, while precision measures how consistently those results repeat from one print to the next.

How much does layer height affect 3D print accuracy?

Layer height is the most significant factor for width and height errors in FDM prints. Thinner layers produce noticeably better dimensional fidelity, especially on features with fine detail or tight tolerances.

Why do some prints warp more than others?

Warping is primarily from thermal shrinkage and uneven cooling during printing. PLA and PETG shrink less than ABS, but proper bed adhesion, enclosure use, and cooling management can reduce warping across all common filament types.

How can topology optimization improve print reliability?

MIT’s technique incorporates real-world print constraints into the design optimization process, which reduces deposition errors and makes complex parts more structurally reliable. It shifts accuracy from a post-print correction problem to a pre-print design solution.

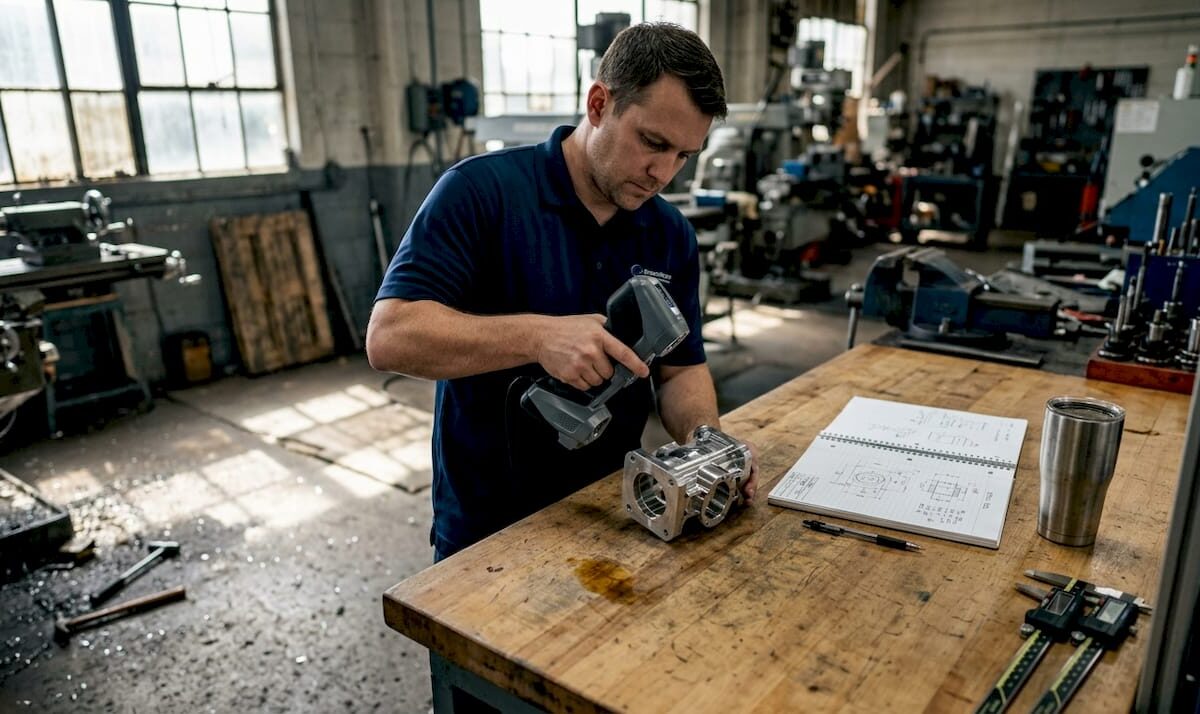
Engineer scanning metal part at workbench

Unlock 3D scanning: boost design accuracy and prototyping


TL;DR:

  • 3D scanning provides precise digital models, faster prototyping, and reliable quality control.
  • Choosing the right technology depends on accuracy, object size, surface, and budget.
  • Integrating 3D scanning early improves design accuracy, reduces errors, and accelerates workflows.

3D scanning gets dismissed as a glorified copy machine for 3D printing. That misunderstanding costs product teams weeks of rework and thousands in avoidable errors. In reality, 3D scanning is one of the most powerful tools available for businesses that need precise digital models, faster prototyping cycles, and reliable quality control. This guide walks you through how 3D scanning works, the main technologies available, the real business benefits, and how to integrate scan data into your design and manufacturing workflows without the common pitfalls.

Table of Contents

Key Takeaways

Point Details
3D scanning basics 3D scanning transforms real objects into accurate digital models for design and prototyping.
Top technologies Laser triangulation, structured light, and photogrammetry each suit different accuracy and use-case needs.
Business benefits 3D scanning saves time, reduces errors, and enables rapid iteration in product development and manufacturing.
Workflow integration Scanned data seamlessly fits into CAD and production pipelines, connecting design with manufacturing.
Real-world success tips Preparation, surface treatment, and calibration improve scan quality and project success.

How 3D scanning works: The basics explained

At its core, 3D scanning captures the exact geometry and surface details of a physical object and converts that data into a digital model. That model can then be edited, analyzed, reproduced, or fed directly into a CAD (computer-aided design) system. The process has three main stages: data capture, point cloud creation, and mesh or model generation.

During data capture, the scanner emits light, laser beams, or uses cameras to measure the surface of an object from multiple angles. Each measurement records the position of a point in 3D space. Thousands or even millions of these points combine to form a point cloud, which is essentially a dense map of the object’s surface geometry. That point cloud is then processed into a mesh, a connected surface made of triangles, which becomes the usable 3D model.

The three most common scanning technologies are:

  • Laser triangulation: Projects a laser line or point onto the surface; a sensor reads the reflected angle to calculate position. Laser triangulation is highly accurate for short-range work and fine detail.
  • Structured light: Projects a pattern of light (often stripes) onto the object and uses cameras to measure how the pattern deforms across the surface. Fast and excellent for medium-sized parts.
  • Photogrammetry: Uses overlapping photographs taken from different angles to reconstruct a 3D model mathematically. Cost-effective and scalable for larger objects.

Learning how 3D scanning optimizes workflows early in a project helps teams avoid costly design revisions later.

Pro Tip: Lighting and object positioning matter more than most people expect. Consistent, diffused lighting reduces shadows and surface noise, which directly improves point cloud density and model accuracy.

A poorly set up scan environment can introduce errors that ripple through every downstream step, from CAD modeling to final part inspection. Investing 15 minutes in proper setup saves hours of cleanup.

Main types of 3D scanning technologies compared

Now that you know the basics, let’s compare the main 3D scanning techniques so you can match the right tool to your project.

Choosing the wrong scanning method is one of the most common mistakes product teams make. Each technology has a distinct performance profile depending on accuracy needs, object size, surface type, and budget.

Technology Accuracy Speed Cost Best for
Laser triangulation Very high Moderate Medium-high Small parts, fine detail
Structured light High Fast Medium Mid-size parts, smooth surfaces
Photogrammetry Moderate Slow Low Large objects, outdoor use
CT scanning Extremely high Slow Very high Internal geometry, medical

Here is a simple process for matching your scanning method to your application:

  1. Define your accuracy requirement. Engineering tolerances under 0.05mm demand laser triangulation or CT scanning.
  2. Assess your object size. Larger objects favor photogrammetry or structured light; small precision parts favor laser-based methods.
  3. Evaluate the surface. Reflective or dark surfaces need special preparation regardless of technology.
  4. Set your budget. Photogrammetry is the most accessible entry point; CT scanning is reserved for high-value inspection needs.
  5. Consider turnaround time. Structured light scanning is typically the fastest for medium-complexity parts.

Understanding the key 3D scanning techniques available helps you ask better questions when working with a scanning service provider.

Pro Tip: For highly detailed engineering parts or small components, laser triangulation consistently delivers the best results. It is the standard choice for high-accuracy work where tolerances are tight and repeatability is critical.

Key benefits for product development and manufacturing

With the options in mind, let’s look at the real business benefits of integrating 3D scanning into your development process.

The most immediate gain is the elimination of manual measurement. Traditional calipers and coordinate measuring machines (CMMs) are slow, operator-dependent, and limited in the complexity of geometry they can capture. 3D scanning captures the full surface of a part in minutes, with far less human error involved.

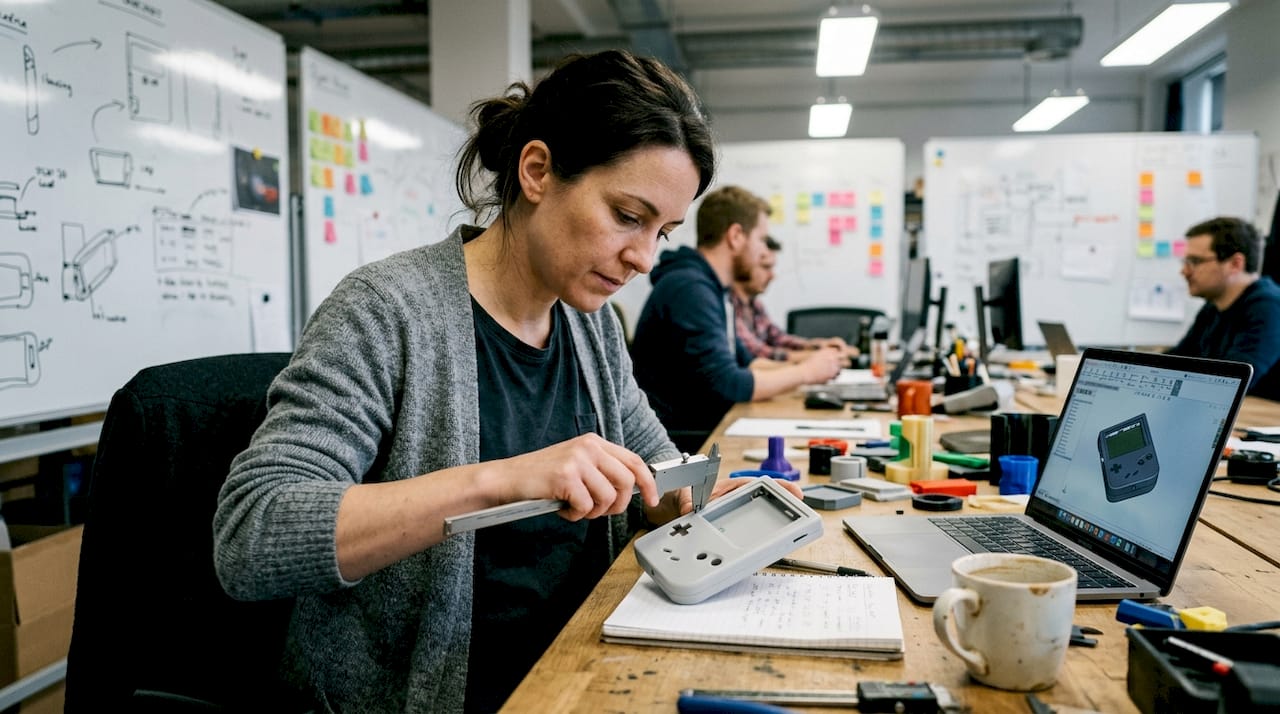
Designer measuring prototype with digital calipers

Workflow factor Traditional method 3D scanning method
Measurement time (medium part) 2 to 4 hours 15 to 45 minutes
Error rate Higher (operator-dependent) Significantly lower
Geometry complexity handled Limited Full freeform surfaces
Iteration speed Slow Fast
Documentation quality Manual records Full digital archive

The real-world impact spans multiple business functions:

  • Part design: Capture existing components with no original CAD file and rebuild them accurately.
  • Reverse engineering: 3D scanning significantly increases accuracy in reverse engineering and prototyping, reducing guesswork entirely.
  • Quality control: Compare scanned production parts against the original CAD model to catch deviations before they become costly defects.
  • Tooling verification: Confirm that molds and fixtures match design intent before committing to full production runs.

Teams focused on ensuring 3D scan quality for manufacturing report faster iteration cycles and fewer engineering change orders. For businesses doing reverse engineering with 3D scanning, the ability to digitize legacy parts without original drawings is a significant competitive advantage.

The compounding effect is real. Fewer errors early in development mean fewer corrections late, which directly reduces cost per prototype and shortens time to market.

From scan to workflow: Where and how 3D data is used

Understanding the benefits, let’s explore where 3D scan data delivers real impact in business workflows.

A raw point cloud is useful, but its true value comes when it is converted into a workable CAD model. Most professional scanning workflows use software like Geomagic, Artec Studio, or SOLIDWORKS to process the point cloud into a clean mesh, then into a parametric CAD file that designers can modify and manufacture from.

Here are the most common ways businesses use 3D scan data:

  • Reverse engineering: Recreate parts with no existing drawings, especially for legacy components or competitor benchmarking.
  • Quality inspection: Overlay the scan against the original CAD model to produce a color deviation map showing where parts are out of tolerance.
  • Tooling and fixture verification: Confirm that production tooling matches design specifications before first-article inspection.
  • Archiving: Build a permanent digital record of physical assets, molds, or prototypes for future reference.
  • Design iteration: Scan a physical prototype, bring it into CAD, refine it, and print or machine the next version faster.

“Modern 3D scanning streamlines the full development pipeline for new and legacy products, reducing the gap between physical reality and digital design intent.”

Exploring 3D scanning in CAD workflows shows just how tightly scanning integrates with modern design tools. Teams that understand using 3D scan data in CAD can move from physical object to production-ready file in a fraction of the time traditional methods require.

The key insight is timing. Scanning should not be an afterthought reserved for inspection. Integrating it early, at the concept and first-prototype stage, is where the biggest gains in speed and accuracy happen.

Common challenges and tips for getting reliable 3D scans

To wrap up the core guide, let’s address the most common snags and how smart teams get reliable results consistently.

Even with good equipment, scan quality can suffer if preparation and technique are not right. Surface type and environment directly influence scan accuracy, and skipping preparation steps is the fastest way to produce unusable data.

The most common challenges and how to address them:

  • Reflective surfaces: Shiny metals and plastics scatter laser or structured light unpredictably. Apply a temporary matte scanning spray to create a uniform, readable surface.
  • Dark or black surfaces: These absorb light rather than reflecting it, creating data gaps. Scanning spray also solves this problem in most cases.
  • Object movement: Even small vibrations during a scan introduce misalignment. Use a stable fixture or turntable to hold the part securely.
  • File misalignment: When combining multiple scan passes, poor alignment creates visible seams in the mesh. Use reference markers (small adhesive targets) placed on the object before scanning to give the software fixed registration points.
  • Calibration drift: Scanners can drift out of calibration over time or with temperature changes. Always run a calibration check before a critical scan session.

Pro Tip: For complex objects that require multiple scan passes, place reference markers on the object before you start. These give the alignment software fixed anchor points, which dramatically reduces mesh errors and cleanup time afterward.

Visit our tips for high quality 3D scanning resource for a deeper breakdown of preparation and post-processing best practices. Proper technique at the scan stage protects every hour of CAD work that follows.

Our take: Why mastering 3D scanning drives real innovation

Most conversations about 3D scanning focus on speed and cost savings. Those are real, but they are not the most important part of the story.

What we see consistently at CC 3D Labs is that businesses which integrate scanning early in their process do not just move faster. They think differently. When your team can digitize any physical object in minutes and bring it into a shared CAD environment, the collaboration between designers, engineers, and production teams changes fundamentally. Decisions get made with real geometry, not assumptions.

The conventional wisdom treats scanning as a QC or reverse engineering tool used after design is mostly done. That is backwards. The teams that leapfrog competitors use real-world 3D scanning insights to inform design from the very first prototype. They catch fit and function issues in the digital model before a single part is machined or molded.

The future of product development is agile, and agility requires closing the loop between physical and digital as fast as possible. 3D scanning is the bridge. Mastering it is not a technical upgrade. It is a strategic one.

Level up your workflow with CC3DLabs 3D scanning and printing solutions

Ready to put these insights into action for your business?

https://cc3dlabs.com

CC 3D Labs offers professional handheld 3D scanning (accuracy to ~0.1 mm) services paired with end-to-end CAD modeling and pro-level 3D printing for product developers and manufacturers near Philadelphia and beyond. Whether you need to digitize a legacy part, verify a production run, or accelerate your prototyping cycle, our team handles the full workflow from scan to finished part. Browse our CAD project gallery to see real examples of scan-to-print projects, or request a free estimate to get started on your next build.

Frequently asked questions

What is 3D scanning used for in business?

Businesses use 3D scanning for design accuracy, prototyping, reverse engineering, and quality control. It significantly increases accuracy in reverse engineering and prototyping compared to manual measurement methods.

Which 3D scanning method is best for fine detail?

Laser triangulation is best for short-range, high-precision applications and is the standard choice for capturing highly detailed or small parts at engineering tolerances.

What impacts 3D scanning accuracy?

Surface reflectivity, ambient lighting, and scanner calibration are the three biggest factors. Surface type and environment require careful preparation to achieve reliable, repeatable scan results.

Can 3D scan data be edited or modified?

Yes. Scan data is processed into a mesh and then converted to a parametric CAD model, which designers can fully edit, refine, and adapt for manufacturing or further prototyping.