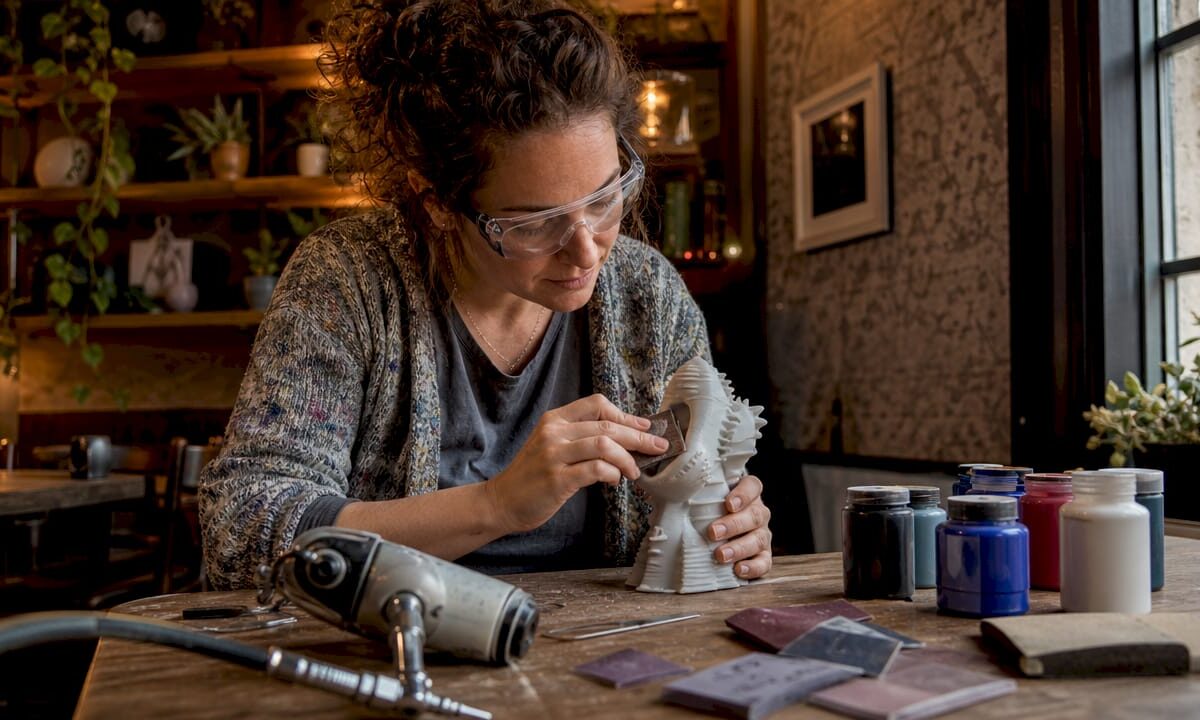
Artist sanding 3D printed sculpture

Ways to Paint 3D Printed Artwork: Artist’s 2026 Guide


TL;DR:

  • Painting 3D printed artwork requires careful surface preparation, compatible materials, and layered application. Patience during drying and sanding ensures a smooth, durable finish with realistic depth and detail.

Painting 3D printed artwork is defined as a multi-step post-processing workflow covering support removal, surface cleaning, sanding, priming, topcoat application, and sealing. The complete process spans 24–48 hours of drying and curing time between steps. Skipping any stage produces peeling, uneven color, or obscured detail. Artists and hobbyists who follow a disciplined sequence consistently achieve finishes that rival hand-sculpted pieces. The ways to paint 3D printed artwork covered here apply to both FDM filament prints and resin prints, with technique adjustments for each material.

Hands painting 3D printed artwork

1. Ways to paint 3D printed artwork start with surface preparation

Surface preparation is the most time-consuming phase of the entire process. Sanding and priming activity may take a few hours, but curing and drying total 1–2 days. Skipping this phase causes paint adhesion failures that no topcoat can fix.

For FDM prints, wash the part with warm soap and water to remove oils and dust. Remove all supports carefully with flush cutters or needle-nose pliers, then file or sand any nubs flush with the surface.

For resin prints, the process is different. For resin prints, wash in 99% isopropyl alcohol for about 5 minutes and cure fully under UV light; FDM (filament) prints just need a soapy-water wash and a quick IPA wipe. A tacky, uncured surface will reject paint regardless of how well you prime it.

Once clean and dry, begin sanding. Start with 120 or 180 grit to knock down layer lines, then progress through 220, 400, and 800 grit for a smooth base. Each grit removes the scratches left by the previous one. The goal is a surface that feels uniform to the touch.

Pro Tip: Matte filaments require significantly less sanding than glossy or silk variants because their microscopically rougher texture grips primer better. Choosing matte PLA or matte PETG before printing saves real time at the finishing stage.

2. Choosing the right primer for your 3D print

Primer does three jobs: it promotes adhesion, reveals surface flaws, and fills minor scratches. Choosing the wrong primer wastes every hour spent sanding. Understanding surface finish fundamentals helps you match primer type to material correctly.

The two main primer categories are:

  • Filler primers: Thick formulas that fill small scratches and layer lines. Ideal for FDM prints with visible texture. Apply in thin coats and sand between layers.
  • Adhesion promoters: Thin chemical primers that bond to slick or specialty plastics. Required before any standard primer on Nylon, polypropylene, or carbon-fiber-filled filaments.
  • Spray primers: Fast, even coverage. Best for organic shapes and complex geometry. Hold the can 25–30 cm from the surface and use sweeping passes.
  • Brush-on primers: Better control for small details or touch-ups. Thin with water or the manufacturer’s recommended solvent to avoid brush marks.

Specialty filaments like Nylon reject standard primers entirely. Apply a plastic adhesion promoter first, or the paint will peel regardless of surface prep quality.

Apply primer in 2–3 thin coats rather than one heavy coat. Let each coat dry fully before adding the next. Rushing this step causes solvent bubbling or wrinkling on the surface.

Pro Tip: After the first primer coat dries, lightly sand with 400 grit and look for shiny low spots. Those spots are depressions that need more filler primer. This is the start of the guide-coat method.

3. The guide-coat technique for a flawless base

The guide-coat method is the single biggest difference between amateur and professional paint results. Sand primer until bare plastic shows through in spots, which reveals low areas that need more filling. Shiny areas are low. Sanded-through areas are high. Fill the low spots with spot putty or another primer coat, then sand again.

This iterative process sounds tedious. It produces a surface where paint lays flat and color reads true. Without it, topcoats magnify every imperfection instead of hiding them.

Repeat the prime-and-sand cycle until the entire surface sands evenly with no shiny low spots remaining. Two or three cycles is typical for FDM prints with visible layer lines. Resin prints often need only one cycle.

4. Painting techniques that enhance 3D printed artwork aesthetics

Acrylic paints are the standard choice for painting 3D prints. They dry fast, thin with water, and bond well to primed surfaces. They also work with both brush and airbrush application.

The core rule for topcoats is the same as for primer: apply 2–3 thin, even coats instead of one thick coat. Thick coats pool in recesses, obscure fine detail, and take far longer to cure. Thin coats dry in minutes and build color gradually.

Beyond base coats, two techniques separate flat color from genuine artistic depth:

  • Washes: Thin dark paint (or dedicated wash medium) to a near-water consistency and apply it over the entire piece. Capillary action pulls the wash into recesses, creating natural shadows. Wipe excess off raised surfaces with a damp cloth before it dries.
  • Dry brushing: Load a stiff brush with a light color, then wipe almost all paint off on a paper towel. Drag the nearly dry brush lightly across raised edges and surface texture. The tiny amount of paint left catches only the highest points, simulating light hitting edges.

Washes and dry brushing are the techniques professional artists rely on to produce realistic depth and highlights beyond simple color coats. A figure painted with only base coats looks flat. The same figure after a wash and dry brush looks like it belongs in a display case.

“The difference between a painted print and a painted sculpture is almost entirely in the detailing stage. Base coats set the color. Washes and dry brushing set the story.”

Pro Tip: Thin your acrylic paints with a dedicated acrylic medium rather than plain water. Water breaks down the binder at high dilution ratios, causing the paint to bead or crack. Acrylic medium maintains the binder while lowering viscosity.

5. Matching paints and primers for compatibility

Paint and primer compatibility is a real technical constraint, not a preference. Solvent-based primers can dissolve water-based topcoats. Oil-based paints over acrylic primers may never cure fully. The safest approach is to stay within one paint family throughout the entire job.

For most artists, an all-acrylic system works well. Use an acrylic filler primer, acrylic base coats, acrylic washes, and an acrylic clear coat. Every layer speaks the same chemical language.

If you use a rattle-can spray primer, check the label for the base chemistry. Lacquer-based spray primers are common and fast-drying, but they require lacquer-compatible topcoats. Applying water-based acrylics over a fresh lacquer primer before it fully outgasses causes wrinkling.

Read the filament-specific finishing guide for your material before choosing a paint system. Flexible filaments like TPU need flexible paints. Rigid PLA accepts almost any acrylic system without issue.

6. Sealing and protecting your finished paint job

A clear coat seals the paint, protects against handling wear, and controls the final surface sheen. Skipping the clear coat means fingerprints and minor abrasion will damage the paint within weeks.

Clear coat options:

  • Matte clear coat: Eliminates surface shine. Best for realistic figures, terrain, and organic subjects where gloss looks artificial.
  • Satin clear coat: A middle ground. Works well for vehicles, armor, and objects that would have a slight sheen in real life.
  • Gloss clear coat: Maximum shine. Correct for candy-colored pieces, jewelry-style prints, and anything meant to look lacquered.

Apply clear coat the same way as primer and topcoat: thin, even passes at 25–30 cm distance. Let each coat dry fully before adding another. Two coats provide solid protection. Three coats are worth the extra time on pieces that will be handled frequently.

Allow the final clear coat to cure for at least 24 hours before handling the piece. The coat may feel dry to the touch in an hour, but full hardness takes longer. Handling too soon leaves fingerprints pressed into the surface.

7. Common mistakes and how to avoid them

The most common mistake in painting 3D prints is rushing drying times. Patience between coats is the single factor that separates a professional-grade finish from a frustrating one. Active brush or spray time may be minutes. Total curing can take days.

Other frequent errors:

  • Skipping adhesion promoter on specialty filaments: Nylon and carbon-fiber-filled materials will peel standard paint regardless of how well the surface was sanded. The adhesion promoter is not optional.
  • Applying paint too thick: One heavy coat obscures detail and takes far longer to dry than three thin coats combined.
  • Not sanding between coats: A light 400-grit pass between primer coats removes dust nibs and improves adhesion for the next layer.
  • Mixing incompatible paint systems: Lacquer over fresh acrylic, or oil over acrylic, causes chemical reactions that wrinkle or crack the surface.

Pro Tip: Sand lightly between every primer coat with 400 grit, and between base coats with 800 grit. This removes any dust contamination and gives each new layer a mechanical key to grip. The extra 5 minutes per coat pays back in a noticeably smoother final surface.

Key takeaways

Successful painting of 3D printed artwork requires proper surface preparation, compatible materials, and patient layering from primer through clear coat.

Point Details
Surface prep is non-negotiable Wash, sand through multiple grits, and cure resin prints before any primer touches the surface.
Match primer to filament type Specialty materials like Nylon need an adhesion promoter before standard primer to prevent peeling.
Use multiple thin coats Thin coats dry faster, preserve detail, and build stronger adhesion than one thick coat.
Washes and dry brushing add depth These two techniques transform flat base coats into realistic, handcrafted-looking finishes.
Seal every finished piece A compatible clear coat in matte, satin, or gloss protects paint from handling wear and controls final sheen.

What I’ve learned from years of painting 3D printed pieces

The advice I give most often is the advice beginners resist most: slow down between coats. Every artist wants to see the finished piece. That impatience is exactly what produces wrinkling, peeling, and the frustration of stripping a piece and starting over.

The technique that changed my results most was the guide-coat method. Before I used it, I thought my surfaces were smooth enough. After the first time I sanded through primer and saw the shiny low spots, I realized I had been painting over a surface full of invisible depressions. The guide-coat method made that visible and fixable.

My other strong recommendation is to invest in washes and dry brushing before you invest in an airbrush. An airbrush is a great tool, but it does not replace the depth that a well-applied wash creates. I have seen hand-brushed pieces with washes and dry brushing outperform airbrushed pieces that skipped the detailing stage entirely.

Material choice matters more than most hobbyists realize before they start. Matte PLA is genuinely easier to finish than silk PLA. The surface texture difference is real, and it shows up in how much sanding you need and how well the first primer coat sticks. If you have not yet printed the piece, choose matte filament. It is a free head start on the finishing process.

The post-processing workflow is not a chore you do after the real work. It is half the work. Treat it that way and the results will show.

— Justin

Cc3dlabs can help you start with a better print

A great paint job starts with a great print. Cc3dlabs, based near Philadelphia, produces custom 3D printed parts with the surface quality and dimensional accuracy that make finishing work faster and more rewarding.

https://cc3dlabs.com

Cc3dlabs offers filament-based printing, multi-color printing, and CAD modeling support for artists and hobbyists who want a reliable foundation for their finishing work. Whether you need a single art piece or a batch of display models, the team provides free online estimates and ships locally and internationally. Browse the project gallery to see the quality of prints that go out the door before a single brush stroke is applied.

FAQ

What paints work best on 3D printed plastic?

Acrylic paints bond well to primed 3D prints and dry fast enough for multi-coat workflows. An all-acrylic system from primer through clear coat avoids chemical compatibility problems.

Do I need to sand before painting a 3D print?

Sanding is required for good paint adhesion on FDM prints. Progress through multiple grits from 120 up to 800 to remove layer lines and create a surface the primer can grip.

How do I paint resin 3D prints without peeling?

Wash resin prints in 99% isopropyl alcohol for about 5 minutes, then cure fully under UV light before priming. An uncured or unwashed resin surface causes paint to peel regardless of primer quality.

What is the guide-coat method for 3D prints?

The guide-coat method involves sanding primer until bare plastic shows through in spots, which reveals low areas that need additional filling. Repeating this cycle produces a flat, uniform surface before topcoats are applied.

How long should I wait between coats when painting 3D prints?

The full drying and curing process between steps often totals 24–48 hours. Paint may feel dry to the touch in minutes, but rushing the next coat before full cure causes wrinkling, peeling, or adhesion failure.
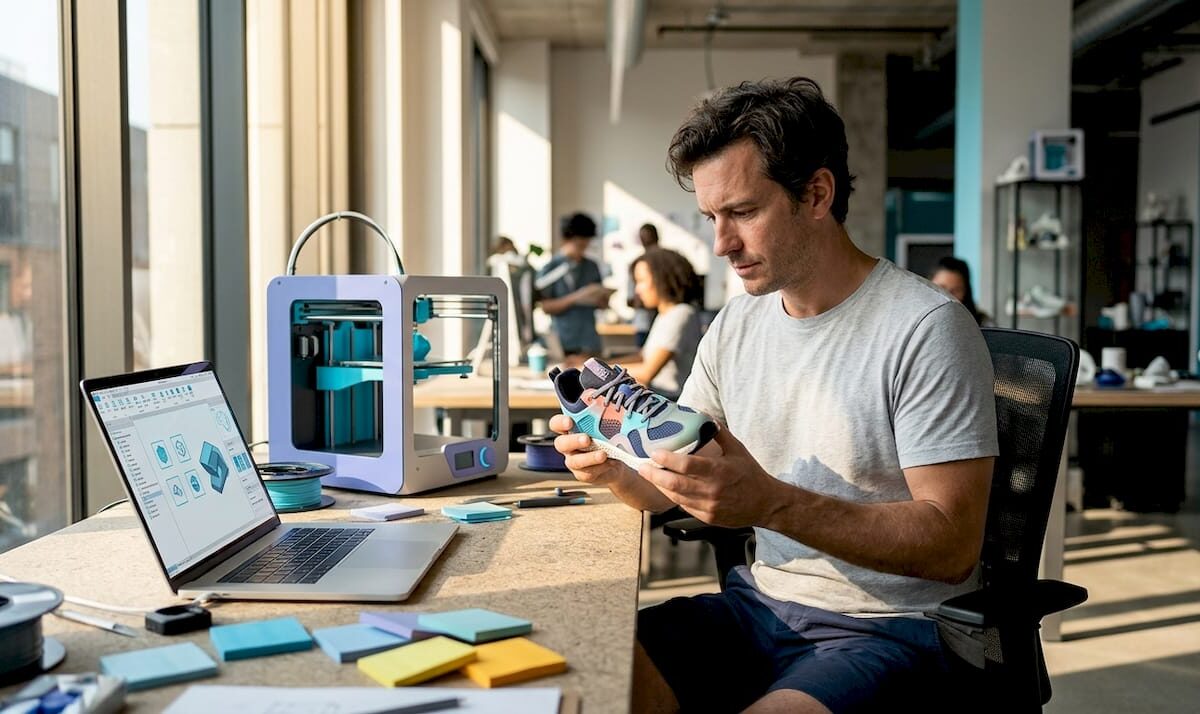

Retail designer examines 3D-printed sneaker prototype

The Real Role of 3D Prints in Retail Today


TL;DR:

  • D printing’s role in retail has expanded to include product customization, store redesign, and supply chain optimization. It enables rapid prototyping, personalized products, and sustainable packaging, offering brands a competitive edge. Retailers must manage operational challenges like licensing, fulfillment, and customer expectations to fully leverage this technology.

Most retail owners think 3D printing means one thing: rapid prototyping. You get a concept, print a model, and move on. But the role of 3D prints in retail has grown far past that narrow definition. Brands are now using additive manufacturing to produce custom products, redesign store interiors, create packaging that people photograph before they even open it, and shorten supply chains in ways that would have seemed impractical five years ago. This article breaks down every major application, the real operational challenges you need to prepare for, and how to use this technology to give your customers something they cannot get anywhere else.

Table of Contents

Key takeaways

Point Details
Beyond prototyping The impact of 3D printing in retail spans product customization, packaging, store design, and supply chain agility.
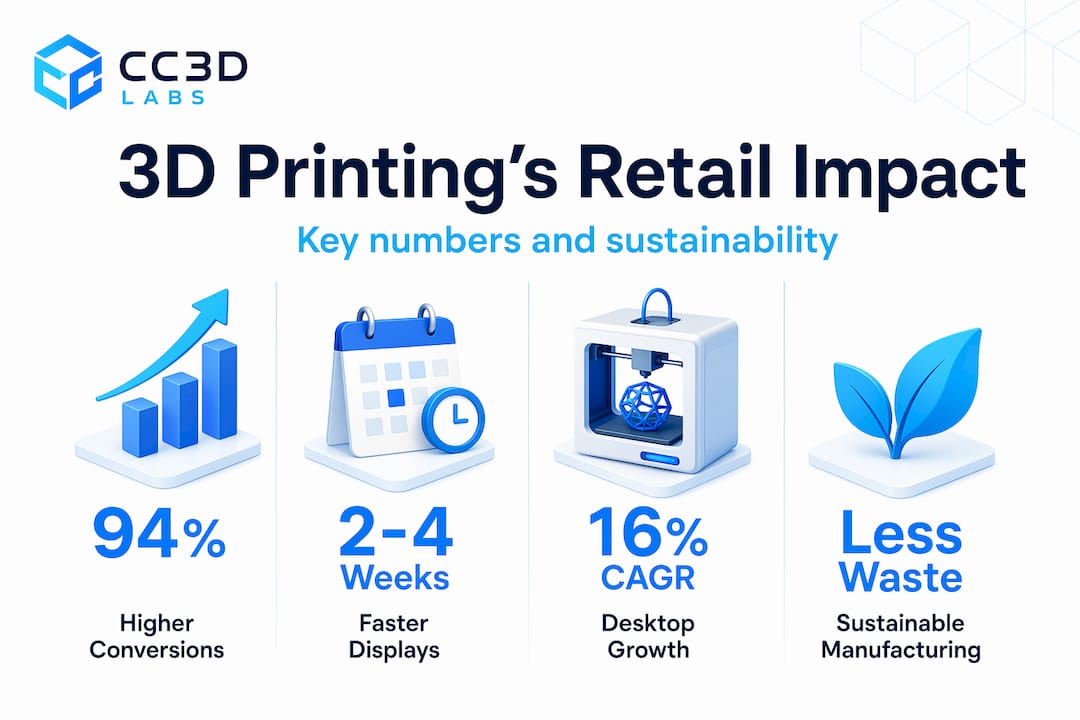
Conversion lift Interactive 3D product content can increase e-commerce conversions substantially (up to 94% in one widely cited study) compared to standard 2D images.
Packaging as brand asset 3D printed packaging splits into two clear markets: luxury customization and functional protective packaging, each with distinct ROI.
Operations demand discipline Selling 3D prints commercially adds shipping, customer service, and legal overhead that most retailers underestimate.
Start with a partner Working with an experienced 3D printing service reduces upfront risk and speeds up your first market-ready application.

How 3D printing is reshaping retail product development

The most direct 3D printing benefits for retailers show up in product development. Traditional design cycles require tooling, mold creation, and minimum order quantities that can tie up capital for months. With additive manufacturing, you can go from a digital file to a physical product in hours, test customer reactions, and iterate without scrapping thousands of dollars of inventory.

This speed creates real competitive advantages in categories where trends move fast.

Customization as a product category

Hyper-customization is where the 3D print applications in retail get genuinely interesting. Brands in jewelry, fashion, and footwear are treating customization as the product itself, not just a feature. Syntilay’s in-store 3D scanning experience in Times Square is a clear example. Shoppers scan their feet and receive custom fit 3D printed shoes built to their exact measurements. The shoes fit better than anything off a standard shelf. That precision becomes the sales pitch.

Beyond footwear, jewelry retailers let customers choose stone placement, engravings, and band dimensions through a configuration tool, then print the piece on demand. The customer is no longer buying from a catalog. They are co-designing a product that only they will own.

On the digital side, e-commerce retailers adding interactive 3D content to product pages see conversion rates up to 94% higher than pages using standard 2D photography. Shoppers who can rotate, zoom, and inspect a product model are more confident and buy more often.

  • Rapid iteration on new product concepts without tooling costs
  • On-demand production of personalized goods in fashion and accessories
  • Reduction of dead stock through made-to-order manufacturing
  • Interactive 3D models on product pages that increase buyer confidence
  • Localized product variants for different markets without retooling

Pro Tip: If you sell accessories or small goods online, even a basic 3D model embedded in your product page can measurably reduce return rates. Customers know exactly what they are getting before the package arrives.

3D printed packaging and the unboxing advantage

Packaging is one of the most underused applications when retailers start exploring how 3D prints change retail. Most conversations skip straight to product. But your packaging is the first physical touchpoint a customer has with your brand, and 3D printing gives you design freedom that injection molding simply cannot match at low volumes.

Retailer inspects custom 3D printed boxes

The 3D printed packaging market breaks clearly into two segments, and understanding which one fits your business matters before you invest.

Packaging segment Best fit Core benefit
Luxury customization Cosmetics, jewelry, premium DTC brands Creates memorable unboxing moments and signals brand quality
Functional protective packaging Electronics, fragile goods, industrial products Reduces damage rates with precise geometric fits
On-demand production E-commerce, subscription boxes Eliminates overstock and supports small-batch product launches

The sustainability angle is real too. Additive manufacturing reduces material waste by building up material layer by layer rather than cutting it away. And recycled filaments made from post-consumer plastics are available now, not in some future roadmap.

Infographic with retail 3D printing key stats

Cosmetics brands have been early movers here. A small-batch fragrance company, for example, can print a run of 200 custom cap designs for a seasonal launch without committing to a 10,000-unit mold. That flexibility protects cash flow and lets you test market response before scaling.

Pro Tip: For DTC brands, your packaging is a social media asset. A 3D printed box with a textured logo or geometric form gets photographed and shared. Design for the unboxing video, not just for protection.

Store architecture and displays powered by 3D printing

Retail 3D printing trends in 2026 include something most owners have not considered: printing the store itself. Large-format 3D printing now makes it practical to produce custom architectural elements, ceiling panels, display fixtures, and wall structures at a scale that changes the entire feel of a retail environment.

Lululemon’s collaboration with Aectual is the most cited example in the industry. The brand used large-format 3D printed panels made from recycled consumer waste for store ceiling and display installations. The result checks three boxes at once: it reinforces their sustainability brand message, creates a store environment that feels genuinely distinctive, and uses modular components that can be reconfigured or moved to a new location.

Feature Traditional fixtures 3D printed fixtures
Lead time 8 to 14 weeks 2 to 4 weeks
Minimum order Often 50+ units Single unit possible
Custom geometry Limited by tooling Unlimited design freedom
Sustainability Standard materials Recycled filaments available
Reusability Low modularity Modular and reconfigurable

For 3D printing for product displays specifically, this means you can build fixture systems that match your visual identity exactly instead of buying generic shelving and adding branding as an afterthought. You can explore custom retail display applications to see what this looks like in practice.

Operational challenges you need to plan for

The benefits are real, but the impact of 3D printing in retail also comes with friction that catches retailers off guard. Understanding these challenges before you launch a program protects your margins and your reputation.

The Syntilay example captures one tension clearly. In-store 3D scanning for custom footwear improves product fit, but retailers must manage the visible friction of delayed fulfillment. A customer who scans their foot in your store and waits two weeks for a shoe has a fundamentally different experience than a customer who walks out with a product. You need to build customer education and expectation management into the process itself, not treat them as afterthoughts.

Commercialization also changes your operation in ways that creative enthusiasm tends to obscure. Selling 3D prints professionally adds shipping logistics, customer service workflows, quality control, and returns management. Each of these requires systems and time that can crowd out the creative work that made the idea appealing in the first place.

Legal exposure is a real risk. Owning a 3D model file does not give you commercial licensing rights to sell products made from it. Designers license files with specific use conditions, and selling printed products from a personal-use file is an infringement. This matters most for retailers sourcing designs from third-party libraries.

  • Audit every 3D model file for its licensing terms before selling a single unit
  • Build fulfillment time into the customer experience by framing it as a feature, not a wait
  • Systematize order tracking and customer communication from day one
  • Test quality control processes on small batches before scaling
  • Consider a low-volume manufacturing approach to validate demand before committing to larger runs

Pro Tip: Transparency about production time actually builds trust when you frame it correctly. “Your item is being made specifically for you” lands very differently than “Your order is delayed.” The product is the same. The customer’s feeling is not.

What the future of 3D printing in stores looks like

The future of 3D printing in stores is moving in two directions simultaneously, and both matter for how you plan your investments.

  1. Industrial scale will dominate production. The industrial 3D printing segment holds the large majority of the market, and that dominance will continue for retailers needing batch production and structural precision.
  2. Desktop 3D printing is growing fast. Desktop units are expanding at strong double-digit annual rates, meaning affordable, in-store printing capabilities are becoming viable for smaller retailers.
  3. Augmented reality integration is accelerating. Customers will configure products in AR and send specifications directly to a print queue. The gap between “I want this” and “I have this” will keep shrinking.
  4. On-demand localized production will reshape logistics. Producing closer to customers shortens supply lines and lets retailers respond to regional demand patterns without holding centralized inventory.
  5. Sustainability credentials will become a differentiator. Brands using recycled filaments and on-demand production to reduce waste will carry a marketing advantage as customers pay closer attention to how products are made.

You can dig deeper into where technology is heading with 3D printing trends for 2026 to make more informed investment decisions.

My take on using 3D printing in your retail strategy

I’ve seen retailers approach 3D printing one of two ways. The first group treats it as a novelty. They print a few display pieces, show them off at a trade show, and then never operationalize the capability. The second group starts small but builds systems around the technology. That second group tends to win.

What I’ve learned working with retail clients is that the operational side trips people up more than the technology does. The printing itself is not the hard part. Managing customer expectations, securing proper licenses for digital files, and building repeatable fulfillment processes are where most early programs stall.

My honest advice: start with one application, run it as a real business operation from day one, and resist the urge to expand before you’ve worked out the unit economics. A single custom product line with clean fulfillment and happy customers will teach you more than five experimental projects that never fully launch.

The retailers who move early and build disciplined operations around this technology will have an advantage that is genuinely hard to replicate. The ones who treat it as a side experiment will eventually wonder why it never delivered.

— Justin

How Cc3dlabs helps retailers move from idea to product

If you’ve read this far, you know the opportunity is real and so is the complexity. Cc3dlabs works with retail businesses at exactly the point where ideas need to become physical products. Their custom 3D printing and scanning services near Philadelphia cover everything from single prototypes to batch production runs, with multi-color printing, CAD modeling, and quality control built into every project.

https://cc3dlabs.com

For retail applications specifically, the ability to get prototypes and custom parts on demand without minimum order commitments is the kind of flexibility that makes early-stage product development financially practical. Whether you’re testing a custom packaging concept or building a product line around personalized goods, Cc3dlabs brings the technical depth and turnaround speed that retail timelines require. Explore their full 3D printing services to see where your next retail application could start.

FAQ

What is the main role of 3D prints in retail?

The role of 3D prints in retail spans product customization, packaging design, in-store displays, and on-demand manufacturing. It gives retailers a way to offer personalized products and distinctive brand experiences without the high costs of traditional tooling.

How does 3D printing affect retail conversion rates?

Interactive 3D product content on e-commerce pages can increase conversion rates by up to 94% compared to standard 2D images. Shoppers who can interact with a product model buy with more confidence and return products less often.

Owning a 3D model file does not automatically grant commercial rights to sell products printed from it. Retailers must secure explicit commercial licenses for every design file used in a product sold to customers.

Can small retailers realistically use 3D printing?

Yes. Desktop 3D printing is growing at 16.40% CAGR and becoming more accessible. Small retailers can start with a single application, such as custom packaging or personalized accessories, and scale once they have validated demand and built operational systems.

How does 3D printing support retail sustainability goals?

Additive manufacturing builds products layer by layer, which reduces material waste compared to subtractive processes. Retailers can also use recycled filaments and produce only what customers order, eliminating overstock waste entirely.

3D modeler working in bright studio

What Is Advanced 3D Modeling: Techniques and Applications


TL;DR:

  • Advanced 3D modeling involves precision parametric design, organic sculpting, and AI workflows that ensure models are production-ready. It relies on geometric representations like polygon meshes, NURBS, and parametric constraints to create models that survive manufacturing, animation, and visualization processes. Mastering topology, UV mapping, and hybrid workflows enables professionals to produce high-quality models efficiently across industries.

Advanced 3D modeling is far more than placing shapes on a digital canvas. When you ask what is advanced 3D modeling, the real answer involves precision parametric design, organic sculpting, intelligent topology management, and AI-assisted workflows that together produce models ready for manufacturing, animation, and architectural visualization. At its core, 3D models represent shape, size, and texture through polygon meshes and mathematical surfaces. This article breaks down the techniques, tools, real-world applications, and emerging trends you need to understand if you want to apply advanced modeling skills to serious design and prototyping work.

Table of Contents

Key Takeaways

Point Details
Beyond basic shapes Advanced 3D modeling combines parametric precision, sculpting, and AI workflows rather than simple geometry creation.
Technique diversity matters Professionals merge CAD, NURBS, and freeform sculpting in hybrid workflows to solve complex spatial and artistic problems.
AI assists but does not replace AI tools accelerate base modeling and texturing while skilled artists handle refinement and production standards.
Applications span industries Manufacturing, gaming, architecture, and virtual production all rely on advanced modeling for prototyping and visualization.
Fundamentals drive AI success Mastering topology and UV mapping remains critical even when AI-generated assets enter the pipeline.

What advanced 3D modeling actually means

Most people associate 3D modeling with creating a rough shape and slapping a texture on it. Advanced 3D modeling sits in a completely different category. It is the discipline of constructing digital geometry with intentional precision, structural logic, and production readiness baked into every decision you make from the first polygon to the final export.

The mathematical foundation matters here. Advanced models rely on three primary geometric representations:

  • Polygon meshes: Grids of vertices, edges, and faces that define surface geometry. Fast to render but require careful topology management to deform cleanly and print accurately.
  • NURBS (Non-Uniform Rational B-Splines): Mathematically smooth curves and surfaces used heavily in industrial CAD. They produce watertight, precise geometry ideal for engineering tolerances.
  • Parametric constraints: Rules and relationships embedded in the model so that changing one dimension automatically updates dependent features throughout the entire design.

The gap between basic and advanced 3D modeling is not just about software complexity. It is about whether your model can survive a real production pipeline. An advanced model transfers cleanly between software environments, holds up under manufacturing tolerances, animates without mesh artifacts, and can be iterated without rebuilding from scratch.

Advanced modeling software today covers a spectrum from parametric CAD platforms to freeform sculpting environments. Each serves a different purpose, and understanding when to use which is part of what separates professionals from beginners. AI’s emerging role in this field is shifting artists from manual geometry creation toward high-level prompt engineering and iterative refinement, but the underlying principles of good modeling have not changed.

Pro Tip: If you are evaluating whether your modeling skills qualify as “advanced,” ask yourself this: can your models survive a file format conversion, a topology audit, and a manufacturing review without significant rework? If the answer is no, that is your learning roadmap.

Advanced 3D modeling techniques and workflows

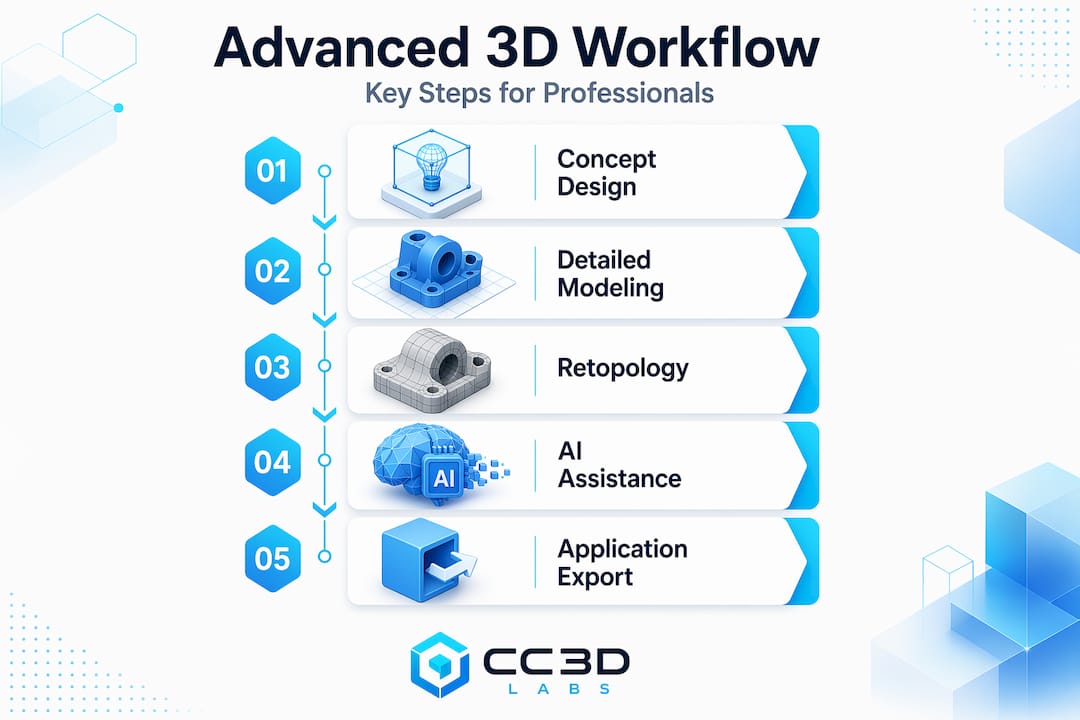
The techniques that define professional-grade advanced 3D modeling are not learned in isolation. They layer on top of each other in workflows that combine structure, detail, and artistic expression. Here is how the major techniques build on each other in practice:

  1. Parametric modeling. You define geometry through constraints and relationships rather than direct manipulation. Change the wall thickness of a housing component and every connected feature updates automatically. This is the backbone of product design and engineering work, where parametric and generative design solve spatial problems with precision rather than aesthetic guesswork.

  2. Freeform sculpting. Digital sculpting tools let you manipulate virtual clay-like geometry using symmetry, layers, and dynamic remeshing. The priority at this stage is artistic freedom before technical constraints. Characters, organic products, and architectural details all benefit from sculpting workflows that capture nuance no parametric tool can match.

  3. Hybrid CAD-sculpt integration. This is where advanced workflows get genuinely complex. Hybrid workflows use CAD for structural precision and sculpting tools for high-detail organic surfaces, requiring careful translation between NURBS and polygon mesh formats. A product designer might build the structural shell in a CAD environment, export to a sculpting tool for surface detailing, and then retopologize before returning to CAD for final manufacturing prep.

  4. Topology and UV mapping. Clean topology means your mesh deforms predictably for animation and prints without internal geometry conflicts. UV mapping unfolds the 3D surface into a 2D space so textures apply correctly without stretching. These two disciplines are unglamorous but are the difference between a model that works and one that causes problems downstream.

  5. Texture baking and iterative refinement. Baking transfers high-resolution surface detail from a dense sculpt onto a lighter mesh, preserving visual quality without the polygon count that would slow rendering or fail in a game engine. Iterative refinement means reviewing the model at each stage, catching problems before they compound.

Pro Tip: Learn retopology before you need it urgently. Most professionals wish they had learned proper edge flow earlier. Bad topology is the most common reason a client’s model gets rejected at the manufacturing or rigging stage.

AI tools are now entering every step of this workflow. AI-assisted features like automated retopology and intelligent mesh deformation compress timelines significantly. Tools like Meshy.ai produce multiple model variations rapidly for stylized and mid-polygon assets, making iteration faster than ever for the right project types.

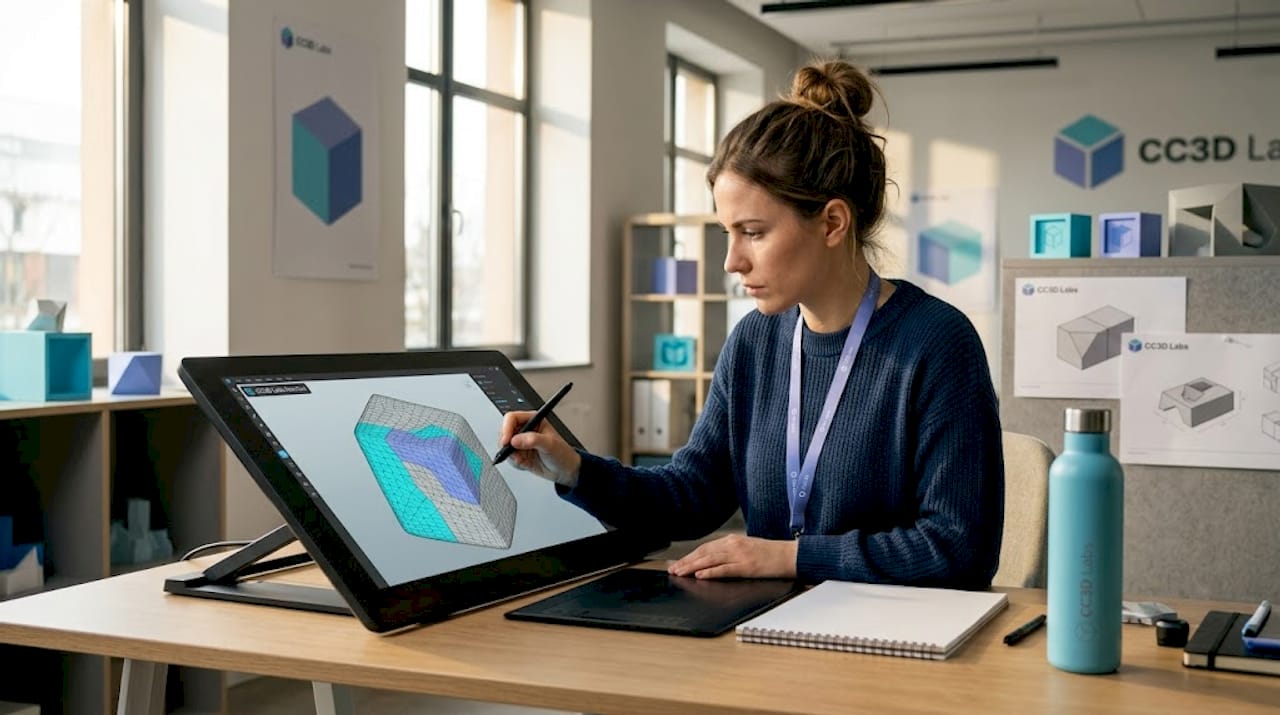
Designer using AI retopology tools on 3D mesh

Benefits and practical applications

Understanding the benefits of advanced 3D modeling is straightforward once you see where it connects to real project outcomes. Advanced modeling is not a luxury skill. It is how serious design and manufacturing work gets done.

Here is where the practical value shows up most clearly:

  • Product prototyping. Advanced modeling improves manufacturing and design processes by enabling precise, adaptable, high-fidelity models. Instead of discovering a fit problem during physical assembly, you catch it in the parametric model and update the design in minutes.
  • Architecture and spatial design. Architects using parametric tools can test structural configurations and aesthetic variations within the same model file, reducing costly design revisions. Digital tools in construction can reduce project costs measurably when modeling accuracy drives early-stage decisions.
  • Gaming and virtual production. Character artists combine sculpting for hero detail and retopology for real-time game engines. The same pipeline feeds into virtual production environments where physical accuracy and visual fidelity both matter.
  • Manufacturing visualization. Engineers use advanced 3D models to simulate assembly sequences, stress test components virtually, and communicate design intent across global teams before a single physical part is produced.
Application Area Primary Modeling Approach Key Benefit
Product design Parametric CAD Precise tolerances, fast iteration
Character and creature art Freeform sculpting Organic detail, artistic control
Architecture Hybrid parametric and mesh Spatial problem solving, visualization
3D printing and prototyping CAD to mesh pipeline Printable geometry, manufacturing accuracy
Gaming and real-time environments Retopologized sculpts Optimized poly count, clean deformation

The creative freedom argument is real too. Sculpting gives artists control that box-modeling never could. But the most powerful outcome of advanced 3D modeling is speed with quality. When your workflow is solid, you can go from concept to print-ready or render-ready file faster than any earlier generation of designers.

Challenges and what comes next

Advanced 3D modeling is not a skill you pick up over a weekend. The challenges are genuine, and the field is changing fast enough that even experienced modelers need to keep adapting.

The persistent technical challenges include:

  • Topology cleanup. AI-generated models often require significant retopology before they are production ready. Post-generation cleanup includes retopology and fixing non-manifold geometry to ensure compatibility with rendering engines and 3D printing workflows.
  • Format interoperability. Moving models between CAD, sculpting, and rendering environments often introduces data loss or geometry errors. Managing NURBS and polygon meshes without losing design intent is one of the most technically demanding aspects of hybrid workflows.
  • Skill gaps in texture pipelines. Junior artists often need mentorship to master topology, UV mapping, and texture pipelines even when they are working with advanced software. The tools do not teach the judgment.

“AI effectively lowers the skill floor and compresses timelines significantly, but the ceiling is still defined by the human who refines and directs the work.”

Looking forward, the field is moving toward real-time sculpting in collaborative cloud environments, spatial computing interfaces that let designers manipulate geometry physically, and AI that can handle increasingly complex base model generation. The artists who will succeed are those treating AI as a skilled collaborator rather than a replacement for foundational knowledge.

My take on mastering advanced 3D modeling in 2026

Infographic showing main steps in advanced 3D modeling workflow

I have watched a lot of people approach advanced 3D modeling the same way. They jump to the most sophisticated software they can find, spend weeks learning its interface, and then produce work that falls apart the moment a client needs it to be printable or rigged. What I have learned is that the fundamentals are not the boring part. They are the part that makes everything else possible.

The most capable modelers I know are not the ones who adopted AI tools first. They are the ones who understand why topology flows a certain way, what happens when geometry is non-manifold, and how UV seams affect texture quality. Because they understand those things, they can direct AI tools effectively and fix what the automation gets wrong. My honest advice: spend real time on topology, spend real time on the math behind your surfaces, and then let AI speed up the work you already understand. The 3D modeling and CAD project gallery at Cc3dlabs is a good place to see what production-ready advanced modeling actually looks like in practice.

— Justin

Turn your advanced models into physical reality with Cc3dlabs

https://cc3dlabs.com

Advanced 3D modeling is where precision design begins. But the real test of any model is whether it survives contact with the physical world. Cc3dlabs, located near Philadelphia, works directly with designers, engineers, and product developers to take advanced 3D models through to high-quality printed parts. Their 3D printing services cover everything from single prototypes to batch production runs, with filament-based printing capable of meeting tight tolerances for functional parts. They also offer professional handheld 3D scanning (accuracy to ~0.1 mm), which feeds directly into advanced modeling workflows when you need to capture existing geometry accurately. If you are ready to validate your design in the real world, Cc3dlabs offers free online estimates and local pickup for Philadelphia-area clients.

FAQ

What is advanced 3D modeling?

Advanced 3D modeling is the practice of creating production-ready 3D geometry using parametric constraints, freeform sculpting, and topology management techniques that go beyond basic shape creation. It encompasses both CAD-driven precision and artistic sculpting workflows, often combined in hybrid pipelines.

How is advanced 3D modeling different from basic 3D modeling?

Basic 3D modeling produces simple geometry for visualization purposes. Advanced 3D modeling produces models with clean topology, accurate tolerances, proper UV mapping, and the structural integrity needed for animation, manufacturing, or 3D printing.

What software is used for advanced 3D modeling?

Professionals use a range of advanced modeling software depending on the application, including parametric CAD platforms for engineering and sculpting tools for organic design. Many advanced workflows combine multiple software environments, translating between NURBS-based and polygon-based geometry.

How does AI fit into advanced 3D modeling workflows?

AI tools generate base models and automate tasks like retopology and mesh deformation, but post-generation cleanup is still required for production-ready assets. AI shifts the artist’s role toward high-level direction and refinement rather than eliminating the need for technical skill.

How do I learn advanced 3D modeling?

Start by building a strong foundation in topology, UV mapping, and at least one parametric CAD platform. Then layer in sculpting tools and hybrid workflows. Working with real production constraints, such as preparing models for 3D printing, accelerates learning faster than purely artistic projects.

Engineer testing 3D printed prototype in studio

How 3D printing drives product innovation in 2026


TL;DR:

  • D printing accelerates product development by enabling rapid iteration, complex geometries, and design flexibility. It reduces lead times significantly and allows testing multiple ideas simultaneously, fostering innovation and performance improvements. However, understanding its limitations in precision and scale is essential for building effective hybrid manufacturing strategies.

Product teams know the frustration: a promising design sits locked behind a weeks-long tooling queue, burning budget and slowing momentum right when speed matters most. Traditional prototyping methods force developers to commit early, iterate slowly, and absorb delays that kill competitive advantage. Faster prototyping with 3D printing changes that equation entirely, compressing design cycles, freeing up geometry constraints, and letting teams actually test more ideas before committing to production tooling. This article breaks down exactly how 3D printing accelerates innovation across the full product development journey.

Table of Contents

Key Takeaways

Point Details
Rapid iteration speed 3D printing cuts prototyping time from weeks to hours, allowing quick design validation.
Unmatched design freedom Complex geometries and consolidated assemblies drive breakthrough innovation.
Proven industry success Top brands achieve lighter, more durable parts and real performance gains with 3D printing.
Know the limitations 3D printing is ideal for low volumes and complexity, while traditional methods remain key for scale.
Constantly evolving tech Staying current with new automation and materials ensures ongoing innovation advantages.

Rapid prototyping radically accelerates iteration

Speed is where 3D printing earns its reputation first. Traditional methods like CNC machining, urethane casting, or injection mold tooling require setup, fixturing, and lead times that stretch from days to weeks. Every iteration cycle costs time and money. For a product team running six or eight design loops, those delays stack up fast.

3D printing produces parts from CAD models in hours to days rather than weeks, which fundamentally changes how teams approach design validation. Instead of betting on a single prototype version before getting feedback, you can print three variations overnight and test them in parallel. That kind of throughput makes early-stage risk much easier to manage.

The numbers back this up at scale. Ford reported a 90% reduction in model lead time after integrating additive manufacturing into its design workflow. Industry surveys consistently show large lead-time reductions for companies that bring 3D printing into their development cycle. Those aren’t marginal improvements. They’re structural shifts in how quickly products move from concept to testable hardware.

Key reasons rapid 3D prototyping beats traditional methods at the iteration stage:

  • No tooling required. Upload a revised STL file and print. No new mold, no fixture setup.
  • Low cost per iteration. Printing a new version costs material and machine time, not tooling charges.
  • Immediate design feedback. Physical parts reveal fit, feel, and function issues that CAD reviews miss.
  • Parallel testing. Multiple design variants can be printed simultaneously, cutting decision time.

Stat to know: Companies integrating 3D printing at the prototype stage consistently report dramatically shorter lead times, giving their teams more cycles to refine before final tooling.

Pro Tip: Match prototype fidelity to your stage. For concept validation, a fast FDM print is enough. Reserve higher-resolution SLA or SLS prints for functional testing and stakeholder reviews where surface finish and dimensional accuracy matter.

Unlocking limitless design flexibility and geometry

Once you accelerate iteration, the next major advantage is design freedom. Traditional subtractive and forming processes impose hard geometric constraints: draft angles for mold release, tool access paths for CNC cutters, minimum wall thicknesses for casting. These rules force designers to simplify parts, often at the cost of performance.

3D printing supports complex geometries and internal features, including lattice structures, conformal channels, and multi-material configurations that are either impossible or cost-prohibitive to produce any other way. Topology-optimized structures that look organic and unconventional in CAD print just as easily as a simple box. That freedom is a genuine product engineering advantage, not just an aesthetic one.

Consider what this means in practice. An aerospace bracket designed with topology optimization and printed in a high-strength polymer or metal can achieve the same load-bearing performance as a machined aluminum part at a fraction of the weight. Internal cooling channels in a printed mold insert improve thermal management in ways that conventional milling simply cannot achieve. Assembly consolidation, where a five-component subassembly becomes a single printed part, reduces failure points, assembly time, and inventory complexity simultaneously.

Technician inspects aerospace 3D printed bracket

The implications for complex 3D geometry applications span industries from medical devices to consumer electronics to industrial tooling. Design teams that understand this don’t treat 3D printing as a copy of traditional manufacturing. They rethink part geometry from the ground up.

How 3D labs drive design innovation extends further when you pair additive processes with generative design software. Algorithms propose geometry that meets load and weight requirements, additive manufacturing builds it without complaint, and the result is a part that no human designer would have sketched manually.

  • Internal lattice structures reduce mass without sacrificing structural integrity
  • Conformal cooling channels improve mold performance and cycle times
  • Part consolidation eliminates fasteners and reduces assembly failure risk
  • Organic, topology-optimized shapes become manufacturable without cost penalties

Pro Tip: Use topology optimization software like nTop or Autodesk Fusion alongside your 3D printing workflow. The software handles geometry generation, and additive manufacturing handles execution. The combination produces results that neither achieves alone.

Real-world breakthroughs: Proven impact on performance and function

Design freedom and speed sound compelling in theory. The proof shows up in measurable product performance gains that translate directly to competitive advantage. Some of the most cited examples come from industries where performance margins are razor thin and every gram of weight or percentage point of efficiency matters.

GE Aviation’s 3D printed fuel nozzle is the benchmark case. By redesigning for additive manufacturing, GE consolidated what had been a 20-part welded assembly into a single printed component. The result: 25% lighter and 5 times more durable than the legacy design. Over 100,000 units have been produced. The downstream impact was a 15% fuel efficiency gain in the CFM LEAP jet engine, a real and auditable number that matters enormously in commercial aviation economics.

Ford’s applications show similar performance payoffs in motorsport. 3D printing accelerated the 2025 Mustang GTD development cycle, with printed aerodynamic components contributing to a sub-7-minute Nürburgring lap time. The team iterated on hood louvers and aerodynamic elements at a pace that traditional tooling schedules would have made impossible. Fast iteration directly enabled better performance outcomes.

Metric Traditional manufacturing 3D printing (additive)
Lead time per iteration 2 to 6 weeks 1 to 3 days
Tooling cost per design change $5,000 to $50,000+ Near zero
Part consolidation potential Limited by assembly constraints High (single-print assemblies)
Weight optimization Constrained by subtractive limits Enabled via topology optimization
Geometric complexity Limited by tool access Near-unlimited

These real-world cases illustrate a pattern: when product teams use 3D printing not just to replicate existing designs faster but to rethink geometry entirely, the performance outcomes go beyond incremental improvement. For teams designing reliable 3D prototypes, this is the fundamental design philosophy shift that separates average results from breakthrough ones.

Limits and best uses: Where 3D printing excels (and doesn’t)

No technology wins every comparison, and honest innovation planning requires knowing where 3D printing falls short. Understanding these edges lets you build a smarter hybrid development strategy rather than forcing additive manufacturing into applications where it underperforms.

Tolerances and anisotropy are real constraints. SLA parts typically hold tolerances near ±0.005 inches, while FDM typically holds ±0.010–0.020 inches, compared to ±0.001 inches for CNC machining. Layer-line anisotropy means a printed part is often weaker in the Z-axis than in X or Y. For structural applications under cyclic or high-impact loading, that matters. Post-processing, including annealing, fiber reinforcement, or metal plating, can close some of that gap, but it adds time and cost.

3D printing excels in iterative prototyping and low-volume production, while hybrid strategies with CNC or injection molding address limitations in precision, strength, and scale. For volumes above 1,000 units of a finalized design, injection molding almost always wins on per-unit cost. For parts requiring submillimeter precision under load, CNC is still the right tool.

Here’s a practical decision framework for matching process to project stage:

  1. Concept validation (units 1 to 5). Use FDM for fast, low-cost physical models. Fidelity matters less than speed.
  2. Functional testing (units 5 to 50). Use SLA or SLS for better surface finish, tighter tolerances, and functional material properties.
  3. Low-volume production (50 to 500 units). SLS, DMLS, or high-performance FDM can produce manufacturing-grade 3D production output cost-effectively.
  4. Bridge production (500+ units). Low-volume 3D printing tips can help manage the transition period before injection mold tooling is ready.
  5. High-volume production (1,000+ units). Injection molding or CNC becomes the primary process, with 3D printing reserved for jigs, fixtures, and design updates.

Pro Tip: Think of 3D printing and CNC as partners, not competitors. Print prototypes early and fast, then move to CNC for final validation of precision-critical features before cutting production tooling. This hybrid approach captures the speed advantage without sacrificing final part quality.

The current state of 3D printing for innovation is already substantial. The trajectory over the next three to five years makes the case even stronger. Several trends are converging to push additive manufacturing further into production-scale applications.

Scalability is still challenged by post-processing labor, anisotropy, and throughput constraints, but automation is emerging as the primary solution vector. Automated support removal, robotic part handling, and inline quality inspection are reducing the labor burden that makes high-volume additive production expensive. As these systems mature, the cost-per-unit crossover point with injection molding shifts further in additive’s favor.

New material development is expanding functional applications rapidly. High-temperature polymers, continuous fiber composites, and metal filaments are enabling printed parts that perform in demanding environments where standard materials would fail. This opens doors in aerospace, automotive, and industrial equipment that were previously closed to additive manufacturing.

Integration with production lines is narrowing the gap between prototyping and manufacturing. Digital thread approaches connect CAD data, print parameters, and quality data in a single workflow, enabling faster scale-up and better traceability. For product developers tracking 3D printing manufacturing trends, this convergence of digital and physical manufacturing is the defining story of the next several years.

Key trends reshaping additive manufacturing for innovators:

  • Automated post-processing reduces labor costs and enables higher throughput
  • Continuous fiber reinforcement closes the strength gap with machined parts
  • Multi-material printing enables functional assemblies in a single build
  • AI-driven process optimization improves consistency and reduces defect rates
  • Inline inspection systems catch dimensional errors during the build, not after

Pro Tip: Stay current on material and process advances specific to your industry vertical. A high-temperature PEEK filament that was unavailable two years ago might now be the right call for a functional prototype that previously required machined PEEK stock.

The uncomfortable truth: Innovation isn’t just faster—it’s riskier (and better) with 3D printing

Here is what most articles about 3D printing and innovation leave out. The biggest benefit is not the speed or the geometric freedom. It’s the permission structure that low-cost, fast iteration creates for product teams who are otherwise too conservative.

Most product developers play it safe. When each prototype costs $15,000 in tooling and six weeks of calendar time, you pick your best idea and commit. You stop exploring. You optimize within a narrow design corridor because the cost of exploring outside it is too high. That’s not innovation. That’s risk management masquerading as development.

3D printing changes what’s rational to try. When a prototype costs a few hundred dollars and takes two days, you can afford to test an idea you’re only 40% sure about. You can build the version you think will fail, just to confirm it fails in the way you expect, and learn something in the process. The teams and startups doing the most interesting product development right now aren’t using 3D printing to go faster on the same path. They’re using it to walk more paths simultaneously, fail faster on the bad ones, and double down on the surprising winners.

Innovation with 3D labs works best when teams bring that experimental mindset to the process. The constraint is no longer tooling cost or lead time. The constraint is how many ideas your team can generate and test. That’s a fundamentally different, and far more interesting, problem to solve.

Take your innovation further with expert 3D printing support

Knowing what’s possible with 3D printing is one thing. Executing it with the right process, material, and design approach for your specific application is another challenge entirely.

https://cc3dlabs.com

CC 3D Labs provides full-service 3D printing services tailored for product developers and engineering teams who need more than a commodity print shop. Whether you’re running your first functional prototype or managing a batch production run, the team brings hands-on expertise in material selection, design optimization, and process matching. Explore on-demand prototyping for fast turnaround on custom parts, or check out what you can print to understand the full range of applications. If you’re near Philadelphia or shipping nationally, CC 3D Labs is ready to help you move your product forward with precision and speed.

Frequently asked questions

What types of innovation are best suited to 3D printing?

3D printing is best for rapid prototyping, low-volume production runs, and complex geometries, including internal features and lattice structures, that are difficult or impossible to produce with traditional subtractive methods.

Are 3D printed parts strong enough for functional applications?

Many are, with proper material selection and post-processing. Real-world cases like GE’s fuel nozzle demonstrate that additive parts can be 5 times more durable than their traditionally manufactured counterparts when designed correctly.

How does 3D printing compare to CNC for precision and scale?

3D printing holds tolerances of ±0.005–0.010 inches and is most cost-effective under 500 units, while CNC achieves ±0.001-inch precision and lower per-unit cost at high volumes.

Scalability improvements through automation, new high-performance materials, and integration with digital production workflows are the primary forces expanding what innovation teams can realistically achieve with additive manufacturing.