
TL;DR:
- D print finishes involve post-processing methods like mechanical, chemical, thermal, or coating treatments, affecting appearance and durability. Proper selection depends on material compatibility and desired surface qualities, with multi-step workflows yielding optimal results. Combining techniques such as sanding, primer, and topcoat consistently produces professional-grade, surface-improved parts.
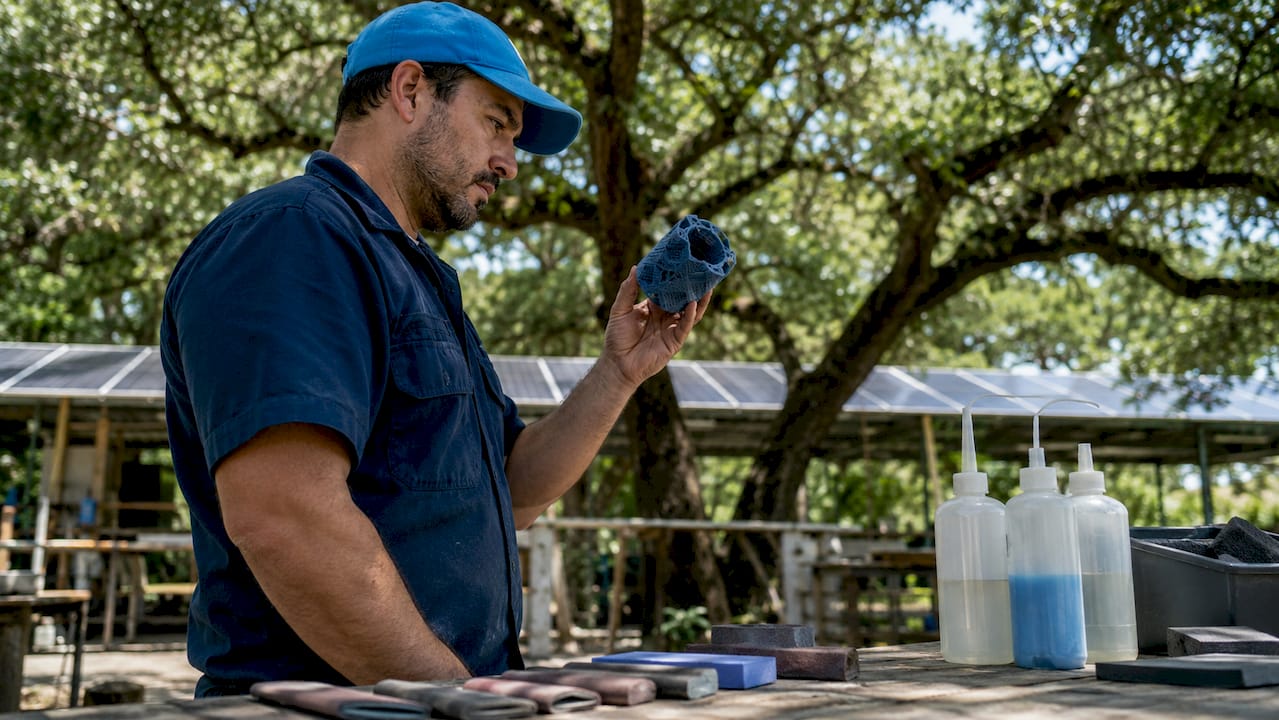
3D print finishes are defined as post-processing treatments that transform raw printed surfaces through mechanical, chemical, thermal, or coating methods. The right finish determines whether a part looks prototype-grade or production-ready, and whether it survives real-world use or fails under stress. From sanding PLA with 2000-grit wet paper to electroplating ABS with copper, the range of post-processing methods available in 2026 covers every aesthetic and functional need. Tools like Smooth-On XTC-3D epoxy coating, acetone vapor smoothing chambers, and glass bead blasting rigs each solve a different surface problem. Choosing correctly starts with knowing what each category does.
1. Types of 3D print finishes: the four core categories
Surface finishes for 3D prints fall into four distinct categories: mechanical, chemical, thermal, and coatings or plating. Each category addresses a different surface problem and suits different materials. Mechanical methods physically abrade or reshape the surface. Chemical methods dissolve or bond with the outer layer. Thermal methods use heat to reflow material. Coating and plating methods add an entirely new surface layer on top of the print.
Understanding these categories prevents costly mistakes. Applying acetone vapor to a PLA print, for example, does nothing useful because PLA does not dissolve in acetone. Knowing which category fits your material and goal is the first decision every finisher must make.
2. Sanding: the foundation of mechanical finishing
Sanding is the most accessible mechanical finishing technique for 3D prints, and it works across PLA, ABS, PETG, and resin. The process follows a progressive grit sequence. Start coarse to remove layer lines, then move finer to refine the surface.
A standard sanding grit progression runs as follows:
- 120 to 220 grit: removes visible layer lines and high spots
- 320 to 400 grit: smooths the surface and removes coarse scratches
- 600 to 800 grit: fine smoothing before primer or topcoat
- 1000 to 2000+ grit: polishing stage for near-gloss results
Wet sanding above 600 grit is the correct approach for PLA and PETG. Dry sanding at fine grits generates friction heat that can deform fine details on these lower-temperature materials. Water acts as a lubricant and carries away debris, keeping the surface cool and the paper cutting cleanly.
Pro Tip: Sand in circular motions at coarse grits, then switch to straight strokes aligned with the print’s longest axis at fine grits. This prevents swirl marks from showing through primer.
3. Media blasting: fast, uniform surface treatment
Media blasting uses pressurized abrasive particles to strip layer lines and texture surfaces in seconds. The result depends entirely on the media geometry. Spherical glass beads peen the surface rather than cut it, producing a smooth satin finish with minimal material removal at depths of 2 to 15 micrometers. Angular crushed glass cuts into the surface and creates a rougher anchor profile, which is ideal when you need a coating to grip the part afterward.
Glass bead blasting suits decorative metal prints and delicate plastic parts where dimensional accuracy matters. Crushed glass blasting suits parts that will receive paint, cerakote, or epoxy, because the anchor profile dramatically improves adhesion. Choosing the wrong media for the job produces either a surface that is too rough for display or too smooth for coating.
4. Tumbling: batch finishing for small parts
Tumbling places parts inside a rotating barrel with abrasive media, letting friction do the finishing work over hours. It excels at deburring and polishing small metal prints in large batches without manual labor. Tumbling media selection determines the result:
- Ceramic media cuts aggressively and removes burrs and sharp edges from metal prints.
- Plastic media deburrs gently and polishes without removing significant material, suited for softer metals and plastics.
- Steel media burnishes surfaces to a bright shine, ideal for stainless steel or tool steel prints.
- Organic media such as walnut shell or corn cob provides the lightest action, used for final polishing and cleaning.
Tumbling cannot reach internal channels or fine recessed details. For parts with complex geometry, combine tumbling for external surfaces with hand sanding for recessed areas.
5. Acetone vapor smoothing: chemical finishing for ABS and ASA
Acetone vapor smoothing is the most dramatic chemical finishing technique available for desktop 3D printing. The process works by suspending ABS or ASA parts above liquid acetone inside a sealed, transparent chamber. Acetone vapor rises, contacts the surface, and melts the outer layer, which then reflows into a smooth, glossy finish as the solvent evaporates.
The standard setup uses paper towels soaked with acetone placed at the bottom of a sealed glass or metal container. The part hangs above the towels on a wire rack, never touching the liquid. Exposure time controls the finish. Short exposure produces a light smoothing effect. Longer exposure creates a high-gloss surface but risks losing fine detail or causing the part to sag.
Material compatibility is non-negotiable here. Acetone vapor does not work on PLA or PETG because these polymers are not soluble in acetone. Attempting it wastes time and materials.
Safety note: Acetone vapor is highly flammable. Vapor smoothing safety requires working outdoors or in a well-ventilated space, away from open flames or sparks. Never use a microwave or oven to accelerate the process.
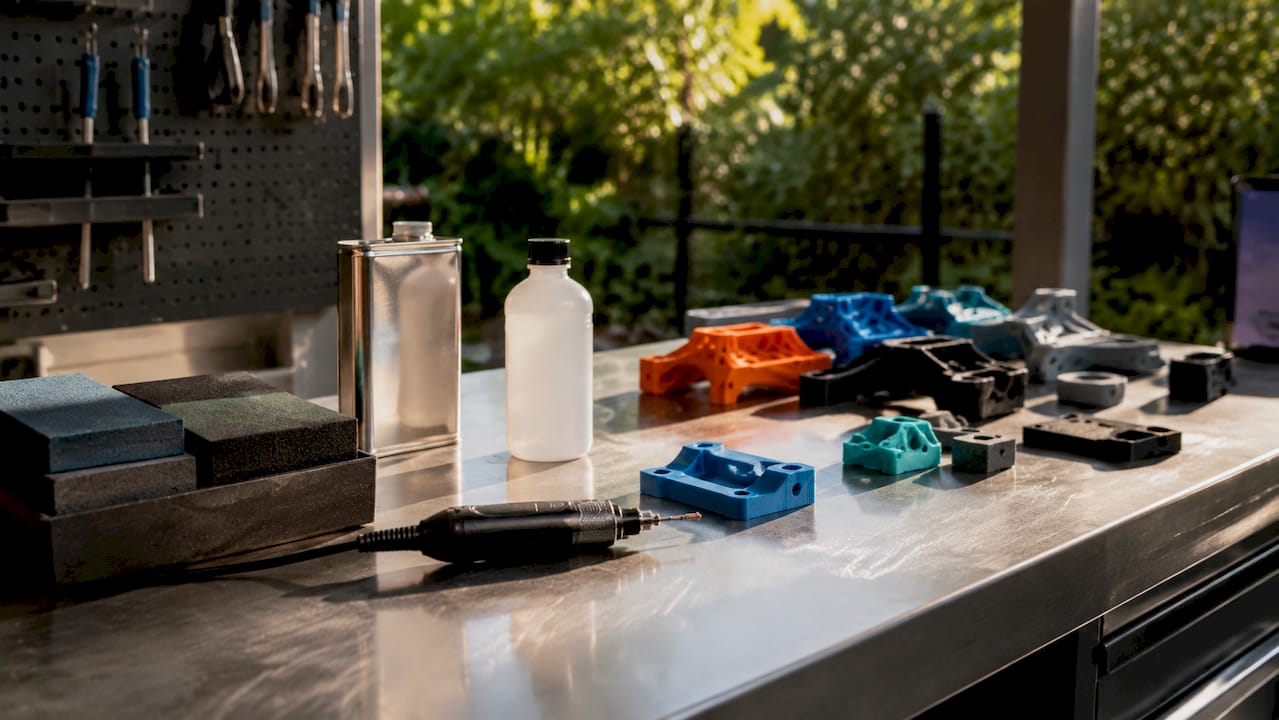
6. Epoxy coatings: chemical finishing for any material
Epoxy coatings like Smooth-On XTC-3D apply to almost any 3D print material, including PLA, PETG, ABS, and resin. XTC-3D is a two-part brush-on epoxy that self-levels into layer lines and cures to a hard, glossy surface within four hours. It adds structural rigidity to thin-walled parts as a side benefit.
The application process matters as much as the product. Mix the two components at the correct ratio, apply a thin coat with a foam brush, and let surface tension pull the material into layer lines. A second coat after light sanding with 400-grit paper produces a near-flawless base for paint. Skipping primer before painting causes uneven texture and poor paint adhesion, even on epoxy-coated surfaces.
Pro Tip: Warm the XTC-3D components slightly in warm water before mixing. Lower viscosity means better self-leveling and fewer brush marks on complex geometry.
7. Thermal finishes: laser polishing and burnishing
Thermal finishing uses controlled heat to reflow surface material without adding or removing mass. Laser polishing directs a focused laser beam across the surface, melting the peaks of layer lines so they flow into the valleys. The result is an ultra-smooth surface achieved without abrasives or chemicals. This method is primarily industrial, used on metal and polymer prints in manufacturing environments where dimensional tolerance must be maintained.
Burnishing applies to metal prints specifically. Steel tumbling media or hand burnishing tools compress and polish the surface through pressure rather than abrasion. The process work-hardens the outer layer slightly, improving wear resistance alongside surface finish. Thermal methods outperform mechanical finishing on metal prints when surface roughness below 1 micrometer is required, a threshold that sanding rarely achieves consistently.
8. Electroplating and metal coatings: functional surface layers
Electroplating plastic 3D prints involves making the surface electrically conductive, then depositing metals like copper, nickel, or chrome through an electrochemical bath. The result is a true metal surface on a plastic core, combining low print weight with metallic appearance and properties. Copper plating adds electrical conductivity for EMI shielding applications. Nickel plating adds corrosion resistance. Chrome plating adds hardness and a mirror finish.
The table below compares the most common coating and plating options for 3D printed parts:
| Finish type | Best material | Primary benefit | Typical use case |
|---|---|---|---|
| Electroplating (copper) | ABS, resin | Electrical conductivity | EMI shielding, decorative |
| Electroplating (nickel) | ABS, resin | Corrosion resistance | Functional hardware |
| Cerakote | Metal prints | Wear and chemical resistance | Firearms, industrial parts |
| Anodizing | Aluminum prints | Color and oxidation resistance | Aerospace, consumer products |
| Epoxy topcoat | PLA, PETG, ABS | Waterproofing, gloss | Display models, prototypes |
Cerakote and anodizing apply to metal prints from processes like Direct Metal Laser Sintering. Anodizing aluminum prints produces a hard oxide layer that accepts dye for precise color coding of functional parts in assemblies. Surface preparation before any coating is critical. Contamination from oils or release agents causes adhesion failure regardless of coating quality.
9. How to choose the right finish for your print
Selecting the best finish for a 3D printed model starts with three questions: What material is the print? What is its end use? What is the budget? The answers narrow the field quickly.
- PLA prints: Sanding plus filler primer plus topcoat is the standard workflow. Avoid solvent smoothing. XTC-3D epoxy works well for display models.
- ABS and ASA prints: Acetone vapor smoothing is the fastest route to a smooth finish. Follow with paint for color. Electroplating is viable for functional hardware.
- PETG prints: Wet sanding is the correct mechanical approach. PETG resists most solvents, so chemical smoothing options are limited. Epoxy coatings adhere well.
- Resin prints: Resin surfaces are already smoother than FDM prints. Light sanding with 400 to 800 grit followed by UV-cure clear coat produces excellent results.
- Metal prints: Tumbling for deburring, then burnishing or laser polishing for final finish. Cerakote or anodizing for protection.
Best finishes consistently come from combining steps: sand, apply filler primer, sand again, then topcoat. This multi-step workflow fills micro-imperfections that single-step finishing misses. Budget-conscious makers can achieve near-professional results with sandpaper, rattle-can filler primer, and patience. Professional shops add media blasting, electroplating, or cerakote for production-grade output.
Pro Tip: Always test your finishing sequence on a scrap print of the same material before committing to the final part. Finishing reactions vary by filament brand, color pigment, and print settings.
Key takeaways
The most effective 3D print finishing workflow combines mechanical preparation, a chemical or thermal smoothing step, and a protective topcoat matched to the print material and end use.
| Point | Details |
|---|---|
| Four finish categories | Mechanical, chemical, thermal, and coating methods each solve different surface problems. |
| Material compatibility first | Acetone vapor works on ABS and ASA only; epoxy coatings work across nearly all materials. |
| Combine methods for best results | Sanding plus filler primer plus topcoat produces more uniform surfaces than any single step. |
| Media geometry matters | Spherical glass beads create satin finishes; angular crushed glass creates anchor profiles for coatings. |
| Thermal and plating for professionals | Laser polishing and electroplating deliver sub-micron smoothness and functional surface properties. |
Why I always tell clients to finish in stages, not shortcuts
After years of working with printed parts at Cc3dlabs, the single most common finishing mistake I see is skipping steps to save time. Someone sands to 400 grit, sprays paint directly, and wonders why the finish looks textured under light. The layer lines did not disappear. They were just covered, not filled.
The finishing techniques that produce truly impressive results are almost always multi-stage. Sand mechanically, fill chemically with primer or epoxy, sand again, then coat. Each stage does a specific job that the next stage cannot compensate for. Trying to skip mechanical prep by applying thick epoxy just traps imperfections under a glossy surface.
I am also direct with clients about safety. Acetone vapor smoothing is genuinely useful, but it belongs outdoors or in a dedicated ventilated space. The number of makers who run it in a closed garage with a space heater nearby is alarming. The finish quality is not worth the risk when a simple setup change eliminates it.
The finishing trend worth watching in 2026 is cerakote application on FDM parts. Shops are now applying cerakote to high-temperature filament prints like PEEK and Ultem, producing parts with extraordinary wear resistance for industrial use cases. It is not a hobbyist technique yet, but the results are changing what clients expect from precision 3D parts in production environments.
Experiment with your finishing sequence. Document what works for each material. The investment in test prints pays back every time you get a production part right on the first attempt.
— Justin
Get production-ready finishes with Cc3dlabs

Cc3dlabs delivers professional 3D printing near Philadelphia with quality control built into every stage of production. Whether you need a single display model with a flawless epoxy finish or a batch of functional parts ready for cerakote or plating, the team handles material selection, print settings, and surface preparation to spec. Explore 3D printing services that cover everything from filament selection to post-processing guidance, or get a free online estimate for your next project. Local pickup and shipping options are available for clients across the US and internationally.
FAQ
What are the main types of 3D print finishes?
The four main categories are mechanical (sanding, blasting, tumbling), chemical (vapor smoothing, epoxy coatings), thermal (laser polishing, burnishing), and coatings or plating (electroplating, cerakote, anodizing). Each category suits different materials and end uses.
Can you sand all 3D print materials the same way?
No. PLA and PETG require wet sanding above 600 grit to prevent heat deformation, while ABS tolerates dry sanding more readily. Resin prints start smoother and typically need only fine-grit finishing before topcoating.
Is acetone vapor smoothing safe for home use?
Acetone vapor smoothing is safe when done outdoors or in a well-ventilated space away from ignition sources. Acetone vapor is highly flammable, so closed indoor spaces and any open flames or electrical sparks create serious hazards.
What finish works best for display models?
Sanding through progressive grits followed by filler primer and a gloss topcoat produces the best results for display models. Smooth-On XTC-3D epoxy coating is a strong alternative that self-levels into layer lines and cures to a hard, glossy surface.
Do I need primer before painting a 3D print?
Primer is not optional for quality results. Skipping primer causes uneven texture and poor paint adhesion, even on sanded surfaces. Apply filler primer in two to three light coats, sanding with 400 to 600 grit between coats, before any topcoat.