
TL;DR:
- Post-processing in 3D printing includes support removal, cleaning, curing, sanding, and surface treatments that determine part functionality and appearance. It is essential for achieving professional quality, mechanical strength, and compliance with industrial standards, especially for metal or high-stakes components. Properly matching techniques to end-use and planning sequences early optimizes results and reduces errors in additive manufacturing.
Most people assume the hard work ends when the print finishes. It doesn’t. What is post-processing in 3D printing? It’s every step you take after the printer stops: removing supports, cleaning away residue, sanding surfaces, applying coatings, or running parts through advanced finishing treatments. These steps determine whether your print is a rough prototype or a production-ready component. Skip them, and even a technically perfect print can fail a fit test, look unprofessional, or break under load. Master them, and you unlock the full potential of additive manufacturing.
Table of Contents
- Key Takeaways
- What is post-processing in 3D printing: the fundamentals
- Surface finishing techniques and their trade-offs
- Advanced post-processing for metal and industrial parts
- Choosing the right post-processing approach
- My honest take on post-processing
- Let Cc3dlabs handle the finish work
- FAQ
Key Takeaways
| Point | Details |
|---|---|
| Post-processing defines final quality | The printing process creates geometry, but finishing determines whether a part is functional and presentable. |
| Core steps apply across technologies | Cleaning, support removal, and curing are foundational regardless of whether you use FDM, SLS, or resin printing. |
| Surface finishing changes mechanics | Spray painting and sanding affect not just appearance but also hardness, roughness, and dimensional accuracy. |
| Advanced methods meet industrial standards | Metal parts often require electro-polishing, laser treatment, or plating to satisfy aerospace and medical certifications. |
| Match technique to end-use | A visual prototype needs different finishing than a load-bearing functional part. Knowing the difference saves time and money. |
What is post-processing in 3D printing: the fundamentals
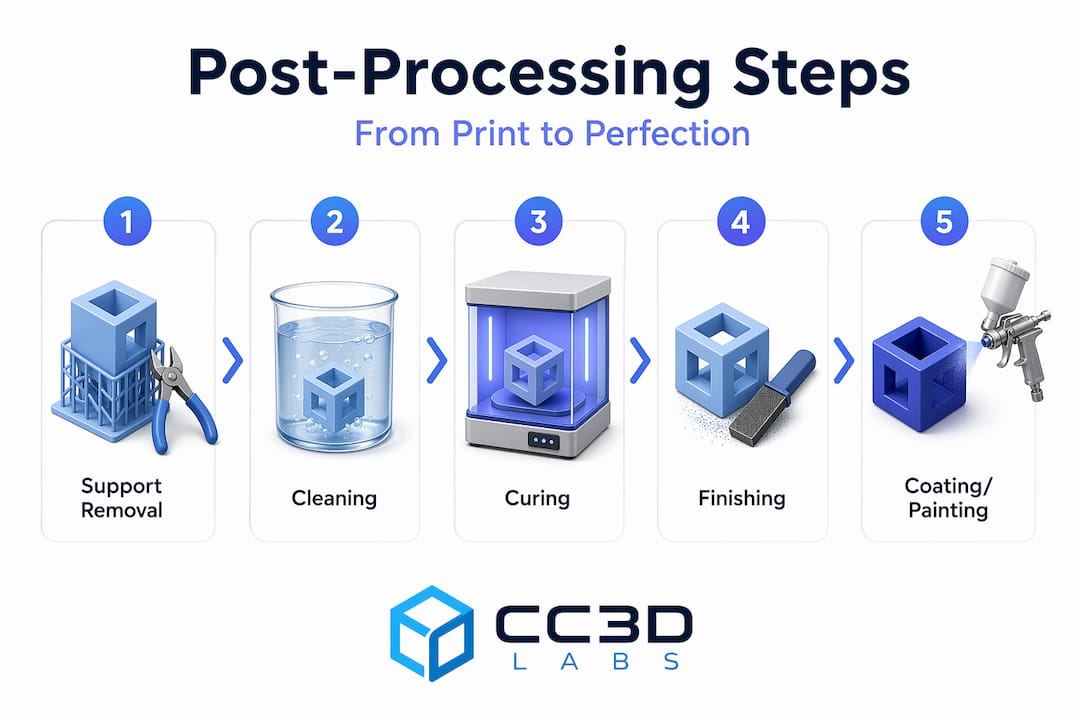
Before you decide which finishing method to use, you need to understand the three foundational steps that apply to almost every print technology. These aren’t optional. They’re where you prepare the part for any further work.
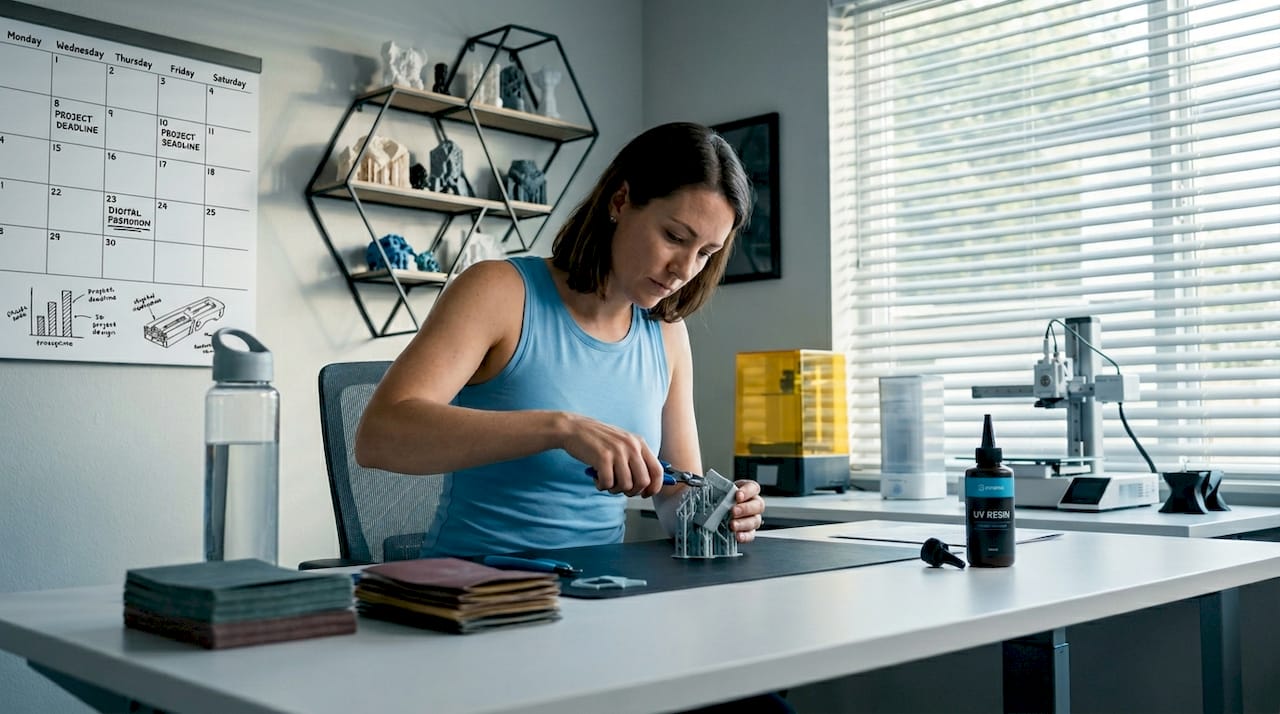
Support removal and cleaning
Support structures are temporary scaffolding. For FDM prints, you typically snap or cut them away with flush cutters and pliers. For resin prints, you dissolve or peel them off after washing the part in isopropyl alcohol. The material matters here. Water-soluble PVA supports can simply dissolve in water when used with dual-extrusion FDM printers, which is a genuine convenience for complex geometries.
Cleaning is equally non-negotiable. Resin prints must be washed to remove uncured liquid resin before UV curing. SLS powder-bed prints are covered in semi-sintered powder that has to be removed before any other step. Automated media blasting can reduce SLS cleaning time to as little as 5 minutes, compared to the labor-intensive brushing that used to be standard. And for parts with complex cavities, automated blasting cleans negative features that a brush simply cannot reach.
Curing for resin-based prints
UV curing is mandatory for any photopolymer print. Without it, the part remains brittle, sticky, and chemically unstable. Most desktop users cure parts in a dedicated UV curing station for 2 to 15 minutes depending on part thickness and resin type. Industrial setups use calibrated UV ovens with temperature control to achieve consistent mechanical properties across a production batch.
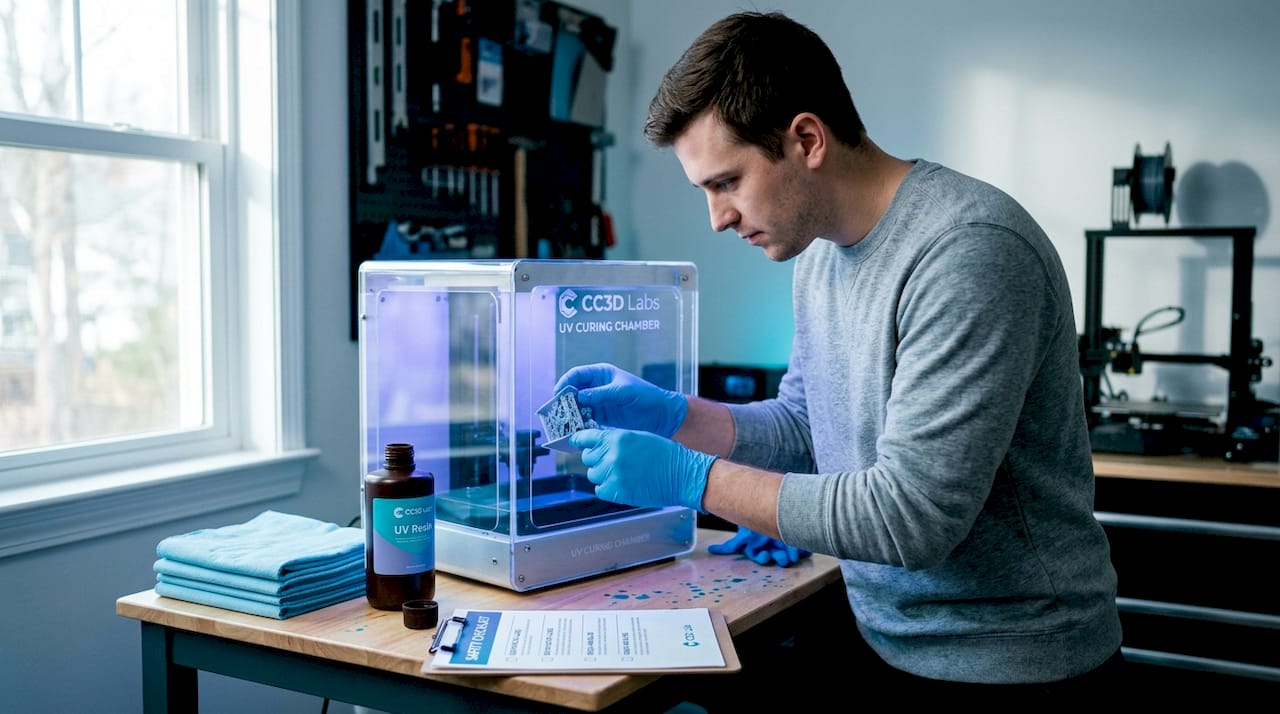
Pro Tip: After curing a resin part, let it cool completely before handling. Warm resin is softer and more prone to warping under pressure from your fingers.
Surface finishing techniques and their trade-offs
Once your part is clean and structurally stable, surface finishing determines how it looks and how it performs. This is where the role of post-processing in 3D prints becomes most visible, and most consequential.
Sanding and mechanical polishing
Sanding is the most accessible 3D printing finishing method available. You start with a coarse grit (around 120 to 200) to knock down layer lines, then work progressively toward finer grits (400, 800, 2000) for a smooth surface. For tight geometries or internal channels, flexible sanding sticks or rotary tools work better than flat sandpaper.
Mechanical polishing with a buffing compound after wet sanding can bring FDM parts to an almost glass-like finish. This works particularly well on PETG and ABS. The trade-off: sanding removes material, so if your part has tight tolerances, you need to account for that. To understand how dimensional accuracy interacts with prototype reliability, it’s worth thinking about finishing from the design stage, not after the fact.
Chemical smoothing
Acetone vapor smoothing is the most well-known chemical finishing method for ABS parts. You expose the part to acetone vapor in a controlled container, and the solvent melts the surface layer just enough to flow and fuse the layer lines. The result looks injection-molded. The downside is real: acetone vapor smoothing reduces roughness but softens the material, which can compromise tensile strength and dimensional accuracy.
For PLA, tetrahydrofuran (THF) or ethyl acetate can produce similar effects, though they require careful handling due to toxicity. These chemical approaches are best reserved for appearance models, not load-bearing parts.
Coatings and painting
Painting is underrated as a finishing technique, particularly when you look at the numbers. Spray painting ABS parts reduces surface roughness by 70% and increases hardness by 19%, outperforming acetone dipping and copper sputtering in surface quality improvement. The key is surface preparation: primer first, then two or three light coats, with light sanding between layers.
| Finishing method | Roughness reduction | Effect on hardness | Best for |
|---|---|---|---|
| Spray painting | ~70% | +19% | Aesthetics and light mechanical improvement |
| Acetone vapor (ABS) | Significant | Slight decrease | Visual models only |
| Sanding (manual) | Moderate | No direct effect | Any material, tight tolerance parts |
| Shot blasting (metal) | 62% to 70% | Varies | Metal MEX parts |
Pro Tip: Apply a UV-resistant clear coat as your final layer on any painted or primed exterior part. It prevents yellowing and surface degradation when the part is used outdoors or under shop lighting.
Advanced post-processing for metal and industrial parts
When you move into metal additive manufacturing or parts destined for aerospace, biomedical, or heavy industrial applications, the types of 3D printing post-processing required change substantially. The stakes are higher, and so are the methods.
Electro-polishing, chem-polishing, and plating
For stainless steel parts produced by laser powder bed fusion or material extrusion, a multi-stage finishing sequence delivers the best results. Combining chemical polishing, electro-polishing, and electroless nickel plating maximizes surface finish and mechanical durability. The optimal sequence is chemical polishing first, then electro-polishing, then electroless nickel plating. Each stage builds on the previous one.
Electroless nickel plating specifically improves corrosion resistance, wear resistance, and surface hardness on AM stainless steel parts. Getting the process parameters right matters: bath temperature, pH, and immersion time all affect coating uniformity and adhesion. This level of finishing is why certain additively manufactured components can pass requirements that were previously only achievable through subtractive machining.
Laser-based surface modification
Laser treatments are among the most precise post-processing techniques available. Laser polishing uses controlled surface melting to smooth surface asperities while maintaining dimensional fidelity. Laser shock peening takes a different approach: it induces compressive residual stresses in the surface to improve fatigue life without adding heat to the bulk of the part.
These techniques matter because post-processing greatly influences fatigue life, corrosion resistance, and dimensional precision of metal parts. Minor surface imperfections can reduce durability significantly when a part cycles through stress millions of times. Shot blasting on metal MEX parts has shown roughness reductions of 62% to 70% on lateral surfaces. That’s not cosmetic. That’s structural.
Regulatory standards and qualification
Post-processing for high-stakes applications isn’t just about performance. It’s about documentation and compliance. Post-processing choices critically impact part certification, requiring rigorous validation protocols especially in aerospace and medical sectors. ASTM and NASA standards define acceptable surface conditions, and hybrid finishing processes often require custom validation plans to demonstrate durability under fatigue, corrosion, and wear conditions.
For manufacturers navigating these requirements, understanding part validation in 3D printing is not optional. You need traceability, documented process parameters, and test results that prove each post-processing stage contributed to the final mechanical specification.
Choosing the right post-processing approach
The benefits of post-processing are only realized when you match the method to the goal. Here’s how to think through that decision systematically.
-
Define the end-use first. Post-processing method selection should be driven by whether the goal is visual prototyping or mechanical testing. A concept model shown at a client meeting needs a smooth, painted surface. A functional bracket needs dimensional accuracy and structural integrity. Conflating these goals leads to over-processing or under-processing.
-
Match finishing to material. PLA is difficult to chemically smooth and doesn’t respond well to acetone. ABS is ideal for vapor smoothing but softens if over-treated. Resin requires UV curing before any mechanical finishing. Metal parts need abrasive or electrochemical treatments that plastics never require.
-
Plan your sequence before you start. The order of operations matters. For a painted FDM part, the correct sequence is: support removal, sanding (coarse to fine), primer coat, light sanding, color coat, clear coat. Skipping primer leads to paint adhesion failures. Skipping coarse sanding before primer wastes fine coats on a rough substrate.
-
Consider the tolerance budget. Every finishing step removes or adds material. If your part has a 0.1 mm press-fit tolerance, track how much material each step removes. Sanding, vapor smoothing, and coating all affect final dimensions. Build this into your 3D print design workflow from the start.
-
Prototype your finishing process. Before committing a final production run to a new post-processing sequence, run the process on a test print. This is especially true for chemical treatments and coatings on unfamiliar materials.
Pro Tip: When working with resin parts that will be sanded and painted, cure them at least 30% longer than the manufacturer’s recommended time. A fully cured part sands more cleanly and holds primer without micro-chipping.
My honest take on post-processing
I’ve seen people spend weeks perfecting their print settings and then rush the finishing in an afternoon. That’s backwards. In my experience, the finishing stage regularly accounts for 40 to 60 percent of the time it takes to produce a high-quality, presentation-ready part. The printing is the easy part now. The finishing is where skill actually shows.
What surprises most people I work with is that post-processing isn’t just about aesthetics. I’ve watched parts that looked perfect off the printer fail fatigue tests because the surface condition was inconsistent. The research is clear on this: surface region condition is decisive for long-term durability. That’s not an abstract concern for aerospace engineers. It applies to any functional part that will see repeated stress.
The other thing I’d push back on is the idea that more finishing is always better. I’ve seen parts chemically smoothed into dimensional failure. I’ve seen coatings applied so thickly that mating surfaces no longer fit. Choosing the right print type from the beginning reduces how much corrective finishing you need later. Post-processing is powerful, but it isn’t a fix for poor design decisions or the wrong material choice.
My advice: treat finishing as part of the design process, not an afterthought. Know what your part needs before the print even starts.
— Justin
Let Cc3dlabs handle the finish work

At Cc3dlabs, near Philadelphia, post-processing isn’t something we bolt on at the end. It’s built into every project from the start. Whether you’re working with filament-based prototypes that need a clean, professional surface or functional parts that require consistent dimensional accuracy across a batch, our team applies the right finishing methods for the job. We handle diverse materials, manage tight tolerances, and support clients from single-part prototyping through production-scale orders. Explore our professional 3D printing services to see how we integrate finishing into every part we deliver, locally or shipped anywhere.
FAQ
What does post-processing mean in 3D printing?
Post-processing in 3D printing refers to all steps performed after a part is printed, including support removal, cleaning, curing, sanding, painting, and advanced surface treatments. These steps transform a raw print into a functional or visually finished part.
Why is post-processing important for 3D printed parts?
Post-processing directly affects surface quality, mechanical performance, and dimensional accuracy. Without it, most prints have visible layer lines, rough surfaces, and reduced durability compared to traditionally manufactured parts.
What post-processing technique works best for FDM prints?
For FDM prints, mechanical sanding followed by primer and spray paint is one of the most effective methods, reducing surface roughness by up to 70% while also improving surface hardness. Acetone vapor smoothing works well for ABS appearance models but can reduce mechanical strength.
Do metal 3D printed parts need post-processing?
Yes. Metal additively manufactured parts almost always require post-processing to meet mechanical and regulatory standards. Techniques like electro-polishing, chem-polishing, and electroless nickel plating improve surface finish, corrosion resistance, and fatigue life, which are critical for aerospace and medical applications.
How do I choose the right post-processing method?
Match the method to the end-use. Visual prototypes benefit from sanding, priming, and painting. Functional parts require treatments that preserve or improve mechanical properties without compromising dimensional accuracy. Material type also dictates which chemical or mechanical methods are safe to apply.