
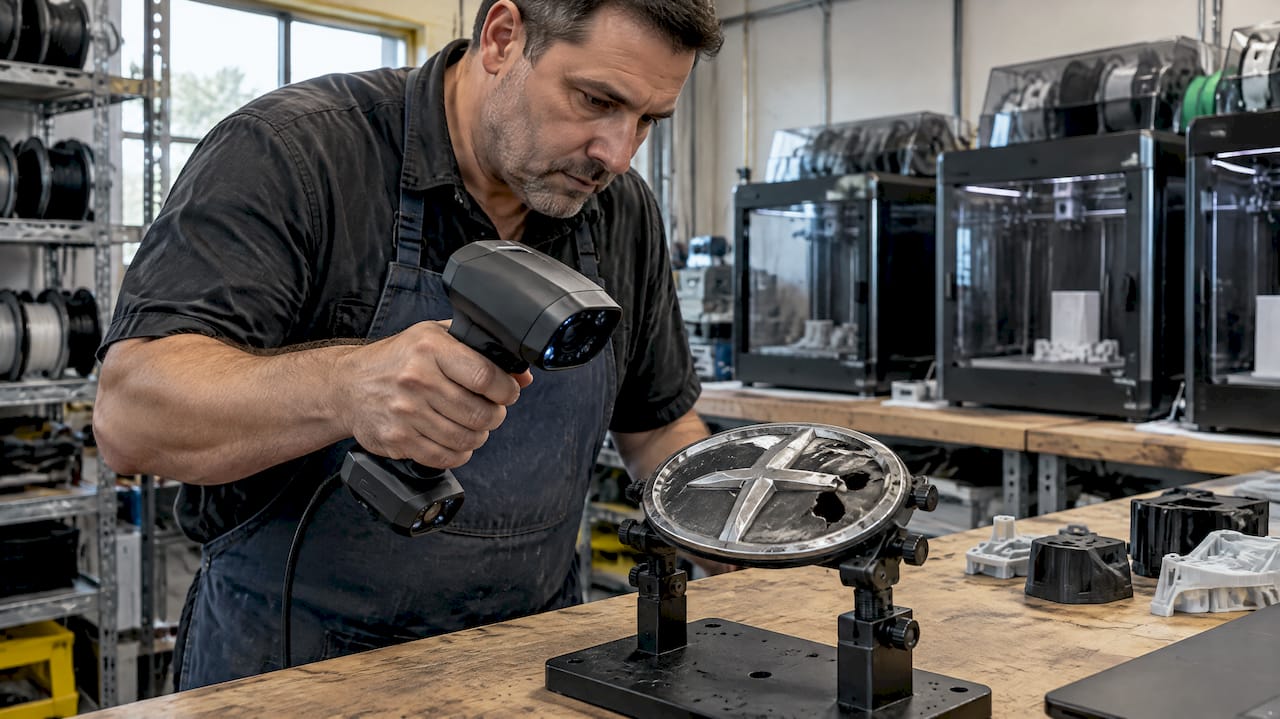
Most automotive emblem reproduction jobs fall into three practical routes: restoring the original piece, reproducing it through molding and casting, or scanning it and 3D printing a new master for finishing. Enameled badges in good structural condition usually favor restoration; cracked plastic inserts or missing pieces usually favor reproduction by mold or 3D print, often handled by expert shops like Belmont, CA exotic and classic auto repair specialists. Before committing to full production, reputable shops quote only after a test print or sample, and resale of trademarked designs carries legal exposure worth checking first.
TL;DR:
- Reproduction methods vary depending on the condition of the original emblem, with restoration suited for intact pieces and 3D printing ideal for missing or damaged parts.
- Materials choice impacts durability, with UV-stable urethane best for outdoor use and plated metals relying on proper metal prep and batch processing.
- Quality checks involve dimensional, visual, and fit assessments, emphasizing the importance of test prints prior to full production runs.
- Legal risks exist for reproducing branded emblems without authorization, especially if resold commercially or labeled as genuine.
- The highest authenticity for collectible emblems comes from restoration, while reproduction is suitable when original parts are too degraded or unavailable.
Table of Contents
- Three ways to get an emblem reproduced or restored
- Materials, finishes, and how they drive your method choice
- The workflow: scanning, printing, finishing, and timeline
- How to choose a restoration or reproduction provider
- Legal and trademark checklist before reproducing branded emblems
- CC 3D Labs: how we approach emblem scan, prototype, and small-batch production
- Quality control on a reproduced emblem
- Customizing a reproduced emblem
- Durability and weather resistance of reproduced emblems
- Editor’s perspective: when restoration beats reproduction
- Get a scan or print quote from CC 3D Labs
- FAQ
- Sources
Three ways to get an emblem reproduced or restored
The right method depends on what survives of the original and how many pieces you need. Each approach solves a different problem, and mixing them often makes sense within a single project.
Restoration works on emblems that still have intact base metal and enamel or paint that can be stripped and refired. It preserves the original stamping, casting marks, and any subtle variations that distinguish a factory piece from a reproduction, which matters to collectors focused on provenance. Its limitation is condition: pitted, cracked, or missing substrate cannot always be brought back without compromising the shape.
Molding and casting suits small to medium production runs, particularly for plastic inserts or urethane-backed badges where you need several identical copies. A silicone mold taken from a good original or a printed master lets a shop pour multiple urethane inserts at a cost per unit that drops as the run grows, which makes this route efficient once you need more than a handful of parts.
Scan-to-CAD plus 3D printing is usually the fastest path to a one-off or a reverse-engineered pattern when no usable original or correct part exists. A handheld scan captures the geometry, CAD software cleans up the mesh, and an FDM printer produces either a test piece or a master for molding. Direct FDM output can serve as a final part for low-visibility or interior badges, but exposed chrome or enameled emblems typically need the printed piece finished through plating or hand enameling rather than used as-is.
- Restoration preserves originality but depends on surviving base metal.
- Molding and casting fits runs of several identical parts at a lower per-unit cost.
- Scan and print fits one-offs and reverse-engineered patterns with no good original.
OEM or new-old-stock parts remain worth sourcing first when available, since they carry factory accuracy without any reproduction risk, but scarcity on older models often pushes prices high enough that custom reproduction becomes the more realistic option.
Materials, finishes, and how they drive your method choice
The substrate behind an emblem determines both how it can be restored and how closely a reproduction can match it.
Enameled, or champlevé, emblems use recessed metal fields filled with colored glass enamel and fired in a kiln. Restoring one correctly requires specialist metal prep, including stripping old enamel, repairing pitted recesses, and refiring at controlled temperatures, work that restoration specialists describe as labor-intensive because surface preparation and coordination with subcontractors tend to dominate the schedule more than the decorative firing itself.
Plastic insert badges, common on dashboard and trunk emblems, are typically urethane or polycarbonate. Urethane holds UV-stable pigment well and is the usual choice when reproducing from a pattern, since cracked or crazed originals rarely survive restoration and a fresh casting from a good sample is often the more durable result.
Metal bezels and plated badges, whether zinc, aluminum, or brass, bring their own constraint: plating shops generally run batch processes, so a one-off part may need to be grouped into a plating run or sent to a subcontractor that accepts small lots.
- Enameled badges need metal prep plus kiln firing, not just surface polish.
- Plastic inserts reproduce well in UV-stable urethane when the original has crazed.
- Plated metal bezels depend on a subcontractor’s batch size and lot minimums.
Reproductions replicate attachment features, meaning studs, bezels, and spring retainers get modeled and recreated alongside the visible face, since a visually perfect badge that does not mount correctly defeats the purpose. ISO/ASTM additive manufacturing standards exist in part to evaluate how well printed geometry holds up against these functional details, which matters more for mounting features than for decorative surface texture.
The workflow: scanning, printing, finishing, and timeline
A disciplined sequence keeps a reproduction project from stalling on surprises, and it starts before anything gets scanned.
- Inspect and decide. A shop examines the original (or whatever remains of it) to decide whether restoration is structurally possible or whether reproduction is the only realistic route. Professional handheld 3D scanning (accuracy to ~0.1 mm) captures geometry even from a damaged piece when restoration is not viable.
- Scan and clean up the CAD. The scan data gets converted into a usable solid model, since raw scans almost always need manual repair to fill gaps and restore sharp edges, a step reverse-engineering workflows treat as a required stage rather than an optional one.
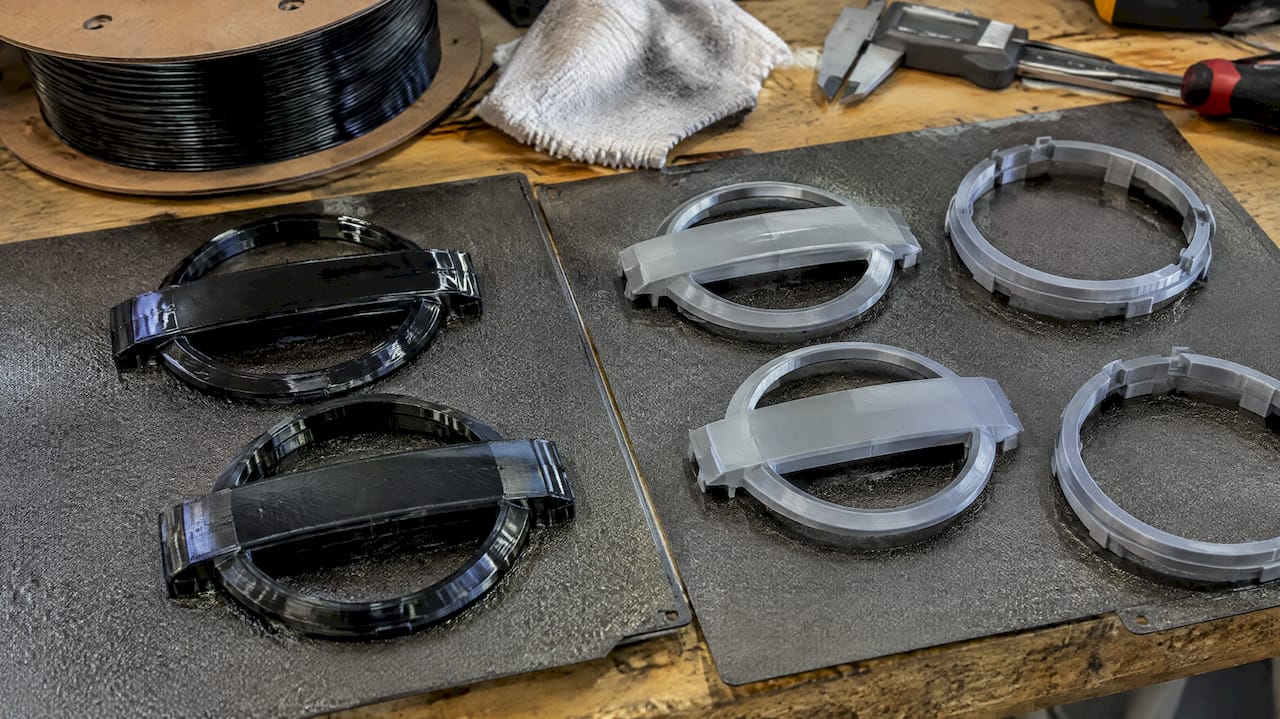
- Test print. An FDM test piece validates fit, proportion, and fine detail before any mold or finishing work begins.
- Finish. Depending on the emblem type, this means silicone molding and urethane casting, metal plating, or enamel firing.
- QA and attach. The finished part gets checked against the original dimensions and test-fitted into its mounting location.
FDM printing holds tolerances of roughly ±0.2 to 0.5 millimeters, which is adequate for masters and most mounting features but can soften very fine engraved lettering or sharp inside corners. Surface prep, enamel firing schedules, and subcontracted plating lead times typically drive the overall timeline more than the printing or scanning steps themselves.
Pro Tip: Ask whether your test print will be scaled and finished enough to judge fit before you approve the full production run, not just the raw print.
How to choose a restoration or reproduction provider
Picking a provider is largely a matter of verifying process, not just price. A shop that cannot describe its steps clearly is a shop that cannot be held to them later.
- Ask for photos of similar completed jobs and a plain description of each production step.
- Confirm the shop quotes only after a sample or test print, rather than committing you to a full run up front.
- Ask the provider to describe their scanning accuracy; a shop offering professional handheld 3D scanning (accuracy to ~0.1 mm) should be able to state that specifically rather than in vague terms.
- Confirm who handles plating or enameling and whether that work is subcontracted or done in-house.
- Get shipping, pickup, and rework terms in writing before approving production.
Watch for any vendor that claims official OEM licensing or branding rights without documentation to back it up. That claim carries legal weight, and an unsupported one is a red flag rather than a selling point.
| Question to ask | Why it matters |
|---|---|
| Do you quote after a test print or sample? | Confirms the vendor won’t commit your full order before fit is verified |
| What is your scanning accuracy? | Separates vague marketing from a stated, specific capability |
| Who handles plating or enameling? | Clarifies whether finishing is in-house or subcontracted |
| What are your shipping and pickup options? | Determines whether local pickup or nationwide shipping fits your logistics |
Legal and trademark checklist before reproducing branded emblems
Reproducing an emblem that carries a protected automaker logo is not purely a manufacturing question. Under the Lanham Act, producing or selling replicas bearing protected trademarks without authorization can create liability if the goods are likely to cause consumer confusion, and courts weigh factors such as mark strength, similarity, and intent when deciding whether confusion exists.
Labeling a replica as a reproduction does not automatically clear the risk, since downstream or post-sale confusion can still support a claim even when the original seller disclosed that the part was not genuine. That risk grows the moment a reproduction is resold commercially rather than used for personal restoration.
Before producing or selling reproductions at any scale:
- Search the USPTO trademark database for the mark in question.
- Never list or advertise a reproduction as original or genuine.
- Consult an attorney before any commercial resale of branded reproductions, especially in volume.
Personal restoration of a part you already own sits in a different category than manufacturing and selling copies, but the line between the two is exactly where legal exposure tends to appear.
CC 3D Labs: how we approach emblem scan, prototype, and small-batch production
We approach emblem work the same way we approach any reverse-engineering job: scan first, print a test piece, then quote based on what that test actually shows. Our 3D Scanning Lab uses professional handheld 3D scanning (accuracy to ~0.1 mm) to capture geometry from a damaged or incomplete original, and our CAD team cleans up that scan data before anything goes to print.
From there, we run the cleaned model on our Bambu Lab FDM printer farm to produce a test piece in the material that fits the job, whether that is a master for molding or a functional prototype for fit-checking. We quote the full production run only after that test print, since no two emblems present the same combination of damage, detail, and attachment geometry.
This workflow fits prototype-quality one-offs, small-batch replacement parts for a restoration shop working through several identical badges, and reverse-engineering legacy emblems where no CAD file has ever existed. Our 3D Modeling & CAD project gallery shows past scan-and-print work if you want to see the process applied to similar projects.
Quality control on a reproduced emblem
Checking a reproduction against the original is less about a single pass/fail test and more about a short sequence of comparisons. Dimensional checks come first: comparing the printed or cast part against the scan data and, where one exists, against the original emblem itself confirms the reproduction tracks the source geometry rather than drifting during cleanup or printing.
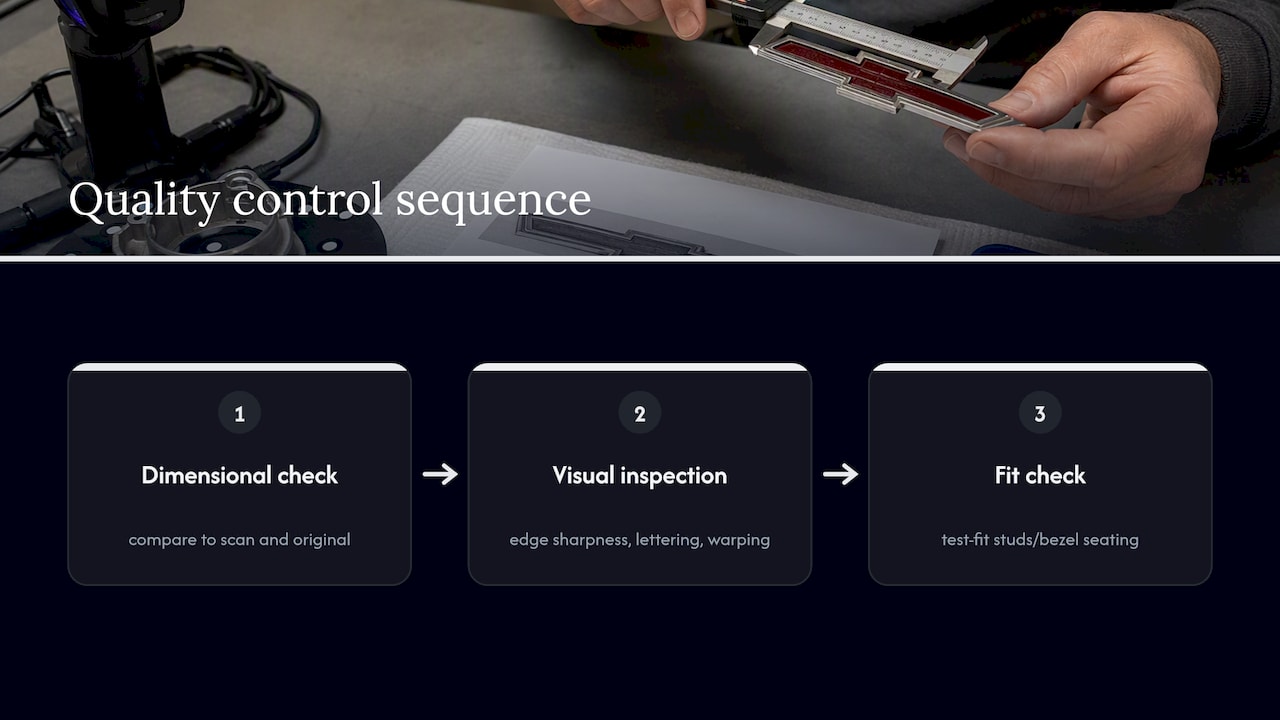
Visual and surface checks follow, looking at edge sharpness, lettering legibility, and any warping introduced by the printing or molding process. ASTM F3674 offers part-grading guidance that can inform how strictly a given reproduction needs to be evaluated depending on how visible and consequence-critical the part is, which matters more for a hood emblem than for a hidden interior badge.
Fit checks close the process: test-fitting the finished piece into its mounting location, whether that means studs through a panel or a bezel snapped into a clip, catches attachment problems that a dimensional check alone can miss. A reproduction that measures correctly but does not seat properly has failed the job regardless of how accurate its surface looks.
Running these checks in sequence, rather than only at the end, is why a test print matters so much earlier in the process: catching a geometry problem before committing to a mold or a plating run is far cheaper than catching it after.
Customizing a reproduced emblem
Because reproduction starts from a scan or a CAD model rather than an existing stamped die, it opens options that straight restoration does not. Color is the most common request: a urethane insert or a printed master can be finished in a different enamel shade or paint color than the original, whether to match a custom build or to correct for a color that has shifted with age on surviving reference pieces.
Branding updates are possible within the same workflow but carry the same trademark considerations covered earlier. Altering lettering, adding a name, or modifying a logo on a piece that still resembles a protected mark does not remove the underlying trademark risk, so any customization involving brand elements is worth checking against the same USPTO search and counsel step before production.
Material and finish choices also function as a form of customization. A badge reproduced in a more UV-stable urethane than the factory original, or a bezel finished with a different plating than stock, can outperform the original piece in daily use while still looking correct at a glance. These changes are easiest to specify at the CAD stage, before the test print, since adjusting color or finish on an approved production run usually means starting the quoting process over.
Durability and weather resistance of reproduced emblems
An emblem that only has to look right in a show photo faces a lower bar than one that has to survive years of sun, rain, and road salt on a daily driver. Material choice is the main lever here: UV-stable polyurethane resists the yellowing and surface crazing that commonly affects older plastic inserts, which is part of why reproduction from a good pattern is often preferred over restoring a plastic insert that has already crazed once.
Plated metal badges face a different durability question, since the plating thickness and base metal prep determine how well the finish resists corrosion over time, independent of whether the underlying part was cast, machined, or printed as a master. Enameled badges depend on a properly fired enamel bonding to correctly prepared metal, which is why rushing the metal prep stage tends to show up later as lifting or cracking enamel rather than as an immediate defect.
For printed parts intended as final components rather than masters for molding or plating, material selection against expected conditions matters: PETG offers better outdoor durability than PLA, and ABS or ASA tolerate higher temperatures, which is relevant for an emblem mounted near an engine bay or on a dark-colored hood that absorbs more heat. None of these choices are guesses so much as matches between a known material property and a known exposure condition.
Editor’s perspective: when restoration beats reproduction
For a genuinely collectible emblem, restoration preserves the stamping and casting history that gives the piece its value, and that provenance cannot be recreated by any reproduction method no matter how accurate the geometry. Reproduction earns its place when the original is structurally gone, missing, or too degraded to save. A well-made reproduction can match the original’s appearance closely, but collectors evaluating a piece for its history, rather than its looks alone, should weigh that distinction before choosing either path.
— Justin
Get a scan or print quote from CC 3D Labs
If you are weighing restoration against reproduction and need a second opinion on what is actually feasible, scanning the part is the fastest way to find out. We offer professional handheld 3D scanning (accuracy to ~0.1 mm) for reverse-engineering damaged or missing emblems, CAD cleanup to turn that scan into a workable model, and FDM printing on our Bambu Lab farm to produce a test piece before anything moves to full production.
We quote every job individually after seeing that test print, since emblem condition and detail vary too much for a blanket price. Local customers in the Greater Philadelphia area can arrange residential pickup, and we ship finished orders anywhere in the United States. Start with our services page or head straight to Cc3dlabs to request a quote.
FAQ
Can I legally reproduce a branded car emblem for personal use?
Restoring or reproducing a badge for your own vehicle carries less exposure than selling copies commercially, but trademark risk under the Lanham Act still applies once a reproduction is sold or distributed. Consulting counsel before any commercial resale is the safer path.
What’s the difference between restoring and reproducing an emblem?
Restoration repairs and refinishes the original part, preserving its factory stamping and history, while reproduction creates a new part through molding, casting, or 3D printing when the original is too damaged or scarce to save. The right choice depends on how much of the original survives.
How accurate is 3D scanning for emblem reproduction?
Professional handheld 3D scanning can achieve accuracy to around 0.1 mm, which is precise enough to capture fine emblem detail for CAD reconstruction. Reverse-engineering workflows still require manual CAD cleanup after scanning to fill gaps and restore sharp edges.
Why do shops require a test print before quoting a full order?
A test print confirms fit, proportion, and detail accuracy before committing to a mold, plating run, or enamel firing, which are far more costly to redo than a single printed sample. We follow this practice and quote full production only after that test piece is approved.
What materials hold up best for emblems exposed to weather?
UV-stable polyurethane resists yellowing and crazing better than standard plastics, which is why reproducing from a pattern in that material is common for weather-exposed inserts. For printed parts, PETG and ABS or ASA generally tolerate outdoor exposure and heat better than PLA.
Sources
- ASTM International — additive manufacturing technology standards
- Emblemagic — Enamel FAQ
- USPTO — About trademark infringement
- Manufacture of Automotive Component Using Reverse Engineering and Manufacturing Additive Techniques