TL;DR:
- Advanced filament materials include high-performance thermoplastics and composites designed for demanding applications. Proper hardware, drying, and environmental controls are essential for successful printing with these materials. Selecting the right filament depends on your application’s thermal, mechanical, and regulatory requirements, not solely on data sheets.
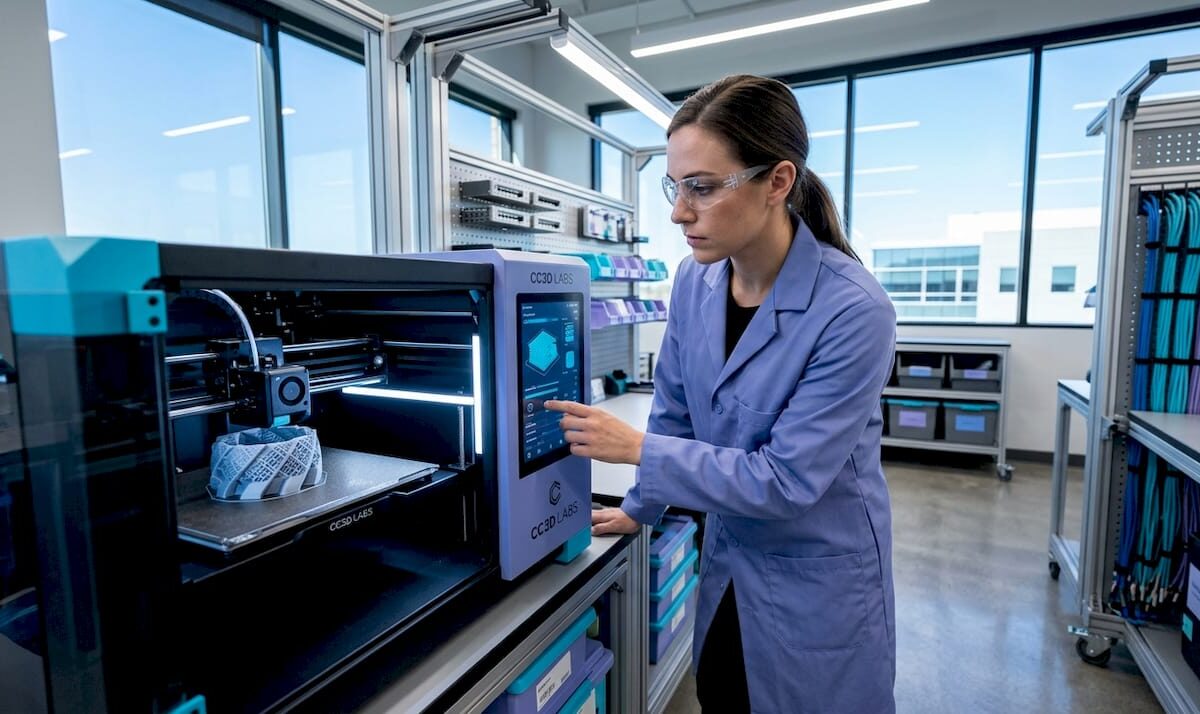
Advanced filament materials are specialized thermoplastics and composites engineered to deliver mechanical, thermal, and functional performance that standard PLA or ABS cannot match. Explaining advanced filament materials means understanding not just what they are made of, but how their composition dictates every aspect of the printing process, from nozzle selection to chamber temperature. The field now spans 23 or more distinct filament types, organized across four categories: General, Aesthetic, Functional, and Engineering. Suppliers like 3DXTECH, Prusament, and Sigma Filament have pushed materials like PEEK, PEKK, carbon fiber composites, and ESD-safe polymers into production-grade workflows. If you are selecting materials for functional prototypes, aerospace components, or electronics housings, this guide covers what you need to know.
What are the main types of advanced filament materials?
The four filament categories map directly to application complexity, and understanding where your project falls determines everything downstream. General-purpose filaments like PLA and PETG cover the majority of prototyping work. Aesthetic filaments such as silk PLA or wood-fill prioritize surface finish over structural performance. Functional filaments, including TPU and ASA, add flexibility or UV resistance. Engineering-grade materials, the focus here, are built for load-bearing, high-temperature, or chemically aggressive environments.
Engineering-grade vs. composite filaments
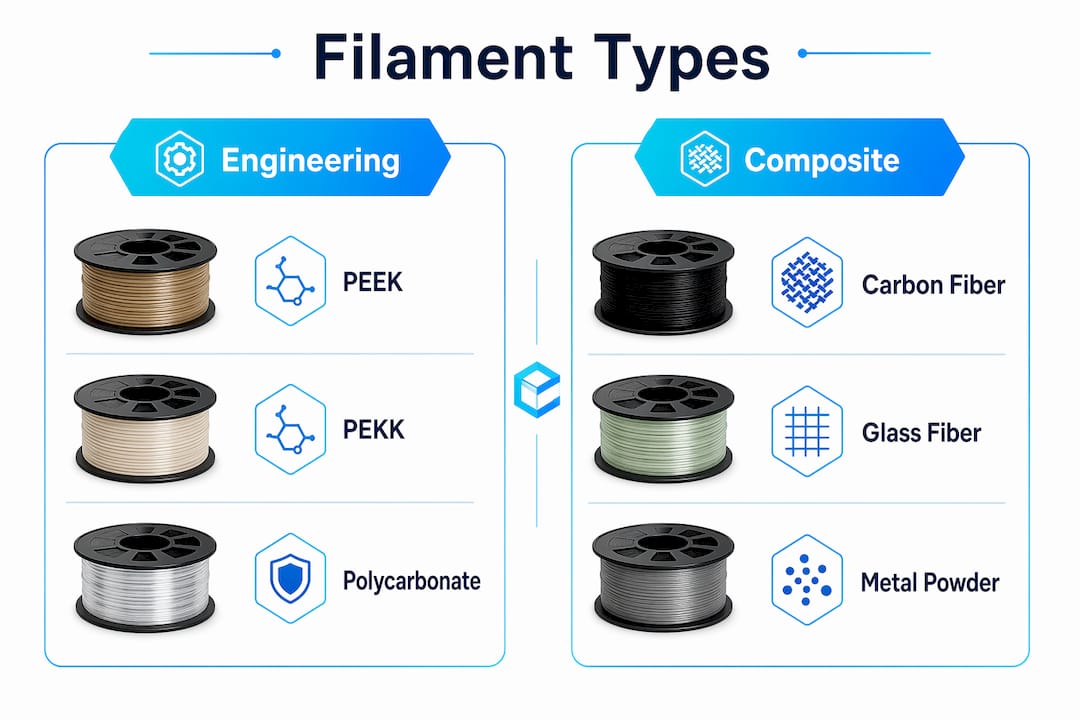
Engineering polymers like PEEK, PEKK, Ultem (PEI), and polycarbonate (PC) are pure thermoplastics processed at extreme temperatures. Composite filaments blend a base polymer with reinforcing agents: carbon fiber, glass fiber, or metal powder. The distinction matters because composites add stiffness and reduce weight, while pure engineering polymers prioritize thermal stability and chemical resistance. PLA-CF, PA6-CF, and PET-CF look similar on a spool but behave very differently under heat and moisture exposure.

Metal filaments: composite vs. sinterable
Metal filaments split into two fundamentally different product types. Composite metal filaments blend 5 to 60% metal powder into a polymer matrix, producing heavy, polishable parts that retain plastic mechanics. Sinterable metal filaments contain 80 to 95% metal and require a debinding and sintering process to yield near full-density metal parts. Composite metal filaments cost $25 to $45 per kilogram. Sinterable options run $120 to $565 per kilogram, reflecting the post-processing infrastructure required.
| Filament type | Base material | Key property | Typical application |
|---|---|---|---|
| PEEK / PEKK | Ultra-polymer | 260°C continuous use | Aerospace, medical implants |
| PA6-CF / PA12-CF | Nylon + carbon fiber | High stiffness, low weight | Structural brackets, jigs |
| ESD-safe PC | Polycarbonate + CNT | Electrostatic discharge control | Electronics housings, aerospace |
| Sinterable metal | 80-95% metal powder | Near full-density metal parts | Low-volume metal production |
| TPU / ASA | Flexible / UV-stable | Elasticity or weatherability | Seals, outdoor enclosures |
How do material properties affect printing requirements?
The properties of filament materials are not just performance specs. They are printing constraints. A material that requires 380°C extrusion and a 120°C heated chamber will fail on a standard desktop printer regardless of how well the slicer profile is configured. Engineers who treat filament selection as separate from hardware selection consistently run into preventable problems.
Temperature and hardware requirements
Ultra-polymers like PEEK and PEKK require extrusion temperatures between 360°C and 400°C, with PEKK-A offering a slightly wider processing window that makes it more forgiving than PEEK. Both demand enclosed build chambers to maintain ambient temperatures above 100°C and prevent warping from thermal gradients. All-metal hotends are non-negotiable at these temperatures, since PTFE-lined hotends degrade and off-gas above 240°C.
Abrasive composites create a separate hardware problem. Brass nozzles fail quickly on carbon fiber or glass fiber filaments. Hardened steel nozzles last approximately 10 times longer than brass under the same conditions. Ruby-tipped nozzles show no measurable wear after processing 8 kilograms of abrasive material, making them the correct choice for high-volume composite printing. The abrasion ranking from most to least aggressive runs: carbon fiber, glass fiber, metal-fill, glow-in-the-dark, wood-fill, then standard PLA.
Moisture sensitivity and drying protocols
Hygroscopic filaments absorb ambient moisture within hours of exposure, and the consequences show up as bubbling, poor layer adhesion, and degraded mechanical properties. PEKK requires drying at 140°C for four hours before printing. Nylon variants need similar treatment. Maintaining filament dryness with heated dry boxes during the print run is mandatory for consistent results, not optional. Even brief humidity exposure during a multi-hour print can degrade a part that would otherwise meet spec.
Pro Tip: For carbon fiber filaments specifically, minimum layer heights of 0.2mm prevent nozzle jams caused by fiber bridging. Use a direct-drive extruder rather than a Bowden setup to reduce filament snapping from stiffness.
Post-print handling matters as well. Engineering polymers under rapid cooling develop internal stresses that cause warping or cracking after the print completes. Controlled cool-down inside a heated chamber, or annealing in an oven, relieves these stresses and stabilizes dimensional accuracy. The Cc3dlabs guide on post-processing techniques covers these protocols in detail.
What should engineers consider when selecting advanced filaments?
Selecting the right material starts with defining the operating environment of the finished part, not with browsing a filament catalog. The properties that matter most vary by application, and the trade-offs between printability and performance are real.
Here is a structured decision framework for material selection:
-
Define the thermal ceiling. What is the maximum continuous-use temperature the part will experience? PETG handles up to roughly 80°C. ASA extends that to around 95°C. PC and Nylon push past 110°C. PEEK and PEKK sustain performance at 260°C. Match the material to the actual thermal load, not the worst-case scenario.
-
Assess mechanical requirements. Carbon fiber reinforced filaments like CarbonX PA6-CF or PET-CF deliver high stiffness-to-weight ratios suited for structural brackets and tooling. Pure engineering polymers like PEEK offer better impact resistance and chemical compatibility for fluid-contact parts.
-
Factor in electrical requirements. ESD-safe filaments developed with carbon nanotube technology meet conductivity and flame-retardant standards for electronics and aerospace applications. Prusament PC Space Grade achieves less than 0.25% total mass loss per ESA outgassing standards, making it viable for space-adjacent applications on standard desktop hardware.
-
Calculate total cost of ownership. Engineering-grade polymers cost $120 to $565 per kilogram. That figure does not include the hardware investment in hardened nozzles, enclosed chambers, or dry storage. Composite filaments at $25 to $45 per kilogram offer a lower entry point but require the same abrasion-resistant hardware. For a detailed breakdown of cost factors, the Cc3dlabs resource on reducing printing costs is worth reviewing.
-
Evaluate post-processing needs. Sinterable metal filaments require debinding at 200 to 300°C and sintering at 800 to 1,100°C. Sintered parts achieve 96 to 99% theoretical density with mechanical properties close to wrought metal, but the process requires specialized furnace equipment or an outsourced sintering service.
Pro Tip: Most print jobs do not require engineering-grade materials. Confirm that the performance gap between a functional filament like ASA or PC and a full ultra-polymer actually matters for your application before committing to the added setup complexity.
What advanced filaments are shaping manufacturing innovation?
The materials driving the most significant changes in additive manufacturing workflows share one characteristic: they close the gap between printed parts and traditionally manufactured components. The engineering filament category is where this convergence is most visible.
PEEK and PEKK have become the benchmark for extreme-environment applications. 3DXTECH’s CarbonX PEKK-A CF15 combines the thermal stability of PEKK with 15% chopped carbon fiber reinforcement, producing parts that compete with machined composites at a fraction of the lead time. The wider processing window of PEKK-A compared to standard PEEK makes it accessible on a broader range of high-temperature printers without sacrificing structural integrity.
ESD-safe filaments represent a different kind of advancement. Rather than maximizing mechanical strength, these materials meet regulatory thresholds for electrostatic discharge protection and flame retardancy. Advanced filament materials in this category now emphasize regulatory compliance over raw mechanical performance, reflecting a shift toward industrial production standards rather than prototype-only applications.
| Material | Supplier example | Key advancement | Target sector |
|---|---|---|---|
| PEKK-A CF15 | 3DXTECH CarbonX | Wide process window + CF reinforcement | Aerospace, defense |
| PC Space Grade | Prusament | Low outgassing, desktop-printable | Space, electronics |
| PA6-CF | Multiple | Stiffness-to-weight for structural parts | Automotive, tooling |
| Sinterable 316L SS | Sigma Filament | Near-wrought density via sintering | Low-volume metal production |
Sinterable metal filaments from suppliers like Sigma Filament are redefining low-volume metal part production. The ability to print a near-full-density 316L stainless steel part without DMLS equipment removes a significant cost barrier for product developers running pre-production validation. The trade-off is process complexity, but for teams already managing multi-step manufacturing workflows, debinding and sintering are manageable additions.
Key takeaways
Advanced filament materials require matching material properties to both the application environment and the printer hardware before a single layer is deposited.
| Point | Details |
|---|---|
| Four filament categories | General, Aesthetic, Functional, and Engineering map to application complexity and cost. |
| Hardware must match the material | Abrasive composites need hardened steel or ruby nozzles; ultra-polymers need all-metal hotends above 300°C. |
| Moisture management is non-negotiable | PEKK and Nylon require pre-print drying and heated dry boxes during printing to maintain part quality. |
| Metal filaments are not interchangeable | Composite metal filaments retain plastic mechanics; sinterable filaments yield near-wrought-density metal parts. |
| Regulatory compliance drives selection | ESD-safe and low-outgassing filaments are chosen for compliance thresholds, not just mechanical specs. |
What working with advanced filaments actually taught me
The most common mistake I see engineers make is treating filament selection as a spec-matching exercise. They find a material with the right tensile strength and heat deflection temperature, order a spool, and then discover their printer cannot maintain the required chamber temperature or their nozzle is destroyed after two prints. The material was correct. The system was not ready for it.
Thermal management is where most advanced filament projects fail in practice. A PEKK print that warps is almost never a slicer problem. It is a chamber temperature problem, or a drying protocol that was skipped because the timeline was tight. I have seen parts that looked perfect off the bed develop stress cracks 48 hours later because the cool-down was too fast. Controlled environments are not a luxury for these materials. They are the process.
The other thing worth saying plainly: most applications do not need PEEK. The instinct to reach for the highest-performance material available is understandable, but it adds cost, setup time, and failure modes that a well-chosen PC or PA12-CF would have avoided entirely. The right material is the one that meets the spec with the least process complexity, not the one with the most impressive data sheet. For teams building toward production, the Cc3dlabs overview of manufacturing-grade workflows addresses this trade-off directly.
— Justin
How Cc3dlabs handles advanced filament applications

Cc3dlabs operates near Philadelphia with the hardware and process controls that advanced filament work actually requires: enclosed build chambers, hardened nozzle configurations, and established drying protocols for hygroscopic engineering polymers. If your project involves PEEK, carbon fiber composites, ESD-safe materials, or sinterable metal filaments, outsourcing to a team that has already solved the setup problems saves significant time and reduces material waste. Cc3dlabs handles both prototype quantities and batch production runs, with design support and free online estimates available. Explore the full range of professional 3D printing services to find the right fit for your next engineering project.
FAQ
What are advanced filament materials in 3D printing?
Advanced filament materials are engineering-grade thermoplastics and composites, including PEEK, PEKK, carbon fiber reinforced nylons, ESD-safe polymers, and sinterable metal filaments, designed for applications requiring high thermal, mechanical, or functional performance beyond standard PLA or ABS.
How do I choose the right filament for an engineering part?
Start by defining the maximum operating temperature, mechanical load, and any regulatory requirements such as ESD safety or outgassing limits, then match those constraints to a filament category before evaluating cost and printer hardware compatibility.
Why do advanced filaments require special nozzles?
Abrasive filaments like carbon fiber and glass fiber wear through brass nozzles rapidly. Hardened steel nozzles last roughly 10 times longer, and ruby-tipped nozzles show no measurable wear after 8 kilograms of abrasive material, making them the correct hardware choice for composite printing.
What is the difference between composite and sinterable metal filaments?
Composite metal filaments blend 5 to 60% metal powder into a polymer base and produce heavy, polishable parts that retain plastic mechanics. Sinterable metal filaments contain 80 to 95% metal and require debinding and sintering to achieve 96 to 99% theoretical density with near-wrought mechanical properties.
Do advanced filaments need to be dried before printing?
Yes. Hygroscopic filaments like PEKK and Nylon absorb moisture quickly and must be dried before printing. PEKK requires drying at 140°C for four hours, and a heated dry box during the print run is necessary to maintain consistent mechanical properties and prevent defects.