TL;DR:
- D scan data captures precise physical geometry to improve quality, speed, and accuracy across industries. Its adoption enhances workflows in automotive, construction, healthcare, manufacturing, and cultural preservation by enabling real-time measurement and digital integration. Success depends more on software connectivity and post-processing automation than on hardware capabilities.
3D scan data is defined as the digital capture of physical geometry, converting real-world objects into precise point clouds or mesh models used for analysis, design, and production. The types of industries using 3D scan data now span automotive, aerospace, construction, healthcare, manufacturing, and cultural preservation. Each sector adopts 3D scanning, the recognized industry term for this technology, to replace slow manual measurement with full-surface digital capture. The result is faster decisions, fewer errors, and tighter tolerances across every stage of a product’s life.

1. Types of industries using 3D scan data: automotive and aerospace
Automotive and aerospace teams use 3D scanning for quality inspection, reverse engineering, and maintenance, repair, and overhaul (MRO). The shift from traditional coordinate measuring machines (CMMs) to handheld 3D scanners is the single biggest change in industrial metrology over the past decade.
- Stamped part inspection: 3D scanners capture full surface geometry in minutes. CMMs measure discrete points and miss deformation patterns like springback in sheet metal.
- Deviation maps: Real-time chromatic deviation maps show exactly where a part drifts from CAD nominal, giving production line operators immediate feedback.
- Reverse engineering: Engineers scan legacy components with no surviving drawings and reconstruct parametric CAD models for redesign or replacement part production.
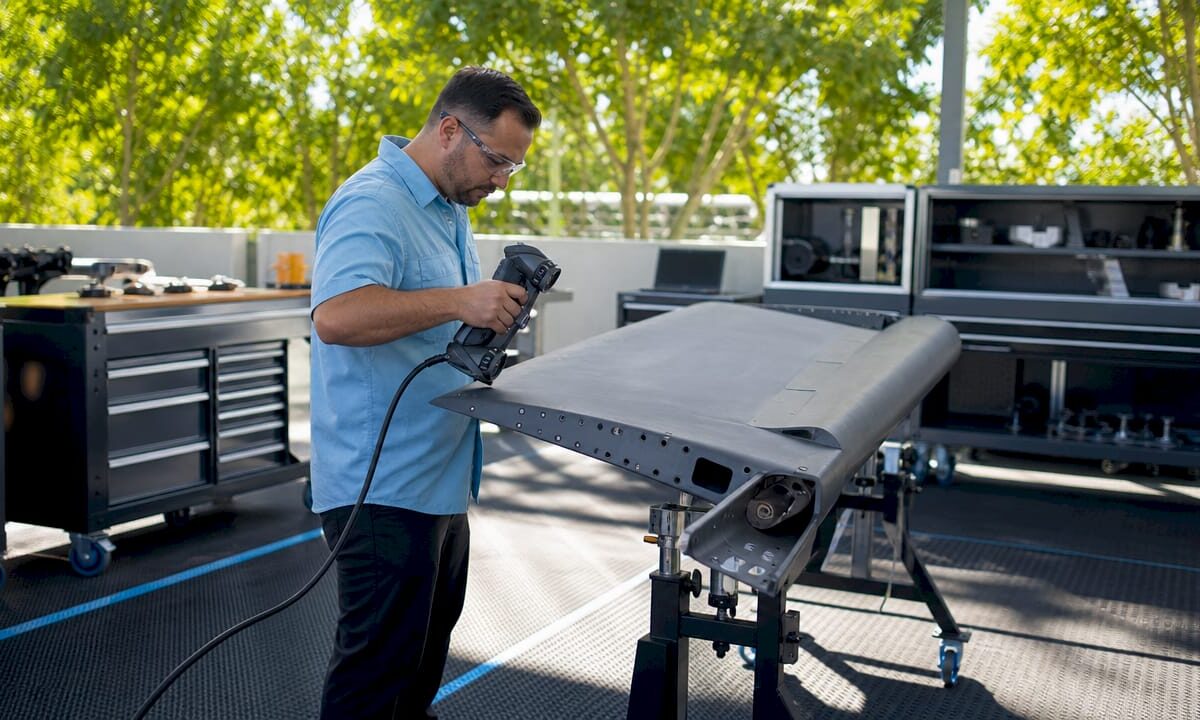
- In-situ aerospace measurement: Aerospace scanning without disassembly captures engine inlet lip geometry at sub-0.03 mm accuracy, delivering certified digital inspection reports without pulling the engine.
- Timeline compression: Replacing a two-month manual gauge design and build process with minutes-long 3D scanning reduces project timelines by at least 33%.
That 33% reduction is not a rounding estimate. It represents the difference between a gauge shop consuming two months of calendar time and a technician walking the shop floor with a handheld scanner the same afternoon.
Pro Tip: Before scanning stamped metal parts, apply matte reference targets to reflective surfaces. Shiny metal scatters laser light and degrades point cloud density, which forces expensive rescan sessions.
2. Architecture, construction, and facility management
Construction is one of the clearest examples of how 3D scan data benefits an entire project lifecycle, from design coordination through ongoing facility management.
3D LiDAR scanning reduces rework by up to 50% by catching clashes between mechanical, electrical, and plumbing (MEP) systems before installation begins. That number matters because rework is the single largest hidden cost in commercial construction.
How construction teams apply scan data
- As-built documentation: Scan the site at each major milestone and compare point clouds against the BIM model to confirm work matches design intent.
- Clash detection: Overlay scan data with MEP drawings to find pipe and duct conflicts before crews install anything.
- Renovation planning: Scan existing structures to get accurate geometry when original drawings are missing or outdated.
- Digital twin creation: Combine successive scans into a living model that facility managers use for space planning, maintenance scheduling, and emergency response.
- Quality assurance: Use scan-to-BIM comparison to generate deviation reports that satisfy owner inspection requirements.
The table below shows how scan data changes key construction metrics.
| Workflow stage | Traditional approach | With 3D scan data |
|---|---|---|
| As-built verification | Manual tape measure and sketches | Point cloud vs. BIM comparison in hours |
| Clash detection | 2D drawing review | Automated spatial conflict flagging |
| Rework rate | Industry baseline | Reduced by up to 50% |
| Facility handover | Paper drawings | Accurate digital twin model |
For teams managing large facilities, the archival scanning guide from Cc3dlabs covers how to structure scan data for long-term asset management.
3. Healthcare and medical fields
Healthcare uses 3D scanning to capture patient anatomy with a level of accuracy that traditional casting and manual measurement cannot match. Digital workflows replace casting sessions, cutting appointment time and improving fit for prosthetics and orthotics.
- Prosthetics and orthotics: Clinicians scan residual limbs or affected anatomy, then send the mesh directly to a CAD workstation for socket design. The patient skips the plaster cast entirely.
- Surgical planning: Surgeons import patient-specific scan data into simulation software to rehearse complex procedures on a digital replica before entering the operating room.
- Dental and orthodontic labs: Intraoral scanners produce digital impressions that replace physical molds. Labs receive files, not trays of alginate, and produce crowns, aligners, and retainers from the digital model.
- Bioprinting research: Scan data of tissue structures feeds into bio-printing workflows for research into custom implants and scaffolding.
Pro Tip: For prosthetic socket design, scan the contralateral limb as a symmetry reference. Designers use it to mirror geometry and reduce the number of fitting iterations the patient needs.
The speed advantage in healthcare is real. A scan session takes minutes. A traditional casting session takes 30 minutes or more, requires drying time, and still produces a static model that cannot be digitally modified.
4. Industrial manufacturing and reverse engineering
Manufacturing is where 3D scan data has its deepest roots and its most measurable financial impact. The core shift is from sampling-based CMM inspection to full surface geometry capture that reveals deformation patterns no point measurement can detect.
- Reverse engineering: Scan a physical part, align the point cloud in CAD software, and reconstruct a parametric model. This is the standard path for legacy tooling with no surviving drawings.
- Quality control integration: Real-time integrated scanning generates deviation maps on the production line, replacing end-of-shift inspection reports with live feedback.
- PLM and quality system integration: The true value of 3D scanning comes from connecting scan data to PLM and CAD software, forming a digital ecosystem rather than treating the scanner as a standalone tool.
- Post-processing management: Data alignment, mesh cleanup, and parametric CAD conversion can equal scanning time without automation. Teams that underestimate this step lose the efficiency gains they expected.
Transitioning to real-time integrated metrology reduces inspection costs by over 50% in high-precision manufacturing. Traditional inspection can account for more than half of a qualified metal component’s total production cost. That figure alone justifies the capital investment for most production managers.
For a practical breakdown of how to structure scan-to-CAD workflows, the scan to CAD workflow guide at Cc3dlabs covers the full process from raw point cloud to production-ready file. Teams dealing with industrial measurement challenges will also find that real-time scan integration directly improves process control at the machine level.
5. Cultural heritage, entertainment, and emerging fields
3D scanning extends well beyond factories and hospitals. Cultural heritage and entertainment industries use scan data to document, preserve, and recreate physical reality at a level of detail that photography cannot achieve.
- Historic landmark preservation: Scan teams capture full building geometry before restoration work begins. If a structure is damaged, the scan record supports accurate reconstruction.
- Museum archiving: Institutions scan artifacts to create digital records for research access, reducing physical handling of fragile objects.
- Art restoration: Conservators use scan data to document surface condition before treatment and verify results afterward.
- VFX and gaming: Studios scan actors, props, and environments to create photorealistic digital assets for film and game production. The scan replaces weeks of manual modeling.
- VR and AR content: Scan-based environments give users accurate spatial context that hand-modeled scenes cannot replicate.
- Biotech and emerging applications: Researchers scan anatomical structures to inform bio-printing and custom implant design, pushing 3D scan data into territory that did not exist as a commercial application five years ago.
The entertainment industry’s adoption of 3D scanning is a useful signal for other sectors. When a technology becomes standard practice in a field as cost-sensitive as film production, the hardware and software costs have dropped to a point where most professional organizations can justify the investment.
Key takeaways
3D scan data delivers the greatest value when integrated directly into existing CAD, PLM, and quality management systems rather than used as a standalone measurement tool.
| Point | Details |
|---|---|
| Automotive and aerospace lead adoption | Handheld scanning cuts project timelines by at least 33% over traditional manual gauging. |
| Construction rework drops sharply | LiDAR-based scan-to-BIM comparison reduces rework by up to 50% on commercial projects. |
| Healthcare replaces physical casting | Digital anatomy capture speeds prosthetic design and eliminates plaster casting sessions. |
| Manufacturing gains real-time control | Integrated scanning cuts inspection costs by over 50% by replacing batch post-process reports. |
| Software integration drives ROI | Connecting scan data to PLM and CAD systems creates a digital ecosystem that multiplies scanner value. |
What I’ve learned about 3D scan data adoption across industries
The conversation about 3D scanning almost always starts with hardware. Which scanner has the best resolution? Which one is fastest? That is the wrong question, and I have seen it derail more than a few adoption projects.
The hardware is good enough. It has been good enough for years. What separates teams that get real results from teams that buy expensive equipment and underuse it is software integration. If your scan data cannot talk to your CAD system, your PLM platform, or your quality management workflow, you have a very expensive ruler.
The second thing professionals consistently underestimate is post-processing time. Scanning a part takes minutes. Aligning the point cloud, cleaning the mesh, and converting it to a usable CAD format can take just as long without the right automation tools in place. Plan for that time before you promise your stakeholders a turnaround.
The trend I find most significant right now is real-time integrated metrology. Moving inspection from the end of a production run to the machine itself changes the economics of quality control entirely. You stop making bad parts instead of sorting them out afterward. That shift is what will push 3D scanning from a specialty tool to a standard production asset across every sector covered here.
My advice to any decision-maker evaluating 3D scanning: audit your data ecosystem first. Know exactly where scan outputs will live, who will access them, and how they connect to downstream decisions. The scanner is the easy part.
— Justin
Cc3dlabs supports your 3D scanning and production workflow
Cc3dlabs operates a professional 3D scanning lab near Philadelphia that handles metrology-grade scanning for parts, prototypes, and complex assemblies. The lab’s outputs connect directly to CAD modeling and filament-based 3D printing, so your team moves from physical object to production-ready file without switching vendors.

Whether you need a single prototype scanned and printed or a batch production run built from scan-derived CAD data, Cc3dlabs covers the full workflow. The 3D printing services page lists current capabilities, turnaround options, and how to request a free estimate. Local pickup is available, and shipping serves clients across the country.
FAQ
What industries use 3D scan data most extensively?
Automotive, aerospace, construction, healthcare, and industrial manufacturing are the primary sectors. Each uses 3D scanning for quality control, reverse engineering, or documentation workflows that require full-surface geometry capture.
How does 3D scanning reduce construction rework?
LiDAR scanning compares physical site conditions against BIM models in real time, catching clashes and deviations before installation. This process reduces rework by up to 50% on commercial construction projects.
What is the difference between CMM inspection and 3D scanning?
CMMs measure discrete points on a surface. 3D scanning captures millions of points per second across the full surface, revealing deformation patterns and deviations that point measurements miss entirely.
How does healthcare benefit from 3D scan data?
Clinicians use scan data to design prosthetics, plan surgeries, and produce dental restorations without physical casting. Digital workflows are faster, more accurate, and produce files that labs can modify without a new patient appointment.
What should teams plan for before adopting 3D scanning?
Plan for post-processing time alongside scanning time. Data alignment, mesh cleanup, and CAD conversion require dedicated software and trained staff. Teams that skip this planning consistently underdeliver on the efficiency gains they projected.