
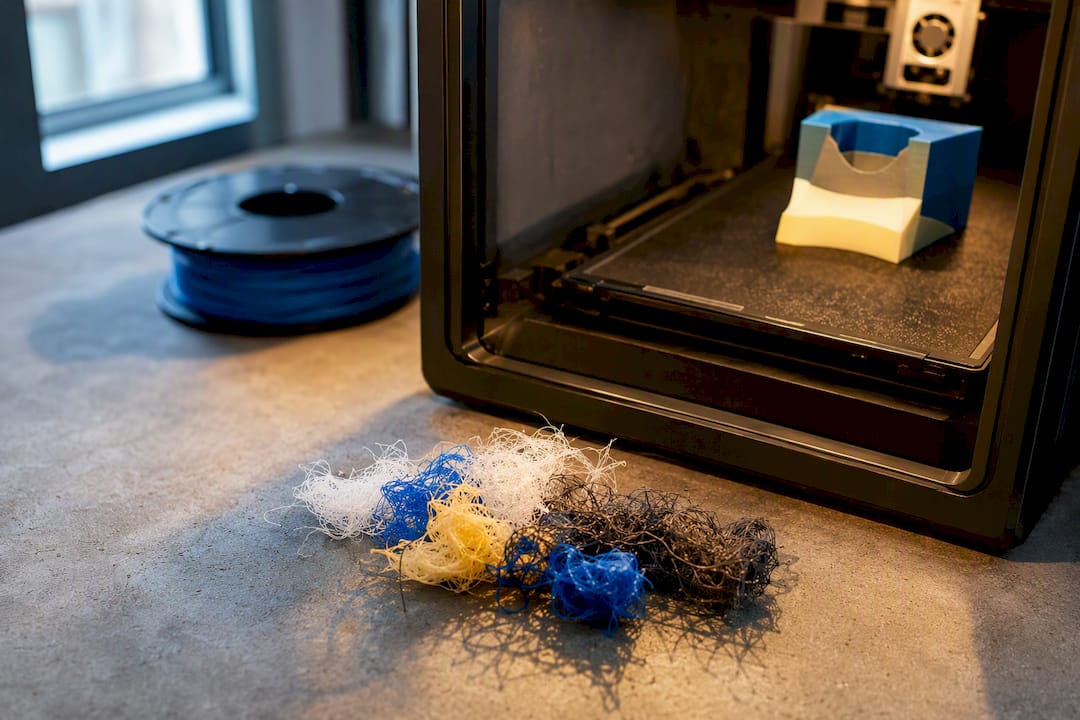
Multicolor FDM printing means producing a single part in more than one color or material without repainting it after the fact, using either manual filament swaps, automated multi-feed systems, dual nozzles, or external splicers. Start with two colors and a small test print before committing to anything automated. Every method trades print time and filament waste for convenience, and that waste, plus the extra failure points a color change introduces, is the real cost of the feature.
TL;DR:
- Manual filament swaps are the most cost-effective method for two or three color changes, requiring no extra hardware but demanding user supervision.
- Automated systems like multi-feed, dual extrusion, or toolchangers significantly increase waste and complexity, especially with more than two colors, due to purge cycles and calibration needs.
- Designing models with fewer, more strategic color boundaries, such as vertical splits or grouped regions, can reduce purge waste by up to 30 percent.
- Purge waste typically adds 15 to 30 percent extra filament consumption compared to single-color prints, with waste and jam risk rising with more color transitions.
- Proper calibration, filament preparation, and test prints before long runs are essential to prevent failures, especially when using hygroscopic filaments or multi-material setups.
Table of Contents
- What Is Multicolor FDM Printing and How Does It Compare to Painting?
- What Happens Under the Hood During a Color Change
- Which Materials Work Together in a Multicolor Print
- Design and Slicer Tactics to Cut Purge Waste
- Setting Up and Calibrating a Multicolor Printer
- Common Multicolor Print Failures and How to Fix Them
- How CC 3D Labs Handles Multicolor Jobs in Production
- Where to Go Deeper on Multicolor FDM
- Why the Real Cost of Multicolor Isn’t the Printer
- Get a Custom Quote for Your Multicolor FDM Project
- Sources
- FAQ
What Is Multicolor FDM Printing and How Does It Compare to Painting?
Painting a single-color print still beats multicolor FDM for photorealistic finishes, fine gradients, and glossy surfaces. But painting adds labor, drying time, and a finish that chips or scratches differently than the base plastic. Multicolor FDM builds the color into the part itself, so the boundary between colors survives abrasion, flexing, and outdoor exposure the way ink or acrylic paint often does not.
The standard industry term for the underlying technique is multi-material or multi-color fused deposition modeling, sometimes shortened to MMU (multi-material unit) printing when discussing automated systems like the kind found on Bambu Lab or Prusa hardware. “Multicolor 3D printing” and “colorful FDM printing” describe the same output, but the mechanics fall into five distinct approaches, each with a different reliability and complexity profile.
Manual Color Swap
This is the oldest method and still the cheapest. You pause the print at a known layer height, physically swap the filament spool, purge the old color out of the nozzle by hand, and resume. It requires no extra hardware beyond what any FDM printer already has, and it produces essentially zero mechanical waste beyond what you purge by hand. The tradeoff is obvious: you have to babysit the print, and it only makes sense for a handful of color changes across the whole job. Practical testing suggests manual swaps remain the lowest-cost, lowest-waste entry point for many two-color designs, and they’re often faster than automated systems when a design only needs one or two swaps total.
Single-Nozzle Multi-Feed (MMU-Style) Systems
These systems, sometimes called AMS, CFS, or IFS depending on the manufacturer, feed multiple filament spools into a single nozzle through a selector mechanism. The printer retracts the active filament, loads the next color, purges the mixed segment, and continues. This is the most common path to four or more colors on a single nozzle, and it’s fully automated once configured. The catch is that every color change means a full retract, load, and purge cycle, which is where most of the waste and most of the jam risk in multicolor printing originates. Community and publication testing confirms that every current consumer multi-feed system follows this same retract, load, purge principle regardless of brand, so reliability differences come down to feed-path tuning and slicer maturity rather than a fundamentally different mechanism.
Dual Extrusion and IDEX
Dual-nozzle and IDEX (independent dual extruder) printers dedicate a separate hot end to each color, which eliminates the purge-and-reload cycle for two-color work since each nozzle stays loaded with its own material. This makes dual extrusion the cleanest option for two colors and the fastest for prints that alternate frequently between just two materials, including soluble support combinations. It doesn’t scale past two colors without adding more print heads, and nozzle-to-nozzle alignment becomes a calibration task of its own.
External Splicer or Palette-Style Systems
An external splicer sits between the spool and the printer, cutting and joining segments of different-colored filament into a single continuous strand before it ever reaches the extruder. The printer itself only sees one filament path, so no in-printer purge tower is strictly required, although many workflows still use one to hide splice seams. This approach supports many colors on a single-nozzle machine but depends on precise timing between the splicer and the print job, and a bad splice joint can jam the nozzle mid-print.
Toolchangers
Toolchangers physically swap the entire print head or extruder assembly between colors, similar in spirit to dual extrusion but scaled to three or more independent tool stations. Each tool can carry its own nozzle diameter and temperature profile, which matters if you’re mixing materials with different melt characteristics. It’s the most mechanically complex option on this list and the most expensive to build or buy, but it also has the smallest purge penalty per color change since each tool stays primed.
- Manual swap: Best for 2 to 3 total color changes, zero extra hardware, highest labor.
- Single-nozzle multi-feed: Best for 4+ colors on one nozzle, most waste per swap, most jam-prone.
- Dual extrusion/IDEX: Best for 2 colors, fastest alternation, doesn’t scale past 2 without more heads.
- External splicer: Best for many colors on simple hardware, depends on splice reliability.
- Toolchangers: Best for 3+ colors with mixed materials, lowest per-swap waste, highest cost and complexity.
What Happens Under the Hood During a Color Change
Every automated color change runs the same three-step cycle: retract the active filament out of the hot end, load the new filament down to the nozzle tip, and purge enough of the mixed-color melt to get a clean color at the nozzle again. That purge step is where nearly all multicolor waste comes from, and it’s also the step most exposed to jams if filament tips aren’t shaped cleanly or the feed path has grit or moisture buildup.
Slicers handle the purge in one of two ways. A prime tower (also called a purge tower) is a small sacrificial column printed alongside your part specifically to catch the mixed-color filament during every transition; it’s reliable and easy to tune but adds visible waste and print time on the plate. Purge-into-infill instead routes that same waste into the part’s own internal infill, where it’s invisible once the print is done, so long as the infill density and geometry can absorb the purge volume without showing through the walls.
The specific slicer settings that determine how well either approach performs include:
- Flush multiplier, which scales how much filament gets purged per color change; too low leaves visible streaking, too high wastes material.
- Purge/prime volume, the raw amount of filament pushed through during a swap, usually measured in cubic millimeters per transition.
- Purge height or purge location, which controls where on the model or tower the waste gets deposited.
- Color change ordering, since minimizing the number of transitions per layer directly reduces total purge volume across the print.
Community and publication testing across current multi-feed systems shows purge waste commonly adds roughly 15 to 30% more filament use to a multicolor print compared to a single-color version of the same model, according to testing published by LayerDepth. That range holds across brands because, as noted above, every consumer system uses the same retract, load, purge sequence.
On manual or firmware-assisted swaps, the actual filament change is often triggered by a G-code command rather than a full mechanical selector. Marlin firmware’s M600 filament-change command automates the pause, moving the print head out of the way, ejecting the old filament, waiting for you to insert new filament, and resuming the print once you confirm. It’s a lightweight way to add color-change automation to a printer that has no dedicated multi-feed hardware at all.
True continuous color gradients, as opposed to discrete color blocks, require a different approach entirely. Peer-reviewed research published in ACM Transactions on Graphics demonstrates gradient techniques using specialized filament-mixing hotends and deliberate layer stratification, blending two materials inside the hot end itself rather than swapping between fully separate colors. Most consumer multicolor setups don’t have this hardware, which is why nearly everything you see on a Bambu Lab or similar machine is discrete color blocks rather than a smooth fade.
Which Materials Work Together in a Multicolor Print
Stick to one polymer family for every color in a single print. Mixing PLA with PETG, or either with nylon, in the same multicolor job routinely causes adhesion failures between color layers because the materials bond poorly to each other and shrink at different rates as they cool. Practical guidance from Bambu3Design is consistent on this point: match the polymer across every spool in the swap, and only vary the pigment or brand within that family.
Hygroscopic filaments add a second complication that multicolor jobs make worse simply by running longer. PETG and nylon both absorb ambient moisture over time, and a multicolor print that takes several extra hours because of purge cycles gives every open spool more time to pull in humidity mid-print. Keep filament in a dry box or enclosed feed system rather than sitting open on a shelf, and dry PETG and nylon spools ahead of any print that’s going to run long. Moisture shows up as popping, stringing, or a rough matte texture where you expect a clean surface, and it’s easy to misdiagnose as a purge or flush setting problem when it’s actually a filament storage issue.
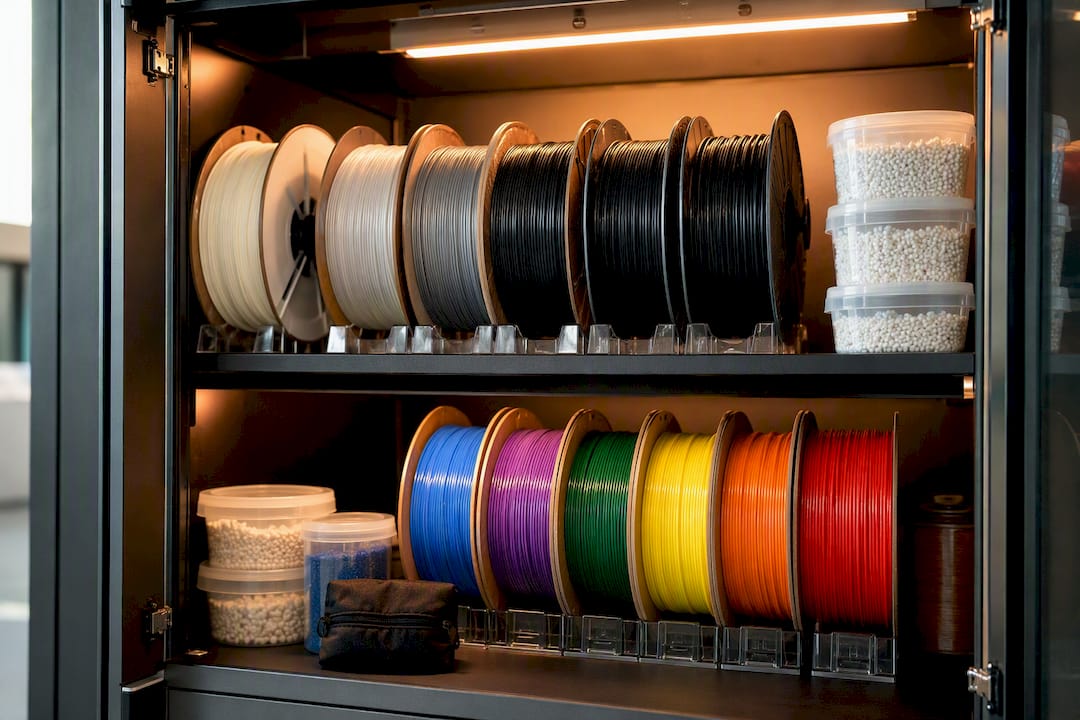
Temperature coordination sets a hard ceiling on which colors you can combine, even within a compatible polymer family. PLA typically prints around 60°C bed temperature, PETG closer to 80°C, and ABS or ASA around 100°C, so a multicolor design that calls for materials with meaningfully different processing temperatures forces the whole print to run at a compromise setting that may not be ideal for either material.
Pro Tip: Keep a dedicated dry box or sealed container for every spool you plan to use in a multicolor swap, and label each spool with its polymer type before it goes anywhere near the printer. A single mislabeled spool is the most common cause of an otherwise unexplainable adhesion failure between colors.
Design and Slicer Tactics to Cut Purge Waste
The single biggest lever you have over multicolor cost is the model itself, not the printer. Every additional color boundary within a single layer forces another retract, load, purge cycle, so a design with color changes concentrated at a few clean layer heights wastes far less filament than one with the same colors scattered across every layer as small interlocking regions.
Three design strategies consistently cut waste in practice:
- Fewer color boundaries per layer. Group color regions so a layer needs one or two transitions instead of five or six.
- Split-into-parts assembly. Print each color as a separate piece and assemble or glue afterward, which eliminates in-print purging entirely for that boundary.
- Vertical color splits. Where the design allows it, stack colors in bands along the Z axis instead of alternating them within a single layer, since a vertical split needs far fewer total transitions across the whole print.
On the slicer side, purge-into-infill is worth enabling on any part with enough internal infill to absorb the waste, since it hides the purge volume inside the part instead of burning it on a visible tower. Slicer documentation and community guidance confirm that purge-into-infill and flush-multiplier tuning, when set correctly in slicers like OrcaSlicer, Bambu Studio, or PrusaSlicer, cut visible waste without leaving dirty color transitions on the outer walls. Color order planning matters too: printing colors in a sequence that minimizes total transitions across the whole job, rather than in the order they happen to appear in the model, can meaningfully reduce total swap count on a multi-part color scheme.
Even with careful tuning, budget for a real cost. Purge waste commonly runs 15 to 30% higher filament consumption on multicolor jobs compared to single-color versions of the same part, per LayerDepth’s testing, and print time climbs alongside it since every purge cycle adds nonprinting time to the job. Additional community testing has found that purge-into-infill combined with deliberate color-boundary reduction can substantially cut that waste on well-designed models, though the exact savings depend heavily on how many transitions the design actually needs. Treat those percentages as planning inputs, not guarantees, and validate them against your own printer’s flush settings.
Setting Up and Calibrating a Multicolor Printer
Get the fundamentals right before you trust a long multicolor job to run unattended. Skipping calibration is the single fastest way to lose an eight-hour print to a jam at hour six.
- Dry your filament first. Any spool that’s been open more than a few weeks, especially PETG or nylon, should go through a drying cycle before a multicolor job. Store dried spools in sealed containers with desiccant until they’re loaded.
- Check the filament tip shape on MMU-style feeders. Automated selectors expect a clean, pointed tip on each filament end to feed smoothly into the path; a blunt or frayed tip is a common cause of failed loads.
- Inspect the feeder path for grit or wear. Dust and filament shavings build up in multi-feed buffer tubes over time and are worth clearing before any print with more than a handful of color changes.
- Verify nozzle offset and alignment on multi-nozzle printers. IDEX and toolchanger systems need their nozzle-to-nozzle offsets calibrated whenever a nozzle is swapped or the printer is moved, since even a fraction of a millimeter of misalignment shows up as visible seams between colors.
- Run three short validation prints before committing to a long job. A small purge-tower-only test confirms your flush multiplier is tuned. A two-color cube confirms clean transitions at a simple boundary. A short version of your actual model, sliced at reduced height, confirms the full color sequence executes without a failed load.
Pro Tip: Run your validation prints in the exact material and color combination you plan to use for the final job, not a substitute. Purge behavior and adhesion at color boundaries vary enough between filament brands that a test in a different material tells you very little about how the real print will behave.
Common Multicolor Print Failures and How to Fix Them
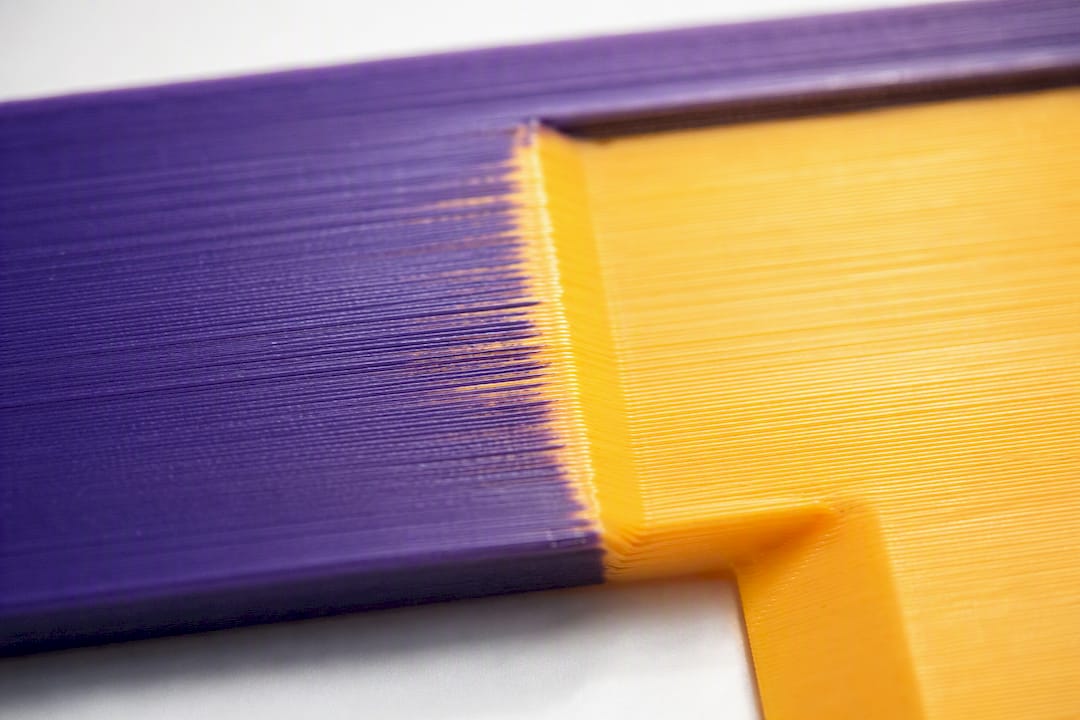
Color bleed, where the new color shows faint streaking of the previous color at the start of a region, almost always traces back to an undersized purge volume. Raise the flush multiplier or prime volume slightly and rerun a small test boundary before touching anything else on the printer.
Failed loads on automated selectors are usually a filament path problem rather than a printer problem. Check the tip shape on the filament end, inspect the feed tube for a kink or obstruction, and confirm the spool itself is feeding freely and not tangled or binding against the spool holder.
Oozing and parked-nozzle marks on IDEX or toolchanger setups happen when the inactive nozzle isn’t fully retracted or its parking temperature is set too high. Lower the standby temperature on the idle nozzle and confirm the retraction distance is enough to clear the nozzle tip completely before the active nozzle passes underneath.
- Color bleed at transitions: Increase flush multiplier or purge volume; verify with a small two-color test cube.
- Failed filament load on a selector: Reshape the filament tip, clear the feed tube, check spool tension.
- Oozing from a parked nozzle: Lower idle-nozzle standby temperature; increase retraction distance before the pass.
- Jam mid-print on an external splicer: Inspect the last splice joint for a rough seam; a poor splice is the most common jam cause on these systems.
Knowing when to salvage a failing print versus abort it comes down to where the failure sits. A cosmetic bleed on an internal color boundary that infill will mostly hide is worth finishing and evaluating afterward. A failed load that’s caused a full nozzle jam, or a print that’s lost adhesion at a structural color boundary, should be stopped immediately. Redesigning the color layout to reduce transitions at that specific boundary is usually a faster fix than trying to tune your way past a structural failure point.
How CC 3D Labs Handles Multicolor Jobs in Production
Running multicolor FDM at production scale looks different than running it on a single hobby printer, mostly because the margin for a failed eight-hour job multiplies across a farm of machines. A production farm of FDM printers for prototypes and small-batch runs shapes how multicolor jobs get planned before a single layer prints.
Every multicolor order follows the same path:
- A test print of the actual model, or a representative section of it, runs first to validate color transitions, flush settings, and material behavior before committing to the full job.
- A custom quote follows the test print, since purge waste, transition count, and print time vary enough between designs that a fixed price per color would misrepresent the actual cost.
- Production runs with quality checks at color boundaries, confirmed against the test print before parts ship.
Multicolor prototyping often starts before a single line of the model exists in CAD. When a customer needs to reproduce a legacy part or match an existing component’s geometry, professional handheld 3D scanning capture the physical part’s geometry to roughly 0.1 mm accuracy, and that scan data feeds directly into a CAD model that can then be color-segmented for a multicolor print. For automotive and reverse-engineering clients in particular, this scan-to-CAD-to-print pipeline replaces guesswork about a discontinued part’s exact dimensions with a measured starting point. Readers ready to move from planning to production can request a 3D printing quote or start with a 3D scan quote if the job begins with reverse-engineering a physical part.
Where to Go Deeper on Multicolor FDM
A handful of technical sources are worth bookmarking if you want to go past the practical basics covered here. Marlin’s own M600 filament-change documentation is the definitive reference for anyone building a firmware-assisted manual swap workflow rather than relying on a dedicated multi-feed unit.
For the research side of color mixing, the ACM Transactions on Graphics paper on FDM color-gradient methods remains the clearest peer-reviewed look at how true gradients differ from discrete color-block printing, and why most consumer hardware can’t produce one without a specialized mixing hotend.
On the community testing side, LayerDepth’s comparison of AMS, CFS, and IFS multicolor systems offers the most detailed purge-waste measurements currently available across brands, and 3D Printer Advice’s multicolor guide is a solid neutral reference for comparing the five core methods side by side before you commit to hardware.
Why the Real Cost of Multicolor Isn’t the Printer
The conventional wisdom treats multicolor FDM as a hardware decision: buy the multi-feed unit, buy the toolchanger, and the colors take care of themselves. That’s backwards. The printer matters less than the design and the slicer profile sitting on top of it, and the community testing on purge waste backs this up directly: waste and jam risk track the number of color transitions in your model far more than they track which brand of selector you bought.
What gets underestimated is how much a design choice made in CAD, before slicing even starts, determines whether a multicolor job is cheap or expensive. A model with color boundaries scattered across every layer will waste filament and time on any hardware, including the best toolchanger money can buy. A model designed with vertical splits or grouped boundaries will run lean on comparatively modest hardware.
If there’s one priority for a reader new to this, it’s this: don’t buy hardware to solve a design problem. Fix the color layout first, run a small test print, and only then decide whether your transition count justifies automation.
— Justin
Get a Custom Quote for Your Multicolor FDM Project
CC 3D Labs turns the tradeoffs covered in this guide into a straightforward production path: a test print of your actual design, a custom quote based on what that test reveals about transitions and waste, and a production run built on a Bambu Lab FDM farm rather than a single machine you’re hoping doesn’t jam at hour six. Unlike guessing at flush settings on a home printer, you get a real test result before you commit to a full production quantity.

If your project starts with an existing physical part rather than a clean CAD file, the same team offers professional handheld 3D scanning capture that geometry before it goes into a multicolor design, and standalone CAD modeling services for building a color-segmented model from scratch. Explore the full multicolor and multi-material printing service page for a look at current production capabilities, then request a 3D printing quote with your model to get a test print scheduled and a real number back instead of a rough estimate.
Sources
- Color mixing and gradient methods for FDM — ACM Transactions on Graphics
- Marlin firmware documentation — M600 filament change
- AMS vs CFS vs IFS: Multicolor systems explained — LayerDepth
- Multi-colour 3D printing guide — 3D Printer Advice
FAQ
Is There a 3D Printer That Can Print Multiple Colors?
Yes. Options range from single-nozzle printers with automated multi-feed units, to dual-nozzle and IDEX machines, to toolchangers, and even standard single-color printers can produce multicolor parts through manual filament swaps.
Is Multicolor 3D Printing Worth It?
It depends on the design. For parts with a handful of clean color boundaries, the added filament waste and print time are usually a reasonable tradeoff for skipping post-print painting; for designs with dozens of scattered color transitions, the waste and jam risk climb fast enough that a split-part assembly or a painted finish may be more practical.
How Do I Make My 3D Printer Multicolor?
The simplest path is a manual filament swap using a firmware-assisted pause like Marlin’s M600 command, which requires no extra hardware. For more colors without manual intervention, an automated multi-feed unit, a dual-nozzle setup, or a toolchanger adds the mechanical capability, but each comes with its own reliability and cost tradeoffs.
Does Multicolor Printing Reduce Print Strength?
Color transitions themselves don’t weaken a print structurally as long as every color in the swap uses the same polymer family; mixing incompatible materials like PLA and nylon in one run is what typically causes adhesion failure at the color boundary, not the color change itself.
How Much Extra Filament Does Multicolor Printing Waste?
Purge waste from color transitions commonly adds roughly 15 to 30% more filament use compared to a single-color version of the same part, though careful design and purge-into-infill settings can bring that down on well-planned models.