
TL;DR:
- Object size, surface texture, and material compatibility determine the suitable 3D scanning technology for each project. Small objects benefit from high-resolution structured light or laser scanners, while large structures often require photogrammetry or LiDAR methods. Proper surface preparation and understanding of material properties are essential to achieve accurate, clean digital captures suited to the object’s intended use.
Types of objects suitable for 3D scanning are defined by three core factors: size, surface texture, and material compatibility with the chosen scanning technology. Whether you are a product developer reverse engineering a mechanical part, an artist digitizing a sculpture, or a manufacturer capturing a prototype for quality control, the object itself determines which scanner you need and how you prepare for the job. Methods like photogrammetry, structured light scanning, and laser scanning each perform differently depending on what sits in front of them. Getting that match right from the start eliminates rework and produces cleaner data.
1. Types of objects suitable for 3D scanning: small and medium items
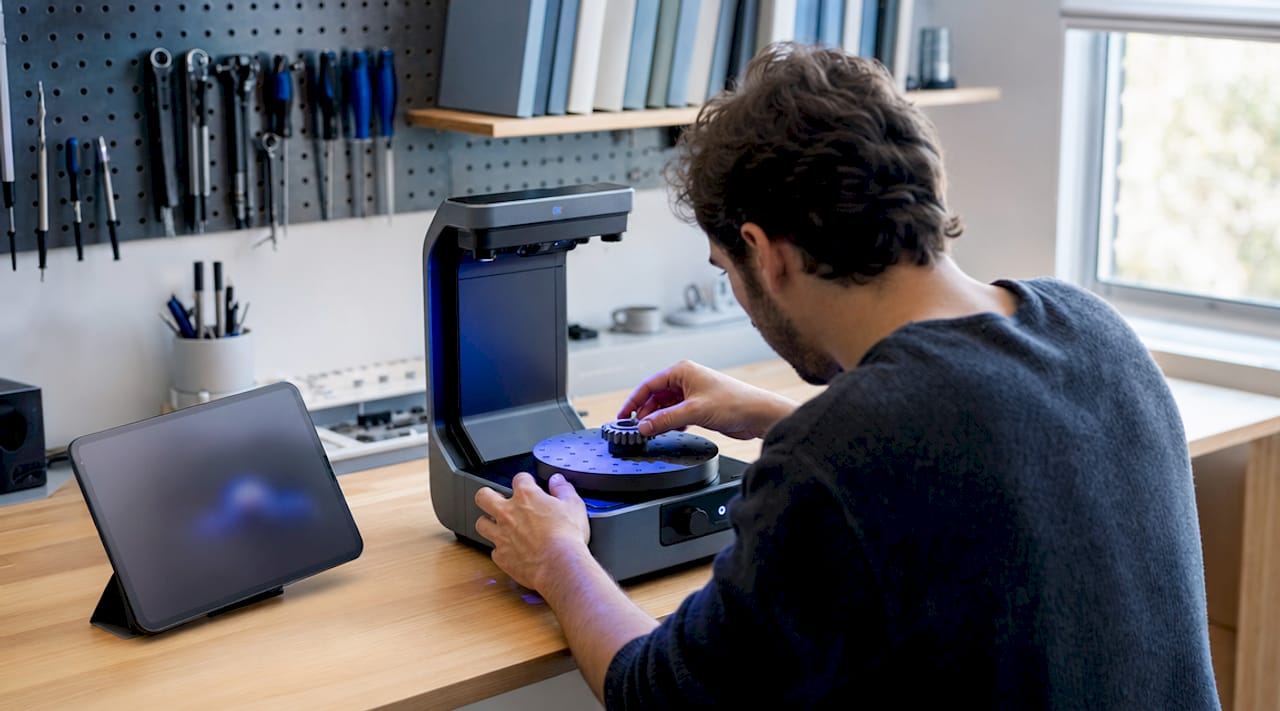
Small and medium objects represent the most common category scanned for prototyping, dental applications, and jewelry design. Items like rings, crowns, miniature figurines, and small mechanical components all fall here. Resolution matters more than raw accuracy at this scale. A scanner that captures 0.01mm surface detail will reveal geometry that a general-purpose device misses entirely.
Surface preparation is the deciding factor for scan quality on small objects. Metallic jewelry and polished prototypes reflect light back at the scanner, creating noise and holes in the mesh. Applying a thin layer of AESUB Blue vanishing spray allows structured light scanners to capture high-detail geometry without permanently altering the object. The spray evaporates on its own within hours, leaving no residue.
- Jewelry and rings: Require blue structured light or laser scanning due to metallic reflectivity
- Dental models: Demand sub-0.05mm accuracy; turntable setups with automated rotation are standard
- Small prototypes and mechanical parts: Benefit from handheld or desktop structured light scanners
- Figurines and collectibles: Photogrammetry works well when surface texture is matte and detailed
Pro Tip: Automated turntables improve consistency for small objects by minimizing stitching gaps and delivering uniform angular coverage. For dental models and jewelry, this repeatability is not optional. It is the difference between a usable scan and a session you repeat three times.
2. Large and architectural objects: challenges and approaches
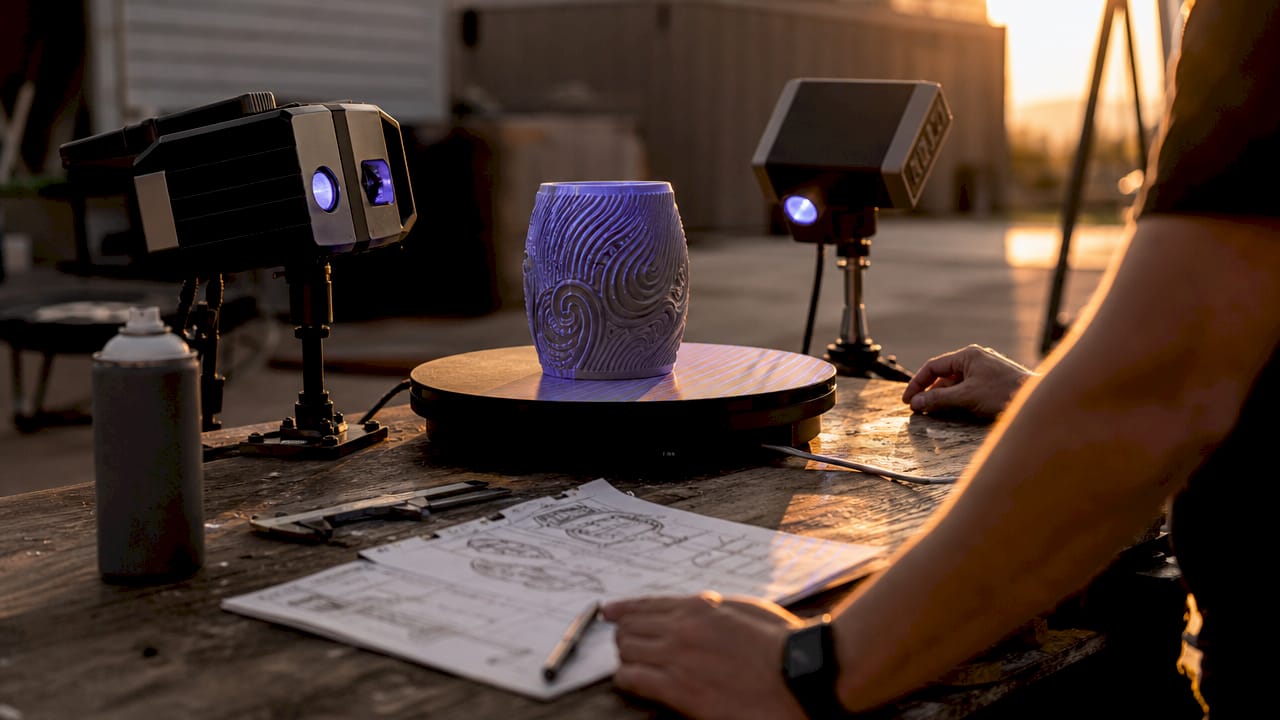
Large objects like buildings, vehicles, aircraft fuselages, and industrial equipment present a different set of constraints. You cannot place a building on a turntable. The scanner must come to the object, and the data volume grows exponentially with scale. Photogrammetry scales effectively with camera placement, making it the dominant method for structures where sub-millimeter precision is not the primary goal.
When precision does matter at large scale, pulse-based and phase shift technologies take over. Long-range 3D scanners using these technologies are specifically engineered for buildings, military vehicles, and industrial equipment. Phase shift scanners offer faster data acquisition at medium range, while pulse-based systems reach farther with slightly lower point density.
| Object type | Recommended technology | Key consideration |
|---|---|---|
| Buildings and facades | Photogrammetry or LiDAR | Environmental lighting control |
| Vehicles and aircraft | Phase shift or handheld laser | Access to undercarriage and interior |
| Industrial equipment | Pulse-based long-range scanner | Scale and occlusion management |
| Large sculptures | Photogrammetry | Texture richness aids reconstruction |
Environmental control is the hidden challenge at large scale. Wind, changing sunlight, and vibration all degrade scan quality. Scheduling outdoor scans during overcast conditions reduces harsh shadows that distort mesh reconstruction. For interior architectural scans, turning off fluorescent lighting and using the scanner’s own projected pattern eliminates competing light sources.
3. Surface materials and textures: how composition affects scan quality
Surface material is the single most disruptive variable in 3D scanning. Reflective, transparent, and very dark surfaces all defeat standard scanning methods in different ways. A chrome-plated part scatters structured light unpredictably. A glass bottle transmits the scanner’s projected pattern rather than reflecting it. A matte black rubber gasket absorbs light and returns almost no signal.
Blue laser technology is the preferred solution for dark or reflective metal surfaces, while infrared technology is favored for scanning human subjects due to comfort and reduced light sensitivity. This distinction matters practically. Scanning a polished stainless steel bracket requires a different scanner than scanning a foam prototype or a human face.
- Reflective metals: Use blue laser scanning or apply AESUB vanishing spray before structured light capture
- Transparent objects: Apply matte spray or painter’s tape to create a scannable surface layer
- Dark rubber or foam: Blue laser or high-sensitivity structured light; increase exposure settings
- Matte plastics and ceramics: Compatible with nearly all scanning methods; photogrammetry works well
Matte sprays and painter’s tape are standard workarounds for glossy or transparent surfaces. Painter’s tape applied to a glass object creates a textured, opaque surface the scanner can read. The tape is removed after scanning, and the geometry underneath is reconstructed from the captured shell. It is a low-cost fix that saves hours of post-processing.
Pro Tip: Before committing to a full scan session on a difficult material, test on a proxy object with similar surface properties. A chrome-plated test piece from a hardware store costs almost nothing and tells you exactly how your scanner responds before you risk a client’s irreplaceable part.
4. Functional and artistic applications: objects scanned for prototyping and design
The intended end-use of a scan determines how much accuracy and detail you actually need. A museum-grade archival scan of a Roman coin requires maximum fidelity and color accuracy. A game-ready asset of the same coin needs optimized topology and a fraction of the polygon count. Different applications require varying accuracy levels, from high-poly archival masters to low-poly performance-optimized models.
Here is how object types map to their primary scanning applications:
- Mechanical parts for reverse engineering: Require dimensional accuracy within 0.02mm or better; structured light or industrial laser scanning is standard
- Product prototypes: Scanned to verify geometry against CAD files; design accuracy is the primary metric
- Sculptures and fine art: Photogrammetry captures color and texture simultaneously; hybrid workflows add structured light for precise geometry
- Cultural artifacts and museum pieces: Hybrid workflows combining photogrammetry for texture and structured light for geometry produce archival-grade digital twins
- Human subjects for medical or fashion use: Infrared structured light scanning; fast capture minimizes subject movement artifacts
- Architectural elements for renovation: Photogrammetry or LiDAR; outputs feed directly into BIM software like Autodesk Revit
The connection between end-use and scan specification is direct. Scanning a prototype for a manufacturing quality check demands tighter tolerances than scanning the same part for a marketing render. Defining the output requirement before you scan prevents over-engineering the capture process and saves time in post-processing.
5. Comparing scanning methods by object type and material
Choosing the right scanning method is not about buying the most expensive hardware. Analyzing object size, surface qualities, and intended use before attempting a scan reduces rework and produces better outcomes. The table below maps the four primary technologies to their strongest use cases.
| Scanning method | Best object types | Strengths | Limitations |
|---|---|---|---|
| Photogrammetry | Large textured objects, sculptures, buildings | Low cost, scalable, captures color | Struggles with featureless or shiny surfaces |
| Structured light | Small to medium parts, dental, jewelry | High resolution, fast capture | Limited range; sensitive to ambient light |
| Laser scanning | Reflective metals, industrial parts | Works on dark and shiny surfaces | Higher cost; slower than structured light |
| LiDAR | Buildings, outdoor environments, vehicles | Long range, fast point cloud | Lower resolution for fine surface detail |
Photogrammetry excels on large textured objects while structured light and laser scanning outperform it on smaller metallic and reflective surfaces. This is not a hierarchy. It is a tool-to-task match. A $500 photogrammetry setup with a DSLR and Meshroom software can outperform a $10,000 structured light scanner when the object is a textured stone wall. The reverse is equally true for a polished aluminum housing.
Handheld scanners offer flexibility for irregular shapes, while turntable scanners provide repeatability and speed for small, manageable objects. For professionals running high-volume scanning workflows, the turntable approach reduces per-scan time significantly and standardizes output quality across batches.
Key takeaways
Matching object size, surface material, and intended use to the correct scanning technology is the single most important decision in any 3D scanning project.
| Point | Details |
|---|---|
| Size determines scanner type | Small objects need high-resolution desktop or turntable setups; large objects require photogrammetry or long-range LiDAR. |
| Surface material drives technology choice | Reflective and transparent surfaces require blue laser scanning or surface preparation with matte spray before capture. |
| End-use defines required accuracy | Archival and reverse engineering scans demand tight tolerances; artistic or game-ready assets prioritize optimized geometry. |
| Preparation prevents rework | Testing on proxy objects and controlling lighting conditions before the final scan eliminates the most common failure points. |
| Hybrid workflows solve complex objects | Combining photogrammetry for texture with structured light for geometry captures both color and precision in one pipeline. |
What I have learned from scanning hundreds of objects
The most expensive mistake I see professionals make is selecting a scanner based on brand reputation rather than object characteristics. A high-end structured light scanner is the wrong tool for a textured sandstone facade, no matter how good the spec sheet looks. The object tells you what it needs. Your job is to listen.
Surface preparation is where most scans are won or lost before the scanner even turns on. I have watched teams spend hours in post-processing trying to fill holes that a two-minute matte spray application would have prevented entirely. The 3D scanning checklist approach, where you assess material, size, and lighting before touching the hardware, consistently produces cleaner first-pass data than any amount of software correction afterward.
The other insight that took me time to internalize: photogrammetry is not a budget compromise. For large, richly textured objects, it is genuinely the best tool available. A controlled photogrammetry session with a calibrated camera and diffuse lighting will outperform a rushed laser scan on a building facade every time. The misconception that quality scans require expensive hardware persists because people conflate cost with capability. They are not the same thing.
— Justin
Bring your objects to life with Cc3dlabs
Whether you are scanning a precision mechanical part, a one-of-a-kind sculpture, or a batch of product prototypes, the quality of your scan determines everything that follows.

Cc3dlabs offers metrology-grade 3D scanning services near Philadelphia, covering a full range of object types from small jewelry and dental models to large industrial components. The team handles surface preparation, technology selection, and post-processing so your data arrives clean and ready for CAD modeling, printing, or archival. If you are ready to move from physical object to precise digital model, Cc3dlabs provides the expertise and equipment to do it right the first time. Explore the full range of printing and scanning services or request a free estimate directly on the site.
FAQ
What objects are hardest to 3D scan?
Transparent, highly reflective, and very dark objects are the most difficult to scan accurately. Surface preparation with matte spray or painter’s tape resolves most of these issues before scanning begins.
Can photogrammetry scan small objects like jewelry?
Photogrammetry can capture small objects, but structured light or blue laser scanning delivers significantly higher resolution for items like jewelry and dental models where fine surface detail is critical.
What is the best scanning method for mechanical parts?
Structured light or industrial laser scanning is standard for mechanical parts requiring dimensional accuracy within 0.02mm or better. The choice between the two depends on whether the surface is matte or reflective.
Do I need expensive equipment to get quality 3D scans?
Not always. Photogrammetry with a calibrated camera and controlled lighting produces high-quality scans of large, textured objects at a fraction of the cost of dedicated hardware. For small or reflective objects, specialized scanners are necessary.
How does object size affect which scanner I should use?
Small objects require high-resolution desktop or turntable scanners. Large objects like buildings and vehicles are best captured with photogrammetry, LiDAR, or long-range laser systems that scale with the object’s dimensions.