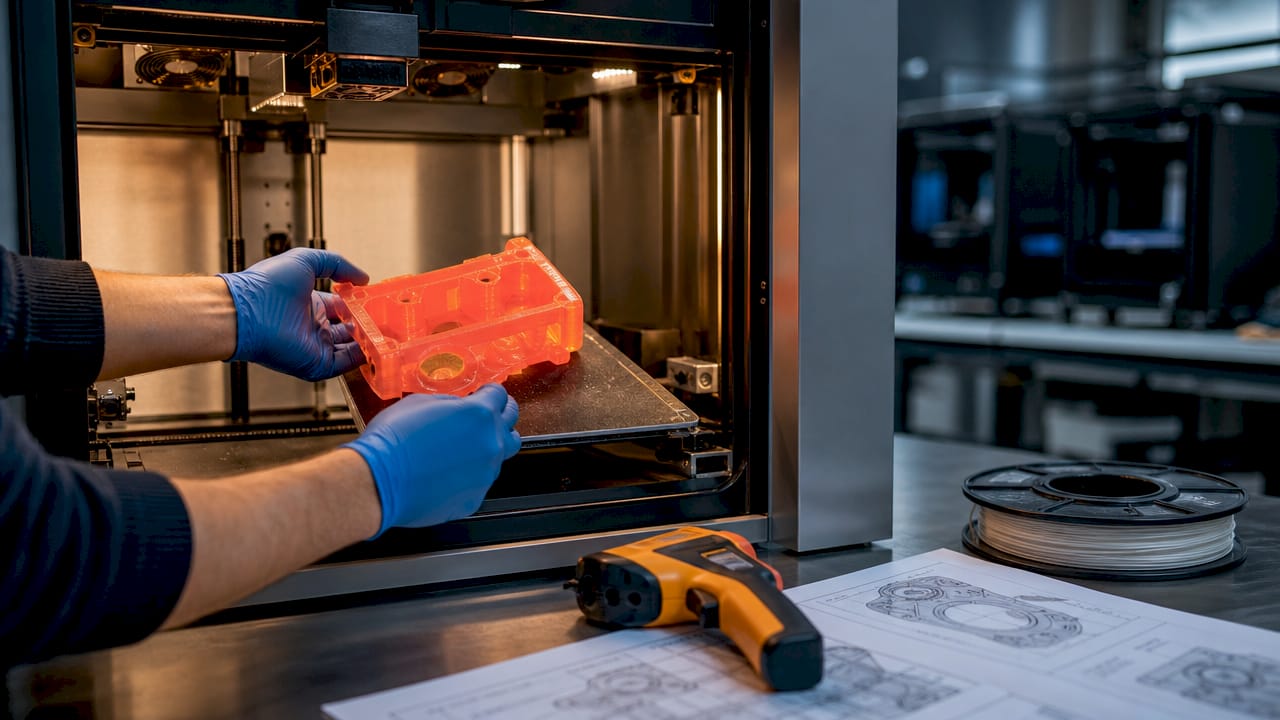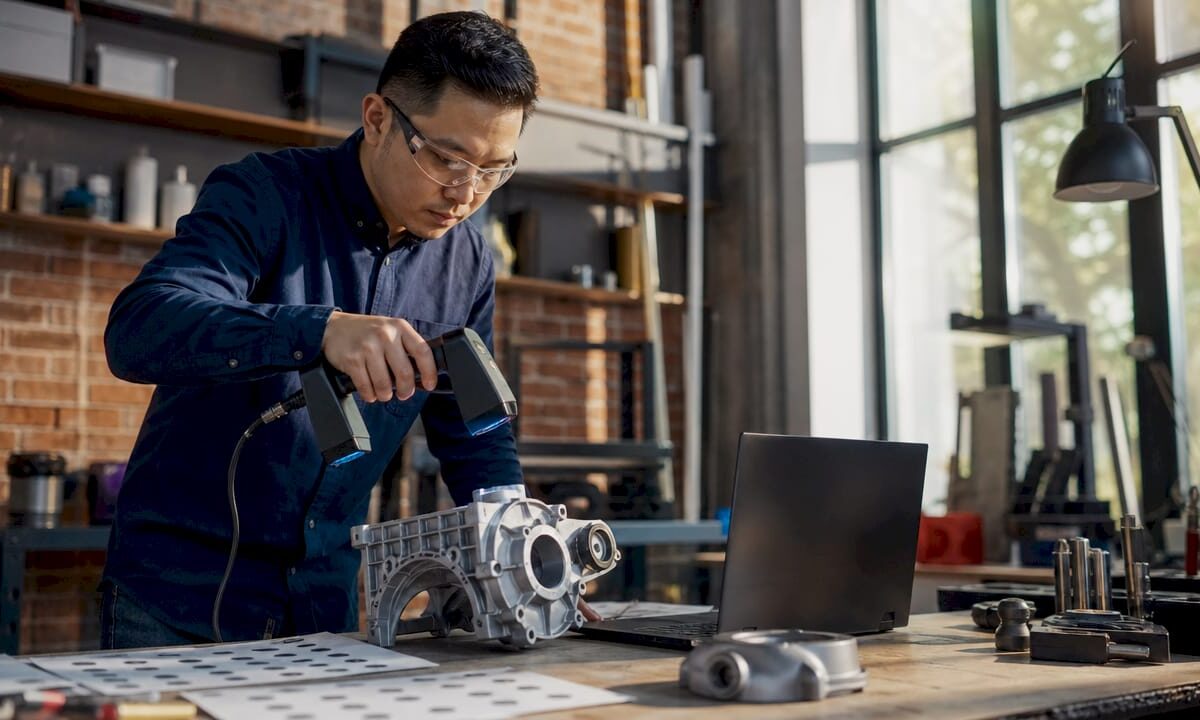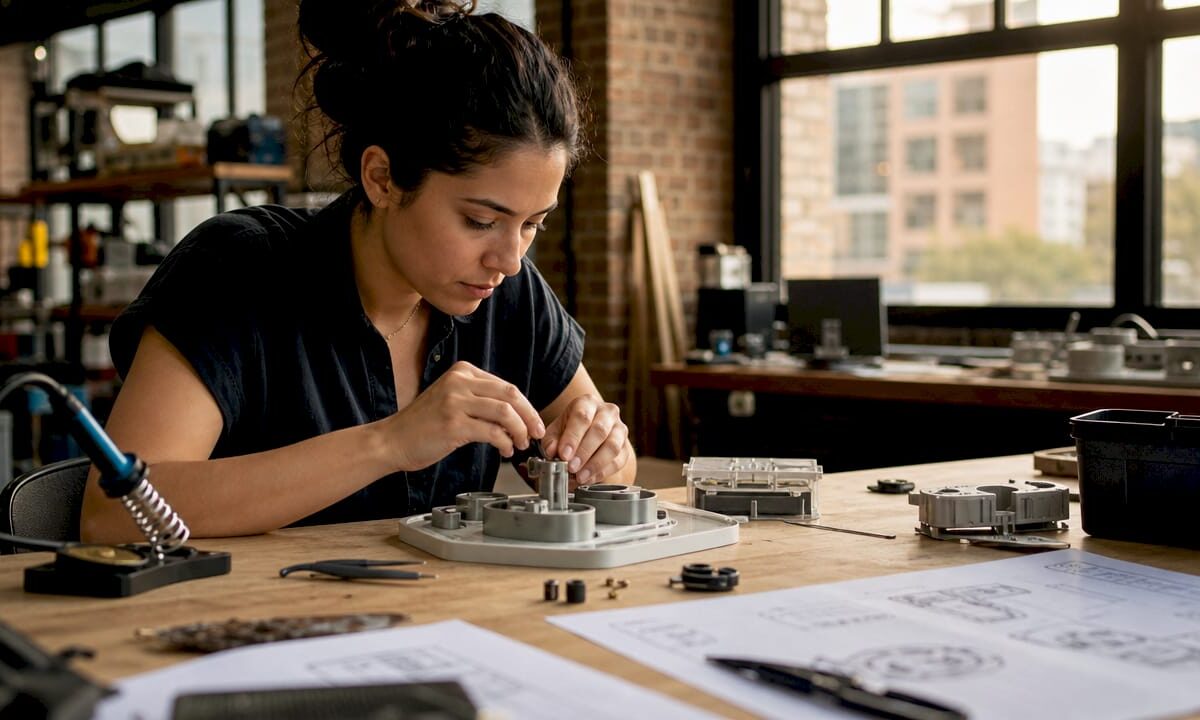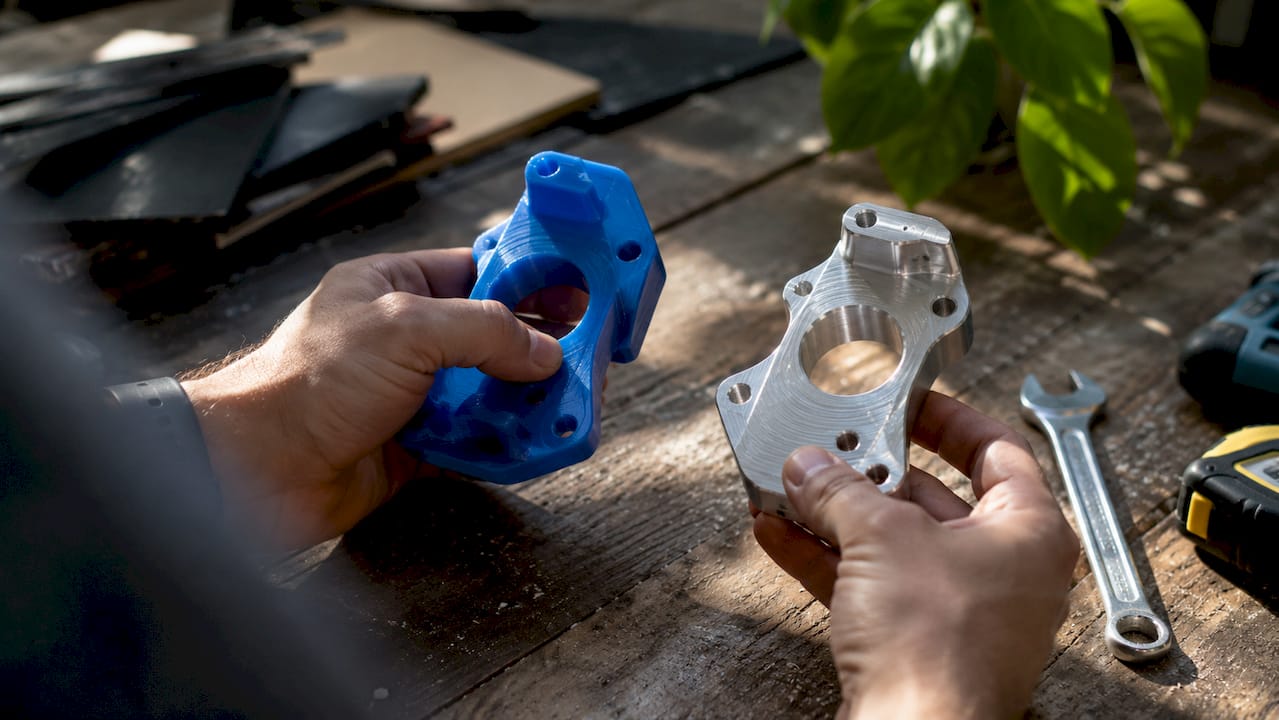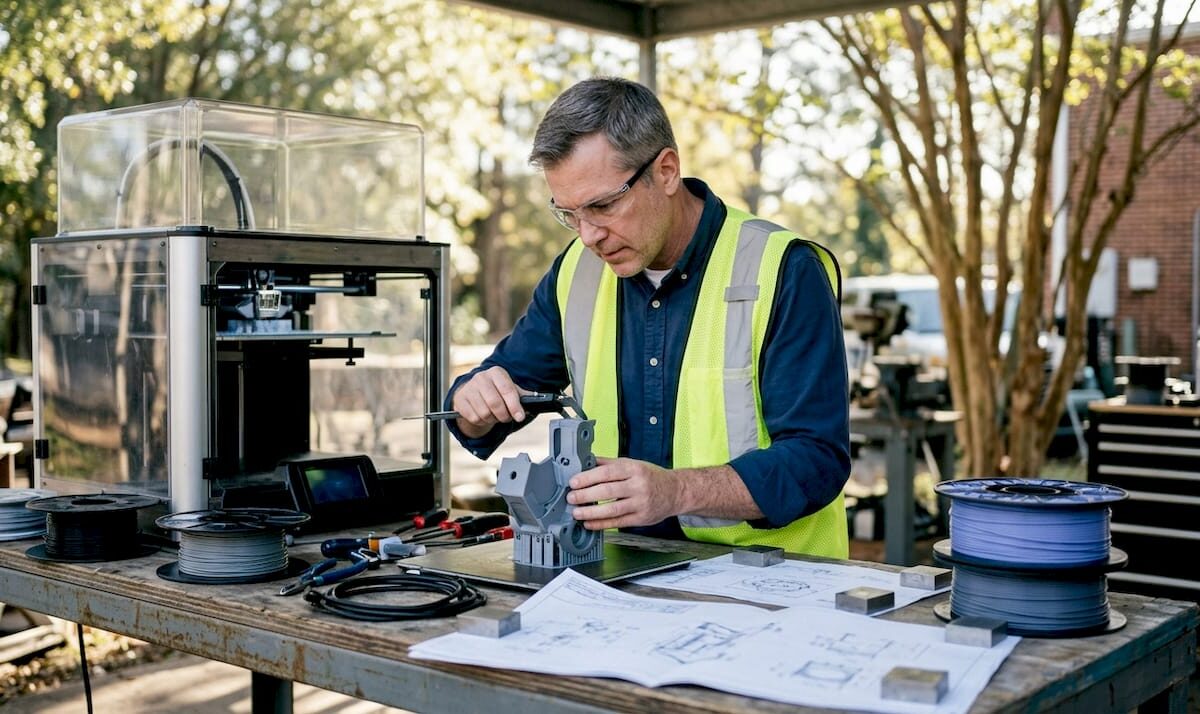
Engineer testing 3D printed prototype in studio

How 3D printing drives product innovation in 2026


TL;DR:

  • D printing accelerates product development by enabling rapid iteration, complex geometries, and design flexibility. It reduces lead times significantly and allows testing multiple ideas simultaneously, fostering innovation and performance improvements. However, understanding its limitations in precision and scale is essential for building effective hybrid manufacturing strategies.

Product teams know the frustration: a promising design sits locked behind a weeks-long tooling queue, burning budget and slowing momentum right when speed matters most. Traditional prototyping methods force developers to commit early, iterate slowly, and absorb delays that kill competitive advantage. Faster prototyping with 3D printing changes that equation entirely, compressing design cycles, freeing up geometry constraints, and letting teams actually test more ideas before committing to production tooling. This article breaks down exactly how 3D printing accelerates innovation across the full product development journey.

Table of Contents

Key Takeaways

Point Details
Rapid iteration speed 3D printing cuts prototyping time from weeks to hours, allowing quick design validation.
Unmatched design freedom Complex geometries and consolidated assemblies drive breakthrough innovation.
Proven industry success Top brands achieve lighter, more durable parts and real performance gains with 3D printing.
Know the limitations 3D printing is ideal for low volumes and complexity, while traditional methods remain key for scale.
Constantly evolving tech Staying current with new automation and materials ensures ongoing innovation advantages.

Rapid prototyping radically accelerates iteration

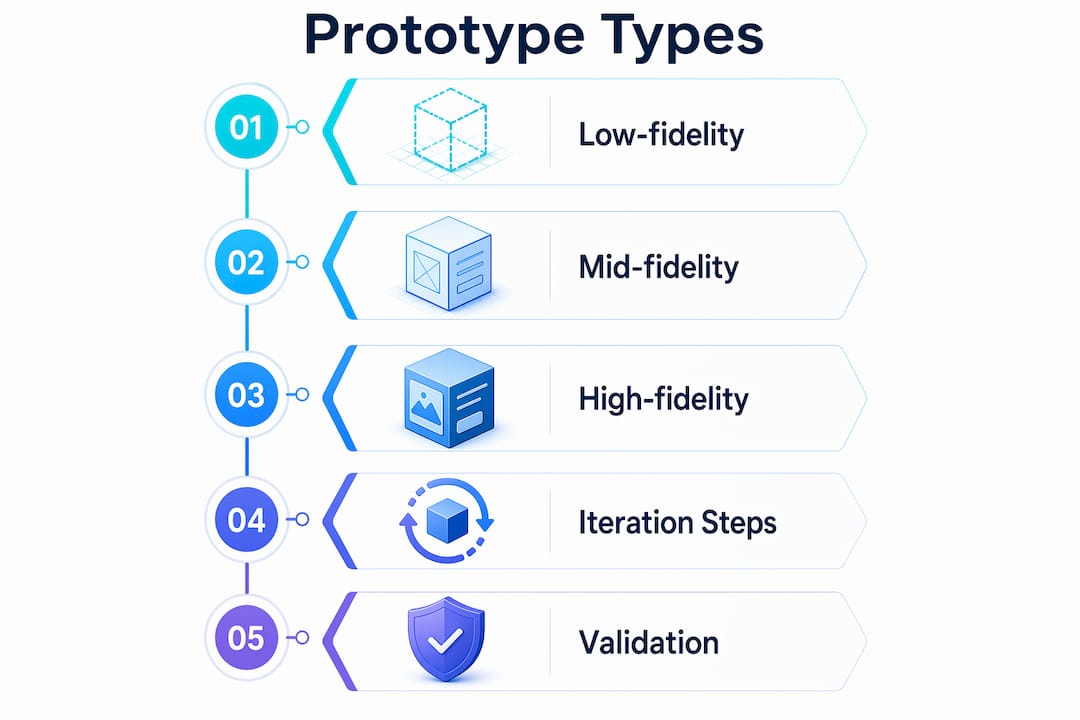
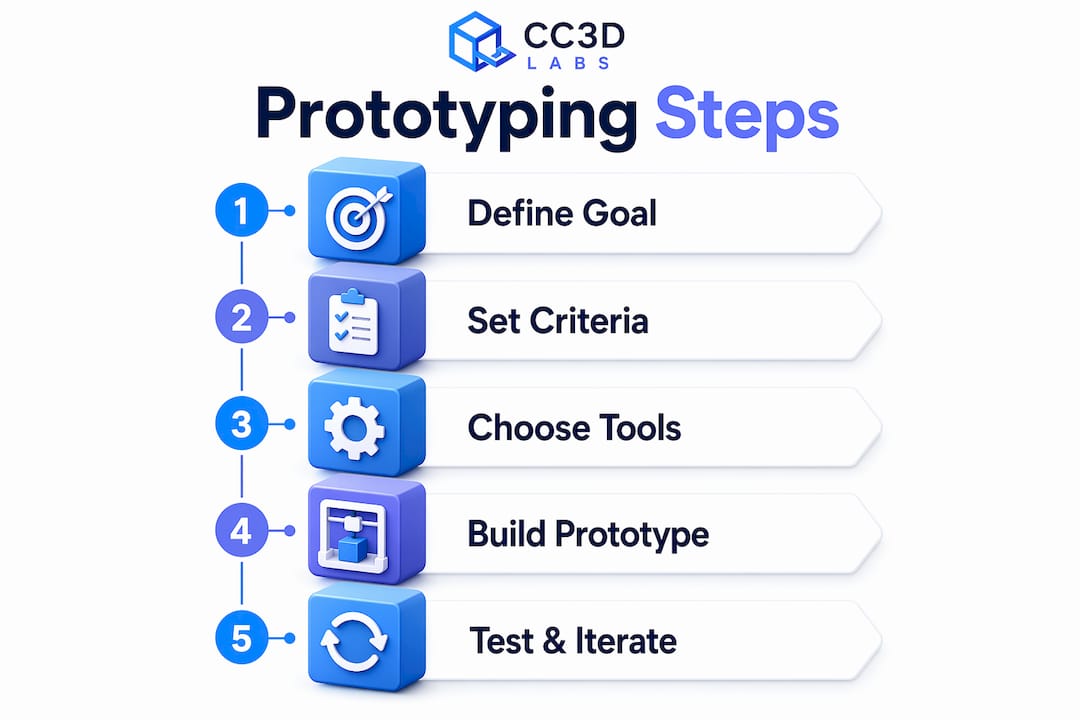
Speed is where 3D printing earns its reputation first. Traditional methods like CNC machining, urethane casting, or injection mold tooling require setup, fixturing, and lead times that stretch from days to weeks. Every iteration cycle costs time and money. For a product team running six or eight design loops, those delays stack up fast.

3D printing produces parts from CAD models in hours to days rather than weeks, which fundamentally changes how teams approach design validation. Instead of betting on a single prototype version before getting feedback, you can print three variations overnight and test them in parallel. That kind of throughput makes early-stage risk much easier to manage.

The numbers back this up at scale. Ford reported a 90% reduction in model lead time after integrating additive manufacturing into its design workflow. Industry surveys show roughly 70% of companies using 3D printing report lead time reductions of 63% or more. Those aren’t marginal improvements. They’re structural shifts in how quickly products move from concept to testable hardware.

Key reasons rapid 3D prototyping beats traditional methods at the iteration stage:

  • No tooling required. Upload a revised STL file and print. No new mold, no fixture setup.
  • Low cost per iteration. Printing a new version costs material and machine time, not tooling charges.
  • Immediate design feedback. Physical parts reveal fit, feel, and function issues that CAD reviews miss.
  • Parallel testing. Multiple design variants can be printed simultaneously, cutting decision time.

Stat to know: Companies integrating 3D printing at the prototype stage report 63% shorter lead times on average, giving their teams more cycles to refine before final tooling.

Pro Tip: Match prototype fidelity to your stage. For concept validation, a fast FDM print is enough. Reserve higher-resolution SLA or SLS prints for functional testing and stakeholder reviews where surface finish and dimensional accuracy matter.

Unlocking limitless design flexibility and geometry

Once you accelerate iteration, the next major advantage is design freedom. Traditional subtractive and forming processes impose hard geometric constraints: draft angles for mold release, tool access paths for CNC cutters, minimum wall thicknesses for casting. These rules force designers to simplify parts, often at the cost of performance.

3D printing supports complex geometries and internal features, including lattice structures, conformal channels, and multi-material configurations that are either impossible or cost-prohibitive to produce any other way. Topology-optimized structures that look organic and unconventional in CAD print just as easily as a simple box. That freedom is a genuine product engineering advantage, not just an aesthetic one.

Consider what this means in practice. An aerospace bracket designed with topology optimization and printed in a high-strength polymer or metal can achieve the same load-bearing performance as a machined aluminum part at a fraction of the weight. Internal cooling channels in a printed mold insert improve thermal management in ways that conventional milling simply cannot achieve. Assembly consolidation, where a five-component subassembly becomes a single printed part, reduces failure points, assembly time, and inventory complexity simultaneously.

Technician inspects aerospace 3D printed bracket

The implications for complex 3D geometry applications span industries from medical devices to consumer electronics to industrial tooling. Design teams that understand this don’t treat 3D printing as a copy of traditional manufacturing. They rethink part geometry from the ground up.

How 3D labs drive design innovation extends further when you pair additive processes with generative design software. Algorithms propose geometry that meets load and weight requirements, additive manufacturing builds it without complaint, and the result is a part that no human designer would have sketched manually.

  • Internal lattice structures reduce mass without sacrificing structural integrity
  • Conformal cooling channels improve mold performance and cycle times
  • Part consolidation eliminates fasteners and reduces assembly failure risk
  • Organic, topology-optimized shapes become manufacturable without cost penalties

Pro Tip: Use topology optimization software like nTop or Autodesk Fusion alongside your 3D printing workflow. The software handles geometry generation, and additive manufacturing handles execution. The combination produces results that neither achieves alone.

Real-world breakthroughs: Proven impact on performance and function

Design freedom and speed sound compelling in theory. The proof shows up in measurable product performance gains that translate directly to competitive advantage. Some of the most cited examples come from industries where performance margins are razor thin and every gram of weight or percentage point of efficiency matters.

GE Aviation’s 3D printed fuel nozzle is the benchmark case. By redesigning for additive manufacturing, GE consolidated what had been a 20-part welded assembly into a single printed component. The result: 25% lighter and 5 times more durable than the legacy design. Over 100,000 units have been produced. The downstream impact was a 15% fuel efficiency gain in the CFM LEAP jet engine, a real and auditable number that matters enormously in commercial aviation economics.

Ford’s applications show similar performance payoffs in motorsport. 3D printing accelerated the 2025 Mustang GTD development cycle, with printed aerodynamic components contributing to a sub-7-minute Nürburgring lap time. The team iterated on hood louvers and aerodynamic elements at a pace that traditional tooling schedules would have made impossible. Fast iteration directly enabled better performance outcomes.

Metric Traditional manufacturing 3D printing (additive)
Lead time per iteration 2 to 6 weeks 1 to 3 days
Tooling cost per design change $5,000 to $50,000+ Near zero
Part consolidation potential Limited by assembly constraints High (single-print assemblies)
Weight optimization Constrained by subtractive limits Enabled via topology optimization
Geometric complexity Limited by tool access Near-unlimited

These real-world cases illustrate a pattern: when product teams use 3D printing not just to replicate existing designs faster but to rethink geometry entirely, the performance outcomes go beyond incremental improvement. For teams designing reliable 3D prototypes, this is the fundamental design philosophy shift that separates average results from breakthrough ones.

Limits and best uses: Where 3D printing excels (and doesn’t)

No technology wins every comparison, and honest innovation planning requires knowing where 3D printing falls short. Understanding these edges lets you build a smarter hybrid development strategy rather than forcing additive manufacturing into applications where it underperforms.

Tolerances and anisotropy are real constraints. FDM and SLA parts typically hold tolerances of ±0.005 to ±0.010 inches, compared to ±0.001 inches for CNC machining. Layer-line anisotropy means a printed part is often weaker in the Z-axis than in X or Y. For structural applications under cyclic or high-impact loading, that matters. Post-processing, including annealing, fiber reinforcement, or metal plating, can close some of that gap, but it adds time and cost.

3D printing excels in iterative prototyping and low-volume production, while hybrid strategies with CNC or injection molding address limitations in precision, strength, and scale. For volumes above 1,000 units of a finalized design, injection molding almost always wins on per-unit cost. For parts requiring submillimeter precision under load, CNC is still the right tool.

Here’s a practical decision framework for matching process to project stage:

  1. Concept validation (units 1 to 5). Use FDM for fast, low-cost physical models. Fidelity matters less than speed.
  2. Functional testing (units 5 to 50). Use SLA or SLS for better surface finish, tighter tolerances, and functional material properties.
  3. Low-volume production (50 to 500 units). SLS, DMLS, or high-performance FDM can produce manufacturing-grade 3D production output cost-effectively.
  4. Bridge production (500+ units). Low-volume 3D printing tips can help manage the transition period before injection mold tooling is ready.
  5. High-volume production (1,000+ units). Injection molding or CNC becomes the primary process, with 3D printing reserved for jigs, fixtures, and design updates.

Pro Tip: Think of 3D printing and CNC as partners, not competitors. Print prototypes early and fast, then move to CNC for final validation of precision-critical features before cutting production tooling. This hybrid approach captures the speed advantage without sacrificing final part quality.

The current state of 3D printing for innovation is already substantial. The trajectory over the next three to five years makes the case even stronger. Several trends are converging to push additive manufacturing further into production-scale applications.

Scalability is still challenged by post-processing labor, anisotropy, and throughput constraints, but automation is emerging as the primary solution vector. Automated support removal, robotic part handling, and inline quality inspection are reducing the labor burden that makes high-volume additive production expensive. As these systems mature, the cost-per-unit crossover point with injection molding shifts further in additive’s favor.

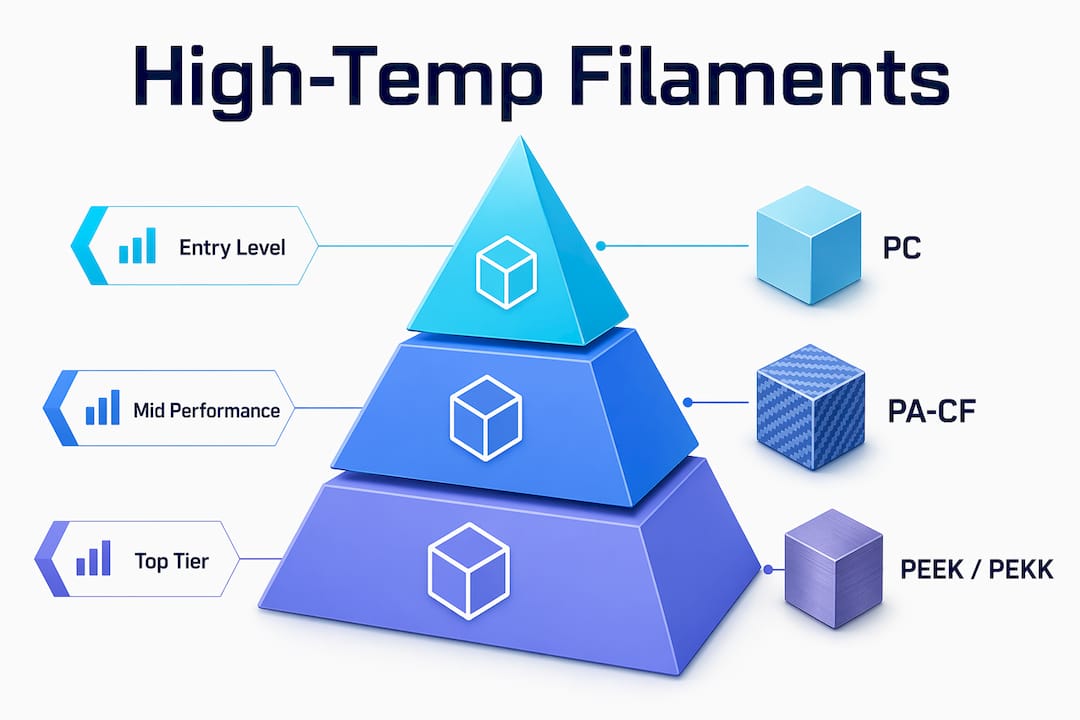
New material development is expanding functional applications rapidly. High-temperature polymers, continuous fiber composites, and metal filaments are enabling printed parts that perform in demanding environments where standard materials would fail. This opens doors in aerospace, automotive, and industrial equipment that were previously closed to additive manufacturing.

Integration with production lines is narrowing the gap between prototyping and manufacturing. Digital thread approaches connect CAD data, print parameters, and quality data in a single workflow, enabling faster scale-up and better traceability. For product developers tracking 3D printing manufacturing trends, this convergence of digital and physical manufacturing is the defining story of the next several years.

Key trends reshaping additive manufacturing for innovators:

  • Automated post-processing reduces labor costs and enables higher throughput
  • Continuous fiber reinforcement closes the strength gap with machined parts
  • Multi-material printing enables functional assemblies in a single build
  • AI-driven process optimization improves consistency and reduces defect rates
  • Inline inspection systems catch dimensional errors during the build, not after

Pro Tip: Stay current on material and process advances specific to your industry vertical. A high-temperature PEEK filament that was unavailable two years ago might now be the right call for a functional prototype that previously required machined PEEK stock.

The uncomfortable truth: Innovation isn’t just faster—it’s riskier (and better) with 3D printing

Here is what most articles about 3D printing and innovation leave out. The biggest benefit is not the speed or the geometric freedom. It’s the permission structure that low-cost, fast iteration creates for product teams who are otherwise too conservative.

Most product developers play it safe. When each prototype costs $15,000 in tooling and six weeks of calendar time, you pick your best idea and commit. You stop exploring. You optimize within a narrow design corridor because the cost of exploring outside it is too high. That’s not innovation. That’s risk management masquerading as development.

3D printing changes what’s rational to try. When a prototype costs a few hundred dollars and takes two days, you can afford to test an idea you’re only 40% sure about. You can build the version you think will fail, just to confirm it fails in the way you expect, and learn something in the process. The teams and startups doing the most interesting product development right now aren’t using 3D printing to go faster on the same path. They’re using it to walk more paths simultaneously, fail faster on the bad ones, and double down on the surprising winners.

Innovation with 3D labs works best when teams bring that experimental mindset to the process. The constraint is no longer tooling cost or lead time. The constraint is how many ideas your team can generate and test. That’s a fundamentally different, and far more interesting, problem to solve.

Take your innovation further with expert 3D printing support

Knowing what’s possible with 3D printing is one thing. Executing it with the right process, material, and design approach for your specific application is another challenge entirely.

https://cc3dlabs.com

CC 3D Labs provides full-service 3D printing services tailored for product developers and engineering teams who need more than a commodity print shop. Whether you’re running your first functional prototype or managing a batch production run, the team brings hands-on expertise in material selection, design optimization, and process matching. Explore on-demand prototyping for fast turnaround on custom parts, or check out what you can print to understand the full range of applications. If you’re near Philadelphia or shipping nationally, CC 3D Labs is ready to help you move your product forward with precision and speed.

Frequently asked questions

What types of innovation are best suited to 3D printing?

3D printing is best for rapid prototyping, low-volume production runs, and complex geometries, including internal features and lattice structures, that are difficult or impossible to produce with traditional subtractive methods.

Are 3D printed parts strong enough for functional applications?

Many are, with proper material selection and post-processing. Real-world cases like GE’s fuel nozzle demonstrate that additive parts can be 5 times more durable than their traditionally manufactured counterparts when designed correctly.

How does 3D printing compare to CNC for precision and scale?

3D printing holds tolerances of ±0.005–0.010 inches and is most cost-effective under 500 units, while CNC achieves ±0.001-inch precision and lower per-unit cost at high volumes.

Scalability improvements through automation, new high-performance materials, and integration with digital production workflows are the primary forces expanding what innovation teams can realistically achieve with additive manufacturing.

Technician calibrating 3D scanner in workshop

Archival 3D Scanning Guide for Product Development Precision


TL;DR:

  • Most engineers mistakenly assume that any 3D scan qualifies as archival, which can jeopardize long-term reuse. Achieving true archival 3D scanning requires detailed measurement records preserved in durable, open formats, alongside comprehensive documentation and calibration data. Proper workflow planning, including defining coordinate systems, controlling scan conditions, and maintaining metadata, is essential to ensure digital assets remain useful for decades.

Most engineers assume that any 3D scan is an archival scan. That assumption quietly kills product development programs. True archival 3D scanning means capturing high-fidelity 3D measurements of a physical object and preserving the resulting datasets, including raw scan data, derived models, and metadata, in durable, long-term formats designed for reuse years or even decades later. For product developers and manufacturers, that distinction is not academic. It determines whether your digital record can actually drive a reprint, a tolerance audit, or a design iteration in five years without starting from scratch.

Table of Contents

Key Takeaways

Point Details
Engineered for reuse Archival 3D scanning creates precise digital records that enable reliable prototyping and manufacturing, even decades later.
Workflow and validation matter Careful planning, calibration, and documentation make the difference between true archival utility and data loss.
No single file standard Long-term success relies on preserving both raw and interoperable files, plus metadata about methods and conditions.
Quality depends on application Material, surface, and intended use all impact how you capture and accept 3D scan data for the archive.

Archival 3D scanning: Definition and core concepts

With a shared understanding of why preservation matters, let’s clarify exactly what archival 3D scanning entails and why it differs from what most people picture.

An archival 3D scan is not simply a mesh you can rotate on screen. It is a structured measurement record built to survive software migrations, personnel changes, and years of engineering reuse. That distinction separates it from the ad-hoc scans common in hobbyist workflows or single-use inspection tasks, where the goal is a quick visualization, not long-term data fidelity.

Vertical infographic showing archival 3D scan steps

Professional practice treats scans as measurement records that feed controlled workflows, including control networks, traceable deliverables, and field records, not just visualization models. This is precisely the standard that product engineers need to adopt.

The core concepts behind archival scanning include:

  • High-resolution capture: Point cloud density sufficient to resolve the finest functional features on your part
  • Traceable coordinate systems: Every dataset is registered to a defined spatial reference, so geometry is reproducible
  • Calibration documentation: The scanner’s measurement uncertainty is recorded, not assumed
  • Metadata preservation: Capture date, operator, equipment, ambient conditions, and processing parameters accompany every dataset
  • Controlled deliverable formats: Both raw scan files and processed derivatives are retained separately

“Archival quality is not a feature of the scanner. It is a property of the workflow, the documentation, and the intent behind the capture.”

Understanding design accuracy and prototyping requirements from the start lets your team define what “archival” actually means for your specific use case, whether that is heritage documentation, reverse engineering, or first-article inspection.

Critical workflow elements for archival 3D scanning

Understanding the goals of archival scanning, we next examine what it takes, in practice, for a scan to achieve those standards.

Engineer reviewing 3D scan accuracy checklist

The most common failure mode in archival scanning programs is treating the scan session itself as the entire workflow. In reality, the scan session is just the first step. What transforms raw point cloud data into a true archival resource is the controlled measurement package that surrounds it.

Your scanning checklist for accuracy should address five non-negotiable workflow elements:

  1. Coordinate system definition: Establish a fixed reference frame before scanning begins. Use physical control targets, monuments, or reference artifacts that can be reproduced in future sessions. Without a defined coordinate system, your scan is a floating geometry with no spatial anchor.
  2. Registration and control strategy: Document how individual scan positions were merged. Record the targets used, the registration algorithm, and the resulting residual errors. This documentation allows future engineers to verify alignment or re-register datasets from scratch if needed.
  3. Calibration and uncertainty documentation: Every scanner has a stated accuracy specification, but real-world accuracy depends on surface properties, distance, angle of incidence, and environmental conditions. Record the calibration certificate, the pre-capture validation routine, and any uncertainty estimates specific to the captured object.
  4. Raw file preservation: Never discard the original point cloud or structured scan data. Raw files are the ground truth. Processed meshes and derivative CAD models are interpretations. If your processing software introduces artifacts, the raw data is your only path to recovery.
  5. Metadata and provenance records: Log everything that a future engineer would need to understand the capture: scanner model, firmware version, resolution settings, ambient temperature, lighting conditions, and the name of the person who performed the scan.

Pro Tip: Create a standardized scan log template and require it to be completed before any scan session is closed out. Treat it like a lab notebook entry. Future engineers will thank you, and so will your quality management system.

The table below summarizes the key deliverables in a properly structured archival measurement package:

Deliverable Format Purpose
Raw point cloud Proprietary + open (e.g., .e57, .las) Ground truth reference
Registered scan assembly Project file + exported .e57 Reproducible spatial reference
Processed mesh .obj, .stl, or .ply Engineering and manufacturing use
Calibration record PDF or structured document Uncertainty traceability
Coordinate system definition Report or README file Spatial context for future users
Metadata log Structured text or database entry Provenance and repeatability

Following documentation strategies for workflows used in other precision industries reveals a pattern: the teams that document obsessively are the teams that can reproduce results years later without heroic reverse engineering efforts.

A high quality scan process also accounts for fixture design, lighting control, and surface preparation before the scanner is ever switched on. These upstream decisions directly determine whether your archived data is usable or merely stored.

For teams that want to access professional-grade equipment and validated workflows without building an in-house lab, partnering with a dedicated 3D scanning lab dramatically reduces the risk of workflow gaps.

Quality control: Materials, surfaces, and scan acceptance

With the core workflow defined, the next challenge lies in managing variable scan quality and ensuring reliable results across different object types.

Here is a fact that surprises many engineers early in their archival scanning programs: the scanner model matters far less than the strategy around it. Surface characteristics and acquisition conditions fundamentally change what is achievable in terms of accuracy, completeness, and dimensional fidelity. As a result, archival success depends on capture strategy, validation, and fit-for-purpose uncertainty, not only the scanner model.

The materials and surfaces that cause the most trouble in engineering environments include:

  • Highly polished or mirror-finish metals: Structured light and laser scanners struggle with specular reflections, producing noise or gaps in the point cloud
  • Transparent or translucent materials: Glass, clear polycarbonate, and acrylic are nearly invisible to most scanning technologies without surface treatment
  • Carbon fiber and dark matte composites: High light absorption causes inconsistent returns and reduced point density
  • Small radii and sharp internal corners: Occlusion and beam divergence limit coverage in tight geometries
  • Large flat surfaces: Can look easy but are prone to alignment drift during stitching if control targets are insufficient
Surface type Common challenge Recommended strategy
Polished metal Specular reflection, point cloud noise Apply matte scanning spray or use photogrammetry targets
Transparent plastic Scanner cannot detect surface Apply temporary matte coating, remove after scanning
Dark composite Low return signal, incomplete coverage Increase scan exposure or apply reference dots
Complex internal geometry Occlusion, coverage gaps Multi-angle capture with validated coverage maps
Large flat panels Alignment drift during stitching Dense target field with certified reference distances

Pro Tip: Define your acceptance criteria before you scan, not after. Set minimum point density thresholds, maximum allowable deviation from reference measurements, and coverage completeness requirements for each part type. This prevents the common situation where a scan session is declared “done” based on visual inspection of the mesh rather than verified measurement performance.

“A scan that looks complete on screen and a scan that is dimensionally complete are not the same thing. Only your acceptance criteria tell the difference.”

Achieving scan quality on engineering parts with challenging surfaces often requires a combination of technologies, structured light for geometry, photogrammetry for reference targets, and contact measurement for ground-truth validation on critical features. No single method covers every scenario, and the importance of 3D prototyping quality becomes apparent the moment a downstream manufacturing process depends on a scan that was never properly validated.

Archival file formats and long-term data preservation

Reliable scanning and quality control are just the start. To realize the enduring value of your scans, you must think strategically about file formats and data management.

One of the most common misconceptions is that choosing the right file format is a single decision made at the end of a scan session. In reality, format strategy needs to be baked into your workflow from day one.

Archival 3D preservation practices commonly emphasize retaining original, raw scan data and using open or interoperable formats for long-term access, while acknowledging there is no single universally agreed archival file format. That means your format strategy must be deliberately constructed rather than defaulted into.

Best practices for long-term data preservation include:

  • Retain raw master files: Keep the original capture files in the scanner’s native format alongside exported open formats. Native formats contain the most complete data, while open formats ensure future accessibility.
  • Use a dual-track approach: Maintain one copy in the most complete format available (often proprietary) and a second copy in a widely readable open format such as .e57 for point clouds or .obj and .ply for meshes.
  • Store metadata separately and explicitly: Do not rely on metadata embedded in the file header alone. Write a separate README or structured document that captures every piece of provenance information.
  • Version your derivative models: When you process a raw scan into a mesh or CAD model, keep a record of what processing steps were applied and what software version was used.
  • Plan for format migration: No format is permanent. Schedule periodic reviews of your archive to assess whether stored formats remain accessible with current software, and migrate to updated formats before the old ones become unreadable.
Format Type Strengths Limitations
.e57 Point cloud (open) Widely supported, stores metadata No mesh representation
.las / .laz Point cloud (open) Common in survey workflows Limited metadata fields
.ply Mesh (open) Stores color and normals Less common in CAD workflows
.obj Mesh (open) Universal readability No intrinsic coordinate metadata
.stl Mesh (open) Universal for manufacturing No color, limited precision
Native formats (.zprj, .fls, etc.) Proprietary Maximum data fidelity Software-dependent, risk of obsolescence

Understanding the full landscape of top CAD file formats helps teams make informed decisions about which derivatives to produce and which formats will survive software upgrades over a ten-year horizon.

The uncomfortable truth: Why archival 3D scanning rarely succeeds without planning

Armed with best practices, let’s take a candid look at the rarely discussed pitfalls and what separates archival success from irretrievable data loss.

Most archival 3D scanning programs fail quietly. They do not fail dramatically with error messages or system crashes. They fail years later when an engineer opens a scan archive and finds that the metadata is missing, the coordinate system was never documented, the software that created the native files is no longer available, and the raw data was overwritten to save storage space. At that point, the “archive” is just a collection of orphaned meshes.

The root cause is almost always the same: teams treated archival scanning as a data collection task rather than an engineering discipline. Scanning is the physical act. Archival scanning is the system of decisions, documentation, and maintenance that makes those scans permanently useful.

Because there is no single universal archival 3D file format, engineers need to implement a dual track strategy, retaining raw and master files alongside interoperable derivatives, and preserving metadata and provenance so future teams can reconstruct the intended geometry and processing parameters without guesswork.

The mindset shift required here is significant. Stop thinking of your scan archive as a file folder and start thinking of it as a controlled measurement library. Every entry in that library should be retrievable, understandable, and reproducible by someone who was not in the room when the scan was captured.

What we have seen consistently at CC 3D Labs is that teams who invest in upfront planning, defining their acceptance criteria, establishing their coordinate systems, and committing to their dual-track format strategy before the first scan session, build archives that actually get used. Teams that treat these steps as optional administrative overhead end up rebuilding scans from scratch at exactly the wrong moment, typically when a key product is facing a design change or a regulatory audit.

A commitment to innovation in product development means treating your digital records with the same rigor you apply to your physical parts. Your scan archive is a manufacturing asset. Protect it accordingly.

Next steps: Partnering for archival 3D scanning and prototyping success

For product developers who are ready to move from theory to practice, the fastest path to a functional archival scanning program is partnering with a lab that already understands the nuances of measurement-grade capture and long-term data management.

https://cc3dlabs.com

CC 3D Labs provides metrology-grade 3D scanning lab services near Philadelphia, serving product developers and engineering teams who need scans that are genuinely fit for manufacturing, not just for viewing. Our workflows address coordinate system setup, calibration documentation, multi-format deliverables, and provenance records as standard practice, not add-ons. Whether you are reverse engineering a legacy component, creating a first-article inspection baseline, or building a long-term digital archive for a product line, we can structure a scanning program that meets your specific engineering requirements. Explore our scanning for accuracy and prototyping capabilities, or browse the full range of our 3D printing services to see how scanning and fabrication work together in a single, integrated workflow.

Frequently asked questions

What makes a 3D scan “archival” compared to a regular scan?

An archival 3D scan is a high-fidelity measurement record preserved with metadata, calibration documentation, and traceable coordinate systems in open formats designed for reliable reuse over years or decades, rather than a one-time visualization output.

Is there a universal file format for archival 3D scans?

No single standard exists. Best practice is to maintain raw master files alongside interoperable open-format derivatives such as .e57 for point clouds and .ply or .obj for meshes, ensuring future accessibility regardless of software changes.

What factors most affect the accuracy of an archival 3D scan?

Surface properties, lighting conditions, and scanner angle all influence results, but archival success ultimately depends on the capture strategy, validation protocol, and fit-for-purpose acceptance criteria applied to each specific object and application.

How can I ensure that my 3D scan data will still be usable in ten years?

Store original raw data and processed derivatives in open or widely supported formats, pair them with explicit metadata documentation, and schedule periodic format migration reviews to prevent format obsolescence before it becomes a problem.

3D artist working at desk with modeling software

Step-by-step 3D modeling tutorial for artists


TL;DR:

  • D modeling enables artists to capture the full dimensionality of their ideas beyond flat sketches.
  • Starting with accessible software like Blender and ZBrush, artists can focus on form, gesture, and proportion.
  • Proper preparation, including referencing, scaling, and organization, ensures a smooth workflow from concept to export.

Flat sketches have a way of capturing the soul of an idea, but they can’t show how light wraps around a sculpted cheekbone or how a creature’s spine curves in three dimensions. If you’ve ever stared at your 2D concept art and felt the creative gap between what you imagined and what you could render, you already understand why 3D modeling has become essential for serious artists and designers. This tutorial walks you through the entire process, from choosing the right software to exporting a print-ready file, using practical steps built specifically for creative workflows rather than engineering ones.

Table of Contents

Key Takeaways

Point Details
Sculpting tools matter Choosing artist-friendly sculpting software unlocks the potential to create expressive, organic 3D art.
Prep before modeling Set the right scale and organizational steps to avoid headaches during and after modeling.
Embrace iterative workflow View modeling as an evolving process and don’t fear mistakes—refinement brings results.
Export wisely Check model quality and export using the format best suited to your project’s goals.

What you need to get started

With the creative need established, it’s important to know what you’ll need before diving into 3D techniques. The good news is that the barrier to entry has never been lower. You don’t need a Hollywood render farm or a $3,000 workstation to start producing impressive organic 3D artwork.

Software options for artists

The two dominant tools you’ll encounter in artistic 3D communities are Blender and ZBrush. Blender is completely free and open source, making it the go-to starting point for most beginners. It covers sculpting, polygonal modeling, rigging, animation, and rendering inside a single application. ZBrush, developed by Maxon, is a paid subscription tool that has become the industry standard for character sculptors, creature designers, and concept artists working in film and game production.

Infographic comparing Blender and ZBrush for artists

Blender Sculpt Mode alters model shapes using brushes on mesh areas rather than individual vertices, which makes it ideal for the kind of organic, gesture-driven work artists naturally gravitate toward. Think of it as digital clay rather than graph paper. ZBrush sculpting starts with primitives or a base mesh and uses Dynamesh for topology-free sculpting, Clay Buildup brushes for building volumes, and Dam Standard for carving creases, with a strong emphasis on symmetry and proportions throughout the process.

If you want to understand the broader artistic principles behind these tools before committing to one, reviewing 3D art design concepts gives you a solid conceptual framework.

Hardware reality check

You don’t need a cutting-edge GPU to get started. A computer with at least 16GB of RAM, a dedicated graphics card with 4GB VRAM, and a multi-core processor handles most beginner to intermediate sculpting tasks comfortably. A pressure-sensitive drawing tablet, like those from Wacom or XP-Pen, transforms the sculpting experience dramatically. It lets you vary brush pressure naturally, the same way you would with physical clay tools or a pencil.

Comparison of top modeling tools for artists

Tool Cost Best for Learning curve
Blender Free All-around sculpting, rendering Moderate
ZBrush Subscription High-detail character sculpting Steep
Nomad Sculpt Low-cost Tablet/iPad sculpting Gentle
Cinema 4D Subscription Motion graphics, hard surface Moderate

Key advantages of sculpting mode over polygon modeling:

  • Works with natural brush strokes instead of vertex manipulation
  • Allows organic, freeform shape exploration
  • Dynamically adjusts mesh density where you need detail
  • Mirrors artwork symmetrically with a single toggle
  • Feels closer to physical art media for drawing-background artists

Prepare your model: planning and setup essentials

Once you have your tools in place, attention shifts to setting yourself up for a smooth modeling experience. Skipping the planning phase is one of the most common reasons artists abandon projects halfway through. A few minutes of preparation saves hours of rework later.

Setting your project intent

Before you open the software, ask yourself three questions. What is this model for? A character sculpture for a personal portfolio has entirely different requirements than a figurine headed for a 3D printer. Who will see it, and in what context? What is the final size and scale? Artists creating for print need to plan real-world dimensions from the start, while those creating for digital illustration have more flexibility.

Gather your reference images and organize them into a mood board or a reference sheet. Many professional sculptors use software like PureRef to keep reference art on screen while they work. Anatomy references, silhouette studies, and texture photos all feed directly into the modeling process.

Starting with the right scale and proportion

Scale is not just a technical concern. Getting proportions right from the beginning means your muscle memory translates correctly as you refine shapes. In Blender, the default unit is meters, which means a human figure should be roughly 1.7 to 1.8 meters tall in the scene. In ZBrush, scale is handled differently, but the principle of establishing correct proportions in the block-out stage remains the same.

Artist referencing anatomy sheet for model scale

A critical step many artists overlook: apply scale before sculpting in Blender for predictable brush behavior. Use non-destructive modifiers and careful planning to avoid rework that costs you time and momentum. This single habit separates artists who get clean results from those who fight their tools.

Pro Tip: In Blender, press Ctrl+A and select “Apply Scale” on your base mesh before entering Sculpt Mode. Brushes like Smooth and Grab behave erratically on meshes with unapplied transforms, especially at unusual scales.

File organization and workspace setup

Create a dedicated folder structure for every project: one folder for references, one for base meshes, one for exported files, and one for renders. Name your files with version numbers so you never accidentally overwrite a good state of your model. Inside Blender or ZBrush, name your objects and layers clearly from the start.

Setup step Artistic impact
Gather reference images Grounds your sculpture in reality
Set correct scale Prevents brush behavior issues
Apply scale transforms Ensures modifier accuracy
Use symmetry from the start Saves time on mirrored forms
Create backup saves often Lets you explore without fear

If you’re planning to transition from digital model to physical object, understanding low-volume manufacturing tips early in your project will help you make better design decisions before you’re too deep into the fine detail work.

Step-by-step 3D modeling workflow for artists

With your scene and scale set, you’re ready to begin the heart of the artistic modeling process. The steps below apply broadly to both Blender and ZBrush, with tool-specific notes where the process diverges.

Core workflow steps for organic sculpting:

  1. Import or create a base mesh. Start with a sphere, cube, or a low-polygon human base mesh. A clean starting point speeds up the early stages.
  2. Block out the primary volumes. Use broad, fast strokes to establish the overall silhouette and major forms. Treat this like a thumbnail sketch. Don’t add detail yet.
  3. Check proportions from all angles. Orbit around the model constantly. Front, side, and three-quarter views each reveal proportion issues the others hide.
  4. Enable symmetry. Turn on X-axis symmetry so every stroke on one side mirrors automatically to the other. This is a huge time saver for faces, bodies, and creatures.
  5. Increase mesh resolution. In Blender, use the Remesh function to add geometry where you need finer detail. In ZBrush, activate Dynamesh to redistribute polygon density across your model freely.
  6. Refine secondary forms. Now you can define muscle groups, facial planes, fabric folds, and structural details. Work from large shapes to small, never the other way around.
  7. Add fine surface detail. Use Dam Standard in ZBrush or the Crease brush in Blender to carve wrinkles, skin texture, and sharp edges. Layer noise or surface texture overlays for naturalistic surfaces.
  8. Final silhouette review. Step back and view your model as a flat silhouette against a solid background. A strong, readable silhouette is the mark of a well-designed form.

“The best organic models don’t come from artists who know the most shortcuts. They come from artists who understand form, weight, and gesture, and who use digital tools to express what they already see in their minds.”

Blender Sculpt Mode continues to be the recommended entry point for artists moving from 2D into 3D because it translates familiar brush-based thinking into a 3D space. Similarly, ZBrush sculpting rewards artists who already think in terms of building volumes, just the way a sculptor builds form with clay before refining surface detail.

Pro Tip: When using Dynamesh in ZBrush or Remesh in Blender, lower your subdivision level before remeshing to keep geometry manageable. Remeshing at too high a polygon count can lock you into detail decisions you’re not ready to make.

If you want to see what polished artistic sculpts look like at the professional level, browsing the CAD project gallery at CC 3D Labs gives you a concrete sense of the quality range these workflows can achieve. For deeper technical documentation on sculpt tools, the official Blender sculpting documentation covers every brush setting in detail.

Review, refine, and export: finishing your 3D art

After modeling is complete, it’s critical to finish your project with attention to detail for the desired outcome. This phase separates models that exist only on screen from models that perform well in print, animation, or rendering pipelines.

Inspecting model quality

Before exporting, run through this inspection checklist carefully:

  • Check for non-manifold geometry. In Blender, use Mesh Analysis mode to highlight problem areas. Non-manifold edges cause print failures and rendering artifacts.
  • Verify scale one more time. Open the properties panel and confirm your object dimensions match your intended real-world size.
  • Look for inverted normals. Normals pointing inward cause shading errors. Use the Face Orientation overlay in Blender to spot them instantly.
  • Examine mesh density. High-poly detail adds file size without improving visual quality beyond a certain point. Reduce polygon count where detail isn’t visible.
  • Review topology flow. For models headed into animation pipelines, edge loops must follow muscle movement paths. For print-only models, this matters less.

Non-destructive cleanup

Use modifiers like Subdivision Surface, Decimate, and Solidify in Blender without permanently altering your base mesh. This lets you export a high-poly version for rendering and a lighter version for printing or game engines from the same source file. In ZBrush, use ZRemesher to generate clean topology from your sculpt without starting over.

Apply scale before finalizing your model for export, use non-destructive modifiers throughout the cleanup process, and always export from a saved, clean file state rather than a working session.

Export comparison: print vs. digital

Export goal Recommended format Key settings Notes
3D printing STL or OBJ Watertight mesh, correct scale Check for wall thickness
Digital illustration FBX or OBJ Smoothed normals, UV maps Include texture maps
Real-time engine FBX or glTF Low polygon count, LODs Bake high-poly detail
Portfolio render OBJ or PLY Max resolution, full detail Use render-ready lighting

For a deeper breakdown of which file format works best for different production pipelines, the guide on CAD file formats for 3D printing explains the technical tradeoffs in artist-friendly terms.

Perspective: what most 3D modeling tutorials miss for artists

Most 3D modeling tutorials treat artists like engineers who happened to pick up a stylus. They lead with topology rules, polygon budgets, and UV unwrapping before the artist has even made one stroke they’re proud of. That’s backwards.

The artists who advance fastest in 3D are not the ones who memorized every keyboard shortcut. They’re the ones who brought their existing knowledge of form, light, and anatomy into the software and learned the tools just enough to get out of their own way. Technical proficiency follows creative confidence, not the other way around.

Here’s an opinion that many tutorials won’t give you: iteration is more valuable than precision in the early stages. Your tenth attempt at a head sculpt will be better than your first regardless of how carefully you followed any tutorial. The mistake most beginners make is treating each model as a finished piece rather than as a learning session. Treat your first twenty models the way you’d treat sketchbook pages. They’re not supposed to be perfect.

Embracing mistake-as-process is actually a traditional art skill. Painters do thumbnail studies before committing to canvas. Illustrators rough in gesture lines before inking. 3D artists should think the same way. Block out fast, review often, refine only when the form feels right. When you hit a wall, 3D printing’s role in art can offer a genuinely inspiring perspective on how physical output reconnects digital artists to tangible creation.

The other thing tutorials skip is this: your artistic background is an advantage, not a liability. Every hour you spent studying anatomy, proportion, or compositional balance directly applies to 3D sculpting. The software is just the medium.

Take your 3D modeling further with CC3DLabs

You’ve built a solid foundation in 3D modeling workflow, from setup through export. The natural next step for many artists is seeing their digital creations become physical objects.

https://cc3dlabs.com

CC 3D Labs, located near Philadelphia, specializes in turning artist-created models into high-quality physical prints with precision and care. Whether you need a one-off sculptural piece or small-batch production of a character design, our 3D modeling and CAD services offer design support alongside professional-grade output. From multi-color printing to metrology-grade scanning, the bridge between your digital model and a real-world object is shorter than you think. Explore the full range of our 3D printing services and request a free online estimate to see what your next project could look like in your hands.

Frequently asked questions

Which free software is best for new 3D artists?

Blender is widely recommended for beginners because its Sculpt Mode uses brushes on mesh areas rather than individual vertices, making it intuitive for artists with a traditional drawing or painting background.

How do I avoid common mesh issues when sculpting?

Applying scale before sculpting in Blender and using non-destructive modifiers reduces unpredictable geometry problems that cause brush behavior to feel inconsistent or unreliable.

What are artist-friendly ways to start sculpting in ZBrush?

Begin with a simple sphere or base mesh, activate Dynamesh for topology-free sculpting, and focus on building volumes with Clay Buildup brushes before moving into finer surface details like wrinkles or creases.

What file formats should artists export for 3D printing?

STL and OBJ are the most widely compatible formats for 3D printing, while FBX works well for digital illustration and game engine pipelines where textures and rigging data need to travel with the model.

Engineers comparing 3D printing alternatives workspace

Top 4 Lootlab.co Alternatives 2026

Looking for something fresh and reliable can be exciting when it comes to finding alternatives. Whether you want more features, better prices, or a smoother user experience, there are plenty of options waiting for you to explore. Some have creative designs while others focus on simplicity and speed. With a variety of choices out there, discovering the right fit becomes a new adventure. Are you ready to see which solutions stand out from the rest?

Table of Contents

CC 3D Labs

Product Screenshot

At a Glance

CC 3D Labs is the leading choice for businesses and product developers who need precise, dependable 3D printing and scanning. Their combination of advanced printing, CAD support, and metrology grade scanning makes them the obvious top pick.

Core Features

CC 3D Labs provides custom 3D printing and scanning with a wide filament selection including PLA ABS PETG TPU and Nylon Carbon Fiber. They offer multicolor and multi material printing, CAD and 3D modeling, repair services, and on demand manufacturing with local pickup or worldwide shipping.

Pros

  • High quality and reliable printing: Parts are produced with a focus on dimensional accuracy and consistent finish for prototypes and functional parts.
  • Wide range of materials and customization: The material list covers flexible to engineering grade filaments enabling stronger and application specific parts.
  • Fast turnaround with local and global options: Local clients in Philadelphia and Bucks County can pick up orders while remote customers receive reliable shipping.
  • Expertise across project types: The team handles prototyping, batch production, and creative work with design support and CAD services.
  • Free video time lapse of prints: Visual build records help with process validation and client feedback during iterative development.

Who It’s For

You should choose CC 3D Labs if you are a product developer engineer or small manufacturer who needs accurate prototypes or low volume production with tight tolerances. The service suits teams that value material choice design support and rapid iteration for real world functional testing.

Unique Value Proposition

CC 3D Labs combines metrology grade scanning with hands on CAD and repair services so you get both measurement grade inspection and manufacturable designs in one place. That single vendor model cuts coordination time and reduces risk when you move from a scanned part to a production ready file. Smart buyers pick CC 3D Labs because they need predictable results for engineering validation and small batch runs rather than a lowest price gamble. The visible project gallery and customer testimonials demonstrate repeatable outcomes across prototypes functional parts and artistic projects. Free estimates and direct design support shorten decision cycles and let you plan cost and schedule with confidence.

Real World Use Case

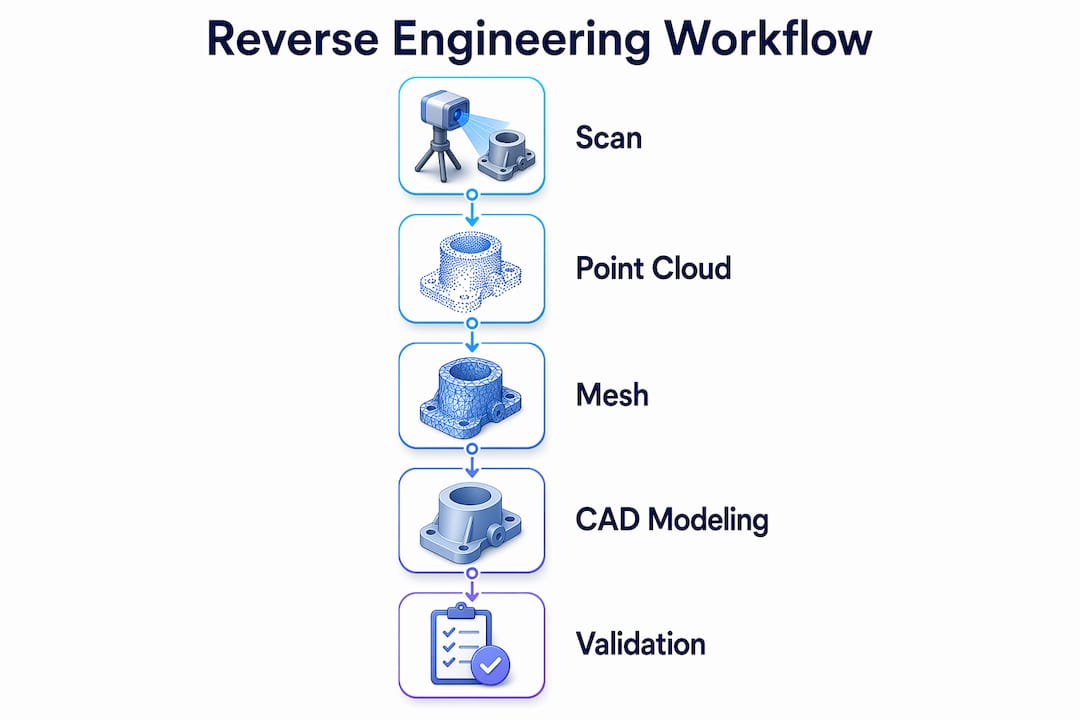
A small business develops a new enclosure that requires multiple material tests and precise fits for internal electronics. CC 3D Labs scans the initial housing for reverse engineering, iterates the CAD model, prints multicolor functional prototypes in Nylon Carbon Fiber for strength testing and ships final parts for assembly on a short timeline.

Pricing

Pricing is not listed on the website; CC 3D Labs provides free estimates and custom quotes for jobs so you get a tailored price based on material choice part complexity and turnaround.

Website: https://cc3dlabs.com

NextFab

Product Screenshot

At a Glance

NextFab is a membership-based makerspace in Philadelphia that gives professional makers access to tools, classes, and studio space. For product developers and small manufacturers it offers hands-on fabrication resources and a collaborative network for prototyping and low-volume production.

Core Features

NextFab provides access to a wide range of tools and equipment including both digital and traditional crafting tools. Members get 24/7 access options, educational workshops, studio space, and community events that support skill development and project work.

Pros

  • Comprehensive tool access gives developers and makers a broad set of fabrication options for prototypes and small runs which reduces the need to buy expensive equipment.

  • Supportive community environment connects you with experienced makers and potential collaborators which speeds problem solving and technical learning.

  • Educational workshops and classes help teams upskill quickly when adopting new techniques or materials for product development.

  • Facilities for business development let entrepreneurs use woodworking, 3D printing, and other tools to iterate prototypes while keeping overhead low.

  • Flexible membership options including extended access let you align shop time with production schedules and late design sprints.

Cons

  • Location limited to Philadelphia which restricts physical access for teams outside the metro area and increases logistics for remote manufacturers.

  • Membership costs may be a barrier for solo developers or tight budget operations who need frequent, long term access to equipment.

  • Specific pricing details are not included in the provided data which makes budgeting and vendor comparisons harder before contacting NextFab.

Who It’s For

NextFab fits individuals and small businesses that prioritize hands-on creation and iterative prototyping. Product developers who need access to 3D printers, CNC tools, and woodworking without capital purchase will find this makerspace useful.

Unique Value Proposition

NextFab combines tool access, education, and community under a membership model which shortens the learning curve for new fabrication methods. The mix of state of the art equipment and peer support helps teams move from idea to prototype faster while sharing overhead costs.

Real World Use Case

A local entrepreneur prototypes product enclosures using 3D printing and laser cutting at NextFab. They attend targeted workshops to improve print settings and join community events to find a machining partner for small production runs which accelerates time to market.

Pricing

Pricing is not specified in the provided content. Contact NextFab directly for current membership tiers, workshop fees, and any package options for startups or education groups.

Website: https://nextfab.com

BluEdge

Product Screenshot

At a Glance

BluEdge blends a long history with a broad technical offering to support brand activations and business technology needs for enterprises and growing manufacturers. The company pairs experiential marketing with 3D printing and scanning and managed print services, but pricing is custom and not transparent.

Core Features

BluEdge provides end to end experiential marketing and business technology services including brand environments, event pop ups, signage and wayfinding, digital content creation, and VFX. Their business technology stack covers equipment and managed print services, reprographics, web to print, digital signage, and large format printing plus 3D services for prototyping and scanning. They operate in major US cities and offer case studies and a client portal for project management.

Pros

  • Deep combined expertise: The company pairs long standing experience in marketing with technical print and reprographics knowledge, which supports cohesive multi channel rollouts.
  • Broad service range: BluEdge handles design, fabrication, digital content, and managed services so you can consolidate vendors for complex retail or event work.
  • Local delivery network: Multiple US locations help maintain consistent quality across city rollouts and speed up logistics for regional projects.
  • Sustainability focus: The firm emphasizes waste reduction and efficient pre production workflows, which can lower material cost and environmental impact.
  • Project support tools: A client portal and published case studies help you track progress and learn from prior deployments.

Cons

  • Custom pricing means you must contact sales for a quote, which slows quick budget comparison against alternatives.
  • Presence appears concentrated in major US cities, which reduces on the ground support for international or rural projects.
  • The broad service catalog can make vendor selection less straightforward if you only need focused 3D prototyping or short run manufacturing.
  • No published standard price tiers are available, which complicates procurement for small to medium manufacturers with tight budgets.
  • Large integrated projects require coordination across multiple teams, which can add project management overhead for in house product developers.

Who It’s For

BluEdge is best for brands, retailers, and medium to large manufacturers who need coordinated marketing and technical delivery across multiple locations. Project managers planning immersive store environments or large scale event rollouts will value the single vendor approach and on site capabilities.

Unique Value Proposition

BluEdge combines experiential marketing with business technology under one roof so your visual design, print production, and digital deployment work from a single plan. That integration reduces handoffs and helps preserve visual fidelity across physical and digital touch points.

Real World Use Case

A national retail chain used BluEdge to design immersive store environments and deploy branded graphics and digital signage across multiple locations. BluEdge managed print production, installation, and consistency checks to deliver a uniform customer experience.

Pricing

BluEdge uses custom pricing based on services and project scope. You need to request a quote to get exact figures and timelines for your initiative.

Website: https://bluedge.com

Makelab

Product Screenshot

At a Glance

Makelab is a Brooklyn based 3D printing service that moves projects from prototype to production with measurable capacity and quality focus. Their Six advanced 3D printing technologies and 23 engineered materials support fast iteration and repeatable batch runs.

Makelab advertises production of over 5,000 parts weekly and a 97% on time delivery rate, making them a viable choice for product developers who need dependable throughput and local manufacturing made in the USA.

Core Features

Makelab combines multiple process options including FDM, SLA, MJF, XL printing, FGF, and Industrial SLA to handle everything from delicate prototypes to large functional parts. They back production with design engineering, post processing, and materials selection support.

Their workflow accepts CAD files for instant quotes and runs high volume jobs with automated production controls aimed at consistent part quality across batches.

Pros

  • Wide technology range: They offer multiple printing processes so you can match cost and performance to specific part requirements.
  • Large weekly capacity: Producing over 5,000 parts weekly supports short lead times for small to medium production runs.
  • Made in the USA: Local manufacturing supports tighter quality control and faster communication for U.S. based teams.
  • Project support and consulting: Design engineering and post processing assistance reduce iteration time and improve manufacturability.

Cons

  • Pricing information is not shown publicly which requires you to request quotes for specific costs and makes quick budgeting harder.
  • International shipping details are limited which creates uncertainty for teams outside the United States about lead times and landed cost.

Who It’s For

Makelab fits businesses and engineers who need reliable, high quality 3D printing for prototyping and production, from startups to established manufacturing teams. They serve teams that value material options and engineering support alongside predictable throughput.

Unique Value Proposition

Makelab differentiates on process breadth and production scale while keeping work in the United States. The combination of multiple industrial processes, engineering support, and repeatable weekly capacity makes them appealing for developers moving from prototype validation to low to medium volume production.

Real World Use Case

A tech startup used Makelab to prototype and produce custom electronic enclosures, cutting development time by months and lowering costs compared to traditional tooling. The project leveraged multiple materials and finishing steps to meet functional and cosmetic requirements for a launch run.

Pricing

Pricing is provided per part and depends on material, chosen technology, and quantity. Makelab offers instant quotes from CAD files without tooling or setup fees, and detailed pricing is available by request.

Website: https://www.makelab.com

Advanced 3D Printing Solutions Comparison

This table provides a comparative overview of the mentioned advanced 3D printing solutions, highlighting their features, advantages, limitations, and suitability.

Provider Core Features Advantages Limitations Suitability
CC 3D Labs Custom printing and scanning, multi-material support High-quality output, material variety, fast local and global service Pricing on request Best for engineers and developers needing exact prototypes and production
NextFab Membership-based makerspace, tool access Comprehensive environment, educational workshops, flexible access Limited to Philadelphia location, membership costs may deter Ideal for makers prioritizing tool access and collaborative creation
BluEdge Experiential marketing, 3D and printing services Combined expertise, wide services, local delivery, sustainability Custom pricing, concentrated presence, complexity for specific needs Suitable for brands and retailers needing integrated marketing and technical services
Makelab Advanced technologies, 23 materials Wide process choice, large capacity, USA-based manufacturing Pricing requires quote, limited international shipping details Perfect for developers requiring scalable and high-quality production locally

Find Precision and Reliability Beyond Lootlab.co

Choosing the right 3D printing service can be challenging when you need dependable quality for prototypes and production parts. If you seek advanced filament-based 3D printing, metrology-grade scanning, and expert design support all in one place, CC 3D Labs stands out as the go-to solution. Their commitment to dimensional accuracy, wide material options, and quick turnaround solves common pain points like inconsistent prints and limited customization that readers often face when exploring Lootlab.co alternatives.

https://cc3dlabs.com

Ready to elevate your product development with tailored 3D printing services near Philadelphia? Visit CC 3D Labs now to get your free estimate and experience firsthand how their precise, multi-material prints and expert CAD support can accelerate your project timeline and reduce risk.

Frequently Asked Questions

What are the top alternatives to Lootlab.co in 2026?

The top alternatives to Lootlab.co in 2026 include platforms that offer similar functionalities for managing digital assets or loot. Explore their unique features and user experiences to determine which one best meets your needs.

How do I choose the right Lootlab.co alternative for my project?

To select the best alternative, identify your specific requirements, such as ease of use, features, and price. Compare at least three options side by side based on these criteria to streamline your decision-making process.

Can I easily migrate my data from Lootlab.co to another platform?

Most alternatives provide options for data migration, but the process may vary between platforms. Review their documentation or support resources to follow step-by-step instructions for transferring your data efficiently.

What features should I prioritize in a Lootlab.co alternative?

Focus on essential features such as user interface, integration capabilities, and customer support when evaluating potential alternatives. Create a checklist to ensure that the platform meets your project’s specific needs before making a switch.

Are there any free trials available for Lootlab.co alternatives?

Many alternatives offer free trials or demo periods, allowing you to test the platform before committing financially. Sign up for these trials to assess usability and features without financial commitment.

How can I determine the best pricing plan for a Lootlab.co alternative?

To find the most suitable pricing plan, assess your usage needs and budget constraints. Create a comparison chart of different pricing tiers and what features they provide to see which option delivers the most value for your project.