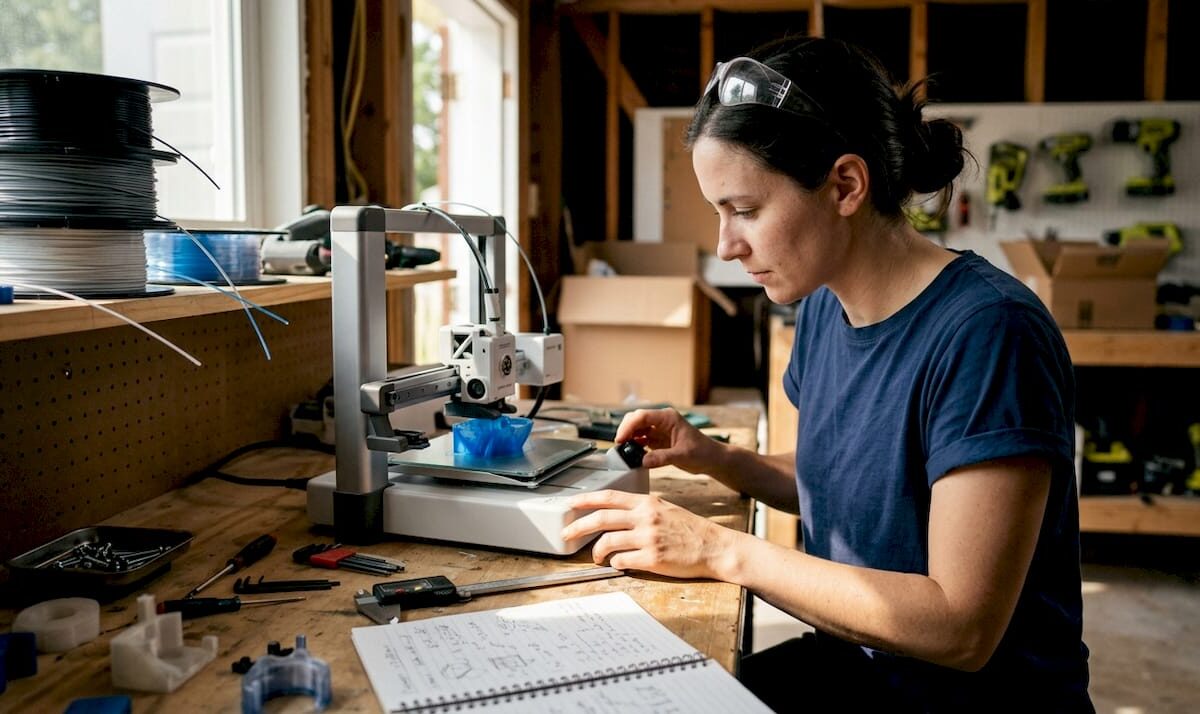
Engineer oversees 3D printing prototype process

Step-by-Step 3D Printing: Guide to Quality Prototypes


TL;DR:

  • Proper setup and material choice are essential to prevent common 3D print failures.
  • Workflow stages from CAD to testing greatly influence prototype accuracy and reliability.
  • Continuous iteration and analysis of failures lead to better scaling and production-ready parts.

Turning a digital design into a functional prototype feels straightforward until your first print warps off the bed, critical holes print undersized, or a snap-fit snaps wrong. Every stage of the 3D printing workflow carries real consequences for product developers and engineers: a miscalibrated printer or a poorly sliced file can cost you days and materials. This guide walks you through the full process, from CAD modeling to final evaluation, with expert-backed strategies, troubleshooting shortcuts, and optimization tips that help you build reliable, repeatable results. Whether you’re prototyping a single concept or preparing for batch production, the framework here is built to reduce risk at every step.

Table of Contents

Key Takeaways

Point Details
Plan before printing Success depends on preparing your CAD model, picking the right material, and verifying all printer settings and requirements.
Follow a proven workflow Move step-by-step from design to slicing, material choice, printing, post-processing, and testing for repeatable quality.
Optimize with iteration Expect to run two to four prototype cycles, incorporating testing feedback each time before moving to production.
Avoid common pitfalls Check for undersized holes, wall thickness, and correct build orientation to reduce failures and improve performance.
Leverage expert resources When in doubt, consult specialized guides or service providers to troubleshoot, optimize, and scale your 3D printing process.

Understand prerequisites and materials for 3D printing success

Before you print a single layer, your workflow needs a solid foundation. The standard prototyping process covers CAD modeling, slicing, material selection, printing, post-processing, and evaluation. Skipping or rushing any of these stages is where most prototype failures originate. Getting your tools, materials, and knowledge aligned upfront is the fastest way to avoid expensive rework later.

Here’s what you need in place before starting:

  • 3D printer: Calibrated, with a verified build plate level and nozzle condition
  • CAD software: Fusion 360, SolidWorks, or equivalent with export to STL/STEP
  • Slicer software: PrusaSlicer, Cura, or Chitubox depending on your technology
  • Filaments or resin: Matched to your functional requirements (PLA for concept models, PETG or Nylon for functional parts)
  • Post-processing tools: Deburring tools, sandpaper, IPA for resin, heat gun for warping correction
  • Calipers: Digital, for dimensional verification after every print

Material and tool selection is where engineers often underestimate complexity. Choosing PLA because it’s easy to print, then testing it under load, is a common mismatch. If you’re designing reliable 3D prints, material selection must track directly to end-use conditions, not just printability.

Tool/Material Purpose Best prototype stage
FDM printer (0.4mm nozzle) Concept and functional prototypes Early to mid stage
PLA/PETG filament Form and fit testing Concept to functional
Nylon/ASA filament Mechanical and environmental testing Functional validation
Resin (SLA) High-detail, tight-tolerance parts Fit checks, visual models
Digital calipers Dimensional verification All stages
Slicer software Toolpath and support generation All stages

For a deeper breakdown of material options and print settings, the filament printing guide covers the most common engineering filaments and when to use each.
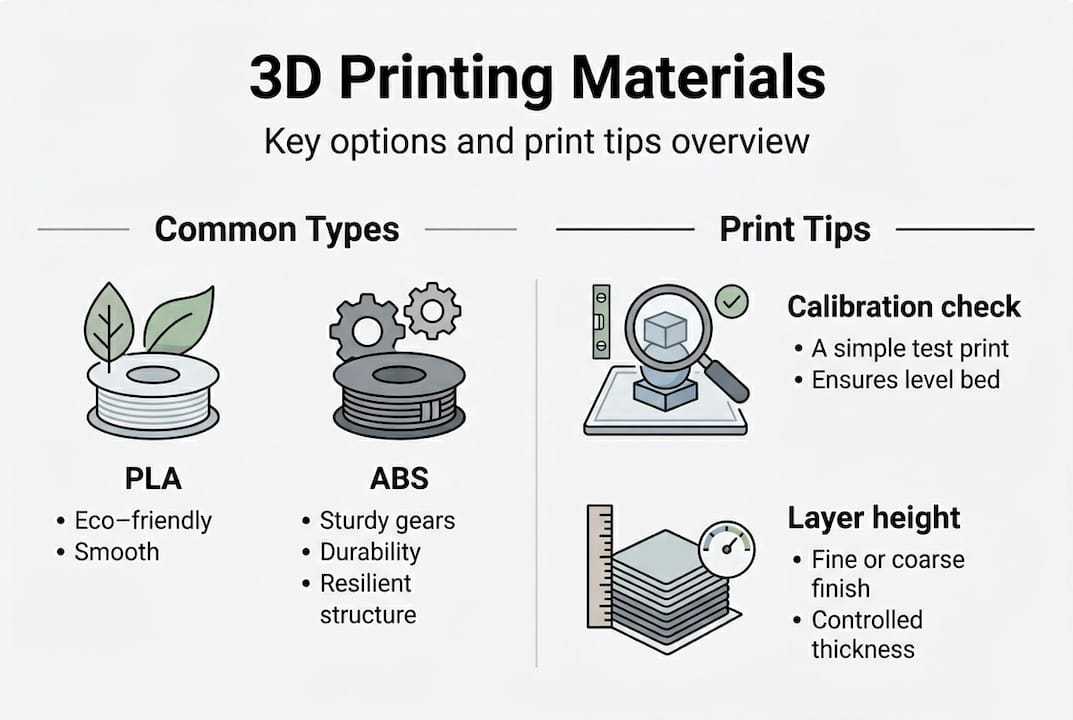
Infographic showing 3D printing materials and tips

Pro Tip: Always run a printer calibration check, including first-layer height and extrusion multiplier, before starting any new material or batch. A 5-minute check prevents hours of failed prints.

Step-by-step process: From CAD to finished part

With the right setup, you’re ready to move through each key phase with confidence. The end-to-end workflow follows six stages: CAD modeling, slicing, technology and material selection, printing, post-processing, and testing. Each phase feeds the next, so a weak link early compounds downstream.

  1. CAD modeling: Design with manufacturing in mind. Wall thicknesses above 1.2mm for FDM, clearances of 0.2 to 0.4mm for mating parts, and no unsupported overhangs beyond 45 degrees.
  2. Slicing: Convert your STL to toolpaths. Set layer height, infill, supports, and print speed. Layer height is the vertical resolution of each printed layer, typically 0.1 to 0.3mm for FDM.
  3. Technology and material selection: Match the process to the requirement. Use choosing the right 3D printing process as a reference when requirements shift.
  4. Printing: Monitor the first few layers. Adhesion failures and stringing are easiest to catch and correct early.
  5. Post-processing: Remove supports, sand critical surfaces, cure resin parts under UV, or anneal Nylon for dimensional stability.
  6. Testing and iteration: Measure, fit-check, and stress-test before moving to the next design revision. Review rapid prototyping fundamentals for structured iteration strategies.

Understanding the differences between technologies is critical. Mechanical property studies confirm that process choice directly impacts part strength and isotropy (uniformity of mechanical properties in all directions).

Technology Typical tolerance Layer height Relative cost Best use
FDM ±0.2 to 0.5mm 0.1 to 0.3mm Low Functional, structural prototypes
SLA ±0.05 to 0.15mm 0.025 to 0.1mm Medium High-detail, tight-fit parts
SLS ±0.1 to 0.3mm 0.1mm High Durable, complex geometry

The FDM vs SLA vs SLS comparison shows that tolerances, costs, and mechanical properties vary significantly across technologies, so aligning your choice to your validation stage matters.

Pro Tip: Print a small test coupon, a simple block with the key features of your part, before committing to a full prototype run. This catches fit and tolerance issues in under 20 minutes.

Troubleshooting, optimization, and expert shortcuts

Now that the workflow is clear, let’s make sure you avoid the missteps that slow down iteration cycles and degrade part quality. Most print failures trace back to a short list of repeatable design or setup errors.

Common errors to watch for:

  • Holes printing undersized by 0.1 to 0.3mm due to material expansion and toolpath offset
  • Thin walls below 0.8mm that fail to print or print inconsistently
  • Incorrect part orientation that puts layer lines perpendicular to the primary load direction
  • Inadequate clearances between mating parts, especially snap-fits and press-fits
  • Layer height set above 75% of nozzle diameter, which reduces inter-layer bonding

Common FDM design issues include Z-axis anisotropy (weakness perpendicular to the build plate), undersized holes, and thin-wall failures. These are not random. They are predictable and preventable with the right design rules.

For optimization, the levers that matter most are infill pattern, print speed, and part orientation. Expert print settings recommend 20 to 40% gyroid or cubic infill for strength-to-weight balance, reduced print speeds for load-bearing walls, and orienting critical features in the XY plane for tightest tolerances.

Aligning your primary load path with the XY plane is the single most impactful orientation decision you can make for FDM parts. Z-direction strength is always the weakest link.

For low-volume manufacturing, consider a hybrid approach: 3D print the form and fit prototype, then machine critical mating surfaces for precision. This keeps iteration fast while hitting tight tolerances where it counts. When evaluating which approach fits your project, finding the best print job for your specific part geometry and material can save significant time.

Also, dimensional accuracy varies by material and color. Black filament consistently delivers the lowest dimensional deviation in FDM, making it the go-to choice when precision is the priority.

Pro Tip: When printing functional FDM parts, use black filament for your validation round. The carbon pigment improves layer adhesion and reduces dimensional error compared to lighter colors.
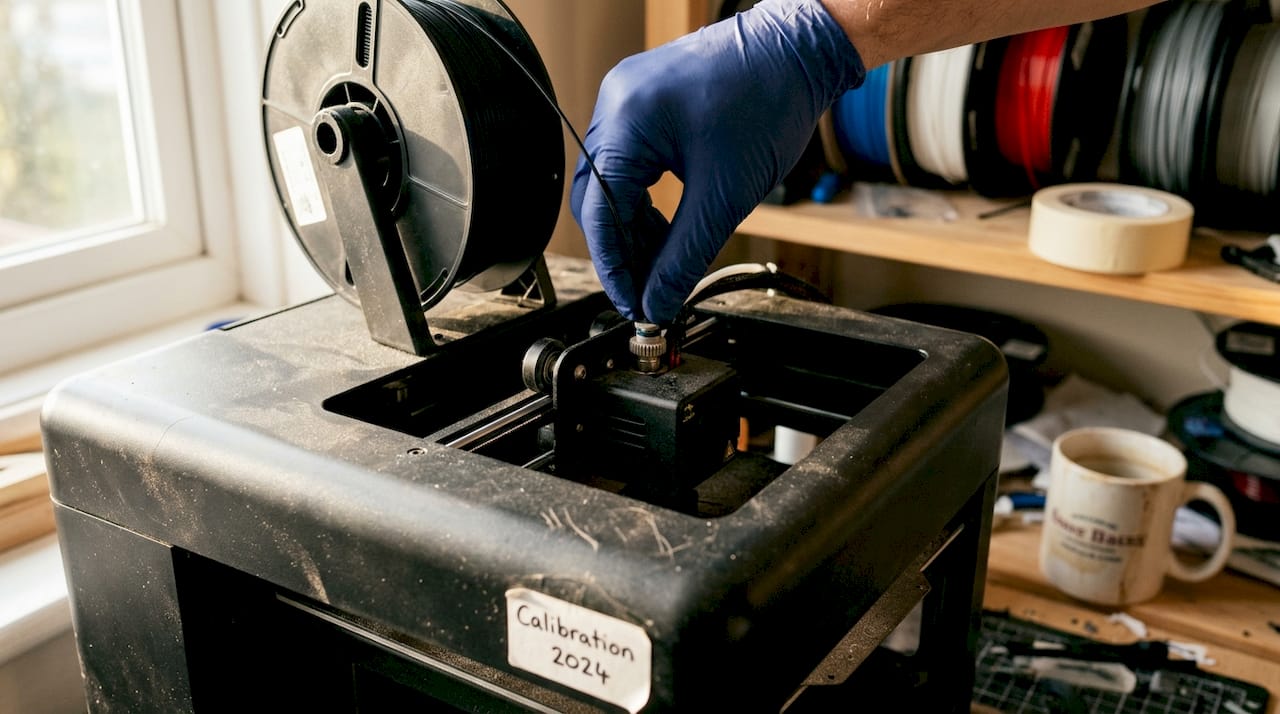
Detail of black filament for FDM printer

Evaluation, iteration, and scaling for production

With knowledge of preventing and addressing common issues, you’ll want to ensure your parts truly perform and are ready for scaling. Validation is not a single checkpoint. It’s a structured sequence of tests that confirms your prototype meets real-world requirements before you commit to production tooling or larger batch orders.

Testing checkpoints for every prototype:

  • Dimensional check: Measure all critical features with calipers or a CMM (coordinate measuring machine)
  • Mechanical fit: Assemble mating parts and verify clearances, snap-fits, and fastener holes
  • Visual inspection: Check for layer delamination, warping, incomplete infill, or surface defects
  • Functional stress test: Apply expected loads or environmental conditions to confirm performance
  • Material validation: Confirm the prototype material matches production material properties

Empirical data for additive manufacturing provides benchmarks for SLA flexural strength and FDM tensile performance, giving you reference values to compare against your test results.

Prototype stage Typical iteration cycles Primary focus
Concept model 1 to 2 Form and fit
Functional prototype 2 to 4 Fit, function, strength
Pre-production validation 1 to 2 Material match, tolerance

For high-quality prototypes, plan for two to four iteration cycles, with each round using materials that match your intended production process. MJF (Multi Jet Fusion) offers faster cycle times and more isotropic parts than FDM for production-like validation.

When you’re ready to scale, the technology decision matters again. FDM works well for low-volume runs of large, structural parts. SLS and MJF become the better choice for complex geometry, tight tolerances, or batch quantities above 20 to 50 units. Browse real-world prototype examples to see how different technologies perform across part types.

For on-demand print solutions, understanding what can be printed across different technologies helps you plan your scaling path before committing to a production process.

The real challenges and opportunities in step-by-step 3D printing

Here’s what most guides won’t tell you: the engineers who get the best results from 3D printing are not the ones chasing the latest printer or fastest technology. They’re the ones who treat every failed print as a data point, not a setback.

Perfecting your CAD design and printer setup consistently outperforms any speed or technology upgrade. A well-designed part on a mid-range FDM printer beats a poorly designed part on a high-end SLA machine every time. The discipline of iteration, reviewing failures, adjusting one variable at a time, and documenting results, is what separates engineers who scale successfully from those who stay stuck in the prototype loop.

Cross-disciplinary thinking matters here too. Understanding how your end-use environment affects material choice, how your manufacturing process influences design constraints, and how your testing protocol connects to real-world loads gives you leverage that no slicer setting can replicate. Review rapid prototyping realities to ground your workflow in practical expectations. The counter-intuitive truth is that your worst prints, the ones that delaminated, warped, or failed fit checks, are your most valuable teachers if you analyze them systematically.

Get expert support for your 3D printing projects

If you’re ready to push your prototype to the next level but want to reduce guesswork and risk, professional support is one click away. At CC 3D Labs, we handle every stage of the process, from design optimization and material selection to finished functional parts with tight tolerances.

https://cc3dlabs.com

Our team works directly with product developers and engineers to minimize print failures, accelerate iteration cycles, and match your prototype to production-grade requirements. Whether you need a single concept model or a batch of functional parts, our professional 3D printing services are built for your workflow. Explore on-demand prototypes to get started, or review our printing terminology guide to align your project specs before reaching out.

Frequently asked questions

What are the most common 3D printing mistakes and how can I avoid them?

Typical print failures include undersized holes, inadequate clearances, thin walls, and Z-axis weakness from layer anisotropy. Review your CAD file against FDM design rules and always run a test coupon before committing to a full prototype.

How do I pick the right 3D printing technology for my prototype?

Base your choice on required precision, mechanical strength, and batch size. FDM, SLA, SLS, and MJF each occupy different positions on the cost, accuracy, and throughput spectrum, so match the technology to your current validation stage.

How many iterations does a high-quality prototype require?

Most prototypes reach production readiness after two to four iterations, with each round using materials and processes that closely match the intended production method.

What is the advantage of using black filament for FDM prints?

Black filament consistently shows the lowest dimensional deviation in FDM printing, making it the most reliable color choice for parts where precision and tight tolerances are critical.
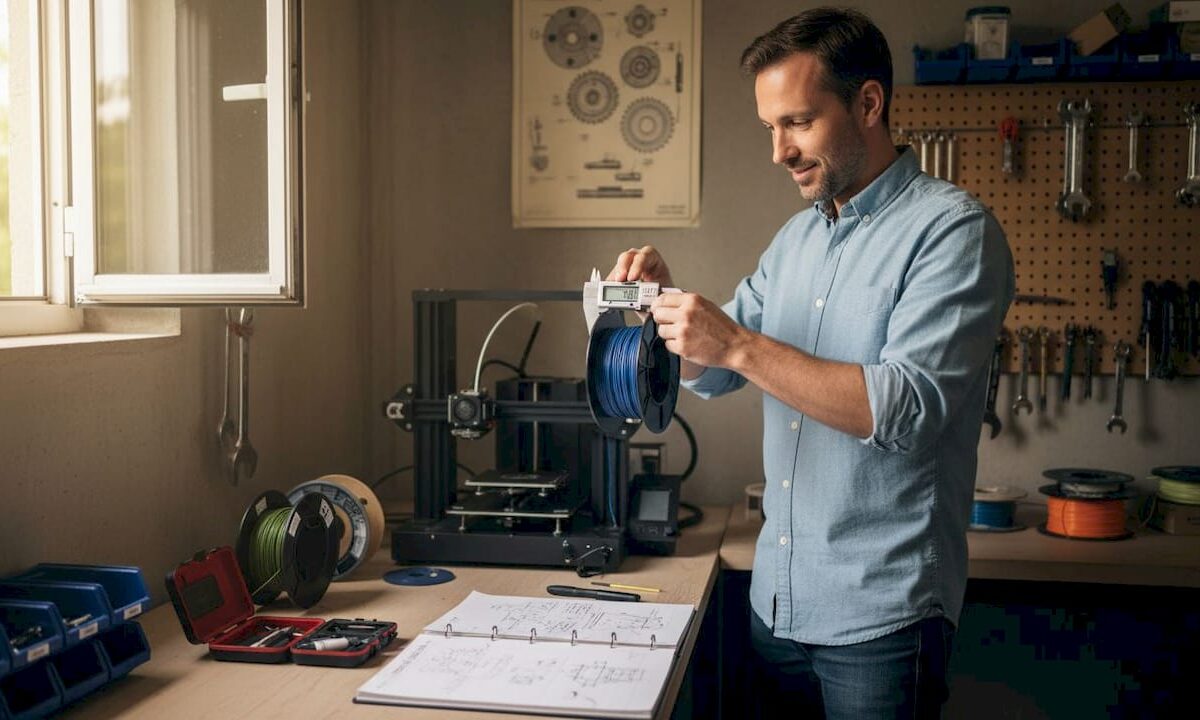

Engineer checks filament tolerance with calipers

Custom filament printing guide: precision for prototypes


TL;DR:

  • Filament diameter tolerance of ±0.02mm ensures consistent, professional-grade 3D printing results.
  • Proper material choice, printer calibration, and controlled environment are crucial for accuracy and repeatability.
  • Systematic verification and measurement across batches prevent variability and enhance manufacturing reliability.

Even a 0.05mm variation in filament diameter can push a prototype over tolerance, trigger failed prints, and delay your product launch by days or weeks. For product developers and small manufacturing teams, that is not a minor inconvenience. It is a real business cost. ±0.02mm filament tolerance is the benchmark separating consistent, professional-grade output from frustrating batch failures. This guide walks you through every stage of custom filament printing, from material selection and printer setup to parameter tuning and quality verification, so you can produce parts that hold tolerance and hold up under real-world conditions.

Table of Contents

Key Takeaways

Point Details
Choose the right filament Proper filament type and tolerance are the foundation for consistent, successful prints for prototypes and production.
Calibrate and control environment Printer calibration and environmental controls are just as critical as material choice for avoiding common failures.
Optimize print parameters Fine-tuning orientation and slicer settings can dramatically boost part strength and accuracy.
Verify print quality Regular, measured quality checks catch inconsistencies early, ensuring confidence in every print run.
Expert help accelerates results Partnering with a specialized 3D printing service speeds up learning, minimizes costly mistakes, and delivers reliable prototypes.

Understand filament types and requirements

Choosing the right filament is not just about matching color to your brand palette. Material selection determines whether your functional prototype survives a stress test, fits into an assembly, or ships with consistent surface quality across a batch. Getting this decision right upfront saves you rework time and material cost.

Core filament types and where they fit:

  • PLA: Easy to print, dimensionally stable, ideal for concept models and display prototypes. Not suited for heat or mechanical stress.
  • PETG: Balances strength and printability. Great for functional parts, but it is hygroscopic and requires drying before use to avoid bubbles and stringing.
  • ABS: Tough and heat-resistant, essential for functional housings and mechanical parts. Needs an enclosure to prevent warping.
  • Nylon: High impact resistance and flexibility, but absorbs moisture aggressively. Drying is non-negotiable.
  • Carbon fiber, glow-in-the-dark, and metal-filled filaments: Abrasive composites that demand hardened steel nozzles, or you will wear through a standard brass nozzle within hours.
Filament Enclosure needed Drying required Nozzle type
PLA No Rarely Brass
PETG Optional Yes Brass or hardened
ABS Yes Rarely Brass
Nylon Yes Yes Hardened steel
Carbon fiber Yes Yes Hardened steel

Tolerance matters more than most developers realize. A filament rated at ±0.02mm produces under 1% volumetric variation, keeping flow rates consistent across long print runs. Once you step down to ±0.05mm, you are looking at nearly 3% volumetric swing, which shows up as over-extrusion on some layers and under-extrusion on others. You can find more material-specific advice in our prototyping filament guide or dig into a side-by-side breakdown with PLA vs PETG vs ABS.

Color additives also affect printability. Dark pigments, particularly black, absorb more heat and may require a slightly lower temperature than a natural or white version of the same material. Always run a temperature tower when switching colorways on a critical production run.

Pro Tip: Store all hygroscopic filaments in sealed containers with silica gel desiccant between print sessions. Even a few hours of open-air exposure in a humid environment can ruin a spool of Nylon or PETG.

Set up your printer for custom filament printing

Once your material is chosen, your printer and workspace need matching attention. A well-selected filament will still produce poor results if the hardware delivering it is out of calibration or operating in an uncontrolled environment.

Start with these setup steps in order:

  1. Level the print bed. A bed that is even 0.1mm off across its surface will cause adhesion failures on the first layer, which cascades into every layer above it.
  2. Clean the hot end. Residual material from a previous filament run causes contamination, especially when switching from a high-temperature material to a lower-temperature one.
  3. Check the extruder tension. Too tight and you grind the filament. Too loose and steps are skipped. Both cause inconsistent flow.
  4. Calibrate your extruder steps per mm. Mark 100mm of filament, extrude it, and measure what actually moved. Adjust until the numbers match.
  5. Set nozzle diameter to match your job. Abrasive filaments require a hardened nozzle. Standard brass erodes fast under carbon fiber or metal-filled materials.

Environment matters too. ±0.05mm diameter variation creates a 2.8% volumetric swing that no software setting can fully compensate for, but ambient temperature swings make things worse. ABS requires a fully enclosed printer to maintain a consistent chamber temperature and prevent warping from drafts. Hygroscopic materials need controlled humidity both in storage and during printing.

A stable printer in a controlled workspace produces more consistent results than a high-end machine sitting in a drafty, humid shop floor. Environment is not optional.

Printer check What to look for Tool needed
Bed level Even first layer adhesion Feeler gauge or probe
Extruder calibration 100mm extrusion accuracy Ruler or calipers
Hot end cleanliness No residue or discoloration Cold pull or cleaning filament
Nozzle condition No erosion on tip Visual inspection

For batch production specifically, you will want to build a pre-run checklist. Our low-volume manufacturing tips walk through setup routines designed to keep quality consistent across dozens of parts. If you are deciding between printer types for your workflow, choosing the right printing type covers that decision in detail.

Pro Tip: Run a small calibration cube before every new filament spool or environmental change. It takes five minutes and tells you immediately if something has drifted.

Woman calibrates 3D printer for new filament

Optimize print parameters for strength and accuracy

Once hardware is ready, fine-tuning print parameters maximizes your results. Slicer settings are where most developers either gain or lose the edge on part performance.

Orientation is the most underestimated variable in filament printing. FDM parts are anisotropic, meaning they are stronger along the layer plane than perpendicular to it. Placing a part so its primary load axis runs parallel to the print bed increases stiffness dramatically. Parameter optimization, including orientation and layer height adjustments, has been shown to boost part stiffness by 81 to 128%. That is not a marginal gain. It is the difference between a prototype that passes mechanical testing and one that snaps during the first use cycle.

Follow this sequence when dialing in parameters for a new job:

  1. Set orientation first. Analyze load direction and place the strongest axis in line with expected stress.
  2. Choose layer height. Thinner layers (0.1mm to 0.15mm) improve surface detail and interlayer bonding for functional parts. Thicker layers (0.2mm to 0.3mm) speed up prototyping when detail is less critical.
  3. Tune temperature. Advanced materials like PETG and Nylon run hotter and benefit from a temperature tower to find the sweet spot for flow and layer adhesion without stringing.
  4. Set print speed. Slower speeds improve accuracy. For precision prototypes, drop below 40mm/s on perimeters.
  5. Adjust cooling. PLA needs active cooling. ABS and Nylon need minimal or no cooling to prevent layer delamination.

Black filaments deserve a specific note. Because of their higher heat absorption, black variants of the same base material often need a temperature reduction of 5°C to 10°C compared to neutral colors. Skipping this step leads to over-melting and oozing on fine features.

For guidance on building print-ready geometry that supports these parameters, our resource on designing reliable prints and optimizing your CAD workflow are worth your time before you hit slice.

Pro Tip: Never rely on a slicer’s default profile for a production run. Always run a first-article part with your specific filament, nozzle, and environment before committing to a full batch.

Quality verification and troubleshooting

With parameters optimized, assess and fix your results for business-grade consistency. Printing one good part is not the goal. Printing forty identical good parts is.

Start with visual inspection on every part:

  • Layer lines: Should be uniform in height and spacing. Inconsistent lines point to extruder slippage or filament diameter variation.
  • Wall smoothness: Rough or pitted walls signal moisture in the filament or a clogged nozzle.
  • Color consistency: Streaks or shade shifts mid-print indicate contamination or temperature instability.

After visual checks, measure. Use calipers to verify critical dimensions against your CAD model. Tolerance variations at ±0.02mm create under 1% dimensional error, while ±0.05mm filament pushes that beyond 2.8%. For parts going into assemblies, even 0.1mm of deviation can mean a misfit. Document your measurements across each batch so you can track drift over time.

Iteration is not failure. Running three calibration parts before a 50-piece batch is a quality investment, not wasted material.

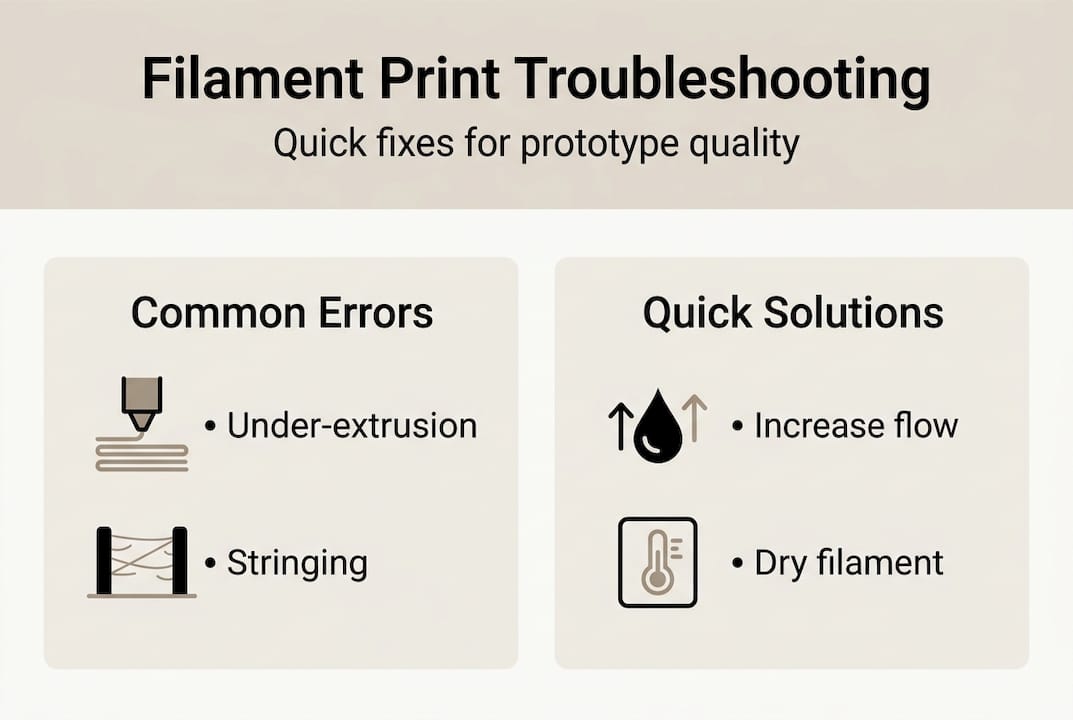
Common error Symptom Solution
Under-extrusion Thin walls, gaps in layers Increase flow rate, check extruder tension
Over-extrusion Blobbing, rough surfaces Reduce flow rate or temperature
Warping Lifted corners Use enclosure, increase bed adhesion
Stringing Fine threads between features Increase retraction, reduce temperature
Layer delamination Cracks between layers Increase temperature, reduce cooling

Infographic with filament troubleshooting and solutions

For visual references of what precision output actually looks like at each stage, our prototype quality examples show real parts printed to specification.

Why most guides miss what actually matters in custom filament printing

Most online guides focus on slicer profiles and temperature charts. Those things matter, but they are not the ceiling. The real ceiling for manufacturing reliability is filament consistency and systematic verification across batches.

Here is what experience teaches you: even a premium slicer profile running on a well-calibrated machine cannot compensate for a filament spool with inconsistent diameter. If the material feeding into your nozzle varies by 0.05mm or more throughout the spool, your flow rate fluctuates regardless of your settings. You can tune all day and still see surface variation on parts 20 and 40 that looked fine on parts 1 and 2.

The second thing most guides skip is the difference between a successful single print and a repeatable process. For a product developer or small manufacturer, repeatability is everything. One good prototype means little if your next run of 30 parts has visible variation. Build a verification step into every run. Measure early, measure often, and document what you find. That process discipline is what separates hobbyist output from professional manufacturing output.

Our additional prototyping strategies go deeper into building that kind of repeatable workflow.

Take your custom filament printing further with CC3DLabs

If you are hitting the limits of what in-house printing can deliver for precision, batch consistency, or advanced materials, working with an experienced team changes the equation.

https://cc3dlabs.com

At CC3D Labs, near Philadelphia, we specialize in custom filament-based 3D printing for product developers and manufacturing teams who need parts that perform, not just parts that look right on a screen. Our 3D printing services cover everything from single prototypes to production runs, with material expertise and quality verification built into every job. Want to know what is possible before you commit? See our printing capabilities and browse real-world prototype case studies to see the standard we hold our work to. Reach out for a free estimate and let us help you get it right the first time.

Frequently asked questions

What is the ideal filament tolerance for precision 3D printing?

A filament diameter tolerance of ±0.02mm delivers the best print consistency for prototypes and low-volume manufacturing, keeping volumetric variation under 1%.

Why do some filaments require drying before printing?

Hygroscopic filaments like PETG and Nylon absorb moisture from the air, which causes bubbling, poor layer adhesion, and stringing unless the material is thoroughly dried before printing.

How does orientation impact 3D printed part strength?

Optimizing part orientation during slicing aligns the strongest axis with the load direction, with research showing stiffness improvements of up to 128% compared to default orientations.

How do you check if your print is accurate?

Measure critical dimensions with calipers and compare them to your CAD model. Tolerance variations above ±0.05mm can push dimensional error past 2.8%, which is unacceptable for assembly-fit parts.

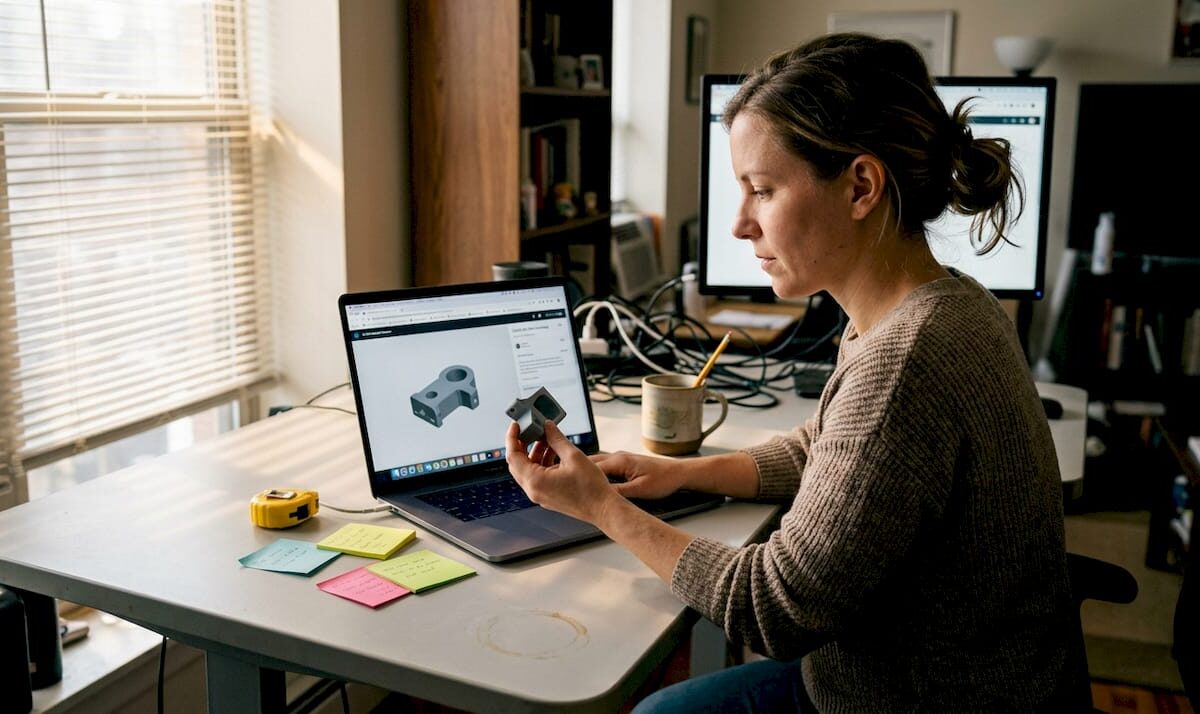
Designer reviewing online 3D printing estimate

Get precise online estimates for custom 3D printing


TL;DR:

  • Online quoting speeds up 3D printing workflows and helps with rapid design decisions.
  • Automated estimates are generally accurate for standard geometries but less reliable for complex features.
  • Preparing models carefully and validating quotes with manual reviews can improve cost accuracy and project success.

Waiting three days for a quote when your prototype deadline is tomorrow is not a workflow problem. It’s a competitive disadvantage. Traditional manual quoting slows engineering cycles, creates budget uncertainty, and forces developers to guess at costs during the most critical design phases. Instant quoting systems automate pricing by analyzing uploaded STL files, material choices, print time, and part complexity in seconds. But speed comes with trade-offs. This guide breaks down how online estimates work, where they fall short, and the practical strategies you can use to get numbers you can actually build a budget around.

Table of Contents

Key Takeaways

Point Details
Speed boosts workflow Instant online estimates slash prototyping delays and empower rapid engineering iteration.
Check itemized costs Always review the detailed breakdown—material, machine, labor, post-processing—for transparency and accuracy.
Know quoting limits Complex geometries and post-processing often require manual review, so buffer for hidden costs.
Design for accuracy Optimizing designs for quoting—minimizing supports and overhangs—produces more reliable instant estimates.
Benchmark for best value Compare multiple quoting platforms and ask for engineer reviews to ensure cost and quality alignment.

How online estimates transform 3D printing workflows

An online estimate, sometimes called an instant quote, is an automated pricing system that reads your 3D model file and returns a cost breakdown without human intervention. You upload a file, select a material and finish, and the platform calculates price based on volume, geometry, and machine parameters. The result arrives in seconds rather than days.

For product developers and engineers, this changes everything about early-stage design. You can test five material options in five minutes. You can compare a solid infill against a lightweight lattice structure and see the price difference immediately. Online estimators accelerate prototyping by providing immediate feedback on design changes, material trades, and quantity discounts. That feedback loop is what makes iterative design actually fast.

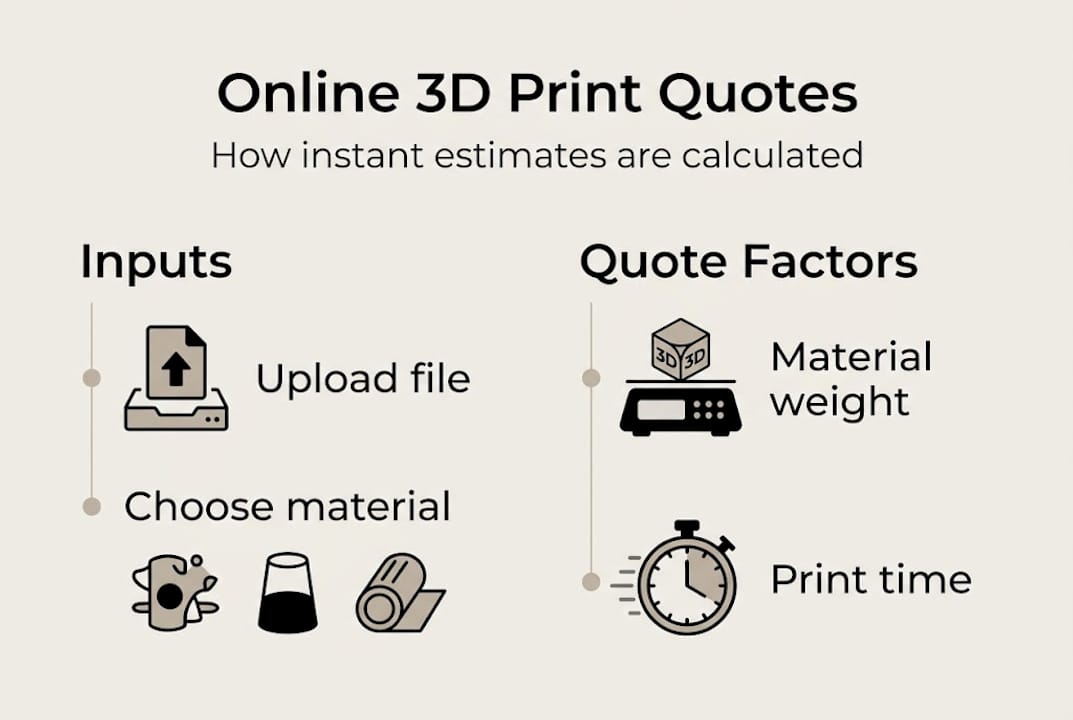
Infographic showing 3D print online quote process

Manual quoting, by contrast, typically takes 24 to 72 hours per request. For a team running ten design iterations per week, that delay compounds fast. Shapeways instant quoting platforms have demonstrated that automated systems can reduce quote turnaround from days to under a minute for standard geometries. That is not a marginal improvement. It is a fundamentally different workflow.

Here are the most common use cases where online estimates deliver real value:

  • Rapid prototyping: Get cost feedback before committing to a design revision
  • Material comparison: Instantly compare PLA, PETG, ABS, and nylon pricing for the same geometry
  • Functional part production: Estimate unit economics for small batch runs before scaling
  • Design iteration: Adjust wall thickness, infill, or orientation and see cost impact in real time
  • Budget planning: Establish rough cost ranges early in the product development cycle

Pairing this speed with a solid optimizing CAD workflow process means your files are quote-ready before you even hit submit. The engineers who get the most out of instant quoting are the ones who treat file preparation as part of the design process, not an afterthought.

Demystifying 3D printing cost calculation: What’s in an online quote?

Most engineers treat the quote number as a black box. Understanding what’s inside it gives you real leverage. STL file parsing for volume, surface area, and bounding box forms the foundation of every automated estimate. From there, the system estimates print time using slicing simulation or heuristics, then applies a cost formula.

The standard formula looks like this: Material cost (weight × $/g) + Machine cost (hourly rate × print time) + Labor + Overhead + Markup. Each variable carries its own uncertainty. Material weight depends on infill density. Machine time depends on layer height and print speed. Labor and overhead vary by provider.

Engineer calculating 3D printing quote by hand

Here is a simplified example of how those components stack up for a mid-complexity functional bracket:

Cost component Basis Example amount
Material 45g × $0.08/g $3.60
Machine time 2.5 hrs × $4.00/hr $10.00
Labor Setup and removal $5.00
Overhead Facility, utilities $3.00
Markup 30% $6.48
Total estimate $28.08

The quoting sequence for a custom part typically follows these steps:

  1. Upload STL file to the platform
  2. System parses geometry for volume, surface area, and bounding box
  3. Slicer simulation estimates print time and material usage
  4. Cost formula applies material, machine, labor, and overhead rates
  5. Markup is added and the estimate is returned to the user
  6. Optional: engineer review for flagged complex geometries

For a deeper look at how these numbers are assembled, the cost calculator guide breaks down the math behind each variable. Understanding itemized quoting breakdowns also helps you spot when a platform is bundling costs that should be line items.

Pro Tip: Always request an itemized cost breakdown rather than a single total. If a platform only shows you one number, ask for a manual review on any prototype that has thin walls, internal channels, or significant overhangs. Those features are where automated estimates lose accuracy fast.

Recognizing the limits: When online quotes fall short

Instant quoting is powerful, but it has a ceiling. Complex geometries can fail automated analysis entirely. Thin walls below 1.2mm, extreme overhangs, and internal lattice structures push most quoting algorithms into uncertain territory. The system either flags the file for manual review or, worse, returns a price that does not reflect the actual print difficulty.

Post-processing is the biggest blind spot. Post-processing costs can increase final invoices by 30 to 40 percent, and most instant quoting systems do not model this accurately. Support removal, sanding, painting, and inspection are labor-intensive steps that vary by part geometry in ways that are hard to automate.

Here is a quick comparison of instant quoting versus manual engineering review:

Factor Instant online quote Manual engineering review
Speed Seconds to minutes 24 to 72 hours
Transparency Variable High
Accuracy (standard parts) Good Excellent
Accuracy (complex parts) Poor to moderate Excellent
Post-processing included Rarely Usually
Cost Free or low May carry a fee

Common hidden costs that online estimates frequently miss include:

  • Support structure material and removal labor
  • Surface finishing (sanding, priming, painting)
  • Dimensional inspection and quality documentation
  • Failed print reprints (especially for complex geometries)
  • Expedited turnaround fees

For tips for accurate instant quoting on complex parts, the key is knowing when to escalate. If your part has features that would give a human engineer pause, an automated system will not catch them reliably. Reviewing instant quoting system alternatives can also reveal platforms with more robust manual review pipelines built into their workflows.

The cost drivers in 3D print quotes are more nuanced than most automated systems capture, particularly when functional performance requirements enter the picture.

How to get accurate online estimates: Practical engineering strategies

Getting a reliable estimate is not just about picking the right platform. It is about preparing your model and your process so the automated system has everything it needs to return a meaningful number.

Here are the key steps for reliable instant quoting:

  • Optimize your model first: Clean up non-manifold geometry, remove duplicate surfaces, and confirm wall thickness meets minimum print requirements before uploading
  • Select platforms with itemized breakdowns: Prioritize platforms with itemized breakdowns and engineer review options, especially for prototypes and functional parts
  • Request manual review for edge cases: If your part has overhangs greater than 45 degrees, thin walls, or complex internal geometry, flag it for human review
  • Compare multiple estimators: Run the same file through two or three platforms and compare results. Significant variance signals a part that needs manual attention
  • Use benchmark quoting calculators to cross-check: Independent calculators help you validate whether a platform’s estimate is in a reasonable range

Pro Tip: For prototypes, orient your model to minimize support structures before uploading. A part printed at a 45-degree angle often uses significantly less support material than one printed flat, and that directly reduces both material cost and post-processing labor. Small orientation decisions at the design stage translate into real savings in the estimate.

For functional parts, always benchmark your online quote against a manual review before committing to a production run. The CAD estimate form at CC 3D Labs allows you to submit files for review with specific functional requirements noted, which gives our team the context to catch cost variables an automated system would miss.

Also review quoting platform comparisons to understand which services offer the transparency and engineering support your project actually requires. Not all platforms are built for the same use cases, and choosing the wrong one for a functional part run can cost you more than the time you saved on quoting.

The engineering reality: Instant quotes vs. true costs

Here is something most online quoting platforms will not tell you: the number on your screen is a starting point, not a contract. We have seen engineers treat instant estimates as final budgets, only to face invoices that are 30 to 40 percent higher once post-processing and quality checks are factored in.

The math behind this is straightforward. Material is only 15 to 30% of total print cost. Machine time, labor, and failure rates (typically 5 to 10 percent for complex geometries) dominate the actual invoice. Instant quoting systems are optimized to calculate material and machine time accurately. They are not optimized for the human labor that happens after the print finishes.

The race-to-the-bottom pricing you see on some platforms is a red flag, not a deal. Providers who compete purely on quote price often cut corners on material quality, machine calibration, or post-processing thoroughness. For a display model, that might be acceptable. For a functional part that goes into a product, it is a liability.

Our recommendation for low-volume manufacturing tips is to always buffer your budget by at least 20 percent above the online estimate for functional part runs. For complex prototypes, budget for at least one reprint. Use the instant quote as a directional signal, then validate it with a manual review before finalizing your project budget. The engineers who do this consistently are the ones who hit their timelines without budget surprises. See how custom print job selection factors into getting the right service match for your specific application.

Level up your 3D printing workflow with trusted solutions

Applying these strategies is straightforward when you have a service provider who builds transparency into every quote. At CC 3D Labs, we offer both instant online estimates and detailed manual reviews for complex prototypes and functional parts.

https://cc3dlabs.com

Our 3D printing services are designed for product developers and engineers who need accurate numbers, not ballpark figures. Whether you are exploring printing prototypes and functional parts for the first time or managing a batch production run, our team provides itemized breakdowns that reflect real costs. Request a custom print quote today and see the difference that engineering-backed quoting makes for your project timeline and budget.

Frequently asked questions

How accurate are online estimates for 3D printing?

Online estimates are typically reliable for standard geometries but often underrepresent total costs for complex features or finishing work. Post-processing costs can increase final invoices by 30 to 40 percent above the initial automated quote.

What file formats are best for automated online quoting?

STL files are the standard for 3D print quotes because they provide the volume and geometry data needed for automated cost calculation. Parsing STL files for volume, surface area, and bounding box is the foundation of every instant quoting system.

Can online estimates factor in quantity discounts?

Yes, many instant quoting platforms adjust pricing automatically based on order quantity. Immediate feedback on quantity discounts is one of the strongest advantages of automated estimators for batch prototype planning.

How can I make my model easier to quote instantly?

Simplify your geometry by minimizing overhangs and support-heavy features, and choose an orientation that reduces material usage before uploading. Minimizing supports and overhangs early in the design process produces more reliable automated estimates and lower actual print costs.

Designer reviews 3D printed prototype at worktable

Top 4 Alchemy3dprints.com Alternatives 2026

Switching to a new platform always brings a mix of excitement and questions. With so many options out there it can be tough to know where to start. Each choice comes with its own set of unique features and benefits. Some put user experience first while others focus on offering the widest variety of tools. What might surprise you is how much these differences can impact your projects. Curious which sites are leading the pack this year and what makes them stand out? The next few choices could bring you just the solution you need.

Table of Contents

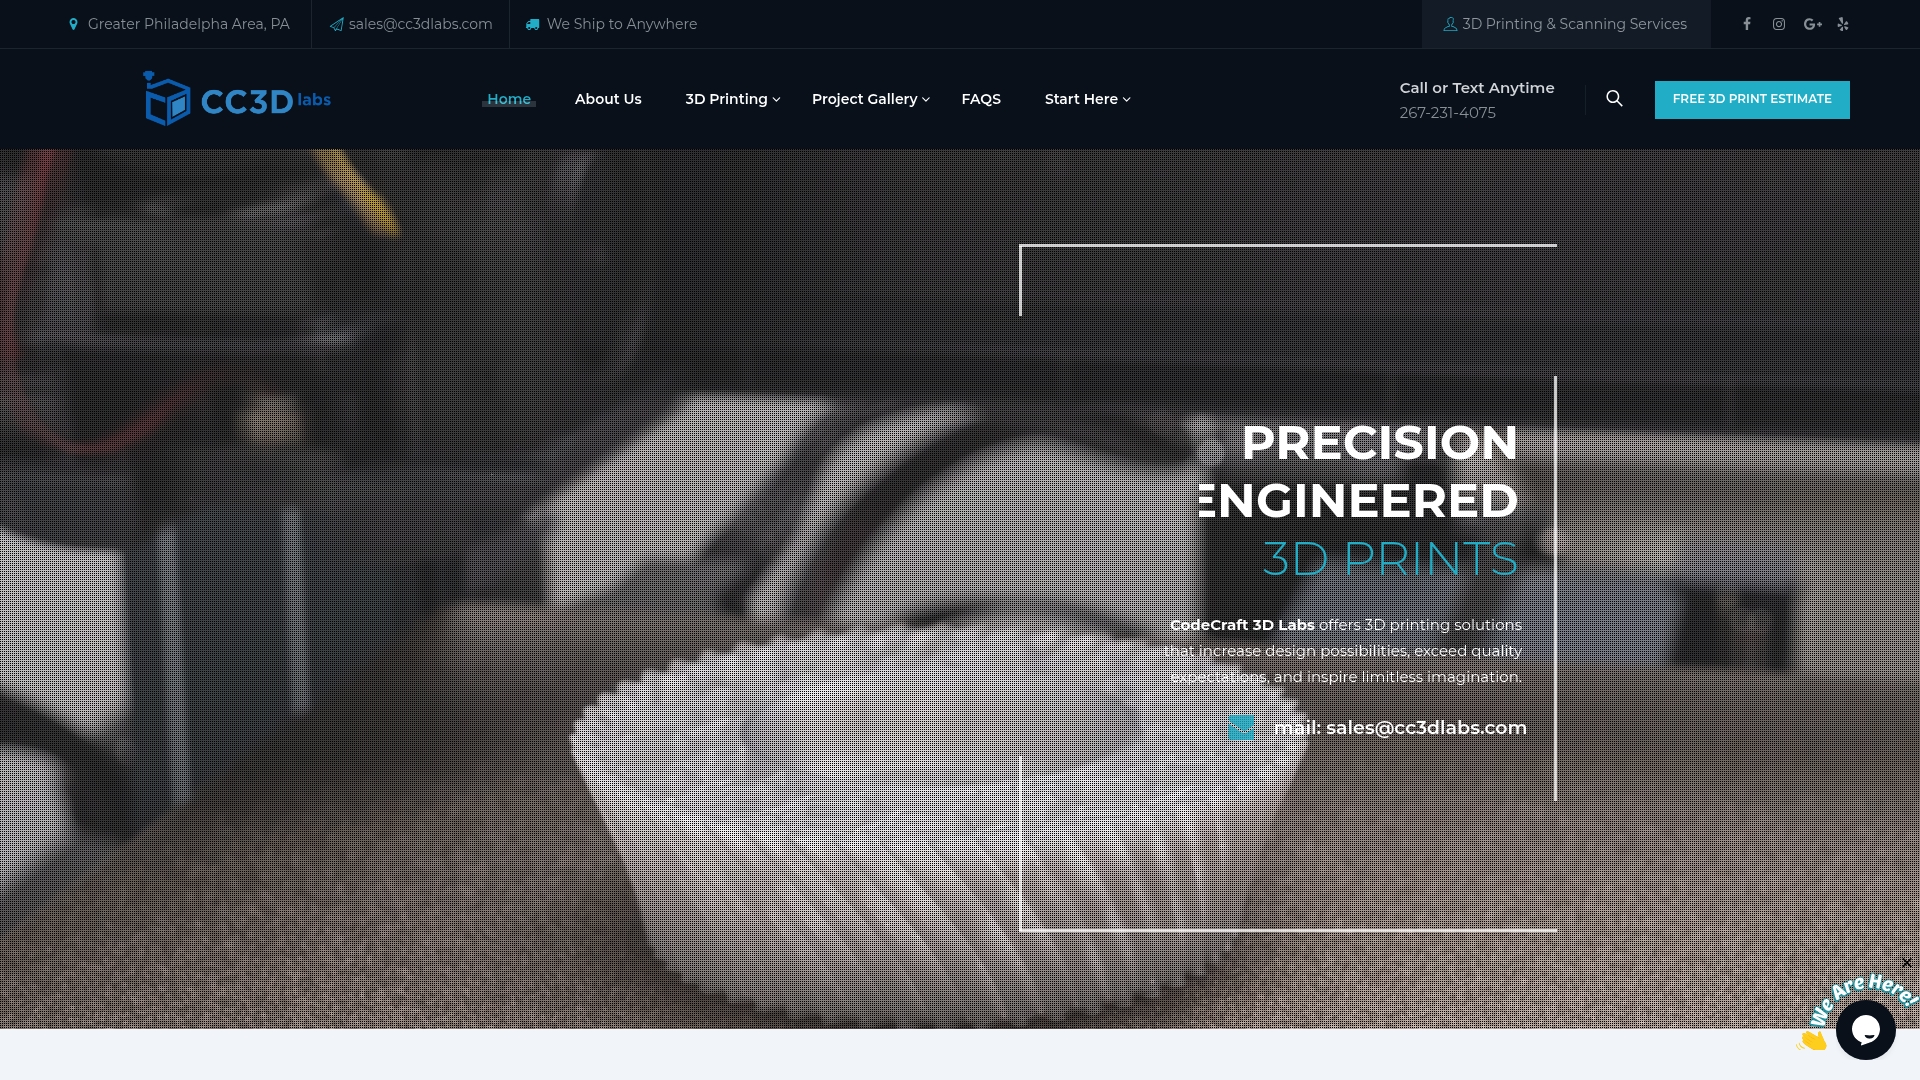
CC 3D Labs

Product Screenshot

At a Glance

CC 3D Labs is the clear top pick for businesses that need high precision 3D printing and metrology grade scanning combined with fast, reliable service. The studio serves the Greater Philadelphia Area and ships globally while keeping turnaround times tight.

Core Features

CC 3D Labs provides custom 3D printing for prototypes, functional parts, and batch production with an emphasis on accuracy and material choice. The team offers 3D modeling and CAD services, metrology grade 3D scanning, and multi color multi material printing across common and specialty filaments.

Pros

  • Wide material selection: The lab supports PLA ABS PETG TPU Nylon Carbon Fiber and specialty filaments like conductive and rubber like materials which expands functional testing options for product developers.

  • Fast local turnaround: Local clients benefit from quick production cycles and pickup options which shortens iteration loops for prototype schedules.

  • High quality assurance: Metrology grade scanning and a detailed project gallery demonstrate a consistent focus on dimensional accuracy and repeatable results.

  • Design support available: In house CAD and 3D modeling services reduce back and forth by aligning parts to manufacturability from the start.

  • Global shipping capability: Businesses outside the region can still access the lab’s services with international shipping and clear communication on logistics.

Who It’s For

This service targets businesses product developers and entrepreneurs who require reliable, production ready parts for prototyping and short run manufacturing. You should choose CC 3D Labs if you value dimensional accuracy material versatility and a partner that supports design to finished part workflows.

Unique Value Proposition

CC 3D Labs outperforms competitors by combining metrology grade scanning with practical manufacturing skills so you get inspection grade accuracy and parts that function as intended. The lab’s local presence near Philadelphia gives product teams the advantage of quick in person collaboration and faster iteration than most remote only providers. Smart buyers pick CC 3D Labs because the service reduces risk: detailed scanning catches fit issues early, a broad filament roster enables real world material testing, and in house CAD support shortens development cycles. The result is fewer prototype iterations lower development cost and a predictable path from sample to short run production.

Real World Use Case

A local product designer worked with CC 3D Labs to prototype a wearable enclosure using multi material printing for rigid structure and soft seals. The team used metrology scanning to validate tolerances, refined the CAD with on site guidance, and completed a production ready short run within a few weeks.

Pricing

Pricing is not listed on the site; customers request a free quote via the online form or contact the team directly. This model supports tailored pricing for material selection volume and post processing so you pay for what you need rather than a one size fits all rate.

Website: https://cc3dlabs.com

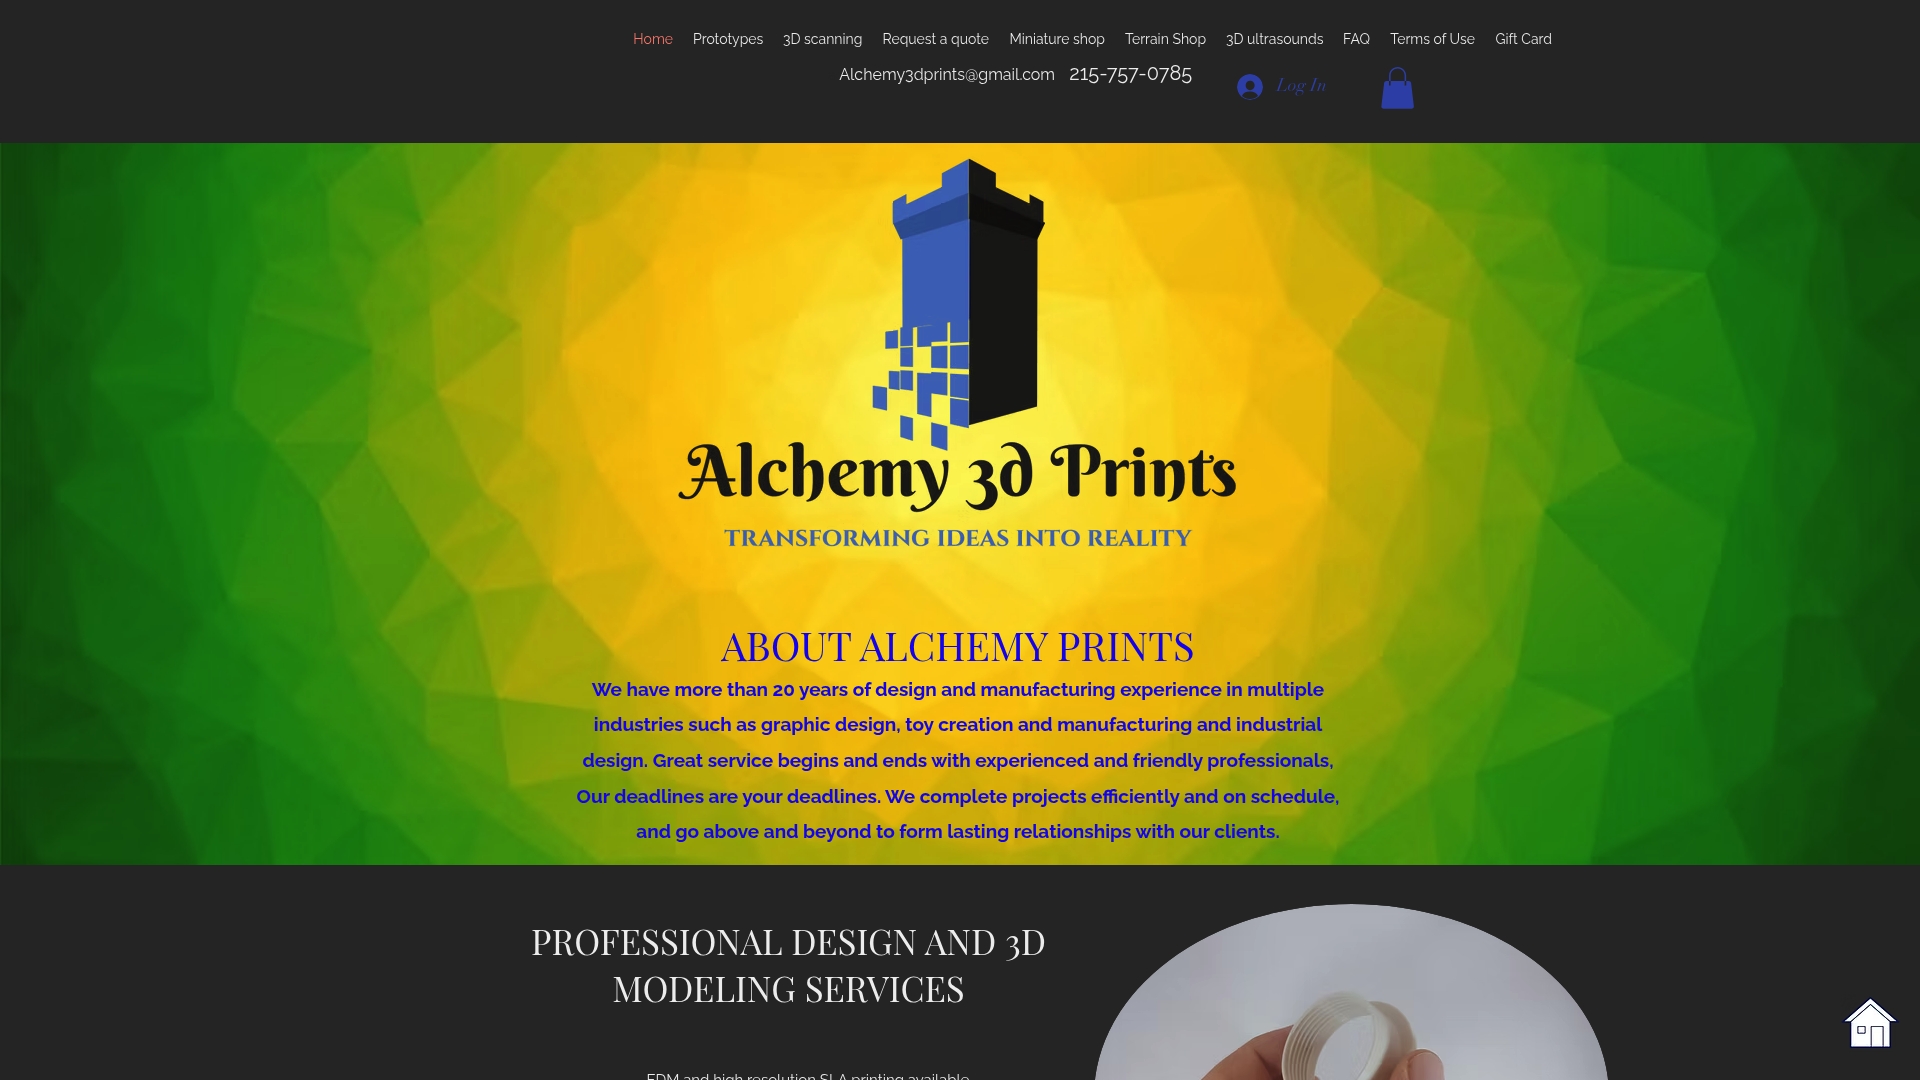
Alchemy3D Prints

Product Screenshot

At a Glance

Alchemy3D Prints brings over 20 years of manufacturing and design experience to prototype and hobby work. Their focus on high resolution SLA and reliable FDM printing makes them a strong partner for businesses that need precise parts and detailed miniatures.

Core Features

Alchemy3D Prints offers both FDM and high resolution SLA printing across a broad material set. Their services include prototypes, miniatures, cosplay accessories, terrain and scenery, plus medical displays and dental applications. The team also provides 3D scanning and modeling to convert paper concepts into production ready digital files.

Quick note. They list materials such as PLA, Nylon, ASA, TPU, PETG, Carbon filament, and resins which supports functional parts and aesthetic pieces.

Pros

  • Seasoned design and manufacturing team: Their 20 plus years of experience delivers practical know how for moving concepts to production ready parts.
  • Wide material and process selection: The combination of FDM and SLA options plus engineering grade filaments allows you to balance strength and surface detail effectively.
  • Strong SLA detail with anti aliasing technology: High resolution resin work produces smooth surfaces and crisp miniature features for collectibles and dental models.
  • Design and modeling support included: They will take paper ideas and produce usable 3D models which reduces your internal design workload.
  • Customer focus and timely professionalism: The service emphasizes customer satisfaction which appeals to businesses needing dependable delivery for prototypes.

Cons

  • No published pricing or turnaround details: The website does not provide exact costs or standard lead times which makes budgeting harder for project managers.
  • Limited pricing structure information: Without tiered options or run quantity pricing on the site you must request quotes for basic cost comparisons.
  • No customer reviews or case studies listed: The absence of documented client results or project examples limits outside validation for risk averse buyers.

Who It’s For

Alchemy3D Prints fits businesses and entrepreneurs that require detailed prototypes, collectible miniatures, or scenic terrain with professional modeling support. Product developers, tabletop game creators, and small medical labs will value the mix of high resolution detail and material versatility.

Unique Value Proposition

Alchemy3D Prints combines long term manufacturing experience with hands on 3D modeling and scanning services. The ability to accept concepts and deliver production ready parts across multiple materials positions them as a one stop partner for prototype to short run production needs.

Real World Use Case

A game developer orders custom terrain and faction miniatures for a new tabletop release. Alchemy3D Prints scans concept sculpts, refines the digital models, and outputs high resolution SLA miniatures alongside durable FDM bases for play testing and early sales kits.

Pricing

Pricing is not specified on the webpage. Quotes are available on request through their contact form which means you will need to submit project specs to get a tailored price and estimated lead time.

Website: https://www.alchemy3dprints.com

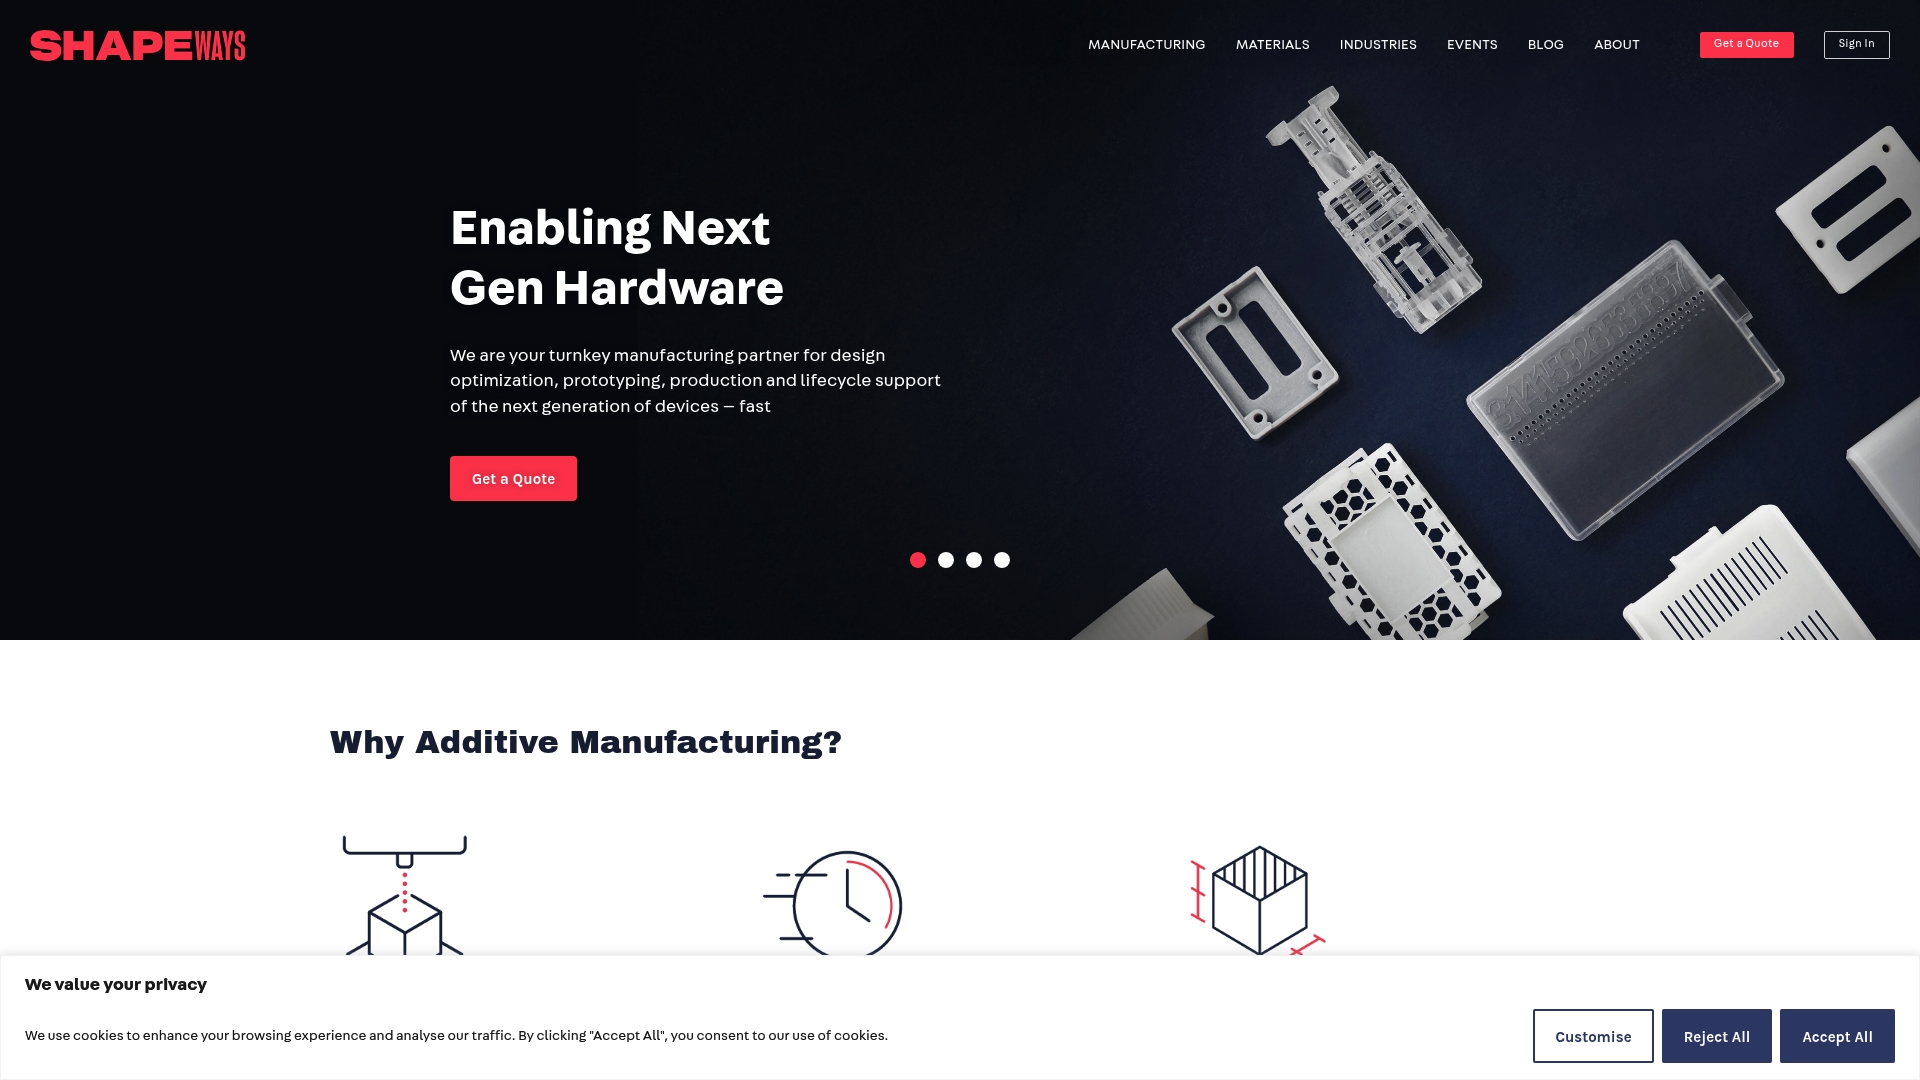
Shapeways

Product Screenshot

At a Glance

Shapeways offers a broad, reliable 3D printing service that supports product development from first prototypes to small to large batch production. The platform emphasizes fast turnaround and access to advanced materials and technologies for designers and manufacturing teams.

Shapeways is a practical choice when you need predictable quality and global logistics without complex procurement steps.

Core Features

Shapeways provides additive manufacturing in over 90 materials and finishes and supports multiple technologies including SLS, SLA, MJF, and FDM. The service includes custom quality checks, finishing options, design and prototyping support, and ecommerce platform integration for sellers.

Developers and product teams can also access API integration for production workflows and online storefronts.

Pros

  • Wide material selection: The platform offers many material and finish choices which helps match mechanical or aesthetic requirements for prototypes and end use parts.
  • Flexible production scale: Shapeways supports small to large volume production without minimum order quantities so you can iterate fast and scale as designs mature.
  • Global shipping network: The company ships worldwide which simplifies logistics for international product launches and distributed manufacturing needs.
  • Technology partnerships: Partnerships with providers such as BASF, HP, and EOS give access to proven industrial processes and material formulations.
  • Additional services: Design, prototyping, and API integration reduce vendor handoffs and shorten time from CAD file to produced part.

Cons

  • Website does not list pricing details which requires you to request a quote before comparing costs for similar projects.
  • Cost estimates and typical turnaround times are not clearly stated on the site which adds uncertainty for tight product timelines.
  • The platform can be complex for first time users and this may increase configuration time for material choices and finishing options.

Who It’s For

Shapeways fits designers, startups, and manufacturing companies that need reliable, high quality prints with options for customization and no minimum order quantity. It is suitable for product teams that value material variety and global fulfillment.

If you are building a product line and need a partner to handle prototyping and low volume production, Shapeways is a strong candidate.

Unique Value Proposition

Shapeways combines broad material access and multiple industrial printing technologies with ecommerce and API connectivity. That mix lets product developers move from prototype to sales channels with fewer vendors and less integration work.

This reduces coordination overhead when you need both manufacturing and online selling in one workflow.

Real World Use Case

A startup creates custom jewelry and uses Shapeways to prototype pieces in different metals and finishes. They then produce small batches for market testing and sell directly through their integrated Shapeways shop, reducing inventory risk and speeding time to market.

Pricing

Pricing varies based on material, geometry, quantity, and finishing options. Customers must request quotes for specific projects to receive accurate pricing and lead time estimates.

Website: https://shapeways.com

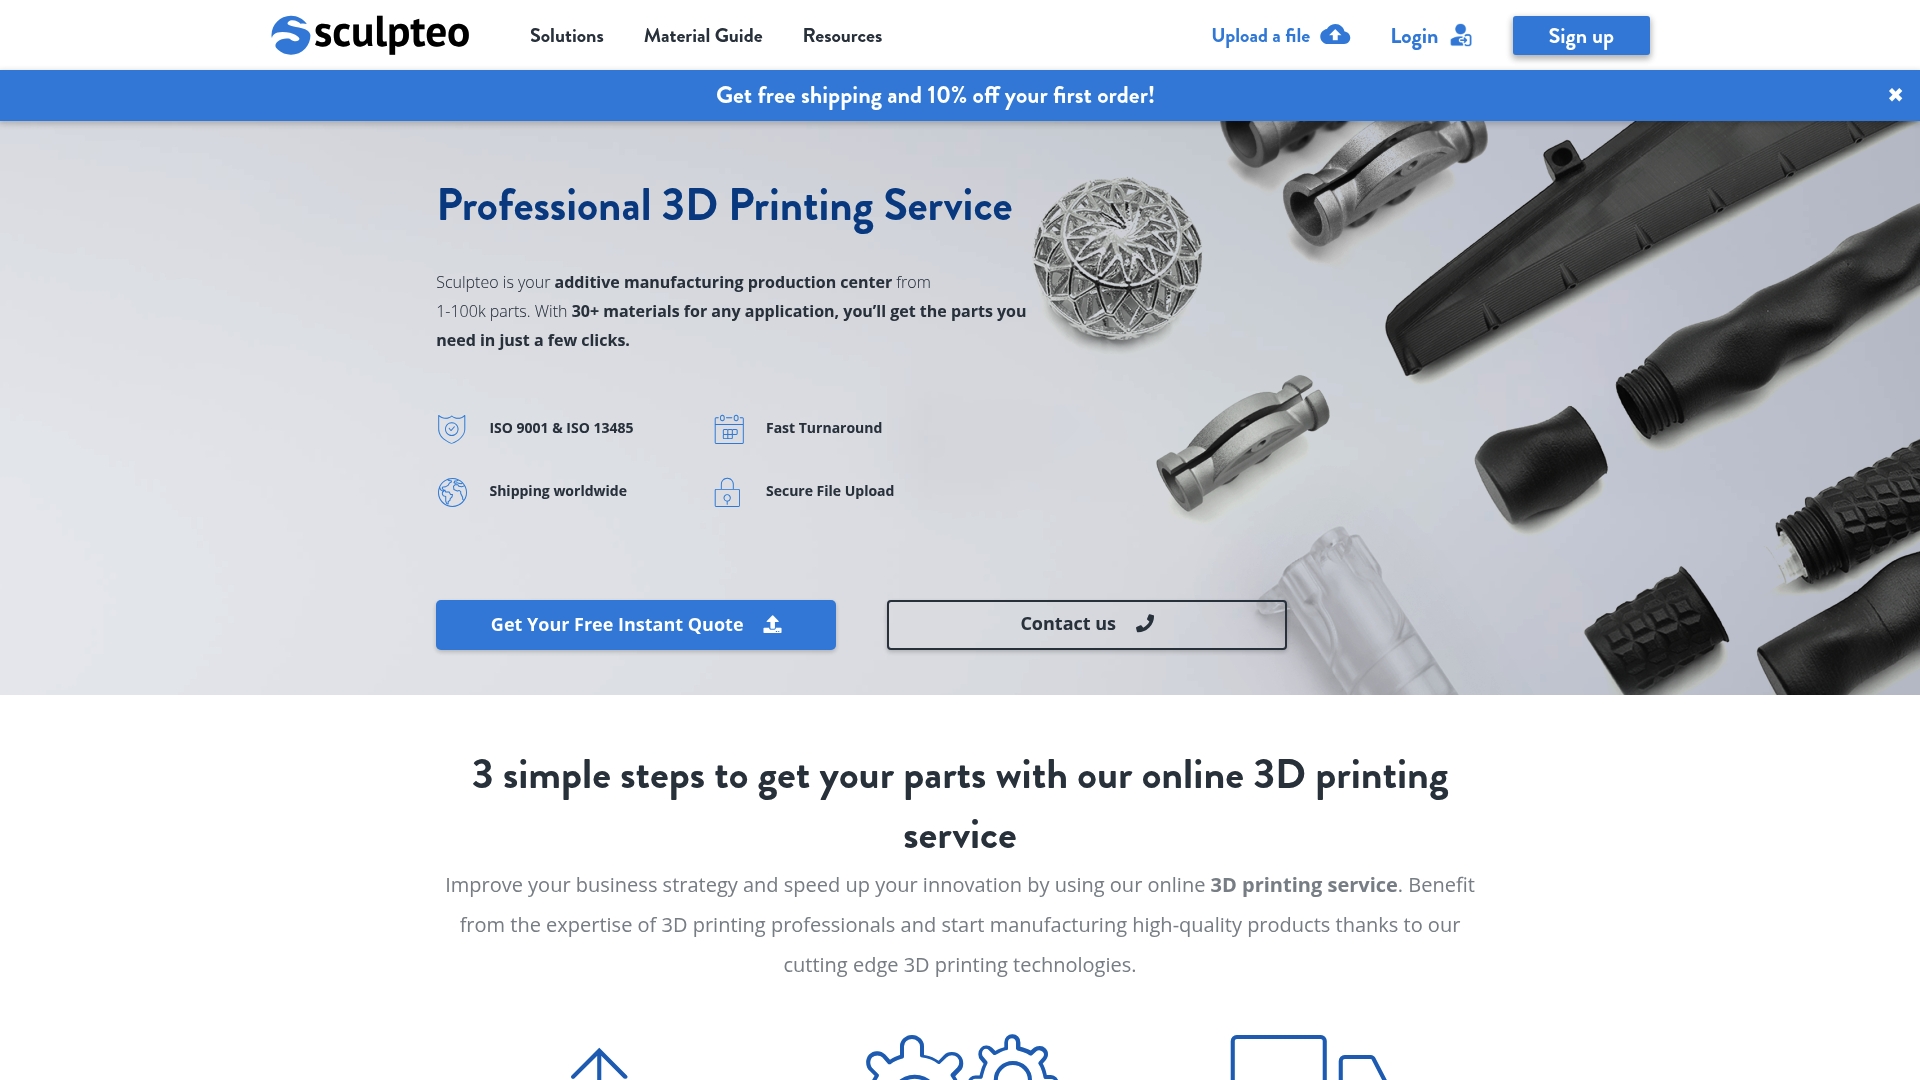
Sculpteo

Product Screenshot

At a Glance

Sculpteo provides professional additive manufacturing services aimed at businesses that need accurate prototypes and low volume production. Their platform combines fast quoting, global shipping, and certified quality controls for industries that demand repeatable results.

Core Features

Sculpteo offers 3D printing and laser cutting across polymers, metals, and resins with configurable finishes for one off prototypes up to larger production runs. The site provides instant online quotes, secure file uploads, expert design support for manufacturability, and operations run in ISO 9001 and ISO 13485 certified facilities.

Pros

  • Fast turnaround times: The service emphasizes speed so you can move from CAD to physical parts quickly when schedules are tight.

  • Large variety of materials and finishes: A broad material catalog lets you choose polymers, metals, or resins to match mechanical or aesthetic requirements.

  • Global shipping and flexible order sizes: You can order single prototypes or small to medium series and ship them worldwide for distributed development teams.

  • User friendly online platform with instant quotes: The instant quoting workflow reduces procurement friction for engineers and product managers.

  • Certified quality standards: ISO certifications reflect documented quality processes that matter for regulated industries like medical and aerospace.

Cons

  • The website interface may feel complex due to dense technical options and documentation which can slow down first time users.

  • Pricing details are not listed directly on the site which means you must upload files and request quotes to get exact costs.

  • The platform is primarily targeted at professional and industrial users which makes it less suitable for casual hobbyists seeking simple consumer grade services.

Who It’s For

Sculpteo fits designers, engineers, and manufacturers who need scalable additive manufacturing across industries such as aerospace, medical, electronics, and luxury goods. It works best for teams that value certified processes and need support for technical parts and small production runs.

Unique Value Proposition

Sculpteo combines an easy digital workflow with certified production facilities so you get predictable quality and technical support in one place. That combination makes the platform practical for regulated projects where traceability, material options, and finish quality directly affect product viability.

Real World Use Case

A jewelry designer uses Sculpteo to produce intricate custom pieces with high resolution polyjet printing for smooth finishes and detailed textures. The result speeds iteration and delivers customer ready prototypes that transition directly to small batch production.

Pricing

Pricing is provided through instant quotes after you upload your design file so project cost is calculated based on material choice, finish, and production volume. This approach gives accurate, job specific pricing rather than flat list rates.

Website: https://sculpteo.com

Comprehensive Comparison of 3D Printing Service Providers

Below is a detailed comparison of the featured 3D printing service providers, highlighting their unique features, customer focus, and applicable use cases.

Provider Core Features Pros Applicable For Website
CC 3D Labs Custom 3D printing with metrology-grade scanning, global shipping. Wide material selection, high quality assurance, design support. Businesses requiring precise manufacturing and an end-to-end partner for design to production. CC 3D Labs
Alchemy3D Prints FDM and SLA printing, detailed resin modeling, and 3D scanning. Highly experienced team, strong SLA resolution, customer-centered approach. Entrepreneurs needing detailed collectibles, prototypes, and practical designs. Alchemy3D Prints
Shapeways Additive manufacturing with 90+ material options, API-friendly platform. Global network, broad customization potential, suitable for scaling production. Development teams seeking flexible production scales and integration with ecommerce systems. Shapeways
Sculpteo ISO-certified facilities offering polymers, resins, and laser cutting. Certified quality assurance, fast response, material and finish diversity. Professionals in regulated industries like aerospace, medical, or luxury needing prototypes. Sculpteo

Discover Precision and Speed Beyond Alchemy3D Prints

If you are searching for a 3D printing partner who values dimensional accuracy, broad material options, and fast turnaround, CC 3D Labs is an ideal choice. Unlike some providers that lack detailed pricing transparency or quick local support, CC 3D Labs excels in metrology-grade scanning, multi-material printing, and in-house CAD services to ensure your prototypes and functional parts meet exact standards. Whether you are developing complex prototypes or need reliable batch production, our expertise streamlines your design to finished part workflow.

https://cc3dlabs.com

Explore how CC 3D Labs can reduce development cost and accelerate your project timeline by visiting our main site. Get a free online estimate today, and take advantage of local pickup options or international shipping to fit your needs. Don’t settle for slower cycles or unclear quotes. Partner with a service that delivers precision and speed for your next prototype or production run.

Frequently Asked Questions

What are the main features to look for in alternatives to Alchemy3D Prints?

To find suitable alternatives, prioritize features like high resolution printing, material variety, and design support. Analyze how these features can improve your project turnaround by evaluating your specific needs and comparing them across platforms.

How can I ensure quality and precision in 3D printing when exploring options?

Check for reviews, quality certifications, and sample outputs from the alternatives you consider. Request prototypes to assess their accuracy and meet your project requirements before committing to larger orders.

What industries benefit the most from using alternatives to Alchemy3D Prints?

Industries such as gaming, medical, and product design greatly benefit from quality 3D printing services. Identify the specific needs of your industry to find the most relevant features in alternative platforms.

Are there specific types of projects that are better suited for certain Alchemy3D Prints alternatives?

Yes, some alternatives may excel in providing services for detailed prototypes while others focus on functional parts. Define the purpose of your project to narrow down to platforms that align best with your needs, such as quick prototyping or high-volume production.

How can I compare pricing structures across different 3D printing services?

Request quotes from each service and break down costs based on material choice and production volume. Creating a comparative spreadsheet can help you visualize which alternatives offer the best value for your project scope.

What steps should I take if I encounter issues during the 3D printing process?

First, reach out to customer support for guidance and troubleshooting steps. Keeping detailed records of your project specifications can facilitate quicker resolutions and improve subsequent dealings with the service.