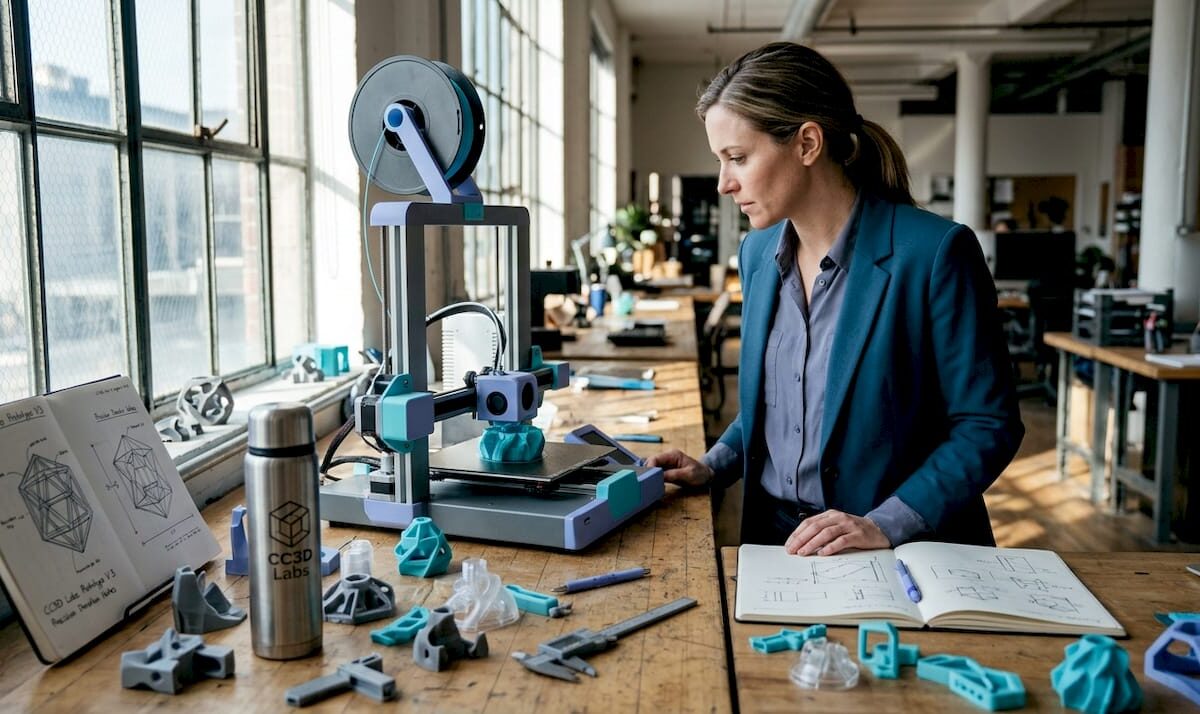
Engineer overseeing 3D prototype printing process

How 3D Printing Accelerates Design for Faster Prototyping


TL;DR:

  • Modern 3D printing reduces prototyping costs by up to 90% and speeds lead times from weeks to days.
  • Rapid iteration with 3D printing enables early testing, reduces risks, and improves team communication.
  • Combining in-house and outsourced 3D printing strategies enhances design flexibility and functional quality.

Prototyping has a reputation problem. Most engineers still think of it as the slow, expensive phase where momentum dies and budgets bleed out. But that assumption belongs to a different era. Modern 3D printing has rewritten the math entirely, cutting prototype costs by 50-90% compared to traditional CNC machining and collapsing lead times from weeks down to a matter of days. This article breaks down the real mechanics behind that shift, how to apply it across your workflow, and where most product teams still leave speed and money on the table.

Table of Contents

Key Takeaways

Point Details
Speed up prototyping 3D printing reduces prototype lead times from weeks to days for faster feedback.
Cut iteration costs Switching to 3D printing can slash per-iteration costs by up to 90%.
Choose the right workflow Hybrid workflows leverage both rapid 3D printing and validation with traditional techniques for optimal results.
Validate early and often Regular testing and empirical tolerance checks ensure functional and reliable designs using 3D printing.
Material matters Selecting the correct material and process is essential for turning prototypes into production-ready parts.

How 3D printing transforms the speed of design

Speed in prototyping used to mean cutting corners. With 3D printing, it means eliminating the steps that never added value in the first place.

Traditional manufacturing requires tooling. Before a single part can be made, molds need to be designed, machined, and tested. That process alone can take two to four weeks and cost thousands of dollars before a designer even holds a physical prototype. Then if the design has a flaw, the process starts over. 3D printing removes that entire layer. Once your CAD file is ready, the printer starts. No molds, no setups, no waiting on a machine shop.

The empirical data backs this up clearly. Industry benchmarks show a 63% average lead time reduction from Wohlers Associates, a 70% cut in iteration costs documented by PwC, and Ford Motor Company reporting a 90% reduction in the time needed to produce physical models for new vehicle components. These are not outliers. They reflect what well-integrated 3D printing looks like across industries.

The industries feeling this most sharply include automotive, consumer electronics, medical devices, and aerospace, where rapid design cycles directly determine whether a product reaches market ahead of competition or behind it. Consumer product teams that once needed three weeks per prototype iteration now run through four or five cycles in the same time window.

Below is a quick snapshot of what the before and after looks like for a typical product team:

Metric Traditional process With 3D printing
Prototype lead time 2 to 6 weeks 1 to 5 days
Cost per prototype $2,000 to $10,000+ $50 to $500
Iteration cycles per month 1 to 2 6 to 10
Design change turnaround 2 to 3 weeks Same day to 48 hours
Tooling cost $5,000 to $50,000 None

Key advantages that drive these numbers include:

  • No tooling or setup costs between design changes
  • Files go straight from CAD to build platform
  • Multiple design variants can print simultaneously overnight
  • Complex geometries print without additional cost or machining complexity
  • Short runs and one-off parts are economically viable

If you want a structured look at how this fits into a full product development strategy, the rapid prototyping guide covers the foundational principles in depth. For teams that need parts fast without sacrificing quality, fast turnaround 3D printing is the practical application of these principles. External manufacturing cost-saving methods also show how 3D printing fits into broader efficiency strategies beyond just prototyping.

The design iteration advantage: Rapid cycles and instant feedback

After seeing how the numbers measure up, it is important to understand how this process transforms the workflow of real product development teams, especially when fast, iterative changes are on the line.

The single biggest workflow change 3D printing delivers is not speed. It is the freedom to be wrong earlier and more cheaply. When a prototype costs $8,000 and takes four weeks, teams hedge their bets. They over-engineer designs on paper, delay physical testing, and often discover fundamental flaws only after significant resources are committed. When a prototype costs $80 and takes 24 hours, the psychology shifts completely. Testing becomes routine rather than a milestone.

Consider a typical day in the life of a design team using 3D printing compared to one relying on traditional methods:

  1. Morning design review. The team identifies a clearance issue in the assembly fit from yesterday’s print. A designer opens the CAD file and adjusts the tolerance by 0.3mm.
  2. File prep and submission. The updated file is sliced, reviewed for printability issues, and sent to the printer by 10 AM.
  3. Print runs during the day. The printer runs unattended while the team works on other components or adjacent design problems.
  4. Afternoon evaluation. The new part is ready by mid-afternoon. The team fits it into the assembly, confirms the fix works, and identifies the next issue to address.
  5. Overnight print queued. A further refined version, incorporating all of today’s findings, is queued to run overnight.
  6. Next morning. The team arrives to a finished part and repeats the cycle.

Without 3D printing, step one would trigger a new quote request, a lead time negotiation, and a wait period measured in weeks rather than hours. The cost gap between methods is equally stark: traditional CNC prototyping can cost 5 to 20 times more per iteration, which limits how many cycles a team can run within a fixed budget.

Here is a direct comparison of iteration cycles:

Factor Without 3D printing With 3D printing
Change to physical part 2 to 4 weeks 1 to 48 hours
Cost per iteration $1,000 to $10,000+ $20 to $300
Risk of catching flaws late High Low
Team feedback loops Monthly Daily
Cross-functional testing speed Slow Fast

Pro Tip: Use in-house desktop FDM (Fused Deposition Modeling) or SLA (Stereolithography) printers for rapid, low-risk design iterations on geometry and fit. Reserve outsourced SLS (Selective Laser Sintering) or DMLS (Direct Metal Laser Sintering) for functional prototypes that need near-production material properties. The cost difference is significant and the distinction saves time where it matters most.

For teams who want to build physically reliable parts from the start, designing for reliable 3D prototypes is the right starting point before any iteration cycle begins.

Integrating 3D printing with traditional manufacturing

Now that rapid iteration is clear, the crucial question for engineers is how and when 3D printing best fits into the broader manufacturing toolbox.

3D printing is not a replacement for every manufacturing process. It is a precision tool for specific phases and applications, and misapplying it creates its own set of problems. The teams that get the most value are the ones who know exactly when to use it and when to hand off to traditional methods.

Hybrid strategies represent the most effective approach: use 3D printing for early concepts, design exploration, and complex geometries, then transition to CNC machining or injection molding for validation, durability testing, and production-scale parts. This approach captures speed in the phase where speed matters most, without sacrificing the material strength and tolerances that validated production parts require.
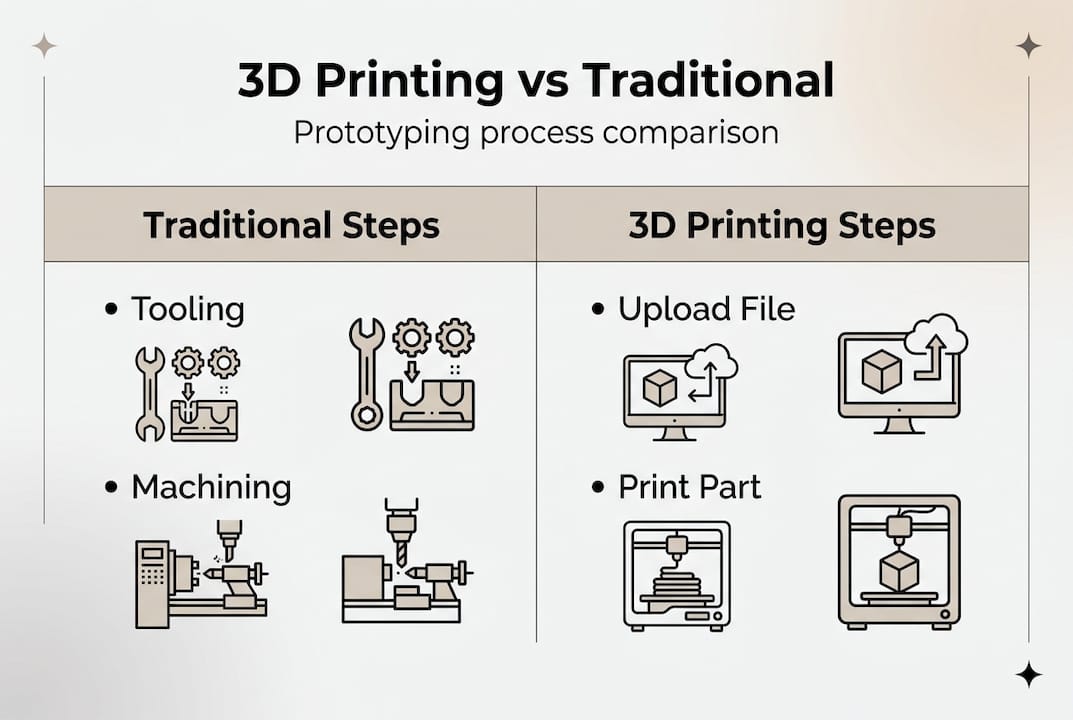
Infographic comparing 3D printing and traditional prototyping steps

Here is a practical breakdown of when to choose each approach:

Use 3D printing when:

  • You need a physical prototype within 24 to 72 hours
  • The geometry is too complex for traditional machining
  • You are running low-volume custom parts (under 100 units)
  • You need to test form, fit, or basic function before committing to tooling
  • Design is still in flux and changes are expected

Use CNC machining or injection molding when:

  • You need tight tolerances under 0.05mm for functional assemblies
  • Parts must withstand high mechanical loads or thermal stress
  • You are producing more than 500 units of the same design
  • Surface finish requirements exceed what FDM or SLA can deliver
  • Material certification is required (aerospace, medical implants)

Pro Tip: Build a deliberate handoff point into your development process. Define upfront which prototype generation marks the transition from 3D printing to traditional manufacturing. Many teams delay this handoff too long, running 3D printed parts through stress tests that expose limitations of the process rather than the design.

Always validate tolerances empirically before assuming a design is production-ready. No simulation and no print specification replaces a physical measurement on a calibrated instrument.

Teams looking to apply these principles at low volume will find low-volume 3D printing tips directly useful, while manufacturing-grade 3D printing covers what it takes to push printed parts closer to production quality. The production optimization guide offers complementary strategies for integrating additive methods across the broader manufacturing pipeline.

Maximizing reliability: Print accuracy, material selection, and quality control

To unlock the full potential of 3D printing within your workflow, reliability and quality must be part of every step, not an afterthought after the print is done.

Material selection is the first decision that determines whether a printed part performs or fails. PLA (Polylactic Acid) is fine for concept models and visual prototypes where loads are minimal. PETG (Polyethylene Terephthalate Glycol) brings better impact resistance and heat tolerance, making it suitable for light functional parts. ASA and ABS handle UV exposure and higher temperatures. For truly functional parts requiring near-engineering-grade properties, Nylon, Polycarbonate, or composite filaments with carbon fiber or glass fill are the right materials. Metal printing via DMLS delivers the closest properties to machined metal, but at a significantly higher cost per part.
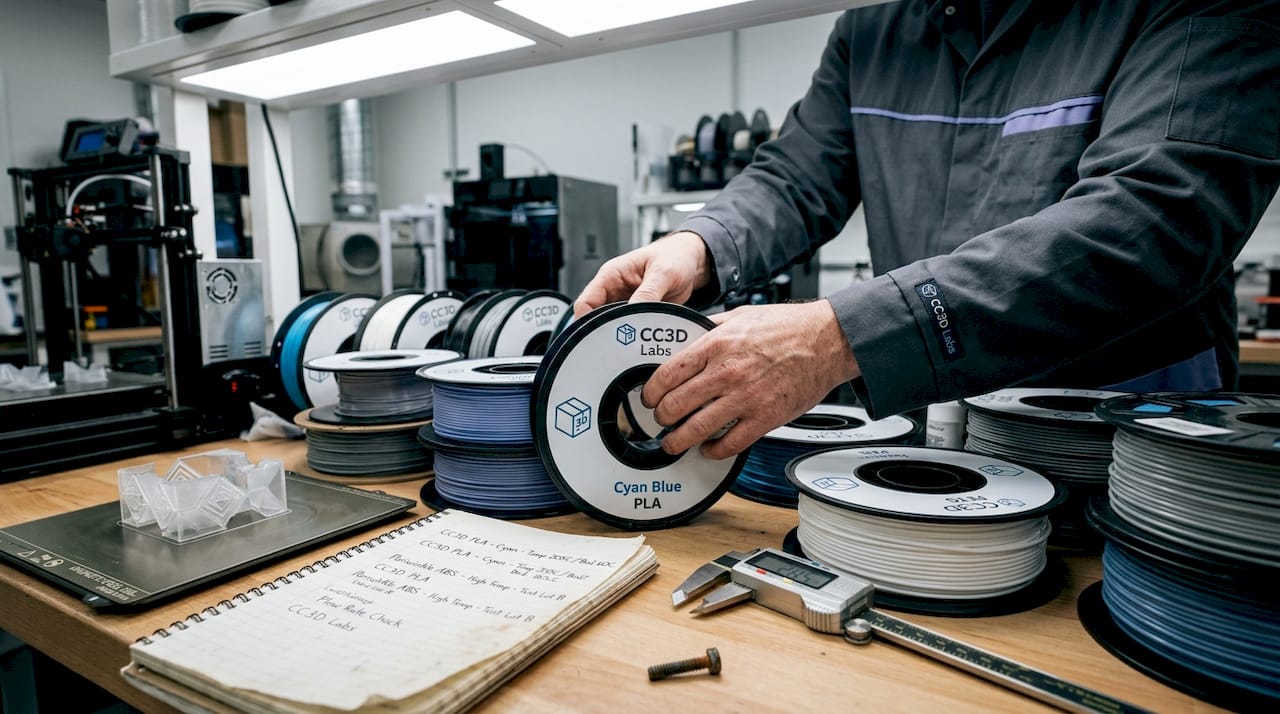
Lab specialist handling various 3D print filaments

Accuracy requires attention at the design stage, not just the print stage. Wall thickness, support structures, bridging distances, and orientation all affect dimensional accuracy. A part that looks perfect in CAD can print with 0.5mm of warp if support strategy and material shrinkage are not factored in before slicing.

Empirical validation of tolerances is non-negotiable, particularly for assemblies with mating parts. Prioritize in-house FDM or SLA for iterative design work, and outsource SLS or DMLS when functional prototypes demand tighter tolerances and superior surface quality.

Follow these steps to ensure your printed parts are reliable before scaling up:

  1. Define the functional requirements first. Determine what loads, temperatures, and fits the part must survive before selecting a material or process.
  2. Design for printability. Review wall thickness minimums, avoid unsupported overhangs beyond 45 degrees, and design in clearance where mating parts will interface.
  3. Validate the print setup. Run a test print of a critical feature or cross-section before committing to a full build.
  4. Measure, not just visually inspect. Use calipers or a CMM (Coordinate Measuring Machine) to verify critical dimensions against your CAD model.
  5. Test under real conditions. Fit the part into its assembly, apply representative loads, and confirm behavior before declaring the design ready for the next phase.
  6. Document what worked. Record print settings, material lot, and measured results so you can reproduce the outcome reliably for future builds.

Pro Tip: Never skip design validation before scaling up production quantities. A single print defect that passes visual inspection can become a systematic failure across a batch of 200 parts. Measure first, scale second.

For more on the variables that affect dimensional output, print accuracy for prototyping is a detailed resource on what to control and how.

Why most teams underestimate the true impact of 3D printing

Here is an observation worth sharing directly: most conversations about 3D printing in product development focus on speed and cost savings, as they should. But those are just the most visible benefits. The less obvious and arguably more important impact is what 3D printing does to how teams communicate and make decisions.

When you put a physical prototype on a table during a cross-functional review, something changes. Marketing, manufacturing, QA, and leadership all engage differently with a real object than with a render or a drawing. Feedback becomes concrete. Objections get raised earlier. The kinds of misunderstandings that survive three rounds of 2D documentation rarely survive five minutes with a physical model.

The teams that get the most from 3D printing are not necessarily the ones with the most advanced printers. They are the ones who have built a culture where physical prototyping is routine and expected at every stage of design. They use what their 3D printer can produce not just to test parts but to communicate intent, to challenge assumptions, and to filter out costly mistakes before tooling and capital are on the line.

The conventional framing treats 3D printing as a cost center to be optimized. The more accurate framing treats it as a risk management tool that pays for itself by catching problems at the cheapest possible moment in the development cycle. A $150 print that exposes a fundamental design flaw is worth more than a $15,000 tooling revision that fixes the same problem six months later.

Hybrid approaches, combining desktop FDM or SLA in-house with outsourced SLS or DMLS for functional builds, consistently outperform single-method strategies. But even the best hybrid strategy delivers only part of its potential if the human element is missing. Designer intuition, shop floor experience, and direct stakeholder feedback are not replaced by technology. They are amplified by it.

Accelerate your next design project with expert 3D solutions

Understanding the principles is only the first step. Putting them into practice with the right equipment, materials, and process expertise is where results actually show up.

https://cc3dlabs.com

CC 3D Labs near Philadelphia offers professional 3D printing services built specifically for product developers and engineering teams who need reliable, high-quality results under real project timelines. Whether you need a single concept prototype or a batch of functional parts, the 3D printing on demand service gets your design from file to physical part fast. If you are still scoping what is possible, exploring 3D printing applications shows the full range of what modern filament-based printing can produce for functional, production-grade, and custom needs. Request a free estimate and move your design forward.

Frequently asked questions

How much faster can iterative design cycles be with 3D printing?

Lead times for prototypes can drop from several weeks to as little as 1 to 5 days, enabling up to 63% faster average cycles across the product development process.

Is 3D printing better than CNC machining for all types of parts?

3D printing is the stronger choice for early prototypes and complex geometries, but CNC is preferred for high-strength requirements, tight tolerances, and validated production parts where material properties are critical.

What is the main limitation of using 3D printing in product design?

Material strength and surface finish can lag behind traditional manufacturing, which is why empirical validation of tolerances is essential before any functional prototype moves into production consideration.

Should startups buy a 3D printer or outsource their prototyping?

In-house desktop printers handle rapid, low-cost design iterations well, but outsourcing SLS or DMLS delivers better results for functional, high-precision prototypes that need near-production material performance.
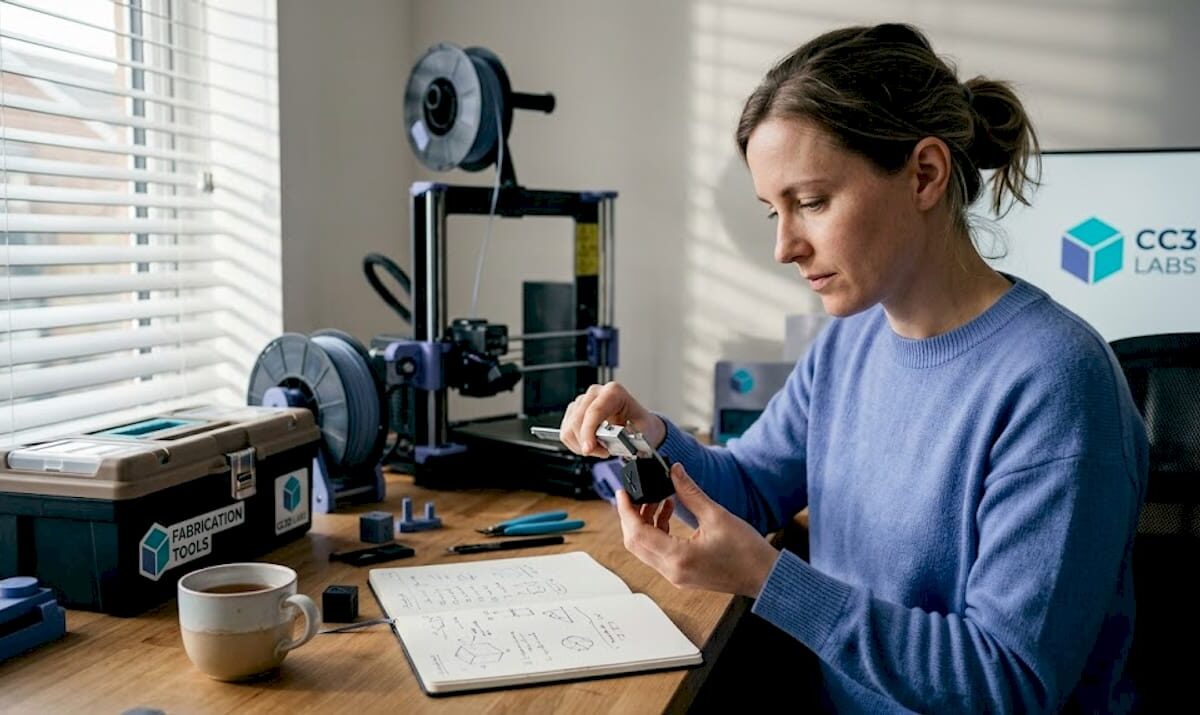
Person measuring 3D print at a tidy workbench

Ensure 3D print accuracy: step-by-step guide for reliable results


TL;DR:

  • Achieving precise 3D prints relies on proper hardware calibration, environment control, and process documentation.
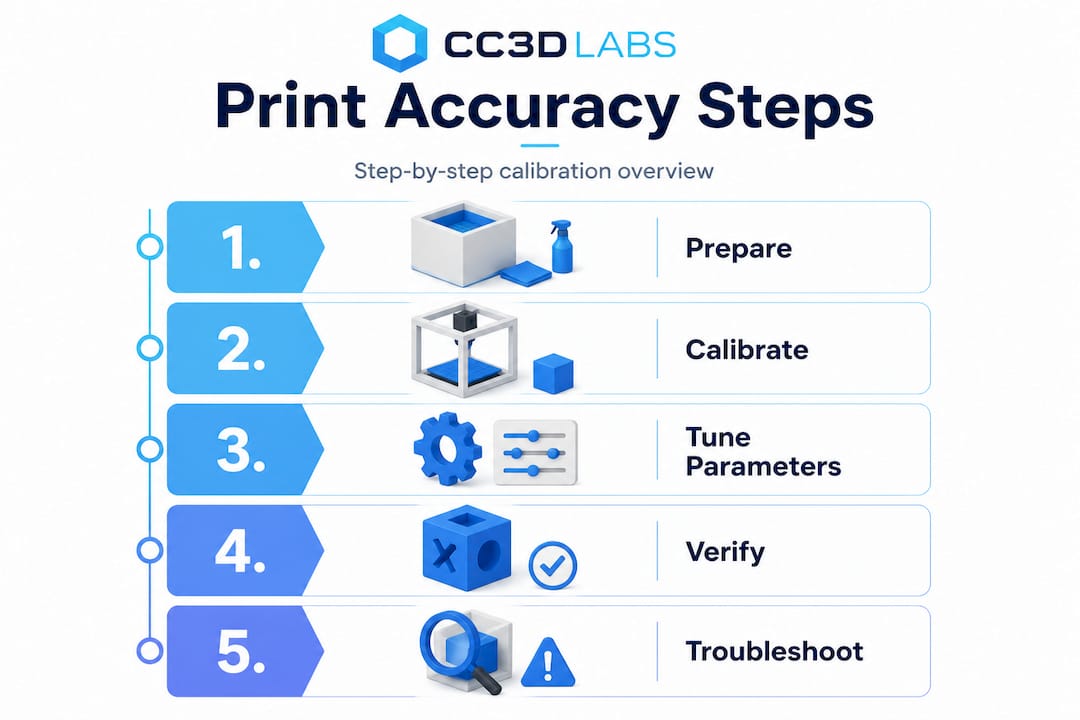
  • Follow a systematic calibration sequence: E-steps, flow rate, temperature, XY compensation, then verify with a calibration cube.
  • Consistent accuracy requires rigorous QC, documentation, and functional testing rather than solely relying on test models.

A single millimeter of dimensional error can turn a promising prototype into a costly restart. For product developers and small manufacturers, a bracket that doesn’t seat properly, a housing that won’t close, or a functional part that binds under load isn’t just frustrating — it’s a schedule killer. The good news is that most accuracy failures in FDM 3D printing trace back to a handful of fixable root causes: uncalibrated hardware, poorly chosen parameters, and skipped verification steps. Work through those systematically, and you can hit repeatable tolerances that actually serve your design intent.

Table of Contents

Key Takeaways

Point Details
Preparation is key Gather the right tools, environment, and expectations to set the stage for print accuracy.
Follow calibration order Calibrate extruder steps, flow rate, and temperature in sequence for the most consistent results.
Tweak parameters wisely Adjust speed, temperature, and layer height according to your printer and project needs.
Verify and troubleshoot Always measure finished prints and address issues like shrinkage, over-extrusion, and first layer errors.
Quality control drives consistency Document processes and apply standards for repeatability and reliability in production.

What you need for precise 3D printing

Before diving into specific steps, understand what gear and setup you need for successful, accurate prints. Skipping this foundation is one of the most common reasons teams struggle with dimensional consistency even after hours of calibration work.

Essential hardware and tools:

  • A printer with a rigid frame and quality linear motion components (linear rails improve consistency significantly)
  • Digital calipers accurate to 0.01mm for measuring test prints
  • A feeler gauge set for bed leveling
  • A known-weight filament spool from a reputable supplier
  • Calibration test models (single-wall cubes, calibration towers, XY compensation squares)

Software requirements:

  • A capable slicer such as PrusaSlicer, Cura, or OrcaSlicer with calibration tools built in
  • Firmware that supports input shaping and pressure advance (Klipper or Marlin 2.x)
  • A spreadsheet or calibration log to track every change you make

Your environment matters more than most people expect. Temperature swings in your print space directly affect filament viscosity and cooling behavior, both of which shift your dimensions. Aim for a room temperature between 65°F and 75°F with minimal airflow drafts around the printer. Enclosures help with materials like ABS and Nylon that are sensitive to ambient temperature.

Set realistic expectations based on your hardware. Industry benchmarks show tuned mid-range FDM printers achieve ±0.1–0.2mm, linear rail systems reach ±0.05–0.15mm, and Stratasys industrial FDM systems hold dimensional variation within 2%. Understanding print accuracy basics before you start calibrating helps you avoid chasing tolerances your hardware simply can’t deliver.

Printer type Typical achievable tolerance Best use case
Budget FDM (Cartesian) ±0.2–0.4mm Concept models, non-critical parts
Tuned mid-range FDM ±0.1–0.2mm Functional prototypes, fixtures
Linear rail FDM ±0.05–0.15mm Precision parts, snap fits
Industrial FDM (Stratasys) ±0.05–0.1mm Production-grade components

For manufacturing-grade 3D printing that needs to meet engineering specs, investing in a quality machine and a controlled environment isn’t optional — it’s the baseline.

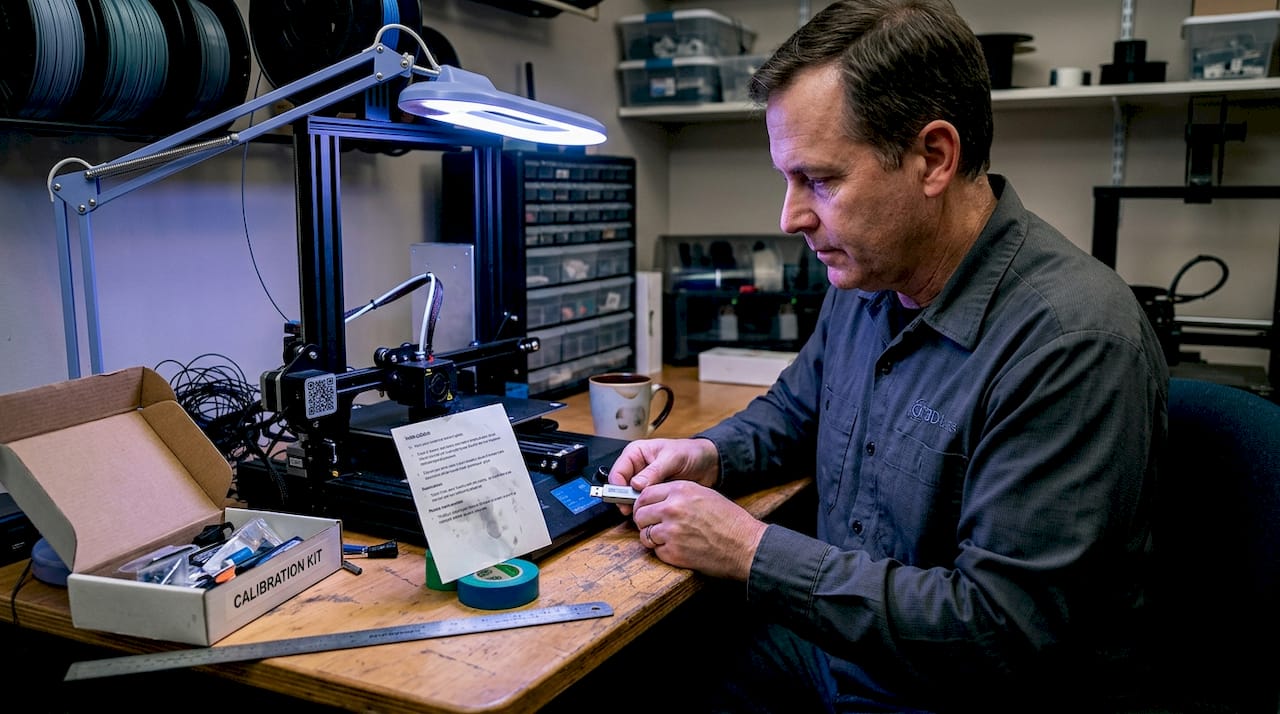
Pro Tip: Keep a dedicated calibration kit in a labeled box next to your printer: a set of calipers, a test print USB or SD card, and a printed log sheet. Calibration done without documentation is just guessing.

Step-by-step calibration for dimensional accuracy

Once you have what you need, follow these concrete steps to calibrate your printer for true dimensional accuracy. The order matters. Skipping ahead or doing steps out of sequence creates compounding errors that are very hard to trace.

The correct calibration sequence is: calibrate extruder E-steps first, then flow rate using a single-wall test, followed by temperature tuning, XY compensation, and finally verify everything with a calibration cube.

Calibration sequence:

  1. Calibrate E-steps. Measure 100mm of filament from the extruder entrance, command the extruder to feed 100mm, and measure what actually moved. Adjust E-steps with the formula: New E-steps = (Current E-steps × 100) ÷ Actual mm fed. This is your foundation. Every other calibration assumes your extruder is delivering accurate filament length.

  2. Tune flow rate with a single-wall test. Print a single-wall box (no infill, no top/bottom layers) and measure wall thickness with calipers. Your measured wall should equal your nozzle diameter. If it reads 0.48mm on a 0.4mm nozzle, reduce flow rate by approximately 17%. The formula: New flow = (Nozzle diameter ÷ Measured wall) × Current flow %. This step catches over-extrusion that inflates all your external dimensions.

  3. Run a temperature tower. Print a temperature tower model and inspect each section for stringing, layer adhesion, and surface quality. Pick the temperature zone that gives the cleanest surface with no stringing. For PLA this is typically 195°C to 215°C, but it varies by brand and color.

  4. Apply XY compensation. Print a calibration square and measure the actual outer dimensions versus the model dimensions. Most slicers let you apply an XY contour compensation value (typically 0.1mm to 0.2mm inward for holes, outward for outer profiles) to correct for systematic over-extrusion on perimeters.

  5. Verify with a calibration cube. Print a 20mm calibration cube and measure all three axes. Your target is within ±0.2mm on a tuned mid-range printer. If Z is off, check your layer height settings and leadscrew pitch.

Calibration step Accuracy impact Difficulty Time required
E-steps Very high Low 10 minutes
Flow rate High Low 20 minutes
Temperature tuning Medium Medium 45 minutes
XY compensation High Low 15 minutes
Calibration cube verify Diagnostic Low 30 minutes

For parts that will be measured against designing reliable prototypes standards, a high quality scan calibration process can validate your physical output against the original CAD geometry, catching errors that calipers alone might miss.

Person calibrating 3D printer with kit and instructions

Pro Tip: Always recalibrate after any maintenance: nozzle swap, belt tension adjustment, or firmware update. What was accurate last week may not be accurate today.

After basic calibration, dial in print parameters for your specific machine and project needs. Calibration sets your baseline, but parameter tuning is where you optimize for the part in front of you.

Research on PLA FDM printing shows that printer-specific optima vary significantly. The Prusa MK4 performs best at lower speeds (20–40mm/s) with a higher nozzle temperature (around 230°C) and small layer heights (0.05mm for fine detail). The LulzBot TAZ Pro handles higher speeds (40–60mm/s) and thicker layers (0.2mm) more effectively. Lower layer heights generally improve XY accuracy by reducing the staircase effect on curved surfaces.

Parameter Prototype run Functional/production part
Print speed 40–60mm/s 20–40mm/s
Layer height 0.15–0.2mm 0.05–0.1mm
Nozzle temperature Manufacturer default Fine-tuned per material batch
Cooling fan 100% 50–80% (material dependent)
Perimeter count 2–3 3–5

Quick tuning tips for production versus prototype runs:

  • For concept prototypes, prioritize speed over fine detail. Use 0.2mm layers and 50mm/s to get a physical model in hand quickly.
  • For functional parts with tight fits, drop to 0.1mm layers and 30mm/s on perimeters. Slow perimeters reduce ringing artifacts that distort edge dimensions.
  • For batch production, lock in a parameter profile and save it as a named preset. Never tweak a production profile mid-run.
  • Use pressure advance (or linear advance in Marlin) to reduce corner bulging, which is one of the most common causes of oversized outer dimensions.
  • Check out this manufacturing optimization checklist for broader process efficiency ideas that complement your print parameter strategy.

For low-volume print tips that balance speed with accuracy, the key is treating each small batch like a mini production run: same parameters, same filament brand, same environment. And if you’re working with specialty materials, our guide to precision with filament printing covers material-specific parameter strategies in detail.

Pro Tip: Document every parameter change per project in a simple spreadsheet. Note the date, filament batch number, temperature, speed, and measured output. Six months from now, when a client reorders, you’ll reproduce the result in one print instead of three.

Verifying accuracy and troubleshooting common issues

Once your parts are printed, verifying their accuracy and resolving any issues should be routine, not an afterthought.

Measuring and verifying part dimensions:

  1. Let parts cool fully before measuring. Warm PLA is slightly flexible and will read smaller than it actually is once rigid.
  2. Use digital calipers for features above 1mm. For bore diameters and precision holes, use a calibrated pin gauge set.
  3. Measure at multiple points on the same feature. A hole that reads 5.00mm at the top may read 4.85mm at the bottom if elephant’s foot is present.
  4. Compare all critical dimensions to your CAD drawing, not just the nominal size. Note deviations by axis and by feature type.
  5. Use PrusaSlicer’s built-in dimensional accuracy test, which includes an XYZ cross gauge with holes to check shrinkage and XY skew simultaneously.

Troubleshooting common accuracy problems:

  • Elephant’s foot: First layer squishes outward by roughly 0.2mm per side. Fix it by increasing the initial layer height slightly or using your slicer’s elephant’s foot compensation setting.
  • Over-extrusion on outer walls: Mimics an E-steps error but is actually a flow rate problem. Calibrate flow first before touching steps/mm.
  • Oversized holes: Apply XY compensation of 0.1 to 0.2mm inward for holes in your slicer. This is separate from your outer profile compensation.
  • XY skew: If your calibration square prints as a parallelogram, use your slicer’s skew correction tool to dial in the actual angle of your motion system.

Material shrinkage matters. PLA shrinks 0.3–0.5% as it cools. For a 100mm part, that’s up to 0.5mm of dimensional loss. Scale your model up by the shrinkage percentage, or use your slicer’s shrinkage compensation field. ABS and Nylon shrink significantly more and require enclosures plus active compensation to hit tight tolerances.

Slicer tools are underused by most teams. PrusaSlicer’s built-in tools include XY skew correction, flow calibration tests, and a dimensional accuracy test model that gives you a complete picture of your printer’s current state in a single print. Run this test after every major calibration session and keep the results in your log.

Vertical flow infographic of 3D print calibration steps

For parts where accuracy is truly non-negotiable, review the critical print accuracy factors that go beyond slicer settings and into design and material choices.

Getting repeatable results: Best practices for production and QC

Beyond a single print, consistent accuracy demands reliable quality control. One good print doesn’t mean your process is stable. Repeatability is what separates a calibrated machine from a production-ready process.

Core best practices for process consistency:

  • Write a one-page print process document for each recurring part: material, brand, profile name, bed surface, and post-processing steps.
  • Tag every batch with the filament lot number. Material properties vary between lots, and tracking this is the fastest way to diagnose unexpected dimensional shifts.
  • Perform a first-article inspection on the first part of every new batch. Measure all critical dimensions before committing the full run.
  • Assign specific operators to specific machines where possible. Operator-to-machine consistency reduces variability significantly.
  • Schedule preventive maintenance on a fixed interval: belt tension, nozzle condition, and bed surface replacement. Don’t wait for failures.

ISO 5725 standards define accuracy as bias (how close to true value) and precision as repeatability and reproducibility across operators and time. Applying this framework to your 3D printing process means you’re not just checking one print — you’re validating that your process delivers consistent results across shifts, machines, and team members.

Post-processing is often the final step to hitting the tightest tolerances. Reaming critical bores to a final diameter, light sanding of mating surfaces, or a quick pass with a file on snap-fit features can take a ±0.2mm printed part to a ±0.05mm functional fit. Plan for this in your design and your schedule.

For teams that need precise estimates for QC planning and budgeting, knowing your expected scrap rate and post-processing time per part is essential for accurate project costing.

Our take: Why print accuracy isn’t just about numbers

Here’s something we’ve seen repeatedly: teams spend hours chasing a perfect calibration cube score, then send a functional bracket to assembly and discover it doesn’t fit the mating part. The cube was perfect. The bracket was wrong. Why? Because dimensional accuracy in isolation doesn’t account for how a part actually functions in context.

The real test of print accuracy is assembly fit and end-use performance, not caliper readings on a test model. A hole that measures 5.02mm on a calibration print may still bind on a 5.0mm shaft because of surface texture, material compliance, or thermal expansion in service. Conversely, a part that reads 0.15mm undersized might assemble perfectly because the mating part has a complementary tolerance.

This is where an application-first mindset pays off. Before you set a dimensional target, ask: what does this part actually need to do? A snap-fit clip needs a specific deflection range, not a specific wall thickness. A bearing housing needs a specific press-fit interference, not a perfect 20mm cube score. Design your verification around the functional requirement, not the geometric ideal.

Teams also tend to measure what’s easy (outer dimensions, wall thickness) and skip what’s hard (hole roundness, flatness, perpendicularity). Those harder-to-measure features are often exactly where assembly problems hide.

Our advice: always review printed parts as part of the design and assembly process. Fit them to their mating components. Test the function. Use calipers as a diagnostic tool, not as the final verdict. And when you’re designing parts for tight tolerances, reliable prototypes by design gives you the framework to build accuracy into your geometry from the start.

Accurate 3D printing starts with the right partner

Precision matters at every stage of product development, from the first prototype to a production batch. If your team is spending more time troubleshooting dimensional errors than iterating on design, the problem might not be your calibration skills — it might be the equipment and process behind your prints.

https://cc3dlabs.com

At CC 3D Labs, we bring calibrated, production-ready 3D printing services to product developers and manufacturers who need parts that are right the first time. Whether you’re producing prototypes and functional parts for fit-and-function testing or running a batch of production components, our quality-controlled process handles the calibration, parameter tuning, and first-article verification so you don’t have to. Get started with on-demand 3D printing and request a free online estimate today.

Frequently asked questions

What is a typical tolerance for high-accuracy FDM 3D printing?

Well-calibrated FDM printers can achieve tolerances of about ±0.1 to ±0.2mm, with advanced linear rail systems reaching as tight as ±0.05mm on a well-maintained machine.

How do I fix oversized holes in my 3D prints?

Apply XY hole compensation of 0.1 to 0.2mm inward in your slicer settings, and always calibrate your flow rate before adjusting steps/mm to avoid compounding errors.

Do layer height and print speed affect dimensional accuracy?

Yes; lower layer heights improve XY accuracy by reducing staircase effects on curved surfaces, while slower perimeter speeds reduce corner bulging that inflates outer dimensions.

Why do my prints measure smaller after cooling?

PLA shrinks 0.3–0.5% as it cools from print temperature to room temperature, so scaling your model up slightly or using your slicer’s shrinkage compensation field corrects for this predictable loss.

How can I verify my 3D printer’s repeatability?

Print calibration parts in batches across multiple sessions, measure all critical dimensions, and evaluate results using ISO 5725 bias and precision criteria to confirm consistency across operators and time.

Designer calibrating desktop 3D printer in studio

Creative 3D printing applications for product developers


TL;DR:

  • 3D printing reduces prototyping lead times by up to 92% and cuts costs significantly.
  • Creative applications across industries drive innovation and demonstrate rapid transition from prototype to production.
  • Understanding print parameters and cross-industry ideas enhances part performance and unlocks new opportunities.

Product developers and small to medium manufacturers are under real pressure. You’re expected to iterate fast, cut costs, and ship innovative products before competitors do. Traditional manufacturing workflows, with their long lead times and expensive tooling, simply can’t keep pace with those demands. 3D printing is changing that equation in ways that go far beyond basic prototyping. From gyroid ceramic fuel cells to surgical training models, the application space is wider and more commercially powerful than most teams realize. This article breaks down how you can translate creative 3D printing strategies into measurable production advantages.

Table of Contents

Key Takeaways

Point Details
Rapid iteration 3D printing dramatically shortens the prototyping cycle, making it possible to iterate designs in hours instead of weeks.
Diverse applications From medical models to high-performance industry parts, creative 3D printing is reshaping what’s possible for product developers.
Parameter-driven quality Print settings such as layer thickness and infill play a critical role in prototype strength, precision, and efficiency.
Scalability potential With proper practices, 3D printing can serve not just for prototyping but also for low-volume and custom production runs.

How 3D printing is transforming product development

Product development at small to medium businesses carries a specific kind of pressure that larger companies rarely feel as sharply. You’re working with tighter budgets, smaller teams, and less tolerance for wasted design iterations. A single wrong turn in tooling can eat weeks and thousands of dollars. That’s exactly where 3D printing earns its place.

The most persistent bottlenecks in SME product development aren’t creativity issues. They’re execution issues. Physical prototypes take too long. Design changes are expensive. Testing cycles stretch project timelines into months. 3D printing addresses all three directly.

The numbers are hard to argue with. Manufacturers using additive manufacturing have seen cost reductions up to 35% and lead times cut by as much as 92%, compressing prototype cycles from weeks into hours. In one heavy machinery case study, companies doubled their prototype speed and cut costs 35% by switching to sand binder jetting for large cast components.

Here’s why that matters for your workflow: when prototyping takes hours instead of weeks, you can test more ideas in a single sprint than you previously could in an entire quarter. That changes the economics of innovation.

Choosing the right process for your application is where many teams stumble. Not every 3D printing technology fits every job:

  • FDM (Fused Deposition Modeling): Best for rapid concept validation, early-stage iteration, and functional prototypes in common thermoplastics. Low cost, widely accessible.
  • SLS (Selective Laser Sintering): Ideal for complex geometries, living hinges, and structural parts that need isotropic properties without support structures.
  • Metal AM (Additive Manufacturing): Best reserved for high-performance parts where topology optimization and weight reduction matter. Think aerospace brackets or load-bearing industrial components.
  • Sand binder jetting: A strong fit for large-format casting patterns in heavy machinery applications.

Knowing your low-volume manufacturing tips before you commit to a process saves significant rework later.

“For SMEs, 3D printing isn’t a replacement for all manufacturing. It’s a precision tool that removes the bottlenecks that slow your best ideas down.” This distinction matters when building your production strategy.

There are real challenges to acknowledge too. A UK study on SME adoption in Greater Manchester identified skills gaps, high energy consumption, and difficulty scaling from prototype to production as the top friction points. The fix isn’t to avoid 3D printing. It’s to build stage-specific support, lean on regional training resources, and use the technology where it genuinely outperforms traditional methods. Your rapid prototyping guide can help you map that out.

Creative 3D printing use cases making an impact

With the core advantages established, the more interesting question is where creative teams are pushing the technology furthest. The answer is consistently: wherever they’re willing to look across industry lines.

Medical and surgical applications offer one of the most striking examples. Surgeons now practice on 3D printed beating heart models before entering the operating room, dramatically reducing procedural risk. The same principle, creating a high-fidelity physical replica for testing before committing to the real thing, applies directly to industrial product development. If a cardiac surgeon can rehearse on a printed model, your engineers can validate assembly sequences on one too.

Engineer examining 3D printed surgical heart model

Energy and advanced materials are another frontier. DTU researchers used Lithoz ceramic 3D printing to build gyroid-structured solid oxide fuel cells (SOFCs) achieving a 1 W/g power-to-weight ratio, five times better than conventional SOFCs. Gyroid geometry, a complex internal lattice that only 3D printing can produce efficiently, is now being explored across thermal management, filtration, and lightweight structural applications.

Precision tech components using PA12 (a nylon-based material) with Multi Jet Fusion (MJF) technology enable teams to go from a one-week prototype to initial production without retooling. That capability alone collapses a step that traditionally costs months.

Here’s a practical overview of where creative applications are delivering results:

Application Industry Material/Process Measurable outcome
Surgical training models Healthcare Ceramic, resin Reduced procedure errors
Gyroid fuel cells Energy Ceramic (Lithoz) 5x power-to-weight ratio
PA12 tech housings Electronics PA12 MJF 1-week proto to production
Sand cast patterns Heavy machinery Sand binder jetting 35% cost reduction
Custom jigs and fixtures General manufacturing FDM PLA/PETG 50%+ tooling time savings
Structural topology parts Aerospace/Industrial Metal AM Weight reduction up to 60%

One consistent pattern across these examples: lead times cut 92% when compared to conventional manufacturing approaches. That’s not incremental. That’s a fundamental change in how quickly your team can move from concept to validated part.

You can see real-world high-quality prototype examples that demonstrate what’s achievable, and review manufacturing-grade applications when you’re ready to take parts beyond the prototype stage.

Pro Tip: Don’t limit your use case research to your own industry. Gyroid geometry came from mathematics, became useful in energy research, and is now finding applications in industrial filtration and heat exchangers. The best ideas rarely start where you expect them to.

Optimizing print quality for advanced applications

Creative use cases only deliver value when the parts actually perform as intended. Print quality isn’t automatic. It’s the result of deliberate parameter choices that you need to understand before your project goes critical.

The relationship between print settings and final part properties is more significant than most product developers expect. Research consistently shows that mechanical properties vary significantly with changes in layer thickness, raster angle, print speed, and infill percentage. Thicker layers can reduce Young’s modulus (a measure of material stiffness) by up to 20%. That’s not a minor aesthetic difference. That’s a structural failure waiting to happen in a load-bearing application.

For strength-critical parts, the optimal FDM settings generally point toward a 0.25mm layer height, a 60-degree raster angle, and 60mm/s print speed. PLA can reach flexural strength of up to 167 MPa at a 0-degree raster angle with 50% infill. These aren’t just interesting numbers. They’re design inputs.

Here’s a reliable process for testing and optimizing your print parameters:

  1. Define your primary requirement first. Strength, flexibility, surface finish, and speed are different goals that require different settings.
  2. Run a Taguchi design of experiments to test multiple variables simultaneously with fewer print cycles. Taguchi method is a structured approach to identifying which variables matter most.
  3. Measure results with ANOVA (Analysis of Variance) to separate real parameter effects from random variation.
  4. Characterize anisotropic properties using DIC and FEM validation, not just standard tensile tests. DIC (Digital Image Correlation) captures how strain distributes across a part in real time.
  5. Adjust for self-supporting geometry to minimize post-processing. Features designed to print without supports save time and reduce surface artifact risk.
  6. Lock in your validated settings as a baseline before scaling to batch runs.
Parameter Strength-focused Speed-focused Cost-focused
Layer height 0.1 to 0.25mm 0.3 to 0.4mm 0.3mm
Infill 50 to 100% 15 to 30% 15 to 20%
Raster angle 0 to 45° 45° 45°
Print speed 40 to 60mm/s 80 to 120mm/s 80mm/s
Shells 4 to 6 2 to 3 2

Pair this optimization workflow with solid upfront design practices. A reliable prototype design process eliminates avoidable reprints and quality issues before they happen. When you’re uncertain about which process fits your goals, working through choosing the right print type for your specific application saves time and material costs.

Pro Tip: Standard tensile tests miss anisotropic behavior in FDM parts, meaning properties that differ by direction. Use DIC combined with FEM simulation to capture how your part will actually perform under real load conditions before it goes into production. This approach is particularly valuable for any part that will experience off-axis loading in the field.

A deep understanding of your filament print optimization settings is one of the highest-value technical skills your development team can build.

Moving from prototype to production with 3D printing

Once you have optimized, validated prototypes in hand, the next question is whether 3D printing can carry you all the way through to production. For an increasing number of applications, the answer is yes.

The traditional assumption is that 3D printing handles prototyping and injection molding handles production. That boundary is eroding fast. The key enabler is process maturity. Technologies like PA12 MJF have reached the repeatability and surface quality thresholds that production demands. PA12 MJF for precise tech components compresses the prototype-to-production window into a single week in the right application context. No tooling changes. No retooling delays. The same process that built your prototype builds your first production batch.

That shift has serious commercial implications. If you’re producing custom parts in volumes under 10,000 units, 3D printing’s unit economics often beat injection molding when you factor in tooling costs and design change penalties. Tooling for injection molding can run $10,000 to $100,000 per mold. 3D printing has no tooling cost at all.

To make the transition from prototype to production work reliably, address these steps in order:

  • Validate dimensional repeatability across at least three print runs before committing to a production schedule.
  • Define finishing specifications for surface texture, color, and post-processing requirements that match your product standard.
  • Audit your CAD file for manufacturability at production volumes, not just at prototype scale.
  • Set tolerance benchmarks and confirm your process holds them consistently across a full build plate.
  • Document your parameter baseline so every production run starts from the same validated settings.
  • Plan for supply chain redundancy if your production schedule depends on a single material or machine type.

“Agile manufacturing isn’t about moving fast and fixing things later. It’s about removing the friction between a validated idea and a shipped product. 3D printing is the most powerful tool we’ve seen for closing that gap.”

Keeping up with 2026 3D printing trends helps you anticipate which new processes are approaching production readiness. And if you’re still mapping out what geometries and materials your workflow can actually handle, reviewing what can be printed on a 3D printer gives you a practical foundation to build from.

The biggest opportunity (and blind spot) in creative 3D printing

Here’s something most product development teams won’t hear from their technology vendors: the biggest gains in creative 3D printing rarely come from pushing your own industry’s applications harder. They come from borrowing ideas from industries you’d never normally monitor.

Gyroid lattice structures were a mathematical curiosity before energy researchers printed them in ceramics. Now they’re appearing in heat exchangers and filtration systems. Surgical training models, pioneered in healthcare, are inspiring fixture design in precision manufacturing. Aerospace topology optimization methods are being applied to consumer product enclosures. None of these transfers happened because someone studied their own field more carefully. They happened because someone looked sideways.

Most SME teams stay firmly in their lane when it comes to benchmarking and inspiration. That’s understandable. You’re busy. But it’s also a significant missed opportunity. A creative breakthrough that costs your competitor six months of R&D might be sitting in a journal from a completely different sector, ready to adapt.

The practical fix is deliberate. Block time each quarter to review additive manufacturing applications from healthcare, aerospace, energy, and consumer electronics. Attend one cross-disciplinary conference or online forum annually. Build a shared inspiration file that your whole team can contribute to.

Start by examining creative use of filament printing across different application contexts. The ideas that will differentiate your next product are probably not in your current industry playbook.

Pro Tip: Set a calendar reminder to review the 3D printing industry press from two or three sectors outside your own once a month. Even 30 minutes of cross-industry reading regularly surfaces ideas that your direct competitors will never see coming.

Power your next breakthrough with expert 3D printing support

Turning these strategies into real parts requires more than ideas. It takes precise execution, material knowledge, and the right equipment working together.

https://cc3dlabs.com

At CC 3D Labs, near Philadelphia, we work with product developers and manufacturers at every stage, from initial concept prints to optimized production batches. Whether you need help dialing in print parameters, scaling validated prototypes, or exploring what’s possible with advanced filament materials, our team brings both technical depth and practical manufacturing experience to your project. Explore our full range of professional 3D printing services, see what’s achievable by browsing printable parts and applications, and get the technical background you need from our detailed prototyping guide. Request a free online estimate and let’s move your next project forward.

Frequently asked questions

What industries can benefit most from creative 3D printing applications?

Healthcare, heavy machinery, electronics, and custom manufacturing all benefit significantly. Specific examples include surgical training models, ceramic fuel cells, and PA12 tech components that move from prototype to production in a single week.

How can 3D printing reduce product development time?

It enables prototyping in hours instead of weeks and makes design changes nearly instant, with lead times cut by 92% compared to traditional manufacturing in documented SME cases.

What print parameters most affect the quality of 3D printed prototypes?

Layer thickness is the most critical factor. Thicker layers reduce Young’s modulus by up to 20%, with raster angle, infill percentage, and print speed also significantly influencing final mechanical properties.

Is 3D printing suitable for full production or just prototyping?

3D printing works well for low-volume production, particularly with technologies like PA12 MJF that deliver the repeatability and surface quality production demands without any tooling investment.

What is the main challenge when scaling 3D printed prototypes to production?

Maintaining consistency, optimizing for manufacturability, and meeting unit cost targets are the primary hurdles. Skills gaps and scalability from prototype to production are the most commonly cited barriers in SME adoption research, addressed best through stage-specific support and process documentation.

Engineer inspecting 3D prototype at workspace

Why quality matters in 3D printing for prototyping


TL;DR:

  • Proper print settings, like raster angle, significantly impact part strength and reliability.
  • High-quality 3D prints enhance prototype performance, surface finish, and business confidence.
  • Investing in precise printing technologies like SLA reduces rework, improves testing, and speeds up development.

A single print setting change can destroy a part before it ever reaches testing. When the raster angle in a PLA or ABS print sits at 90°, flexural strength drops by more than 40%, turning what looks like a solid component into a liability waiting to crack under load. For businesses and product developers, that kind of failure doesn’t just waste filament. It delays launches, burns through revision budgets, and undermines confidence in your entire development process. This article breaks down exactly how quality decisions in 3D printing ripple through your prototype performance, surface finish, and business outcomes, with data to back it up.

Table of Contents

Key Takeaways

Point Details
Print quality drives reliability High-quality prints are essential for functional and durable prototypes that can withstand testing and daily use.
Surface finish affects perception Smooth and precise finishes enhance both the usability and professional appearance of 3D printed parts.
Invest in quality upfront Businesses save time and resources when they prioritize quality from the start rather than fixing issues later.
SLA outperforms FDM for precision For the highest accuracy and best surface finish, SLA printing is preferred, especially for critical business prototypes.

What defines quality in 3D prints

Quality in 3D printing is not a single number on a spec sheet. It’s a combination of measurable parameters that together determine whether a part performs the way your team designed it to perform. Understanding each parameter helps you make smarter decisions before a single layer is printed.

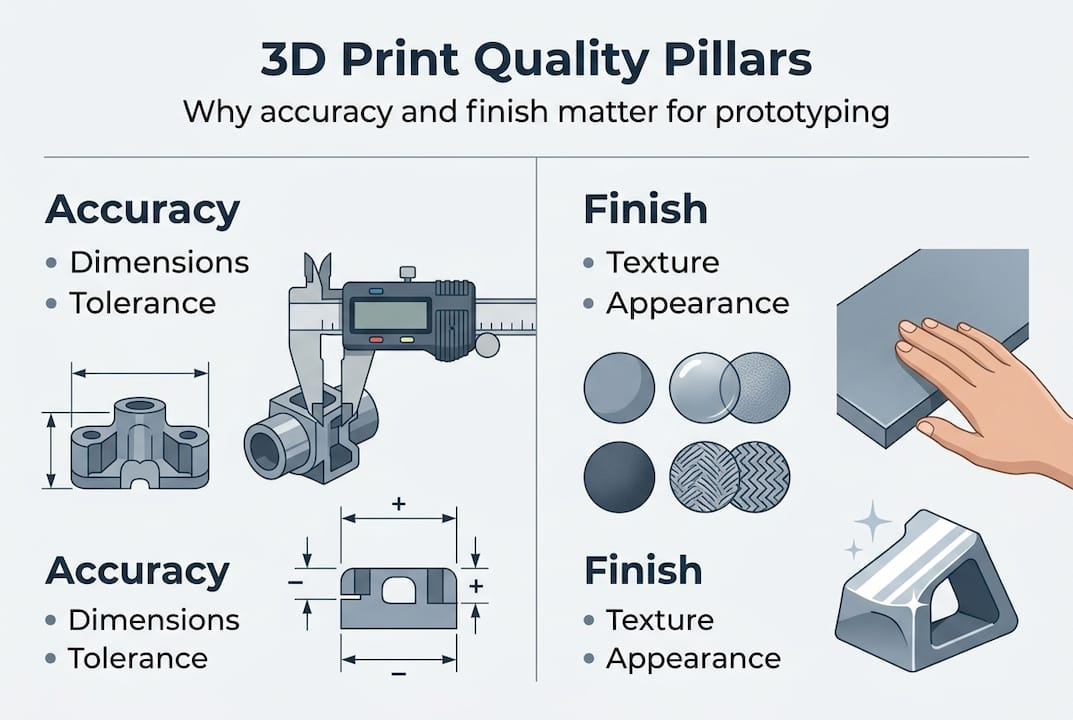
The three pillars that define quality in business and product development contexts are dimensional accuracy, surface finish, and material consistency. Each one affects a different stage of your product cycle.

Infographic shows pillars of 3D print quality

Dimensional accuracy is how closely the printed part matches the intended design. In engineering terms, you’re looking at tolerances, which represent how far off the actual dimensions can be from the CAD model before the part fails its function. For fit-critical assemblies, like snap-fit enclosures or interlocking mechanical components, tolerances tighter than 0.2mm are often essential. Good print accuracy for prototyping depends on machine calibration, material behavior during cooling, and how the model is oriented on the build platform.

Surface finish is measured using roughness average, or Ra, a standard metric that tells you how much texture exists on a part’s surface. A lower Ra value means a smoother surface. SLA printing achieves Ra≈2μm while FDM typically lands between 12 and 13μm, which is a dramatic difference that directly affects how much post-processing you’ll need and whether the part functions correctly in tight assemblies.

Material consistency refers to how uniformly the filament or resin deposits from layer to layer. Inconsistent extrusion creates voids, weak spots, and surface defects that compromise structural integrity. This parameter is often overlooked until a batch of parts fails quality inspection.

Here are the key quality metrics that matter for business applications:

  • Layer adhesion strength: How well each layer bonds to the one below it
  • Warping and dimensional distortion: Especially critical for large flat parts
  • Overhang quality: How well unsupported sections hold their shape
  • Infill density and pattern: Determines internal strength versus weight trade-off
  • Wall thickness consistency: Critical for pressure-bearing or load-bearing components

Different printing technologies deliver dramatically different results across these metrics. FDM (Fused Deposition Modeling) is cost-effective and fast, but its layer-by-layer nature creates visible lines and weaker inter-layer bonds. SLA (Stereolithography) uses UV-cured resin and achieves much finer detail with superior surface finish. For a developer comparing technologies, the right choice comes down to which quality parameters matter most for the specific part. Knowing how to approach designing reliable prints from the start gives your team a significant upstream advantage.

Statistic callout: SLA surface finish (Ra≈2μm) is up to six times smoother than FDM output (Ra≈12–13μm), which can cut post-processing time significantly for parts requiring tight surface tolerances.

How quality affects prototype performance and outcomes

Defining quality parameters is one thing. Seeing how they play out in real prototype testing is where those parameters become urgent business concerns. Poor quality doesn’t just produce ugly parts. It produces parts that fail, and often at the worst possible moment.

Layer delamination, warping, and reduced strength are the most common mechanical failures tied directly to print quality decisions. Layer delamination happens when inter-layer adhesion is insufficient, often due to incorrect print temperatures or poor material selection. Warping occurs when cooling is uneven, causing internal stresses that pull the part away from the build plate. Both failures are preventable with correct settings and experience.

Technician examining failed 3D printed part

The flexural strength data is particularly important for structural components. A raster angle set incorrectly doesn’t just reduce strength by a few percent. It reduces it by more than 40%, which means a part that should handle 500N of force may fail at under 300N. For a prototype going through functional load testing, that’s the difference between a passing result and a catastrophic test failure.

Here’s a side-by-side comparison of how quality levels affect prototype outcomes:

Quality factor High quality print Low quality print
Layer adhesion Strong, consistent bonds Delamination risk under load
Dimensional accuracy Within 0.1–0.2mm May exceed 0.5mm variance
Surface finish Low Ra, minimal post-processing High Ra, extensive sanding needed
Flexural strength Near design specification Up to 40%+ below specification
Iteration cycles Fewer, faster More, slower, costlier

The business implications stack up fast. Each failed prototype test means another round of redesign, reprinting, and retesting. That cycle costs time and budget. For teams working toward a product launch or investor pitch, those delays can shift timelines by weeks or months.

“Quality in prototyping is not just about aesthetics. It’s about whether the part tells you truthful information about your product’s performance. A low-quality prototype gives you unreliable test data, and that’s worse than no prototype at all.”

Here’s a practical workflow for protecting your prototypes from quality-related failures:

  1. Verify material specs before printing. Confirm tensile strength, thermal resistance, and layer bonding characteristics match your application.
  2. Set correct raster angles based on the primary load direction of the part in use.
  3. Run a test print of a small representative section before committing to a full part.
  4. Inspect layer adhesion visually and with a basic flex test before any functional testing begins.
  5. Document print settings so successful configurations can be repeated reliably across batches.

Pro Tip: Before sending any functional prototype for investor review or load testing, always request a layer adhesion check on representative sample sections. This simple step catches the most common failure mode before it costs you a valuable opportunity. Reviewing a quality prototyping guide before your first print run can also flag issues early.

The path to durable prototype parts runs directly through deliberate quality choices at every step of the printing process, not just at the design stage.

Surface finish, aesthetics, and functionality: Why they matter

Surface finish tends to get categorized as a cosmetic concern. That’s a costly mistake. The texture of a printed surface directly affects how parts fit together, how they seal, how they feel in a user’s hand, and how much finishing labor your team needs to invest before a part is usable.

SLA achieves Ra≈2μm versus FDM’s 12–13μm, and that difference translates into real functional consequences. A part with a rougher surface creates more friction in sliding assemblies, requires more adhesive for bonding, and may not pass a sealing test for fluid-carrying components. For injection mold patterns, master models, or display prototypes for investor meetings, surface finish is every bit as critical as dimensional accuracy.

Here’s a practical breakdown of surface finish by application:

Application type Recommended finish (Ra) Best technology
Investor display models Below 4μm SLA or post-processed FDM
Functional mechanical parts 5–10μm FDM with calibrated settings
Mold masters and tooling patterns Below 3μm SLA
Concept models for internal review 10–15μm Standard FDM
End-use consumer products Below 6μm SLA or post-processed FDM

The post-processing question is directly tied to surface finish quality. A part printed with FDM at 12–13μm Ra needs sanding, priming, and sometimes painting before it’s presentable for external stakeholders. Each of those steps adds time and introduces variability. An SLA part with Ra≈2μm may need only a light polish, dramatically reducing prep time and ensuring more consistent results across a batch.

Benefits of prioritizing surface finish in product development:

  • Reduces post-processing labor by minimizing sanding and filling requirements
  • Improves dimensional accuracy of finished parts by removing the need for aggressive material removal
  • Enhances perceived quality during client presentations and investor demos
  • Ensures functional fit for assemblies with tight tolerances
  • Lowers rejection rates in quality inspection

Pro Tip: Match your post-processing approach to the actual intended use of each part. An internal stress-test prototype doesn’t need a mirror finish, but a demo unit going to a potential partner or investor should look production-ready. Planning this distinction upfront saves hours of unnecessary finishing work.

Exploring high-quality filament prototypes gives a clear picture of how far optimized FDM can go when settings and materials are dialed in correctly. For teams starting with FDM who want to maximize surface quality without switching to SLA, a detailed filament printing guide is a practical starting point.

Business case: High-quality 3D printing for innovation and investment

The technical case for quality is clear. But the business case is what drives the decision for most development teams and product managers. High-quality 3D printing isn’t just a production preference. It’s a strategic investment that affects how fast you move, how much you spend, and how convincingly you can present your product to the market.

High-quality prints reduce iteration cycles, produce reliable prototypes for testing and investment pitches, and enable functional end-use parts, with SLA preferred for precision-critical applications despite its higher upfront cost. That last point matters because many teams default to the cheapest option early in development, then discover later that low-quality prototypes generated incorrect test data, leading to design decisions based on flawed information.

The business advantages of committing to quality from the start include:

  • Fewer revision cycles: A prototype that accurately represents the final design reduces the number of iterations needed before production.
  • More reliable test data: Structural tests and fit checks on high-quality parts give you data you can actually trust for engineering decisions.
  • Stronger investor presentations: A professional, precise prototype signals that your team executes at a high level. Investors notice the difference between a rough print and a production-grade model.
  • Faster time-to-market: When prototypes perform correctly the first time, the path from concept to production shortens considerably.
  • Lower total development cost: Spending more on quality upfront consistently costs less than rerunning multiple rounds of low-quality prototype testing.

Statistic callout: Teams that commit to precision prototyping early in product development consistently report fewer total iteration rounds compared to teams that use low-cost, low-quality prints for initial functional testing. The savings compound as the project scales.

The shift toward functional end-use parts printed directly from files is also accelerating. Businesses no longer use 3D printing just for prototypes. They use it for jigs, fixtures, tooling, end-use components, and short-run production. In all of those contexts, quality directly determines whether the part can do its job reliably over time. Understanding what 3D printing can produce in a professional context helps teams identify where precision printing adds the most value in their workflow.

For teams evaluating providers, the ability to find the right print job for your specific application, rather than settling for a one-size-fits-all solution, is what separates effective use of 3D printing from expensive experimentation.

Our take: The hidden risks and rewards of prioritizing 3D print quality

Here’s what years of working with product development teams has made absolutely clear: the teams that cut corners on print quality at the start always end up spending more by the end. Not sometimes. Always. A low-quality prototype doesn’t save money. It delays the moment when you discover what’s actually wrong with your design, and by that point, you’ve already spent weeks moving in the wrong direction.

The more interesting lesson is about when quality matters most. For very early concept models used only for rough spatial visualization, moderate quality is perfectly acceptable. But the moment a prototype enters functional testing, stress analysis, or stakeholder review, quality becomes non-negotiable. A flawed part in an investor meeting doesn’t just lose that meeting. It raises questions about your execution capability that follow your product into future conversations.

Investing in precision from the point where your prototype carries any external weight, whether physical load or professional credibility, is consistently the decision our most successful clients make. And the foundation for that starts at the design stage. Solid reliable prototype design practices, combined with the right printing technology, eliminate most quality problems before they ever reach the printer.

Unlock high-quality 3D printing with CC3DLabs

Knowing the quality standards you need is step one. Finding a partner who can consistently deliver them is step two.

https://cc3dlabs.com

CC3DLabs, based near Philadelphia, specializes in precision professional 3D printing services for businesses, product developers, and engineering teams that cannot afford the cost of poor-quality prints. From on-demand prototypes built to tight tolerances, to batch production of functional parts, every project gets the attention to detail your development timeline depends on. The team also offers CAD support, design review, and multi-material capabilities so your concept doesn’t get lost in translation between file and finished part. Get a free online estimate today and see exactly what your next prototype could look like when quality isn’t a compromise. Ready to explore print capabilities for your project? Start there.

Frequently asked questions

What causes poor quality in 3D printing?

Incorrect print settings, poor material selection, and inadequate layer adhesion are the most common root causes, and any one of them can produce layer delamination, warping, and reduced strength in finished parts. Addressing these factors before printing, not after, is where quality control actually begins.

How does surface finish impact a 3D printed part’s usability?

A smoother surface finish improves functional fit, reduces friction in moving assemblies, and cuts post-processing time significantly. Because SLA achieves Ra≈2μm compared to FDM’s 12–13μm, the technology choice itself is often the biggest lever for surface quality.

Why should businesses invest in high-quality prototypes?

High-quality prototypes produce reliable test data, reduce the total number of revision cycles, and make a far stronger impression in investor and stakeholder settings. Research confirms that high-quality prints reduce iteration cycles and enable functional end-use applications that lower-quality prints simply cannot support.

Which 3D printing technology offers the best quality?

SLA printing consistently delivers the best surface finish and dimensional accuracy for precision prototypes, with Ra values around 2μm compared to FDM’s typical 12–13μm range. The trade-off is higher material and equipment cost, which is why SLA is best reserved for prototypes where surface finish and accuracy directly affect test outcomes or stakeholder presentation.