
TL;DR:
- Multi-color 3D printing involves complex methods with tradeoffs in cost, waste, and reliability.
- Workflow discipline, including filament storage and model preparation, is crucial for success.
- Choosing the right method depends on your project needs, volume, and desired color fidelity.
Multi-color 3D printing looks like a straightforward upgrade. Add more colors, get better prototypes. Done. Except it rarely works that way. The technology that makes your product models pop with realistic branding and vivid detail can also consume up to 50% more raw filament through purging alone, stall your production timeline, and introduce failure risks that only show up halfway through a 14-hour print. For business owners and product developers, understanding the true mechanics and tradeoffs is the difference between a compelling prototype and a costly mistake.
Table of Contents
- What is multi-color 3D printing?
- How multi-color 3D printing works: Key methods compared
- Workflow pitfalls and how to solve them
- Business impact: Choosing the right solution for your product development
- The real cost and opportunity of multi-color 3D printing: A practitioner’s view
- Explore advanced multi-color 3D printing with CC3DLabs
- Frequently asked questions
Key Takeaways
| Point | Details |
|---|---|
| Waste impacts cost | Multi-color 3D printing processes can waste up to 50% more material, raising project expenses. |
| Workflow matters | Using dry filament and well-tuned slicer settings is critical for reliable, high-quality multi-color prints. |
| Tech choice is key | AMS, independent nozzle, and toolhead systems each offer unique tradeoffs for business use. |
| Plan for application | Choose your multi-color method based on your product’s needs, volume, and visual requirements. |
What is multi-color 3D printing?
Once you understand why multi-color prints attract attention, it’s essential to grasp exactly how these technologies work and what sets them apart.
At its core, multi-color 3D printing is the ability to produce a single printed object using two or more filament colors or materials in one print session. Unlike painting or post-processing, the color is built directly into the part during fabrication. That makes it ideal for product logos, realistic concept models, client presentation pieces, and branded components that need to communicate design intent without extra finishing steps.
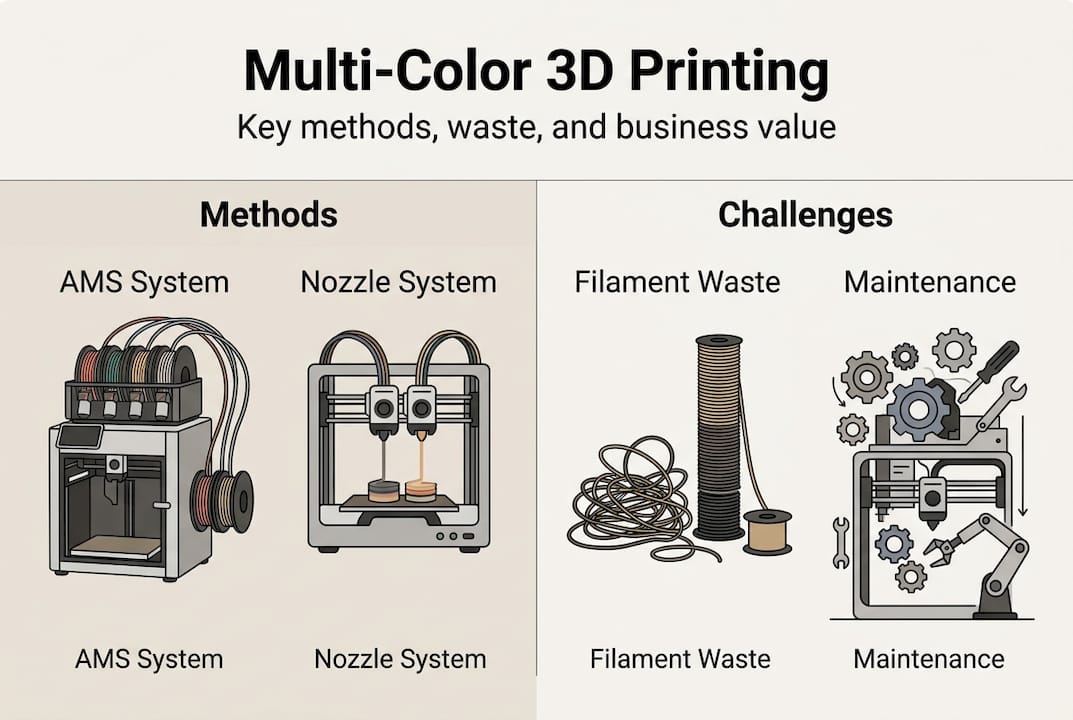
Standard single-extruder printers work with one color of filament from start to finish. Multi-color setups break that constraint. The main approaches include:
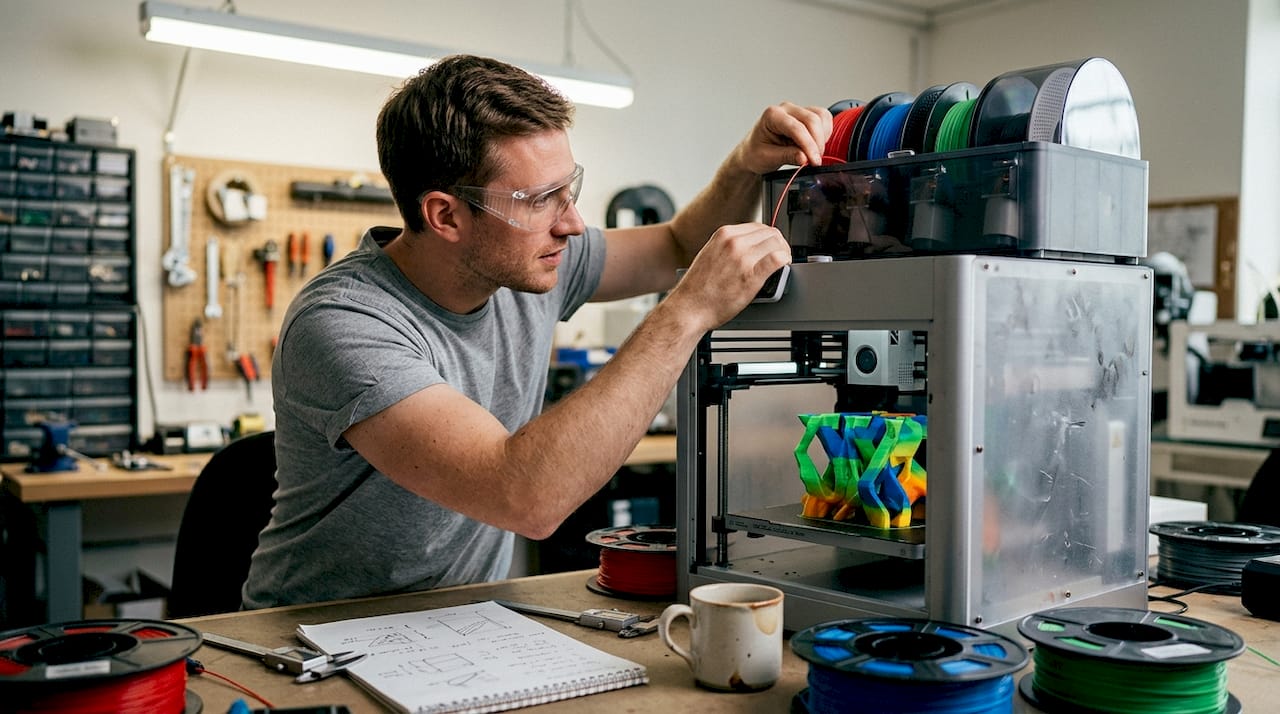
- Single-extruder with material switching: An automated device like an AMS (Automatic Material System) feeds different filament colors into the same nozzle. The printer purges old color before switching. Simple, but wasteful.
- Multi-extruder or independent printhead systems: Each nozzle carries a different color or material. No purging needed between colors, and both can print simultaneously.
- Tool-changing systems: A robotic carriage swaps entire printheads mid-print. Extremely precise, but more mechanically complex.
- Full-color inkjet-style 3D printing: Binder jetting or similar processes deposit colored binders layer by layer. Highest color fidelity, but limited material strength.
For 3D printing on demand, the FDM-based methods dominate because they support functional materials like PETG, TPU, and engineering-grade filaments that clients actually need.
Here is where the first hard reality lands:
“Color changes in basic FDM setups are limited to layer-aligned boundaries. Vertical color splits within a single layer require multi-extruder or tool-changing setups. Common failure points include color bleeding from incomplete purging, wet filament jams in AMS units, and non-manifold geometry errors in AI-generated models.”
For business prototypes, this means your slicer settings, model geometry, and filament condition matter as much as the hardware itself. Rushing any of these steps produces prints that look impressive in a render but fall apart in the build chamber.
How multi-color 3D printing works: Key methods compared
After covering what multi-color 3D printing is, the next step is comparing how the main methods perform in a real-world, business-relevant context.
The method you choose determines your cost per part, your waste rate, your failure risk, and ultimately whether your multi-color workflow makes financial sense at scale. Here is a direct comparison:
| Method | Filament waste | Print speed | Color accuracy | Maintenance load |
|---|---|---|---|---|
| AMS single-nozzle | 30 to 50% extra | Moderate | Moderate (purge dependent) | Low to moderate |
| Independent multi-nozzle | Low (up to 90% less waste) | High (up to 800 mm/s) | High | Moderate |
| Tool-changing (e.g., Prusa XL) | Minimal | Moderate | Very high | Higher |
| Full-color inkjet | Minimal | Slow | Highest | High |
AMS systems waste 30 to 50% of extra filament on purges, while systems like the MOVA Palette 300 cut that waste by up to 90% through independent nozzles. Tool-changing systems eliminate purging entirely, and advanced multi-nozzle setups reach print speeds up to 800 mm/s.
For most businesses running a handful of color prototypes per week, AMS setups offer an accessible entry point. But as your run volume grows or your color count increases beyond four, the filament 3D printing economics shift fast. Waste filament is paid filament. At 30 to 50% extra consumption, a $40 material run becomes a $60 one before you factor in failed prints.
Independent nozzle systems cost more upfront but pay back quickly when you factor in reduced waste, faster cycle times, and fewer failed prints. If you are producing client-facing demos, validation prototypes, or small-batch branded parts, that investment compounds.
Pro Tip: Before buying hardware, calculate your projected monthly filament spend at a 40% waste rate. That number alone often justifies upgrading to an independent nozzle or tool-changing system, or outsourcing to a custom filament printing specialist who already runs optimized equipment.
Workflow pitfalls and how to solve them
So, how do you actually operationalize these systems and avoid common errors that can undermine even the most promising prototypes?
The technical capability exists. The workflow discipline is what separates successful multi-color shops from expensive ones. Here are the most common failure points and how to fix them:
- Wet filament jams: Moisture-absorbed filament causes bubbling, weak layers, and nozzle clogs. This is the leading cause of failed multi-color prints. Store all filament in sealed containers with desiccant, and dry spools before extended print jobs.
- Incomplete purging: When the previous color is not fully flushed from the nozzle, you get color bleeding that ruins logos and brand elements. Increase purge volumes in your slicer, even if it raises waste temporarily.
- Poor model geometry: AI-generated models often contain non-manifold geometry, which causes slicer errors and mid-print failures. Always run your STL through a mesh repair tool like Meshmixer or Netfabb before slicing.
- Slicer misconfiguration: Wrong retraction settings, color transition zones placed incorrectly, or inadequate purge towers cause visible artifacts. Calibrate slicer profiles specifically for each filament type and color combination.
- Underestimating print duration risk: Every additional hour of print time increases failure probability. Low-volume manufacturing runs benefit from scheduling shorter multi-color jobs when possible and monitoring long prints with webcam feeds.
Business trade-offs are real: waste in the 30 to 50% range drives up costs fast in high-volume scenarios, independent nozzle systems cut that by 90%, and longer prints increase failure risk. Prioritize dry filament and tuned slicers before blaming the hardware.
Pro Tip: Plan your purging towers and color transition zones during the design phase, not after slicing. When color change locations are built into the model architecture, you get cleaner transitions and less guesswork during print setup. Review filament-based prototype examples to see how transition planning affects final part quality.
Business impact: Choosing the right solution for your product development
Solving technical hurdles is only half of the journey. Here is how these choices impact real business results and ROI.
The right multi-color method depends on your production context. Here is a simplified cost and use-case comparison to guide your decision:
| Scenario | Best method | Waste impact | Ideal for |
|---|---|---|---|
| 1 to 3 colors, low run volume | AMS single-nozzle | 30 to 50% extra | Early-stage prototypes |
| 4+ colors, client presentation pieces | Independent multi-nozzle | Up to 90% less | Product demos, branding |
| Mixed materials, functional validation | Tool-changing system | Minimal | Engineering prototypes |
| Highest color fidelity, artistic pieces | Inkjet-style 3D printing | Minimal | Display models |
Waste drives costs by 30 to 50% in high-volume AMS setups, while independent nozzle systems cut waste by up to 90% and toolhead systems remain superior for multi-material prototypes.
For small-batch client work, the visual impact of accurate multi-color parts accelerates stakeholder buy-in and reduces revision cycles. That is real time saved. For higher-volume runs, the math on waste versus hardware investment becomes critical to your pricing model.
Key decision factors to evaluate before committing:
- How many distinct colors does your typical prototype require?
- What is your average print duration, and how does failure risk affect your deadline?
- Are you producing display models or functional, tested parts?
- Is waste filament cost currently included in your per-part pricing?
- Would outsourcing to a specialist reduce total cost compared to in-house hardware?
Explore the full range of applications of 3D printing and review 3D printing trends shaping how businesses are deploying multi-color capabilities in 2026 to benchmark your own approach.
The real cost and opportunity of multi-color 3D printing: A practitioner’s view
Here is the uncomfortable truth we see play out regularly: businesses invest in multi-color hardware because it looks impressive, then spend the next six months troubleshooting waste, jams, and failed prints. The technology gets blamed. But the real issue is almost always workflow and process maturity.
More colors do not automatically produce better prototypes. A two-color print with clean geometry, dry filament, and a calibrated slicer will beat a six-color print with a sloppy workflow every time. Business trade-offs are stark: waste in the 30 to 50% range compounds fast, longer prints increase failure risk, and the organizations that get the best results prioritize process discipline over hardware specs.
The overlooked opportunity here is stakeholder engagement. A precise, well-executed multi-color prototype shortens your feedback loop and gets decisions made faster. That speed-to-validation advantage is worth more than the print itself. Before upgrading your printer, upgrade your multi-color printing workflow. Dry your filament. Tune your slicer. Fix your geometry. Then evaluate whether your current equipment is actually the bottleneck.
Explore advanced multi-color 3D printing with CC3DLabs
Ready to go beyond the basics? Here is how we can help accelerate your innovation.
At CC 3D Labs, we run production-grade multi-color and multi-material printing workflows built specifically for business owners and product developers who need accurate, repeatable results without the overhead of managing complex hardware in-house.

Our 3D printing services cover everything from early-stage concept models to small-batch branded components, with optimized setups that minimize material waste and maximize color accuracy. Whether you need a fast-turnaround consultation on what can be printed for your next prototype or a full on-demand prototyping run, our team is ready to scope your project, estimate costs, and get your parts moving. Reach out for a free online estimate today.
Frequently asked questions
How does multi-color 3D printing work with a single extruder?
A single-extruder printer uses an automated filament-switching device to load different colors into the same nozzle at set layer points. AMS systems waste 30 to 50% of extra filament in purge cycles, which limits its efficiency for high-volume runs.
Is multi-color 3D printing good for making functional parts?
For most functional applications, material properties matter more than color, but advanced multi-nozzle systems can produce durable, accurate prototypes with color integrated. Toolhead systems are superior when combining different materials in a single functional part.
What is the biggest challenge with multi-color 3D printing?
Material waste from color purging and the compounding failure risk on long multi-color print jobs are the primary challenges. Longer prints increase failure risk, making process discipline and filament condition critical to every run.
Does multi-color 3D printing cost more than regular printing?
Yes. Between increased material consumption and more complex hardware requirements, the cost per part is higher. Waste drives costs by 30 to 50% in standard AMS setups, which must be factored into your pricing from the start.