
TL;DR:
- Choose 3D printing projects that match your skill level, materials, and printer capabilities.
- Practical projects like snap-fit assemblies and gearboxes teach mechanical principles and design skills.
- Experimentation and iterative design are essential for mastering 3D printing beyond downloaded templates.
The sheer volume of things you can make with a 3D printer is both thrilling and paralyzing. Whether you’re a product developer prototyping your next invention, a maker building custom tools, or an artist sculpting interactive installations, the hardest part is often choosing where to start. This guide cuts through the noise by presenting project ideas grounded in real engineering data, practical design principles, and hands-on experience. You’ll find a clear framework for matching ideas to your skill level, detailed examples that span functional parts and artistic work, and technical benchmarks that help you make smarter decisions from the first layer to the last.
Table of Contents
- How to choose the right 3D printing project for your skills and goals
- Innovative 3D printing project ideas to try
- Key considerations for successful 3D printing projects
- Project case study: Snap-fit assemblies and gearboxes in action
- Why project experimentation beats sticking to templates
- Bring your 3D printing ideas to life with expert support
- Frequently asked questions
Key Takeaways
| Point | Details |
|---|---|
| Evaluate your resources | Choose projects that fit your skills, printer capabilities, and goals. |
| Mix creativity and function | Innovative ideas span artistic, functional, and prototype projects—combine approaches for best results. |
| Prioritize material and design | Align filament choice, print orientation, and infill with the project’s end use for optimal results. |
| Iterate for success | Experiment, test, and refine designs to achieve dependable and creative outcomes. |
How to choose the right 3D printing project for your skills and goals
Before you open a slicer or browse a model repository, it’s worth spending a few minutes thinking about what you actually need from a project. Not all ideas are created equal, and a mismatch between ambition and readiness wastes both filament and time.
Here’s a practical framework for filtering your options:
- Assess your technical skill level. Are you comfortable adjusting support structures, tuning retraction, and post-processing parts? If not, start with single-body prints before tackling multi-part assemblies with tight tolerances.
- Know your printer’s capability. A standard FDM printer with a 0.4mm nozzle and a modest build volume handles most projects, but large-format or multi-material setups open different doors. Understand what 3D printers can create at each tier before committing to a build.
- Match material to purpose. A decorative sculpture and a snap-fit enclosure both look like “plastic parts,” but they demand very different filaments. Artistic projects tolerate PLA’s rigidity; functional assemblies often require PETG’s flex or ABS’s impact resistance.
- Define the project’s core purpose. Prototypes need accuracy and fast iteration. Functional everyday parts need durability. Art installations need visual impact and sometimes movement. Each purpose shapes your constraints.
- Check tolerances before you commit. Print orientation along layers for strength and material choice directly affect whether a design fits together. Edge cases like layer anisotropy require empirical testing, not just simulation.
Once you have a baseline understanding of where you stand, use reliable 3D print design principles to evaluate whether a project idea is technically achievable on your setup.
Pro Tip: Start with modular builds. Print one module, test its fit, then scale up. This approach catches errors early and prevents wasting an entire build plate on a part that’s slightly off-dimension.
Innovative 3D printing project ideas to try
With your evaluation criteria in hand, here are the project ideas that consistently deliver both utility and creative satisfaction across skill levels.
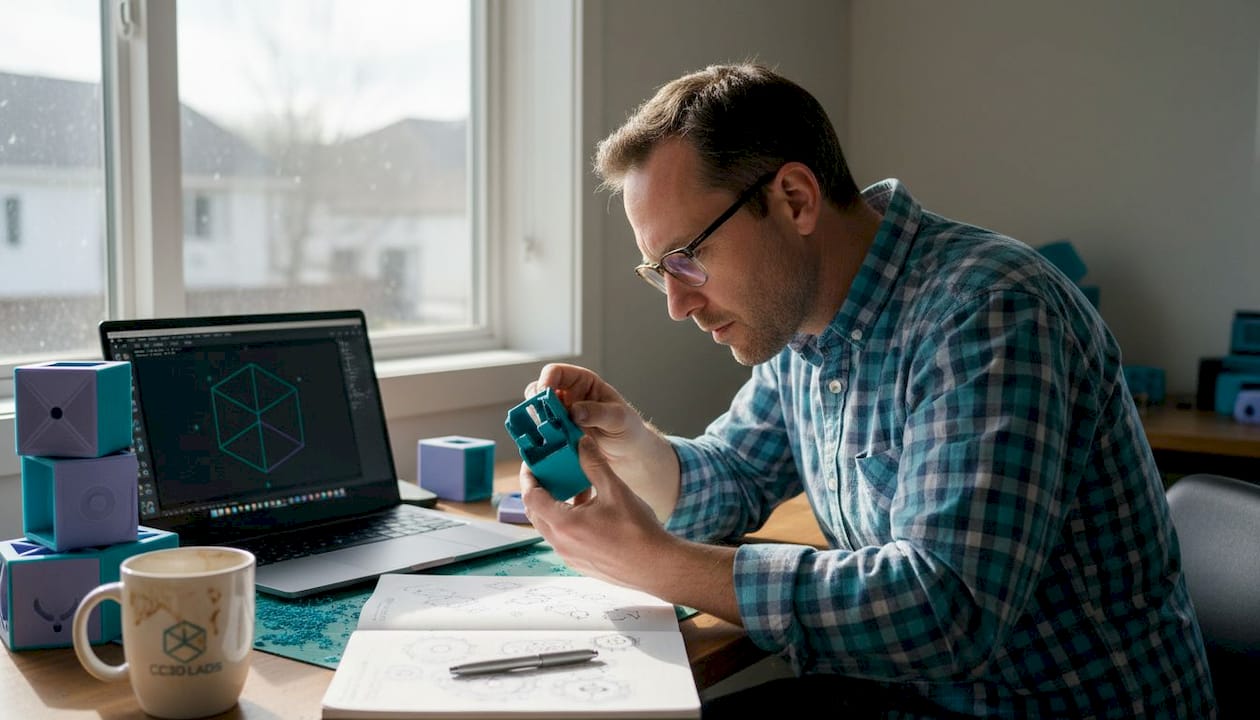
Snap-fit tool organizers. These are modular, screwless storage systems where parts click together using designed cantilever tabs. You can customize bin sizes, wall thickness, and layouts. Because they require no hardware, they’re fast to print and easy to reconfigure. The design challenge is getting tolerances right so parts snap firmly without breaking.
Custom mechanical keyboards and macropads. This is one of the most rewarding functional builds you can undertake. Projects like the ScottoErgo ortholinear design, a 36-key layout with a 10-degree tilt, show how ergonomic, highly personalized input devices can be printed flat, then assembled with off-the-shelf switches and controllers. Keycaps are customizable, and the entire housing is your design.
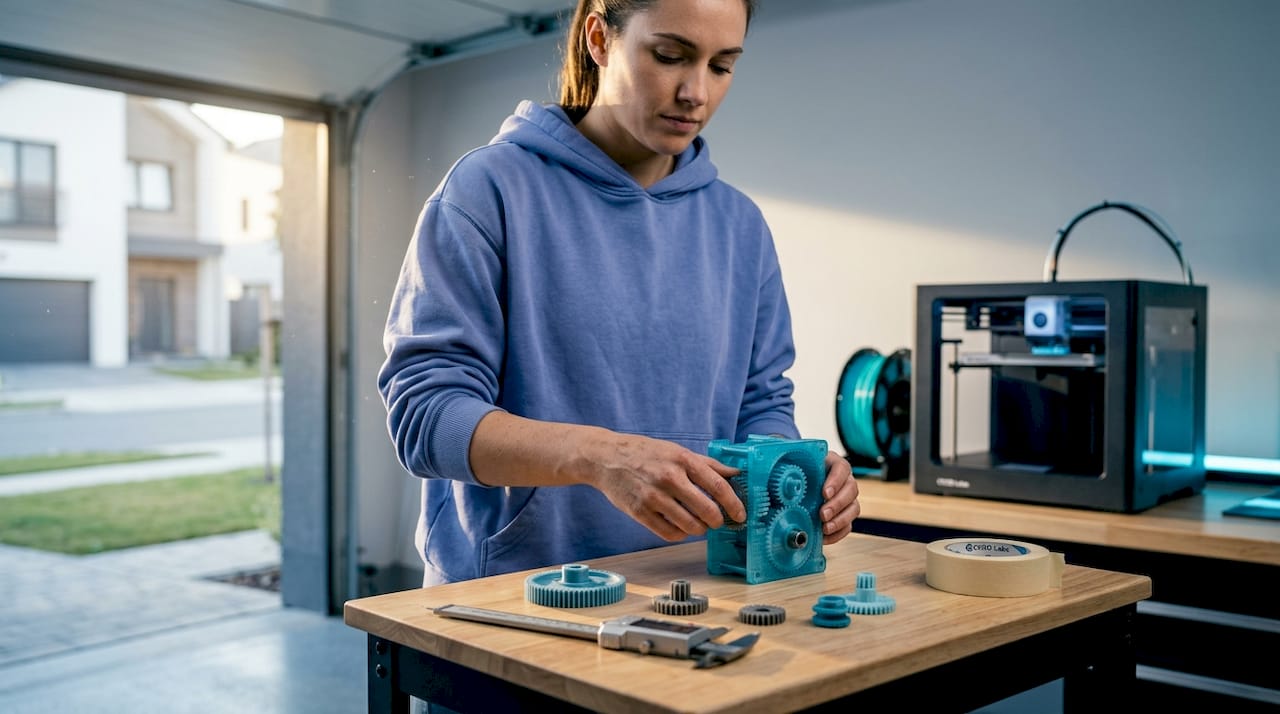
Functional gearboxes. Printing a working gearbox from scratch teaches you more about mechanical engineering than almost any other project. You’ll learn about gear ratios, pressure angles, clearance tolerances, and how load transfers between parts. It’s demanding but deeply instructive.
Prototyped gadgets and fixtures. Got a real problem to solve? Design a custom mounting bracket, a jig for a workshop tool, or a housing for a PCB. Printing your own fixtures addresses specific needs faster than buying generic solutions, and iteration is cheap.
Interactive art and sculpture. 3D printing gives artists direct control over geometry. Multi-color prints, layered translucent sections, and articulated joints open up possibilities that traditional fabrication can’t match economically. Moving parts add a kinetic quality that draws audiences in.
“The best project is one that solves a real problem you actually have. When your motivation is personal, you iterate faster and care more about the result.”
Pro Tip: Browse the project idea gallery to study how others have solved design challenges in their builds. Adapting a proven approach to your specific constraints is faster than starting from zero.
Key considerations for successful 3D printing projects
Good ideas fall apart in execution when the technical decisions are wrong. Here’s what actually moves the needle between a print that works and one that ends up in the scrap bin.
Material selection is the foundation. PLA averages 56.6 MPa tensile strength and a modulus of 3,368 MPa. ABS prints at 28.5 MPa and 1,807 MPa respectively. PLA is stiffer and stronger in raw tensile terms, but it’s brittle under repeated flex stress. ABS absorbs impact better and handles elevated temperatures. For flexible snap-fit designs, the PLA vs PETG vs ABS guide makes it clear: PETG is often the right middle ground between strength and elasticity.
Print orientation controls part strength more than most settings. Layers bond well in the X and Y plane but are weaker in the Z direction. If your part will be loaded perpendicular to the layer stack, it’s at risk of delamination. Orient critical features so their load path runs along layers, not across them.
Layer height and infill density are the two dials that matter most. Thinner layers (0.2mm) boost tensile strength by 22% compared to thicker ones. Higher infill (above 40%) dramatically improves resistance to compression. Infill and layer height dominate Taguchi ANOVA benchmarks for mechanical performance, confirming what experienced makers already know intuitively.
Here’s a quick reference for common project types:
| Project type | Recommended material | Layer height | Infill | Orientation priority |
|---|---|---|---|---|
| Decorative sculpture | PLA | 0.2mm | 15-20% | Aesthetic surface |
| Snap-fit assembly | PETG | 0.2mm | 30-40% | Bending along layers |
| Functional gearbox | PETG or ABS | 0.15-0.2mm | 40-60% | Load path alignment |
| Outdoor fixture | ASA or PETG | 0.2mm | 35-50% | Structural load |
| Art installation | PLA or multi-material | 0.15-0.2mm | 10-20% | Visual surface quality |
For anything that needs to survive weather or UV exposure, review the materials for outdoor prints to avoid the common mistake of using PLA where ASA or PETG belong.
Avoid the three most common failure modes:
- Warping. Caused by uneven cooling. Use enclosures, bed adhesion, and brim settings.
- Delamination. Caused by too-fast print speed, low temperature, or poor orientation. Slow down and increase nozzle temp by 5-10°C.
- Material fatigue. Snap-fit parts under repeated flex will eventually fail if the wall is too thin or the material too brittle. Test cycles before finalizing your design.
Project case study: Snap-fit assemblies and gearboxes in action
Let’s get specific. These two project types represent different ends of the functional print spectrum, and both teach lessons that carry over to almost everything else you’ll build.
Snap-fit assemblies. A well-designed snap-fit joint requires no screws and no glue. The critical parameters: design cantilever snaps 1.5-2.5mm thick with a length-to-thickness ratio of about 5:1 and a 30-45 degree entry angle. Print with the bending direction running along layers. PETG handles repeated flex better than brittle PLA. These joints are ideal for enclosures, modular storage bins, and any project where you want to open and close a housing regularly.
3D printed gearboxes. A practical gearbox design uses bevel and worm gears with a 20-degree pressure angle, with a minimum of 8 teeth on the pinion gear to avoid undercutting. A 16:8 bevel stage followed by a worm drive achieves a 1:2 ratio input-to-output that translates manual crank motion into controlled mechanical output. Clearance tolerances of 0.2-0.3mm between meshing teeth account for FDM’s dimensional variation.
Here’s how the two project types compare across key design and production factors:
| Factor | Snap-fit assembly | Functional gearbox |
|---|---|---|
| Design complexity | Moderate | High |
| Material | PETG preferred | PETG or ABS |
| Critical dimension | Wall thickness (1.5-2.5mm) | Tooth profile, clearance |
| Print orientation | Bending along layers | Load path on gear faces |
| Post-processing | Light sanding on snap surfaces | Lubrication, clearance fit test |
| Best use case | Enclosures, organizers | Mechanical demonstrations, robotics |
| Common failure | Delamination at snap root | Tooth stripping under load |
Key lessons from both project types:
- Always print a small test piece before committing to a full print
- Measure twice with calipers before declaring a fit acceptable
- Support structures should be minimal inside gear cavities to avoid surface defects on tooth faces
- Material choice affects not just strength but how the part wears over time
Why project experimentation beats sticking to templates
Here’s an opinion you won’t hear enough: pre-made STL files are a starting point, not a destination. Downloading a model, slicing it, and printing it teaches you very little about design intent, material behavior, or how to solve the next problem. It’s the 3D printing equivalent of following a recipe without understanding why each ingredient is there.
The most capable makers we see aren’t the ones with the largest STL libraries. They’re the ones who’ve broken enough parts, revised enough tolerances, and rethought enough assemblies to have actual intuition about what works. That intuition doesn’t come from browsing Thingiverse.
Designing for a specific context forces you to make real decisions. You pick the material because of this environment. You choose that orientation because of the load direction you actually measured. You set the infill because you calculated the stress, not because a tutorial said 20% is fine. That process is where mastery lives.
Failure is also faster than it looks. A failed snap-fit tells you whether your wall is too thin, your angle is too steep, or your material choice was wrong. That feedback is immediate and precise. A generic template that “works” teaches you nothing you can apply to the next original problem.
If you’re thinking about on-demand prototyping for a real product or custom solution, this iterative mindset is exactly what produces parts worth manufacturing. The path from rough idea to reliable design is always a series of intentional experiments, not a straight line from downloaded file to finished product.
Build something that solves your problem, not someone else’s. That’s when 3D printing gets genuinely interesting.
Bring your 3D printing ideas to life with expert support
Sometimes a project idea outgrows what your current setup can deliver. Whether it’s a complex multi-part mechanism, a high-tolerance prototype, or a batch of custom components for a product launch, having expert support in your corner changes what’s possible.

CC 3D Labs offers professional 3D printing services near Philadelphia, with capabilities that include multi-color FDM printing, CAD and design support, and metrology-grade 3D scanning for design accuracy. If your design needs precise dimensional data before printing, scanning an existing part can give you the exact geometry you need to work from. Ready to see what’s achievable? Explore printed prototypes from real projects and get a free online estimate for your next build. Local pickup near Philadelphia or shipping nationwide.
Frequently asked questions
What are the best materials for durable 3D printed project parts?
PETG balances flexibility and strength well for functional assemblies, while PLA offers higher raw tensile strength but is more brittle under repeated flex. ABS delivers 28.5 MPa with better impact toughness, making it the right choice for parts that take hits.
How do you prevent snapped parts or fit failures in snap-fit joints?
Orient your print so the bending stress runs along the layers, not across them, and design cantilever walls 1.5-2.5mm thick in PETG. Printing along layers with PETG reduces delamination and extends the fatigue life of your joints significantly.
Can I design moving parts, like gearboxes, without metal fasteners?
Yes. Bevel and worm gear designs with correct pressure angles and 0.2-0.3mm clearance tolerances allow fully functional gearboxes without any metal hardware, provided your FDM tolerances are dialed in.
What printing settings improve the strength of structural projects?
Use 0.2mm or thinner layers and orient load paths along the print direction. Thinner layers boost strength by 22%, and pairing that with 40%+ infill on structural sections gives you a meaningful improvement over default slicer presets.