
TL;DR:
- Texture mapping projects 2D images onto 3D surfaces to define color and surface detail without adding geometry. It enhances realism by controlling material appearance and reducing polygon count, making real-time rendering feasible. Proper UV unwrapping, combined with multiple texture maps, is essential for achieving accurate, efficient, and photorealistic 3D models.
Texture mapping is the process of projecting 2D images onto 3D model surfaces to define color, surface detail, and light interaction without adding geometry. It is the reason a game character’s jacket looks like worn leather instead of a smooth gray blob, and why a film set’s concrete wall shows every crack and stain without a single extra polygon. The role of texture mapping in 3D modeling is not decorative — it is structural. Without it, achieving photorealistic visuals would require geometry so dense it would be computationally impossible in real time.
Here is what texture mapping actually does for a 3D model:
- Adds surface color and pattern through diffuse or albedo maps
- Simulates bumps, scratches, and surface relief without modifying geometry
- Controls how light reflects off a surface using specular, roughness, and metalness maps
- Creates soft shadows in crevices through ambient occlusion maps
- Cuts polygon counts dramatically while preserving visual complexity
- Enables realistic materials like wood grain, fabric weave, and rusted metal in games, film, and VR
As foundational computer graphics research from Princeton confirms, texture mapping enhances visual richness with only a small increase in computation — a trade-off that has made it indispensable across every major 3D production pipeline.
What is the role of texture mapping in 3D modeling workflows?
The technical process behind texture mapping starts with a problem: a 3D surface is curved and continuous, but a texture image is flat and rectangular. Bridging those two realities requires UV unwrapping.
UV unwrapping converts a 3D model’s surface into a flat 2D coordinate space, called UV space, where U and V represent the horizontal and vertical axes of the texture image. Think of it like unfolding a cardboard box — you cut along specific edges and flatten the surfaces so they can be printed on. UV coordinates are assigned to each vertex of the model, and during rendering, those coordinates are interpolated across triangle faces using barycentric weights, so every pixel on the surface knows exactly where to sample from the texture.
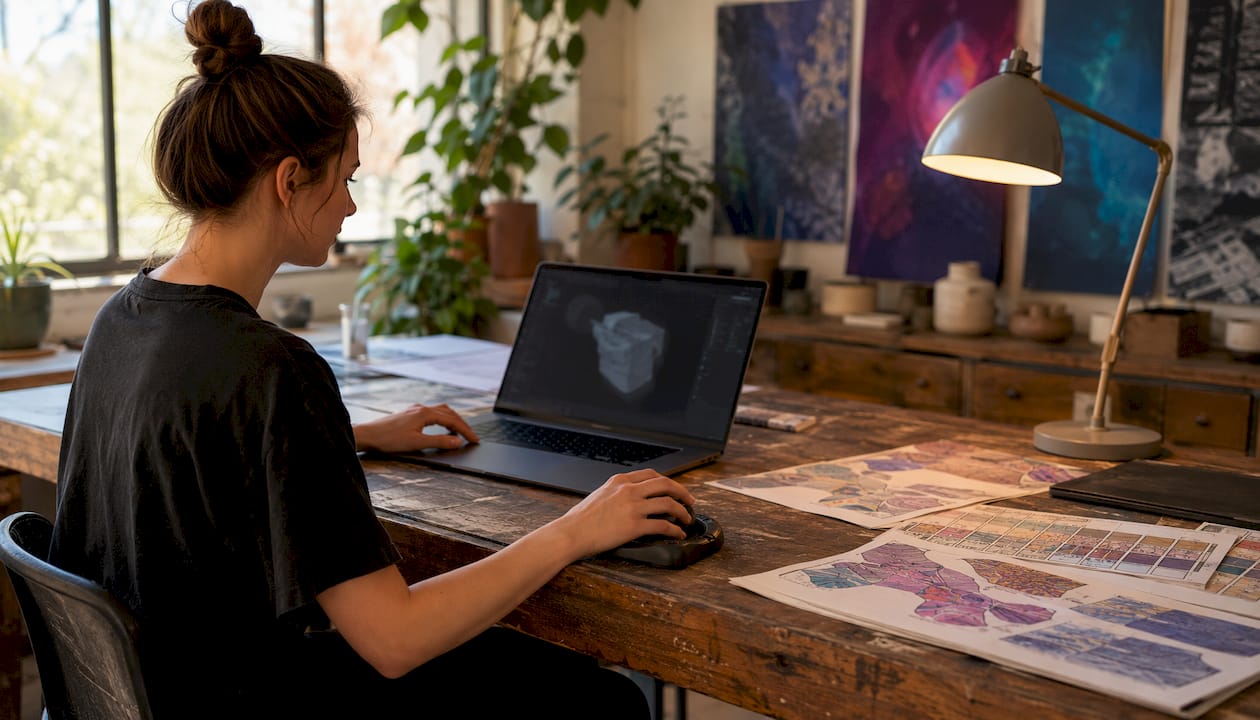
How UV coordinate assignment works
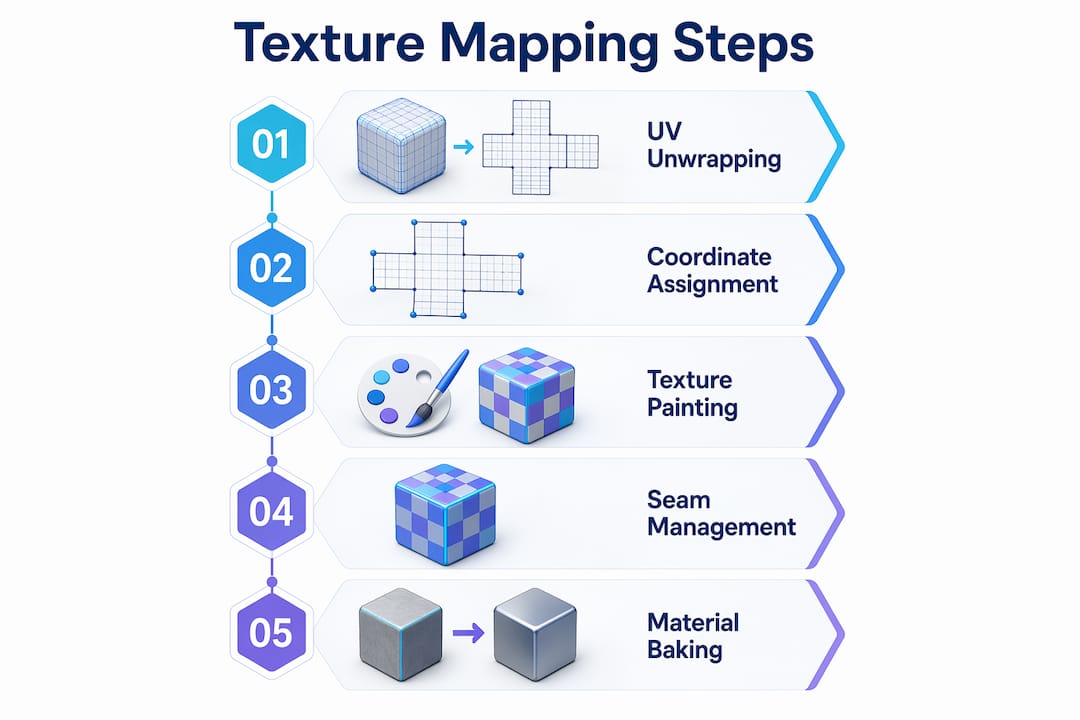
The renderer does not just snap each pixel to the nearest UV coordinate. It calculates the barycentric position of each point inside a triangle, then uses those weights to blend the UV values from the triangle’s three vertices. The result is a smooth, continuous texture sample across the entire face. Perspective correction matters here too — interpolating UV coordinates in screen space without accounting for perspective distortion produces warped textures on angled surfaces, which is why modern GPU pipelines apply perspective-correct interpolation by default.
Common UV mapping challenges
| Challenge | Cause | Solution |
|---|---|---|
| Texture seams | UV island edges that don’t align | Place seams in low-visibility areas |
| Stretching/distortion | Uneven UV island scaling | Relax UV islands; use conformal mapping |
| Texel density mismatch | Inconsistent UV island sizes | Normalize all islands to the same texel density |
| Overlapping UVs | Islands stacked in UV space | Use unique UV channels for baked maps |
Beyond standard UV mapping, solid texturing offers an alternative worth knowing. Rather than unwrapping the surface, solid texturing uses 3D object-space coordinates to sample from a 3D texture function, treating the model as if it were carved from a block of material. Wood grain, marble, and stone procedural textures often use this approach because it produces continuous patterns with no seams at all.
Common software for UV unwrapping includes Blender’s UV Editor, Autodesk Maya’s UV Toolkit, and dedicated tools like RizomUV, which automates island packing and relaxation for complex meshes.
Pro Tip: When unwrapping organic models like characters, place UV seams along natural boundaries — inside the armpits, behind the ears, along the inner leg. Seams hidden by anatomy or clothing are seams the viewer never notices.
What types of texture maps do 3D models use?
Modern 3D models rarely rely on a single texture. A photorealistic surface is typically the result of several specialized maps working together, each controlling a different aspect of how the surface looks and responds to light. This multi-map approach is the foundation of Physically Based Rendering (PBR), the standard workflow in game engines like Unreal Engine and Unity, and in film rendering pipelines.
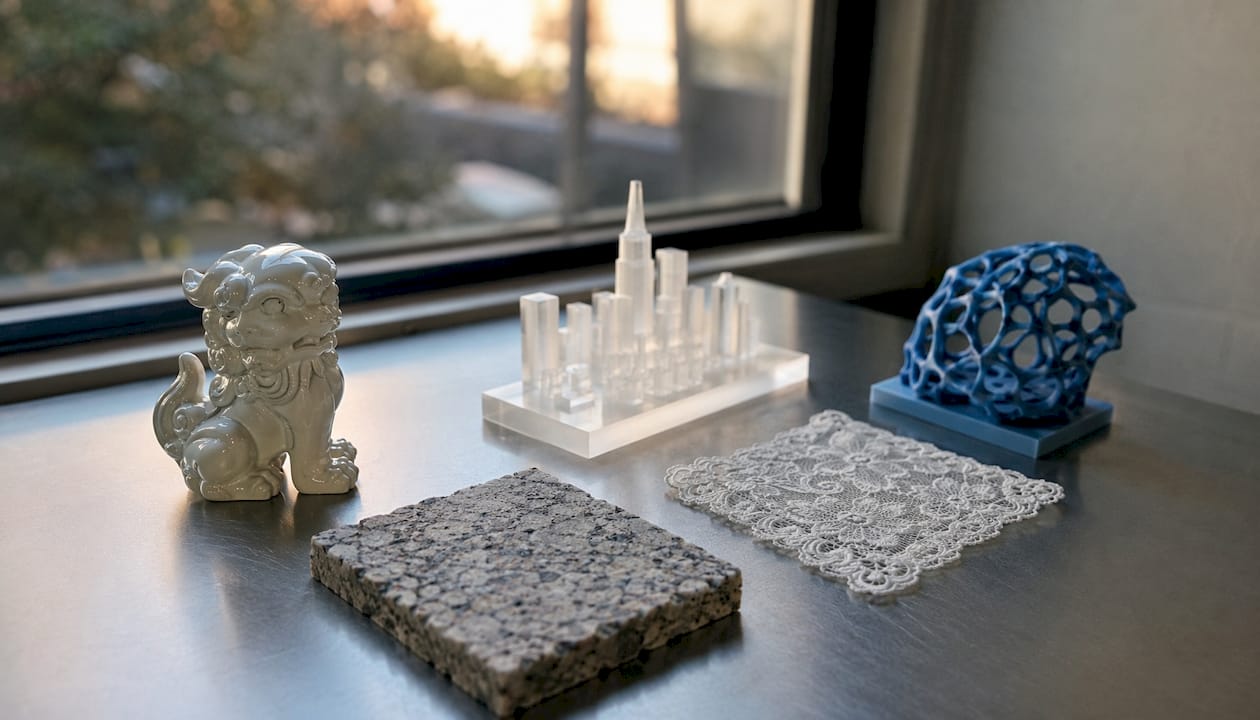
The materials system in PBR dictates how light interacts with surfaces through multiple combined texture maps — and that combination is what separates a convincing material from a flat one.
Here is how each map type contributes:
- Diffuse (albedo) map: Stores the base color of the surface with no lighting information baked in. This is the starting point for almost every material.
- Normal map: Encodes surface direction data in RGB channels to fake small-scale surface detail — bumps, grooves, stitching — without changing the underlying geometry. The renderer uses these fake normals to calculate lighting as if the surface were actually bumpy.
- Bump map: An older, grayscale predecessor to the normal map. Lighter values push the surface outward; darker values pull it inward. Less accurate than normal maps but still used for simple effects.
- Displacement map: Unlike normal maps, displacement maps actually move geometry at render time. They require a subdivided mesh to work, but the result is true geometric detail visible at silhouette edges.
- Specular map: Controls the intensity of specular highlights across the surface. A scratched metal surface, for example, would have high specular values on the bare metal and low values in the scratches.
- Roughness map: In PBR workflows, roughness replaces the specular map. Low roughness values produce sharp, mirror-like reflections; high values scatter light for a matte finish.
- Metalness map: A binary or grayscale map that tells the renderer which parts of a surface are metallic and which are non-metallic, affecting how reflections and color interact.
- Ambient occlusion (AO) map: Stores pre-calculated soft shadows in crevices and corners where light has difficulty reaching. Multiplied over the diffuse map, it adds depth and contact shadow detail.
- Opacity map: Controls transparency across a surface. Used for leaves, hair cards, fabric mesh, and any surface that is not uniformly solid.
| Map type | What it controls | Visual effect |
|---|---|---|
| Diffuse/albedo | Base color | Surface color without lighting |
| Normal | Surface direction (fake geometry) | Bumps, grooves, fine detail |
| Displacement | Actual geometry offset | True surface relief at silhouettes |
| Roughness | Light scattering | Matte vs. glossy appearance |
| Metalness | Metal vs. non-metal | Colored reflections on metal |
| Ambient occlusion | Soft shadow in crevices | Depth, contact shadow |
| Opacity | Transparency | Cutouts, translucency |
Specialized maps like normal, displacement, and ambient occlusion help achieve near-photorealistic real-time rendering by reducing the polygon count needed to represent surface complexity. A character mesh with 10,000 polygons can look like it has millions of surface details when a well-crafted normal map is applied.
How does texture mapping enhance realism and efficiency?
The core efficiency argument for texture mapping is straightforward: geometry is expensive, and textures are cheap by comparison. Texture mapping offsets the need for highly detailed geometry by simulating intricate surface light behaviors through maps, maintaining manageable model complexity for real-time applications. A brick wall modeled geometrically would require thousands of polygons per brick. The same wall, textured with a diffuse map, a normal map, and an AO map, uses four polygons and looks nearly identical at normal viewing distances.
This efficiency is what makes real-time rendering in games and VR possible. Game engines process millions of texture samples per frame, but the GPU handles this far more efficiently than it would handle equivalent polygon geometry. The 3D modeling process for businesses almost always includes texture mapping as a core step precisely because it keeps file sizes and render times manageable without sacrificing visual quality.
Where texture mapping is applied across industries
- Game development: Characters, environments, and props all rely on PBR texture sets. Real-time constraints make efficient UV layouts and optimized texture resolutions critical.
- Film and visual effects: Displacement maps and high-resolution diffuse maps allow film assets to hold up under close-up camera work. Textures are often 4K or 8K for hero assets.
- Virtual reality: VR demands high frame rates (90 frames per second or above) to prevent motion sickness, so texture optimization is even more aggressive than in standard games.
- Industrial design and product visualization: Accurate material representation — the sheen of injection-molded plastic, the brushed finish of aluminum — depends entirely on well-crafted roughness and metalness maps.
- Architecture and real estate: Photorealistic interior renders use texture maps to simulate materials like hardwood flooring, stone countertops, and fabric upholstery.
Texture mapping also supports advanced 3D modeling techniques like baking, where complex lighting and surface data from a high-polygon model are rendered into a 2D texture for use on a low-polygon version. This is standard practice in game development and increasingly common in product visualization.
Pro Tip: For real-time applications, keep texture atlases in power-of-two resolutions (512, 1024, 2048, 4096 pixels). GPUs handle these sizes most efficiently, and non-power-of-two textures can cause performance penalties on some hardware.
Procedural textures offer a different path. Instead of storing pixel data in an image file, procedural textures generate surface detail mathematically at render time. They scale infinitely without resolution loss, never tile visibly, and take up almost no disk space. The trade-off is that they are harder to art-direct precisely and require more CPU or GPU computation during rendering. Image-based textures, by contrast, are fast to sample and easy to paint, but they tile at large scales and consume significant memory at high resolutions. Most production pipelines use both: procedural textures for large-scale variation and image-based maps for fine surface detail.
Expert tips for overcoming texture mapping challenges
Texture mapping looks straightforward until you are staring at a visible seam running down the middle of a character’s forehead, or a texture that stretches grotesquely across a curved surface. These problems are predictable, and they have solutions.
Careful UV layout and consistent texel density are the two factors that most reliably separate clean texture work from problematic texture work. Texel density refers to how many texture pixels cover a given area of the 3D surface. When one part of a model has twice the texel density of another, the textures look sharp in one area and blurry in another — even if the same map is applied to both. Normalizing texel density across all UV islands before painting or baking is a non-negotiable step in any production-quality workflow.
Baking: the bridge between high-poly and low-poly
Baking is one of the most powerful techniques in the texture mapping toolkit. Baking complex surface data from high-poly models into 2D textures allows high-fidelity visuals on low-poly models, optimizing performance in game engines. The process works by casting rays from the low-poly mesh toward the high-poly mesh, recording the surface normal, color, and occlusion data at each hit point, and storing that information in a texture. The low-poly model then uses that baked texture to look as detailed as its high-poly counterpart, at a fraction of the render cost.
Normal map baking is the most common application, but AO baking, curvature baking, and color ID baking are all standard steps in a game-ready asset pipeline. Tools like Marmoset Toolbag and Substance Painter include dedicated baking workflows that handle cage setup, ray distance, and anti-aliasing automatically.
Procedural vs. image-based textures: when to use each
- Use procedural textures when you need infinite scalability, no visible tiling, or mathematically precise patterns (wood grain, noise-based weathering, circuit board traces).
- Use image-based textures when you need photographic accuracy, hand-painted detail, or specific real-world material references.
- Combine both for most production work: a procedural base with image-based detail layers gives you the best of both approaches.
PBR accuracy and physical correctness
PBR workflows require physically accurate values to look correct across different lighting environments. Albedo maps should not contain baked lighting or shadows — those belong in the AO map. Metalness values should be either 0 (non-metal) or 1 (metal) in most cases, with intermediate values reserved for dirty or oxidized surfaces. Roughness values for polished surfaces typically sit below 0.3, while rough concrete or unfinished wood sits above 0.7. Violating these ranges produces materials that look wrong under any lighting condition, regardless of how detailed the textures are.
Pro Tip: Validate your PBR materials under at least three different lighting environments before finalizing: a neutral gray studio, a warm interior HDRI, and a bright outdoor scene. A material that looks correct in all three is physically accurate. One that looks great in one but wrong in another has incorrect base values.
Seam management deserves its own attention. Beyond placing seams in hidden areas, you can reduce seam visibility by extending texture islands slightly past their UV borders (called padding or bleeding), so that filtering at the seam edge samples from valid texture data rather than empty UV space. Most baking tools add this padding automatically, but hand-painted textures require manual attention.
For professionals working on assets that will eventually be validated for manufacturing or production, texture mapping also plays a role in communicating surface finish intent — showing where a part should be matte, glossy, or textured before it ever reaches a printer or machinist.
Key Takeaways
Texture mapping is the single most efficient method for adding visual complexity to 3D models, enabling photorealistic surfaces through layered 2D maps rather than dense geometry.
| Point | Details |
|---|---|
| UV unwrapping is foundational | Flattening 3D surfaces into UV space is the prerequisite for any image-based texture application. |
| PBR uses multiple map types | Diffuse, normal, roughness, metalness, and AO maps work together to simulate physically accurate materials. |
| Baking transfers high-poly detail | Rendering surface data from dense meshes into textures lets low-poly models carry the same visual fidelity. |
| Texel density consistency matters | Uneven texel density causes visible quality differences across a model’s surface, even with identical maps. |
| Procedural and image-based textures complement each other | Most production pipelines use procedural textures for large-scale variation and image-based maps for fine detail. |
Bring your 3D models to life with Cc3dlabs

Understanding texture mapping is one thing. Seeing it realized in a physical, production-grade object is another. At Cc3dlabs, near Philadelphia, the team works with detailed 3D models every day — from CAD files with precise surface specifications to scanned assets that need accurate material representation before printing. Whether you need professional 3D printing services for a prototype or a batch run, Cc3dlabs brings the same attention to surface detail and material accuracy that texture mapping demands in digital workflows. Get a free online estimate and find out what your model can become.