
TL;DR:
- Managing 3D printing expenses involves considering labor, machine time, design complexity, and overhead, which often outweigh raw material costs.
- Optimizing design and workflow, choosing suitable materials, and evaluating alternative manufacturing methods are crucial steps to ensure cost-effective production.
Managing 3D printing expenses is rarely as simple as buying cheaper filament or running machines faster. The real cost picture includes labor, machine time, design complexity, post-processing, and purchase overhead, and businesses that focus only on one variable often end up paying more overall. Whether you’re producing custom prototypes or scaling toward batch manufacturing, understanding how costs actually stack up, and where to apply targeted reductions, can dramatically change your bottom line. This article lays out research-backed methods to help product developers and manufacturing businesses reduce 3D printing expenses without compromising part quality.
Table of Contents
- Understand the real cost drivers in 3D printing
- Optimize your design for cost-effective printing
- Choose the right materials and process for your application
- Streamline your workflow to reduce hidden costs
- Know when 3D printing isn’t the cheapest solution
- Our take: Cost cutting isn’t about one magic fix
- Take the next step with expert 3D printing support
- Frequently asked questions
Key Takeaways
| Point | Details |
|---|---|
| Major cost drivers | Material, labor, and purchase costs are the biggest factors in 3D printing expenses. |
| Design optimization impact | Smart design choices can cut up to 54% of print time and 16% of material use. |
| Workflow efficiencies matter | Batching and efficient post-processing help lower per-part costs significantly. |
| Material and process fit | Matching the right material and printing process to your project prevents overspending. |
| Alternative solutions | Sometimes, traditional manufacturing is cheaper—make cost-based decisions, not just tech-based ones. |
Understand the real cost drivers in 3D printing
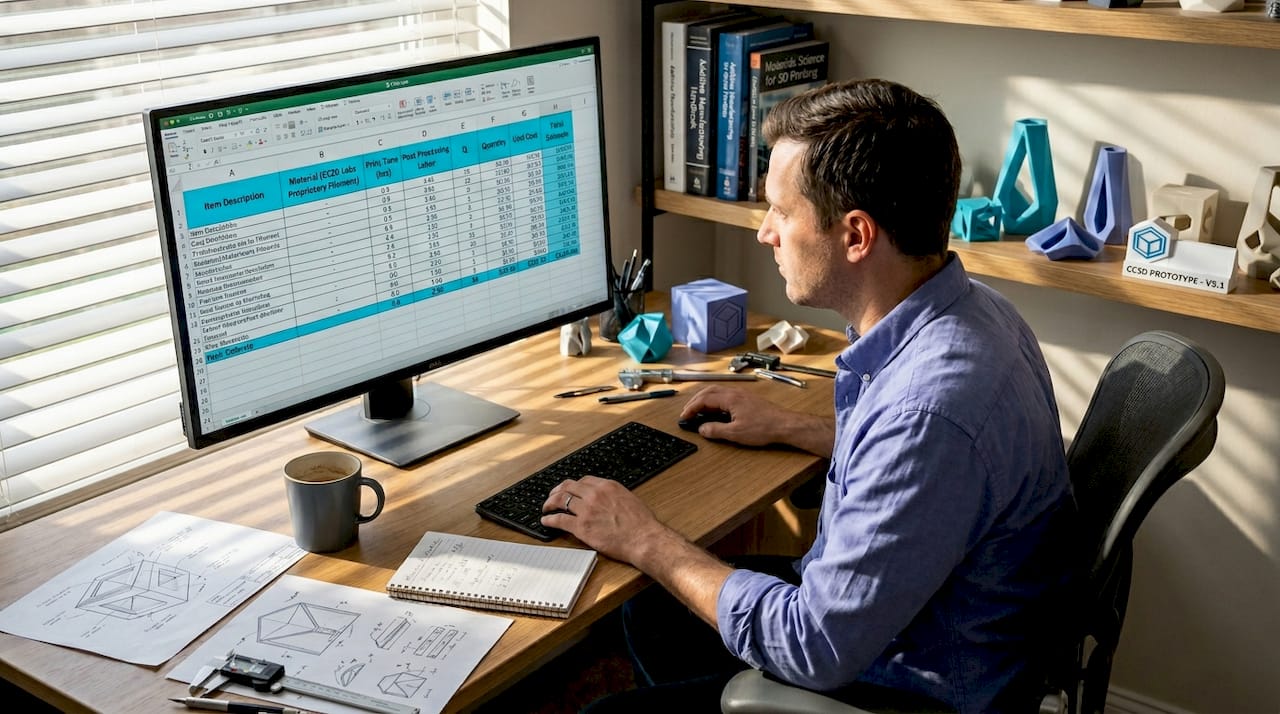
Most businesses assume material is the biggest cost in 3D printing. That assumption is frequently wrong, and it leads to poor decisions. A thorough cost breakdown reveals that labor, machine time, design complexity, and purchase overhead often outweigh raw material expense, particularly in custom or low-volume scenarios.
Here’s a breakdown of the main cost factors you need to track:
- Material cost: Filament, resin, or powder consumed during printing, including support material that gets discarded
- Machine time: The hours a printer runs to complete a job, which directly ties to energy consumption and capacity allocation
- Labor: Time spent on setup, monitoring, support removal, finishing, and quality checks
- Purchase cost: Amortized cost of equipment, software licenses, and facility overhead
- Design complexity: More complex geometries require longer print times, more support, and more labor to finish
A clinical study evaluating 3D-printed orthoses against traditionally manufactured ones found that labor and purchase cost dominated the 3D printing expense structure. Labor alone accounted for 62.2% of total cost, while purchase cost contributed 22.2%. By comparison, conventional thermoplastic orthoses relied mainly on material (69.4%) and labor (30.6%).
| Cost factor | 3D-printed orthosis | Conventional orthosis |
|---|---|---|
| Labor | 62.2% | 30.6% |
| Purchase cost | 22.2% | N/A (minimal overhead) |
| Material | Smaller share | 69.4% |
| Mean total cost | €46.54 | €30.28 |
In some product categories, 3D printing is not automatically cheaper. Labor and overhead can push total cost well above what conventional manufacturing would charge. Accurate cost analysis always has to account for all six factors, not just material weight.
For your planning, you can get accurate 3D printing cost estimations upfront before committing to a production run. Knowing your full cost structure is the first step toward finding where to cut.
Optimize your design for cost-effective printing
Knowing what affects your costs, the next step is learning how your design decisions directly alter material, labor, and time expenses. Design is where the biggest leverage lives, and most businesses underuse it.
Multi-objective optimization means adjusting your model to minimize two or more cost factors at the same time, rather than just solving for one. For example, reducing overhangs reduces support material, but doing that alone may increase print height and extend print time. A multi-objective approach balances both simultaneously.
Published research shows that multi-objective design optimization reduced material use by 11 to 16% and print time by 12 to 54% compared to sequential single-variable optimization. That kind of improvement does not require a major redesign. It requires the right design review process.
Practical design changes that reduce cost:
- Reduce part height: Taller prints take longer, layer by layer. Reorienting a part, when the geometry allows, can dramatically cut print time.
- Minimize overhang angles: Overhangs beyond 45 degrees typically require support. Each gram of support material adds both material cost and removal labor.
- Hollow non-structural sections: Infill is one of the most adjustable cost levers. Reducing infill density where strength is not critical directly cuts material and time.
- Simplify surface features: Fine decorative details increase print time without adding structural value for functional parts.
- Split and reassemble complex geometries: Sometimes printing a part in two simpler pieces, then joining them, is cheaper than printing a complex monolithic form.
Pro Tip: Before sending any file to print, run a quick design checklist that flags overhangs, wall thickness violations, and unnecessary height. Many of the biggest cost savings happen at this stage, before a single layer is laid down. For a deeper look at designing reliable prints, CC 3D Labs has practical guidance specific to functional prototypes and production parts.
The right material choice also matters here. Some designs that look complex in one material become simpler and cheaper in another. Explore choosing cost-efficient materials to understand how material selection interacts with your design geometry.
Choose the right materials and process for your application
While design is crucial, your choice of material and print process can make or break your savings. Let’s compare how different options shift the cost equation depending on whether you’re making prototypes or end-use parts.
The core principle here is that the cheapest prototyping process is rarely the cheapest production process. PLA is inexpensive and prints quickly, making it ideal for concept models. But for functional end-use parts, it may fail under load or temperature, leading to reprints and wasted cost. Choosing a stronger material upfront, even if it costs a bit more per kilogram, can reduce total cost over a product’s lifecycle.
As research confirms, objective importance varies by AM method, meaning that what you optimize for, whether material, time, or support volume, should change depending on which print technology you’re using. FDM, SLA, and SLS all have different dominant cost drivers.
Here’s a practical comparison:
| Technology | Typical material | Best use case | Primary cost driver |
|---|---|---|---|
| FDM (filament) | PLA, PETG, ABS, ASA | Prototypes, functional parts, jigs | Machine time, labor |
| SLA (resin) | Photopolymer resin | High-detail prototypes, patterns | Material cost, post-processing |
| SLS (powder) | Nylon, TPU | Complex geometry, batch production | Machine and powder cost |
| Metal AM | Stainless, titanium | Aerospace, medical, high-stress parts | Material and machine cost |
How to evaluate your material and process combination step by step:
- Define the functional requirement: What stress, temperature, and environment will this part face?
- Identify the minimum viable material: Choose the least expensive material that meets that requirement, not the most capable one.
- Calculate total cost, not just material cost: Include setup, print time, post-processing, and failure rate.
- Compare against alternatives: A simple injection-molded or machined part may cost less at volume, even if 3D printing is cheaper per prototype.
- Check batch economics: Some processes become cost-competitive only above certain volumes. SLS, for example, benefits significantly from packing multiple parts into a single build.
For businesses scaling from prototyping toward higher volumes, reviewing a production-grade printing guide will clarify when to switch processes and how to manage the transition economically. If you’re still evaluating what project type fits your production needs, matching print jobs to needs can help you narrow it down faster.
Streamline your workflow to reduce hidden costs
After selecting your ideal material and process, it’s time to address workflow tweaks that further slash hidden or secondary costs. These are the expenses businesses rarely track, yet they compound quickly.
Labor, as the data shows, is the largest cost factor in many 3D printing scenarios, making up 62.2% of total cost in real production environments. That means any workflow step that consumes labor, without adding direct value to the finished part, is a cost reduction opportunity.
Key workflow strategies to implement:
- Batch similar parts together: Combining multiple small jobs into a single build plate reduces setup time and maximizes machine utilization. Each setup avoided is labor saved.
- Standardize post-processing steps: When post-processing follows a consistent sequence, workers complete it faster and make fewer errors. Random or ad hoc finishing inflates labor time.
- Track failure rates by design and material: If certain part configurations fail print quality checks regularly, the rework cost is invisible but real. Logging failures helps you identify and fix root causes.
- Reduce unnecessary support structures at the workflow level: Even after design optimization, slicing software settings can further minimize support. Spending a few extra minutes in the slicer often saves more time in post-processing.
- Consolidate orders: Sending multiple small orders separately is almost always more expensive per part than consolidating them into planned batch runs.
Pro Tip: Use digital job tracking tools, even a simple shared spreadsheet, to log setup times, failure rates, and post-processing hours per job type. Within a few weeks, patterns emerge that reveal where your actual time and money are going. For specific low-volume manufacturing tips tailored to 3D printing, CC 3D Labs offers practical guidance from real production experience.
Staying current on process innovation also matters. Reviewing latest cost-saving trends in 3D printing manufacturing for 2026 can reveal new materials, software tools, or workflow approaches that further cut costs without requiring major investment.
Know when 3D printing isn’t the cheapest solution
Even the best cost-cutting strategies have limits. Sometimes, the wisest move is to opt out of 3D printing entirely for a given part. Recognizing this scenario early prevents you from sinking optimization effort into a process that was never the right fit.
The orthosis research is a clear example. Even after accounting for reduced material waste in 3D printing, the mean cost per 3D-printed part was €46.54 versus €30.28 for the conventionally manufactured version. The labor and purchase overhead of 3D printing erased any material savings.
Warning signs that 3D printing may not be your cheapest option:
- High labor for finishing: If your parts require extensive sanding, painting, assembly, or inspection after printing, labor costs escalate fast
- Large production volumes: At high quantities, injection molding or die casting often delivers a lower per-part cost
- Simple, flat, or extrudable geometry: Parts that can be cut, stamped, or machined from stock material are usually cheaper to produce conventionally
- Tight dimensional tolerances: When post-machining is required to hit tolerance, the combined cost of printing plus machining often exceeds just machining from the start
- Heavy parts: Dense, heavy parts require significant material and print time, reducing the cost advantage of 3D printing versus alternatives
Always compare your 3D printing cost estimate with at least one alternative manufacturing method before committing. Sometimes conventional or hybrid manufacturing delivers greater savings, especially when labor and post-processing are factored in correctly.
Understanding your 3D printing alternatives is not a concession to failure. It’s smart cost strategy. The goal is always the right process for the job, not loyalty to any single technology.
Our take: Cost cutting isn’t about one magic fix
After walking through all of these methods, here’s the perspective that often gets left out of cost reduction conversations. Businesses frequently chase the single biggest lever, whether that’s cheaper filament, a faster printer, or a new slicer setting, expecting it to solve their cost problem. It rarely does.
Real cost reduction in 3D printing is additive. It comes from stacking several small wins: a better-designed part, an appropriate material, batched workflow, and honest process selection. Each individual change may save 5 to 15% in isolation. But combined, they often cut total production cost by 30 to 50% without sacrificing part quality.
The uncomfortable truth is that the most expensive mistake is not choosing the wrong material. It’s running an unoptimized process repeatedly and measuring only the material cost. Labor is the hidden giant in most manufacturing environments, and 3D printing is no exception.
We’ve also seen businesses resist switching away from 3D printing for a specific part because they’ve invested in the workflow. That’s a sunk cost bias. When a conventional process is genuinely cheaper, making the switch is not a setback. It’s what good cost management looks like.
Tracking manufacturing trends insight helps you stay current as the economics of different technologies shift year over year. The right answer today may look different in 18 months as new materials and processes enter the market.
The most effective cost strategy we see at CC 3D Labs is a simple one: analyze all cost drivers, optimize design first, choose the minimum viable material and process, batch the workflow, and then honestly evaluate whether 3D printing is the right call for each job. That sequence, applied consistently, delivers better savings than any single optimization ever could.
Take the next step with expert 3D printing support
Implementing these strategies on your own takes time, and miscalculations can cost more than the savings you’re chasing. Working with a specialist who understands the full cost picture from design through finishing makes the entire process faster and more predictable.

CC 3D Labs works with product developers and manufacturing businesses across the Philadelphia region and beyond, helping them reduce costs through smarter design, material selection, and production planning. Our professional 3D printing services cover everything from early-stage prototyping to batch production runs, with transparent pricing and fast turnaround. If you’re not sure where to start, explore 3D printing options to see what’s possible, then reach out for a free estimate tailored to your specific project and volume.
Frequently asked questions
What is the most effective way to cut 3D printing costs?
Optimizing your design with a multi-objective approach is one of the highest-impact changes you can make, with material and time savings of up to 16% and 54% respectively. Layering that with workflow batching and honest process selection multiplies the impact further.
Are labor and purchase costs more important than materials in 3D printing?
In many real-world production scenarios, yes. Studies show labor accounts for 62.2% of total 3D printing cost, making it the dominant expense, not material.
When is 3D printing not the cheapest solution?
When parts require heavy finishing, have simple geometry, or are produced in high volumes, conventional manufacturing often wins on cost. Research confirms 3D printing can cost more than alternatives even when material waste is reduced, once labor and overhead are counted.
Does batch size affect 3D printing costs?
Yes. Larger batches reduce the per-part burden of setup, machine initialization, and labor, making the unit cost fall significantly as batch size increases.
Can support volume and overhang area impact cost?
Absolutely. Support structures add material cost and, more importantly, removal labor. Design changes that eliminate or minimize support, as shown by multi-objective optimization research, directly reduce both cost categories at once.